Tensorflow深度学习之十二:基础图像处理之二
Tensorflow深度学习之十二:基础图像处理之二
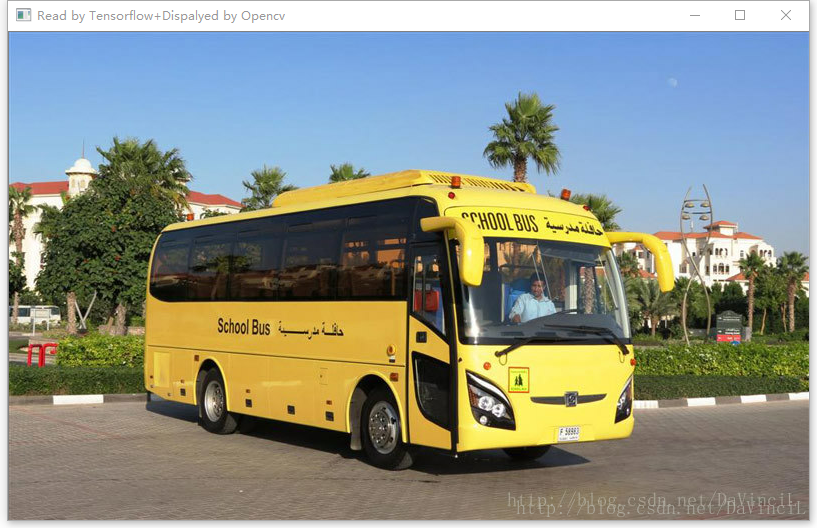
首先放出原始图像:

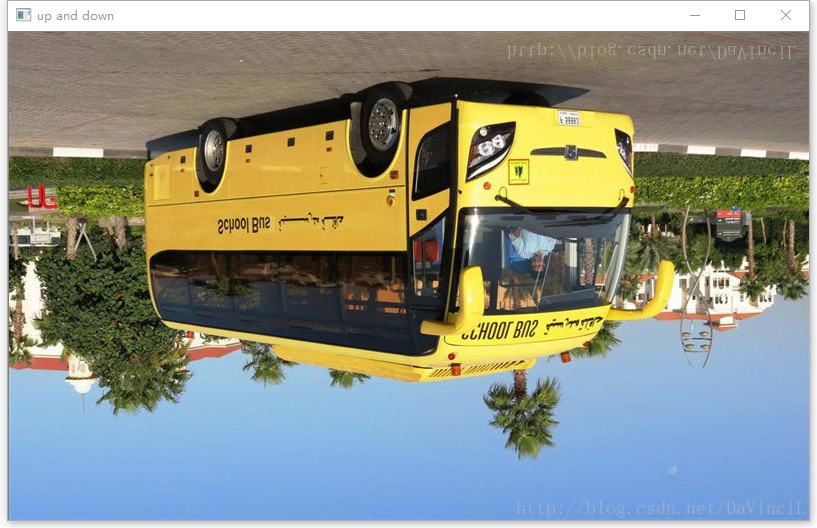
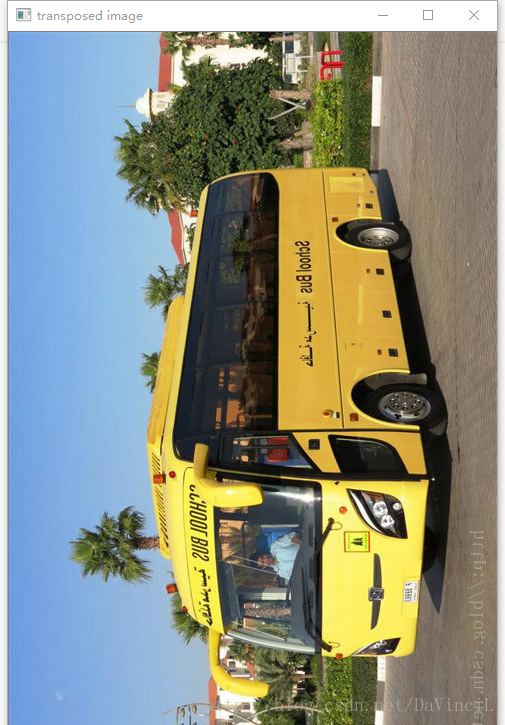
1、图像的翻转
import tensorflow as tf

import cv2

# 这里定义一个tensorflow读取的图片格式转换为opencv读取的图片格式的函数

# 请注意:

# 在tensorflow中,一个像素点的颜色顺序是R,G,B。

# 在opencv中,一个像素点的颜色顺序是B,G,R。

# 因此,我们循环遍历每一个像素点,将第0位的颜色和第2位的颜色数值换一下即可。

# 第一个参数name:将要显示的窗口名称。

# 第二个参数image:储存图片信息的一个tensor。

def cv2Show(name="", image=None):

    # 获取矩阵信息

    np = image.eval()

    # 获取行数列数

    row, col = len(np),len(np[1])

    # 两重循环遍历

    for i in range(row):

        for j in range(col):

            # 交换数值

            tmp = np[i][j][0]

            np[i][j][0] = np[i][j][2]

            np[i][j][2] = tmp

    # 显示图片

    cv2.imshow(name,np)

    pass

# tensorflow会话

with tf.Session() as sess:

    # 以二进制的方式读取图片。

    image_raw_data = tf.gfile.FastGFile("bus.jpg", "rb").read()

    # 按照jpeg的格式解码图片。

    image_data = tf.image.decode_jpeg(image_raw_data)

    # 显示原图片。

    cv2Show("Read by Tensorflow+Dispalyed by Opencv",image_data)

    # 上下翻转图像

    up_and_down = tf.image.flip_up_down(image_data)

    cv2Show("up and down",up_and_down)

    # 左右翻转图像

    left_and_right = tf.image.flip_left_right(image_data)

    cv2Show("left and right", left_and_right)

    # 沿对角线翻转图像

    transposed = tf.image.transpose_image(image_data)

    cv2Show("transposed image", transposed)

    # 以一定概率上下翻转图像

    random_up_and_down = tf.image.random_flip_up_down(image_data)

    cv2Show("random up and down", random_up_and_down)

    # 以一定概率左右翻转图像

    random_left_and_right = tf.image.random_flip_left_right(image_data)

    cv2Show("random left and right", random_left_and_right)

cv2.waitKey()- 1
- 2
- 3
- 4
- 5
- 6
- 7
- 8
- 9
- 10
- 11
- 12
- 13
- 14
- 15
- 16
- 17
- 18
- 19
- 20
- 21
- 22
- 23
- 24
- 25
- 26
- 27
- 28
- 29
- 30
- 31
- 32
- 33
- 34
- 35
- 36
- 37
- 38
- 39
- 40
- 41
- 42
- 43
- 44
- 45
- 46
- 47
- 48
- 49
- 50
- 51
- 52
- 53
- 54
- 55
- 56
- 57
- 58
- 59
- 60
程序运行结果如下:

注:由于个人的显示器限制,这里只截取了部分的对角线翻转的图像。
注:可以看到这里按照一定的概率翻转,只有上下进行了翻转,而左右并没有翻转。


2、图像的亮度调整
import tensorflow as tf

import cv2

# 这里定义一个tensorflow读取的图片格式转换为opencv读取的图片格式的函数

# 请注意:

# 在tensorflow中,一个像素点的颜色顺序是R,G,B。

# 在opencv中,一个像素点的颜色顺序是B,G,R。

# 因此,我们循环遍历每一个像素点,将第0位的颜色和第2位的颜色数值换一下即可。

# 第一个参数name:将要显示的窗口名称。

# 第二个参数image:储存图片信息的一个tensor。

def cv2Show(name="", image=None):

    # 获取矩阵信息

    np = image.eval()

    # 获取行数列数

    row, col = len(np),len(np[1])

    # 两重循环遍历

    for i in range(row):

        for j in range(col):

            # 交换数值

            tmp = np[i][j][0]

            np[i][j][0] = np[i][j][2]

            np[i][j][2] = tmp

    # 显示图片

    cv2.imshow(name,np)

    pass

# tensorflow会话

with tf.Session() as sess:

    # 以二进制的方式读取图片。

    image_raw_data = tf.gfile.FastGFile("bus.jpg", "rb").read()

    # 按照jpeg的格式解码图片。

    image_data = tf.image.decode_jpeg(image_raw_data)

    # 显示原图片。

    cv2Show("Read by Tensorflow+Dispalyed by Opencv",image_data)

    # 将图片的亮度-0.5

    adjusted1 = tf.image.adjust_brightness(image_data, -0.5)

    cv2Show("brightness -0.5", adjusted1)

    # 将图片的亮度+0.5

    adjusted2 = tf.image.adjust_brightness(image_data, 0.5)

    cv2Show("brightness +0.5",adjusted2)

    # 随机调整图像的亮度:

    # random_brightness(image, max_delta, seed=None)

    # image:待调整的图像

    # max_delta:在[-max_delte,max_delte)的范围随机调整图像的亮度

    # seed:随机数种子

    adjusted3 = tf.image.random_brightness(image_data, 0.3)

    cv2Show("random brightness", adjusted3)

cv2.waitKey()- 1
- 2
- 3
- 4
- 5
- 6
- 7
- 8
- 9
- 10
- 11
- 12
- 13
- 14
- 15
- 16
- 17
- 18
- 19
- 20
- 21
- 22
- 23
- 24
- 25
- 26
- 27
- 28
- 29
- 30
- 31
- 32
- 33
- 34
- 35
- 36
- 37
- 38
- 39
- 40
- 41
- 42
- 43
- 44
- 45
- 46
- 47
- 48
- 49
- 50
- 51
- 52
- 53
- 54
- 55
- 56
程序运行如下:


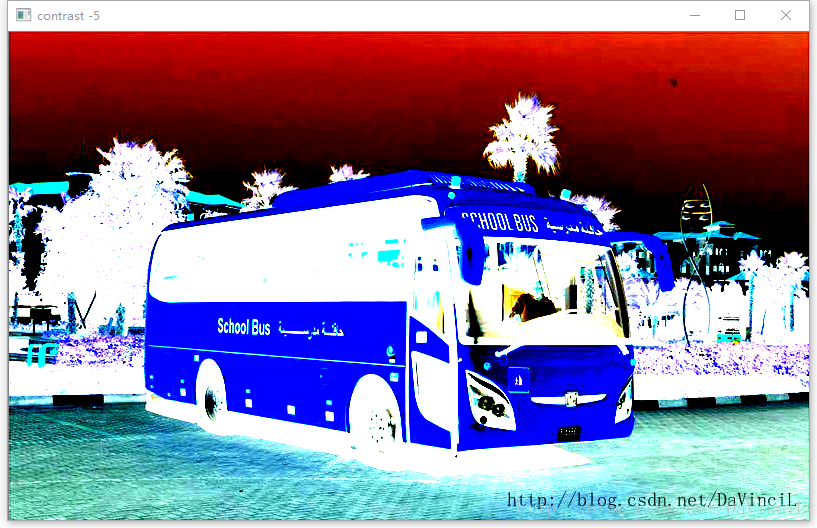
3、调整图像的对比度
import tensorflow as tf

import cv2

# 这里定义一个tensorflow读取的图片格式转换为opencv读取的图片格式的函数

# 请注意:

# 在tensorflow中,一个像素点的颜色顺序是R,G,B。

# 在opencv中,一个像素点的颜色顺序是B,G,R。

# 因此,我们循环遍历每一个像素点,将第0位的颜色和第2位的颜色数值换一下即可。

# 第一个参数name:将要显示的窗口名称。

# 第二个参数image:储存图片信息的一个tensor。

def cv2Show(name="", image=None):

    # 获取矩阵信息

    np = image.eval()

    # 获取行数列数

    row, col = len(np),len(np[1])

    # 两重循环遍历

    for i in range(row):

        for j in range(col):

            # 交换数值

            tmp = np[i][j][0]

            np[i][j][0] = np[i][j][2]

            np[i][j][2] = tmp

    # 显示图片

    cv2.imshow(name,np)

    pass

# tensorflow会话

with tf.Session() as sess:

    # 以二进制的方式读取图片。

    image_raw_data = tf.gfile.FastGFile("bus.jpg", "rb").read()

    # 按照jpeg的格式解码图片。

    image_data = tf.image.decode_jpeg(image_raw_data)

    # 显示原图片。

    cv2Show("Read by Tensorflow+Dispalyed by Opencv",image_data)

    # 将图片的对比度-5

    adjusted1 = tf.image.adjust_contrast(image_data, -5)

    cv2Show("contrast -5", adjusted1)

    # 将图片的对比度+5

    adjusted2 = tf.image.adjust_contrast(image_data, 5)

    cv2Show("contrast +5",adjusted2)

    # 随机调整图像的对比度:

    # random_contrast(image, lower, upper, seed=None)

    # image:待调整的图像

    # lower,upper:在[lower,upper]的范围随机调整图像的对比度。lower非负。

    # seed:随机数种子

    adjusted3 = tf.image.random_contrast(image_data, 1, 9)

    cv2Show("random contrast", adjusted3)

cv2.waitKey()- 1
- 2
- 3
- 4
- 5
- 6
- 7
- 8
- 9
- 10
- 11
- 12
- 13
- 14
- 15
- 16
- 17
- 18
- 19
- 20
- 21
- 22
- 23
- 24
- 25
- 26
- 27
- 28
- 29
- 30
- 31
- 32
- 33
- 34
- 35
- 36
- 37
- 38
- 39
- 40
- 41
- 42
- 43
- 44
- 45
- 46
- 47
- 48
- 49
- 50
- 51
- 52
- 53
- 54
- 55
- 56
程序运行如下:


4、调整图像的色相
import tensorflow as tf
import cv2
# 这里定义一个tensorflow读取的图片格式转换为opencv读取的图片格式的函数
# 请注意:
# 在tensorflow中,一个像素点的颜色顺序是R,G,B。
# 在opencv中,一个像素点的颜色顺序是B,G,R。
# 因此,我们循环遍历每一个像素点,将第0位的颜色和第2位的颜色数值换一下即可。
# 第一个参数name:将要显示的窗口名称。
# 第二个参数image:储存图片信息的一个tensor。
def cv2Show(name="", image=None):
# 获取矩阵信息
np = image.eval()
# 获取行数列数
row, col = len(np),len(np[1])
# 两重循环遍历
for i in range(row):
for j in range(col):
# 交换数值
tmp = np[i][j][0]
np[i][j][0] = np[i][j][2]
np[i][j][2] = tmp
# 显示图片
cv2.imshow(name,np)
pass
# tensorflow会话
with tf.Session() as sess:
# 以二进制的方式读取图片。
image_raw_data = tf.gfile.FastGFile("bus.jpg", "rb").read()
# 按照jpeg的格式解码图片。
image_data = tf.image.decode_jpeg(image_raw_data)
# 显示原图片。
cv2Show("Read by Tensorflow+Dispalyed by Opencv",image_data)
# adjust_hue(image, delta, name=None)
# delte的范围:[-1,1]
# 将图片的色相+0.1
adjusted1 = tf.image.adjust_hue(image_data, 0.1)
cv2Show("hue +0.1", adjusted1)
# 将图片的色相+0.3
adjusted2 = tf.image.adjust_hue(image_data, 0.3)
cv2Show("hue +0.3", adjusted2)
# 将图片的色相+0.6
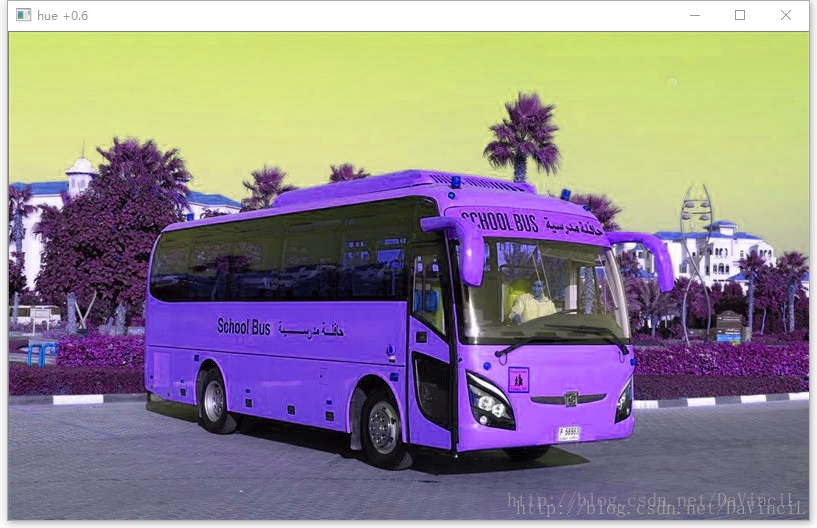
adjusted3 = tf.image.adjust_hue(image_data, 0.6)
cv2Show("hue +0.6", adjusted3)
# 将图片的色相+0.9
adjusted4 = tf.image.adjust_hue(image_data, 0.9)
cv2Show("hue +0.9", adjusted4)
# 随机调整图像的色相:
# random_hue(image, max_delta, seed=None)
# image:待调整的图像
# max_delta:在[-max_delta,max_delta]的范围随机调整图像的色相。max_delta的范围[0,0.5]。
# seed:随机数种子
adjusted5 = tf.image.random_hue(image_data,0.4)
cv2Show("random hue", adjusted5)
cv2.waitKey()- 1
- 2
- 3
- 4
- 5
- 6
- 7
- 8
- 9
- 10
- 11
- 12
- 13
- 14
- 15
- 16
- 17
- 18
- 19
- 20
- 21
- 22
- 23
- 24
- 25
- 26
- 27
- 28
- 29
- 30
- 31
- 32
- 33
- 34
- 35
- 36
- 37
- 38
- 39
- 40
- 41
- 42
- 43
- 44
- 45
- 46
- 47
- 48
- 49
- 50
- 51
- 52
- 53
- 54
- 55
- 56
- 57
- 58
- 59
- 60
- 61
- 62
- 63
- 64
- 65
- 66
程序运行结果如下:


5、调整图像的饱和度
import tensorflow as tf

import cv2

# 这里定义一个tensorflow读取的图片格式转换为opencv读取的图片格式的函数

# 请注意:

# 在tensorflow中,一个像素点的颜色顺序是R,G,B。

# 在opencv中,一个像素点的颜色顺序是B,G,R。

# 因此,我们循环遍历每一个像素点,将第0位的颜色和第2位的颜色数值换一下即可。

# 第一个参数name:将要显示的窗口名称。

# 第二个参数image:储存图片信息的一个tensor。

def cv2Show(name="", image=None):

    # 获取矩阵信息

    np = image.eval()

    # 获取行数列数

    row, col = len(np),len(np[1])

    # 两重循环遍历

    for i in range(row):

        for j in range(col):

            # 交换数值

            tmp = np[i][j][0]

            np[i][j][0] = np[i][j][2]

            np[i][j][2] = tmp

    # 显示图片

    cv2.imshow(name,np)

    pass

# tensorflow会话

with tf.Session() as sess:

    # 以二进制的方式读取图片。

    image_raw_data = tf.gfile.FastGFile("bus.jpg", "rb").read()

    # 按照jpeg的格式解码图片。

    image_data = tf.image.decode_jpeg(image_raw_data)

    # 显示原图片。

    cv2Show("Read by Tensorflow+Dispalyed by Opencv",image_data)

    # 将图片的饱和度-5

    adjusted1 = tf.image.adjust_saturation(image_data, -5)

    cv2Show("saturation -5", adjusted1)

    # 将图片的饱和度+5

    adjusted2 = tf.image.adjust_saturation(image_data, 5)

    cv2Show("saturation +5", adjusted2)

    # 随机调整图像的饱和度:

    # random_saturation(image, lower, upper, seed=None)

    # image:待调整的图像

    # lower,upper:在[lower,upper]的范围随机调整图像的饱和度。lower非负。

    # seed:随机数种子

    adjusted3 = tf.image.random_saturation(image_data, 1, 9)

    cv2Show("random saturation", adjusted3)

cv2.waitKey()- 1
- 2
- 3
- 4
- 5
- 6
- 7
- 8
- 9
- 10
- 11
- 12
- 13
- 14
- 15
- 16
- 17
- 18
- 19
- 20
- 21
- 22
- 23
- 24
- 25
- 26
- 27
- 28
- 29
- 30
- 31
- 32
- 33
- 34
- 35
- 36
- 37
- 38
- 39
- 40
- 41
- 42
- 43
- 44
- 45
- 46
- 47
- 48
- 49
- 50
- 51
- 52
- 53
- 54
- 55
- 56
程序运行结果如下:


6、图像的标准化
import tensorflow as tf

import cv2

# 这里定义一个tensorflow读取的图片格式转换为opencv读取的图片格式的函数

# 请注意:

# 在tensorflow中,一个像素点的颜色顺序是R,G,B。

# 在opencv中,一个像素点的颜色顺序是B,G,R。

# 因此,我们循环遍历每一个像素点,将第0位的颜色和第2位的颜色数值换一下即可。

# 第一个参数name:将要显示的窗口名称。

# 第二个参数image:储存图片信息的一个tensor。

def cv2Show(name="", image=None):

    # 获取矩阵信息

    np = image.eval()

    # 获取行数列数

    row, col = len(np),len(np[1])

    # 两重循环遍历

    for i in range(row):

        for j in range(col):

            # 交换数值

            tmp = np[i][j][0]

            np[i][j][0] = np[i][j][2]

            np[i][j][2] = tmp

    # 显示图片

    cv2.imshow(name,np)

    pass

# tensorflow会话

with tf.Session() as sess:

    # 以二进制的方式读取图片。

    image_raw_data = tf.gfile.FastGFile("bus.jpg", "rb").read()

    # 按照jpeg的格式解码图片。

    image_data = tf.image.decode_jpeg(image_raw_data)

    # 显示原图片。

    cv2Show("Read by Tensorflow+Dispalyed by Opencv",image_data)

    # 将代表一张图像的三维矩阵中的数字均值变成0,方差变为1。

    adjusted = tf.image.per_image_standardization(image_data)

    cv2Show("image_standardization", adjusted)

cv2.waitKey()- 1
- 2
- 3
- 4
- 5
- 6
- 7
- 8
- 9
- 10
- 11
- 12
- 13
- 14
- 15
- 16
- 17
- 18
- 19
- 20
- 21
- 22
- 23
- 24
- 25
- 26
- 27
- 28
- 29
- 30
- 31
- 32
- 33
- 34
- 35
- 36
- 37
- 38
- 39
- 40
- 41
- 42
- 43
- 44
程序运行结果如下:


Tensorflow深度学习之十二:基础图像处理之二的更多相关文章
- TensorFlow深度学习基础与应用实战高清视频教程
TensorFlow深度学习基础与应用实战高清视频教程,适合Python C++ C#视觉应用开发者,基于TensorFlow深度学习框架,讲解TensorFlow基础.图像分类.目标检测训练与测试以 ...
- 没有博士学位,照样玩转TensorFlow深度学习
教程 | 没有博士学位,照样玩转TensorFlow深度学习 机器之心2017-01-24 12:32:22 程序设计 谷歌 操作系统 阅读(362)评论(0) 选自Codelabs 机器之心编译 参 ...
- TensorFlow 深度学习中文第二版·翻译完成
原文:Deep Learning with TensorFlow Second Edition 协议:CC BY-NC-SA 4.0 不要担心自己的形象,只关心如何实现目标.--<原则>, ...
- (转) TensorFlow深度学习,一篇文章就够了
TensorFlow深度学习,一篇文章就够了 2016/09/22 · IT技术 · TensorFlow, 深度学习 分享到:6 原文出处: 我爱计算机 (@tobe迪豪 ) 作者: 陈迪 ...
- (转)深度学习word2vec笔记之基础篇
深度学习word2vec笔记之基础篇 声明: 1)该博文是多位博主以及多位文档资料的主人所无私奉献的论文资料整理的.具体引用的资料请看参考文献.具体的版本声明也参考原文献 2)本文仅供学术交流,非商用 ...
- 深度学习word2vec笔记之基础篇
作者为falao_beiliu. 作者:杨超链接:http://www.zhihu.com/question/21661274/answer/19331979来源:知乎著作权归作者所有.商业转载请联系 ...
- TensorFlow深度学习,一篇文章就够了
http://blog.jobbole.com/105602/ 作者: 陈迪豪,就职小米科技,深度学习工程师,TensorFlow代码提交者. TensorFlow深度学习框架 Google不仅是大数 ...
- 问题集录--TensorFlow深度学习
TensorFlow深度学习框架 Google不仅是大数据和云计算的领导者,在机器学习和深度学习上也有很好的实践和积累,在2015年年底开源了内部使用的深度学习框架TensorFlow. 与Caffe ...
- 学习参考《TensorFlow深度学习》高清中文版PDF+英文版PDF+源代码
我们知道,TensorFlow是比较流行的深度学习框架,除了看手册文档外,推荐大家看看<Tensorflow深度学习>,共分5方面内容:基础知识.关键模块.算法模型.内核揭秘.生态发展.前 ...
随机推荐
- js/jq仿window文件夹框选操作插件
0.先给大家看看效果: 1.创建一个index.html文件 1 2 3 4 5 6 7 8 9 10 11 12 13 14 15 16 17 18 19 20 21 22 23 24 25 26 ...
- KVC技巧二则
说两个与KVC相关的技巧. 1.KVC与字典 有时候我们需要取出嵌套字典中的某个键的值.例如某个嵌套字典: NSDictionary *dict = @{@"subDict":@{ ...
- vue-router 的URL路径中#的意义
传送门 https://router.vuejs.org/zh-c... Router 构造配置 routes 类型: Array<RouteConfig> RouteConfig 的类型 ...
- 解决js输出汉字乱码的问题
近期做安卓开发.安卓client调用server页面,可是server编码为gbk,安卓编码为utf-8.导致js输出内容报错,前期的做法是调整js文件编码.可是会生成两个版本号,非常不方便,最后找到 ...
- iOS 多线程技术2
iOS 多线程技术2 NSOperation NSInvocationOperation //创建一个队列 NSOperationQueue *queue = [[NSOperationQueue a ...
- iOS开发 — (UINaVigationController)导航控制器,界面传值
UINavigationController 继承于 UIViewController , 以栈的方式管理所 控制的视图控制器 . 至少要有一个被管理的视图控制器 ,这个控制器我们称作导航控制器的根视 ...
- 你所不知道的库存超限做法 服务器一般达到多少qps比较好[转] JAVA格物致知基础篇:你所不知道的返回码 深入了解EntityFramework Core 2.1延迟加载(Lazy Loading) EntityFramework 6.x和EntityFramework Core关系映射中导航属性必须是public? 藏在正则表达式里的陷阱 两道面试题,带你解析Java类加载机制
你所不知道的库存超限做法 在互联网企业中,限购的做法,多种多样,有的别出心裁,有的因循守旧,但是种种做法皆想达到的目的,无外乎几种,商品卖的完,系统抗的住,库存不超限.虽然短短数语,却有着说不完,道不 ...
- 【Sprint2 每日Scrum】 第一天(4.22)Sprint2计划会议成果
Sprint2计划会议成果 从今天起我们就开始正式的Sprint2之旅了,经过上一次Sprint1的冲刺计划和几天的调整,我们已经大致了解了敏捷开发的流程和思想,并将我们的TD学生助手做出了大致的框架 ...
- 基于OpenCL的深度学习工具:AMD MLP及其使用详解
基于OpenCL的深度学习工具:AMD MLP及其使用详解 http://www.csdn.net/article/2015-08-05/2825390 发表于2015-08-05 16:33| 59 ...
- Java内部类之间的闭包和回调详解
前言 闭包(closure)是一个可调用的对象,它记录了一些信息,这些信息来自于创建它的作用域.通过这个定义,可以看出内部类是面向对象的闭包,因为它不仅包含外围类对象(创建内部类的作用域)的信息,还自 ...