TensorFlow笔记六:基于cifar10数据库的AlexNet识别
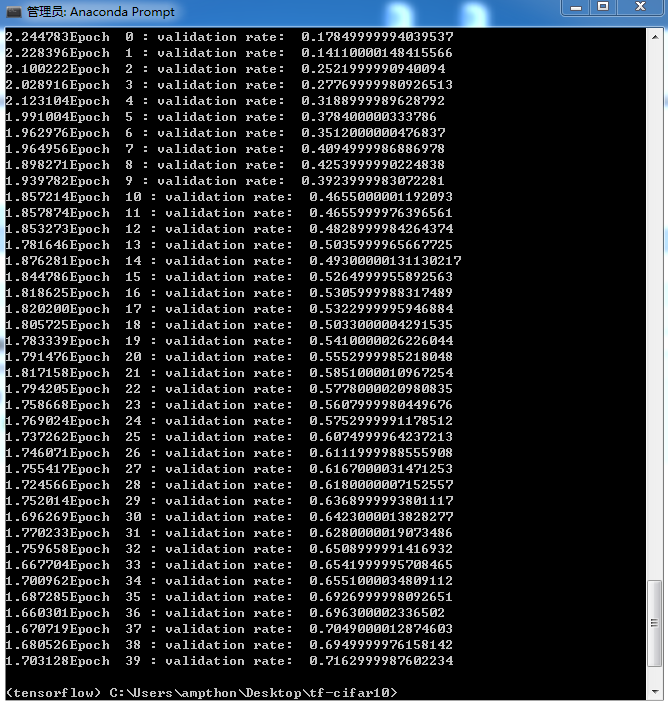
准确率只有70%,cpu版本的TF居然跑了两天才跑完,其他方法将继续尝试。
生成数据目录:
import numpy as np

import os

train_label = {}

for i in range(10):

    search_path = './data/train/{}'.format(i)

    file_list = os.listdir(search_path)

    for file in file_list:

        train_label[os.path.join(search_path, file)] = i

np.save('label.npy', train_label)

test_label = {}

for i in range(10):

    search_path = './data/test/{}'.format(i)

    file_list = os.listdir(search_path)

    for file in file_list:

        test_label[os.path.join(search_path, file)] = i

np.save('test-label.npy', test_label)
训练:
import tensorflow as tf

import numpy as np

import random

import cv2

# 将传入的label转换成one hot的形式。

def getOneHotLabel(label, depth):

    m = np.zeros([len(label), depth])

    for i in range(len(label)):

        m[i][label[i]] = 1

    return m

# 建立神经网络。

def alexnet(image, keepprob=0.5):

    # 定义卷积层1,卷积核大小,偏置量等各项参数参考下面的程序代码,下同。

    with tf.name_scope("conv1") as scope:

        kernel = tf.Variable(tf.truncated_normal([11, 11, 3, 64], dtype=tf.float32, stddev=1e-1, name="weights"))

        conv = tf.nn.conv2d(image, kernel, [1, 4, 4, 1], padding="SAME")

        biases = tf.Variable(tf.constant(0.0, dtype=tf.float32, shape=[64]), trainable=True, name="biases")

        bias = tf.nn.bias_add(conv, biases)

        conv1 = tf.nn.relu(bias, name=scope)

        pass

    # LRN层

    lrn1 = tf.nn.lrn(conv1, 4, bias=1.0, alpha=0.001/9, beta=0.75, name="lrn1")

    # 最大池化层

    pool1 = tf.nn.max_pool(lrn1, ksize=[1,3,3,1], strides=[1,2,2,1],padding="VALID", name="pool1")

    # 定义卷积层2

    with tf.name_scope("conv2") as scope:

        kernel = tf.Variable(tf.truncated_normal([5,5,64,192], dtype=tf.float32, stddev=1e-1, name="weights"))

        conv = tf.nn.conv2d(pool1, kernel, [1, 1, 1, 1], padding="SAME")

        biases = tf.Variable(tf.constant(0.0, dtype=tf.float32, shape=[192]), trainable=True, name="biases")

        bias = tf.nn.bias_add(conv, biases)

        conv2 = tf.nn.relu(bias, name=scope)

        pass

    # LRN层

    lrn2 = tf.nn.lrn(conv2, 4, bias=1.0, alpha=0.001 / 9, beta=0.75, name="lrn2")

    # 最大池化层

    pool2 = tf.nn.max_pool(lrn2, ksize=[1, 3, 3, 1], strides=[1, 2, 2, 1], padding="VALID", name="pool2")

    # 定义卷积层3

    with tf.name_scope("conv3") as scope:

        kernel = tf.Variable(tf.truncated_normal([3,3,192,384], dtype=tf.float32, stddev=1e-1, name="weights"))

        conv = tf.nn.conv2d(pool2, kernel, [1, 1, 1, 1], padding="SAME")

        biases = tf.Variable(tf.constant(0.0, dtype=tf.float32, shape=[384]), trainable=True, name="biases")

        bias = tf.nn.bias_add(conv, biases)

        conv3 = tf.nn.relu(bias, name=scope)

        pass

    # 定义卷积层4

    with tf.name_scope("conv4") as scope:

        kernel = tf.Variable(tf.truncated_normal([3,3,384,256], dtype=tf.float32, stddev=1e-1, name="weights"))

        conv = tf.nn.conv2d(conv3, kernel, [1, 1, 1, 1], padding="SAME")

        biases = tf.Variable(tf.constant(0.0, dtype=tf.float32, shape=[256]), trainable=True, name="biases")

        bias = tf.nn.bias_add(conv, biases)

        conv4 = tf.nn.relu(bias, name=scope)

        pass

    # 定义卷积层5

    with tf.name_scope("conv5") as scope:

        kernel = tf.Variable(tf.truncated_normal([3,3,256,256], dtype=tf.float32, stddev=1e-1, name="weights"))

        conv = tf.nn.conv2d(conv4, kernel, [1, 1, 1, 1], padding="SAME")

        biases = tf.Variable(tf.constant(0.0, dtype=tf.float32, shape=[256]), trainable=True, name="biases")

        bias = tf.nn.bias_add(conv, biases)

        conv5 = tf.nn.relu(bias, name=scope)

        pass

    # 最大池化层

    pool5 = tf.nn.max_pool(conv5, ksize=[1,3,3,1], strides=[1,2,2,1], padding="VALID", name="pool5")

    # 全连接层

    flatten = tf.reshape(pool5, [-1, 6*6*256])

    weight1 = tf.Variable(tf.truncated_normal([6*6*256, 4096], mean=0, stddev=0.01))

    fc1 = tf.nn.sigmoid(tf.matmul(flatten, weight1))

    dropout1 = tf.nn.dropout(fc1, keepprob)

    weight2 = tf.Variable(tf.truncated_normal([4096, 4096], mean=0, stddev=0.01))

    fc2 = tf.nn.sigmoid(tf.matmul(dropout1, weight2))

    dropout2 = tf.nn.dropout(fc2, keepprob)

    weight3 = tf.Variable(tf.truncated_normal([4096, 10], mean=0, stddev=0.01))

    fc3 = tf.nn.sigmoid(tf.matmul(dropout2, weight3))

    return fc3

def alexnet_main():

    # 加载使用的训练集文件名和标签。

    files = np.load("label.npy",  allow_pickle=True , encoding='bytes')[()]

    # 提取文件名。

    keys = [i for i in files]

    print(len(keys))

    myinput = tf.placeholder(dtype=tf.float32, shape=[None, 224, 224, 3], name='input')

    mylabel = tf.placeholder(dtype=tf.float32, shape=[None, 10], name='label')

    # 建立网络,keepprob为0.6。

    myoutput = alexnet(myinput, 0.6)

    # 定义训练的loss函数。

    loss = tf.reduce_mean(tf.nn.softmax_cross_entropy_with_logits(logits=myoutput, labels=mylabel))

    # 定义优化器,学习率设置为0.09,学习率可以设置为其他的数值。

    optimizer = tf.train.GradientDescentOptimizer(learning_rate=0.09).minimize(loss)

    # 定义准确率

    valaccuracy = tf.reduce_mean(

        tf.cast(

            tf.equal(

                tf.argmax(myoutput, 1),

                tf.argmax(mylabel, 1)),

            tf.float32))

    # tensorflow的saver,可以用于保存模型。

    saver = tf.train.Saver()

    init = tf.global_variables_initializer()

    with tf.Session() as sess:

        sess.run(init)

        # 40个epoch

        for loop in range(40):

            # 生成并打乱训练集的顺序。

            indices = np.arange(50000)

            random.shuffle(indices)

            # batch size此处定义为200。

            # 训练集一共50000张图片,前40000张用于训练,后10000张用于验证集。

            for i in range(0, 0+40000, 200):

                photo = []

                label = []

                for j in range(0, 200):

                    # print(keys[indices[i + j]])

                    photo.append(cv2.resize(cv2.imread(keys[indices[i + j]]), (224, 224))/225)

                    label.append(files[keys[indices[i + j]]])

                m = getOneHotLabel(label, depth=10)

                a, b = sess.run([optimizer, loss], feed_dict={myinput: photo, mylabel: m})

                print("\r%lf"%b, end='')

            acc = 0

            # 每次取验证集的200张图片进行验证,返回这200张图片的正确率。

            for i in range(40000, 40000+10000, 200):

                photo = []

                label = []

                for j in range(i, i + 200):

                    photo.append(cv2.resize(cv2.imread(keys[indices[j]]), (224, 224))/225)

                    label.append(files[keys[indices[j]]])

                m = getOneHotLabel(label, depth=10)

                acc += sess.run(valaccuracy, feed_dict={myinput: photo, mylabel: m})

            # 输出,一共有50次验证集数据相加,所以需要除以50。

            print("Epoch ", loop, ': validation rate: ', acc/50)

        # 保存模型。

        saver.save(sess, "model/model.ckpt")

if __name__ == '__main__':

    alexnet_main()
测试:
import tensorflow as tf

import numpy as np

import random

import cv2

def getOneHotLabel(label, depth):

    m = np.zeros([len(label), depth])

    for i in range(len(label)):

        m[i][label[i]] = 1

    return m

# 建立神经网络

def alexnet(image, keepprob=0.5):

    # 定义卷积层1,卷积核大小,偏置量等各项参数参考下面的程序代码,下同

    with tf.name_scope("conv1") as scope:

        kernel = tf.Variable(tf.truncated_normal([11, 11, 3, 64], dtype=tf.float32, stddev=1e-1, name="weights"))

        conv = tf.nn.conv2d(image, kernel, [1, 4, 4, 1], padding="SAME")

        biases = tf.Variable(tf.constant(0.0, dtype=tf.float32, shape=[64]), trainable=True, name="biases")

        bias = tf.nn.bias_add(conv, biases)

        conv1 = tf.nn.relu(bias, name=scope)

        pass

    # LRN层

    lrn1 = tf.nn.lrn(conv1, 4, bias=1.0, alpha=0.001/9, beta=0.75, name="lrn1")

    # 最大池化层

    pool1 = tf.nn.max_pool(lrn1, ksize=[1,3,3,1], strides=[1,2,2,1],padding="VALID", name="pool1")

    # 定义卷积层2

    with tf.name_scope("conv2") as scope:

        kernel = tf.Variable(tf.truncated_normal([5,5,64,192], dtype=tf.float32, stddev=1e-1, name="weights"))

        conv = tf.nn.conv2d(pool1, kernel, [1, 1, 1, 1], padding="SAME")

        biases = tf.Variable(tf.constant(0.0, dtype=tf.float32, shape=[192]), trainable=True, name="biases")

        bias = tf.nn.bias_add(conv, biases)

        conv2 = tf.nn.relu(bias, name=scope)

        pass

    # LRN层

    lrn2 = tf.nn.lrn(conv2, 4, bias=1.0, alpha=0.001 / 9, beta=0.75, name="lrn2")

    # 最大池化层

    pool2 = tf.nn.max_pool(lrn2, ksize=[1, 3, 3, 1], strides=[1, 2, 2, 1], padding="VALID", name="pool2")

    # 定义卷积层3

    with tf.name_scope("conv3") as scope:

        kernel = tf.Variable(tf.truncated_normal([3,3,192,384], dtype=tf.float32, stddev=1e-1, name="weights"))

        conv = tf.nn.conv2d(pool2, kernel, [1, 1, 1, 1], padding="SAME")

        biases = tf.Variable(tf.constant(0.0, dtype=tf.float32, shape=[384]), trainable=True, name="biases")

        bias = tf.nn.bias_add(conv, biases)

        conv3 = tf.nn.relu(bias, name=scope)

        pass

    # 定义卷积层4

    with tf.name_scope("conv4") as scope:

        kernel = tf.Variable(tf.truncated_normal([3,3,384,256], dtype=tf.float32, stddev=1e-1, name="weights"))

        conv = tf.nn.conv2d(conv3, kernel, [1, 1, 1, 1], padding="SAME")

        biases = tf.Variable(tf.constant(0.0, dtype=tf.float32, shape=[256]), trainable=True, name="biases")

        bias = tf.nn.bias_add(conv, biases)

        conv4 = tf.nn.relu(bias, name=scope)

        pass

    # 定义卷积层5

    with tf.name_scope("conv5") as scope:

        kernel = tf.Variable(tf.truncated_normal([3,3,256,256], dtype=tf.float32, stddev=1e-1, name="weights"))

        conv = tf.nn.conv2d(conv4, kernel, [1, 1, 1, 1], padding="SAME")

        biases = tf.Variable(tf.constant(0.0, dtype=tf.float32, shape=[256]), trainable=True, name="biases")

        bias = tf.nn.bias_add(conv, biases)

        conv5 = tf.nn.relu(bias, name=scope)

        pass

    # 最大池化层

    pool5 = tf.nn.max_pool(conv5, ksize=[1,3,3,1], strides=[1,2,2,1], padding="VALID", name="pool5")

    # 全连接层

    flatten = tf.reshape(pool5, [-1, 6*6*256])

    weight1 = tf.Variable(tf.truncated_normal([6*6*256, 4096], mean=0, stddev=0.01))

    fc1 = tf.nn.sigmoid(tf.matmul(flatten, weight1))

    dropout1 = tf.nn.dropout(fc1, keepprob)

    weight2 = tf.Variable(tf.truncated_normal([4096, 4096], mean=0, stddev=0.01))

    fc2 = tf.nn.sigmoid(tf.matmul(dropout1, weight2))

    dropout2 = tf.nn.dropout(fc2, keepprob)

    weight3 = tf.Variable(tf.truncated_normal([4096, 10], mean=0, stddev=0.01))

    fc3 = tf.nn.sigmoid(tf.matmul(dropout2, weight3))

    return fc3

def alexnet_main():

    # 加载测试集的文件名和标签。

    files = np.load("test-label.npy", encoding='bytes')[()]

    keys = [i for i in files]

    print(len(keys))

    myinput = tf.placeholder(dtype=tf.float32, shape=[None, 224, 224, 3], name='input')

    mylabel = tf.placeholder(dtype=tf.float32, shape=[None, 10], name='label')

    myoutput = alexnet(myinput, 0.6)

    prediction = tf.argmax(myoutput, 1)

    truth = tf.argmax(mylabel, 1)

    valaccuracy = tf.reduce_mean(

        tf.cast(

            tf.equal(

                prediction,

                truth),

            tf.float32))

    saver = tf.train.Saver()

    with tf.Session() as sess:

        # 加载训练好的模型,路径根据自己的实际情况调整

        saver.restore(sess, r"model/model.ckpt")

        cnt = 0

        for i in range(10000):

            photo = []

            label = []

            photo.append(cv2.resize(cv2.imread(keys[i]), (224, 224))/225)

            label.append(files[keys[i]])

            m = getOneHotLabel(label, depth=10)

            a, b= sess.run([prediction, truth], feed_dict={myinput: photo, mylabel: m})

            print(a, ' ', b)

            if a[0] == b[0]:

                cnt += 1

        print("Epoch ", 1, ': prediction rate: ', cnt / 10000)

if __name__ == '__main__':

    alexnet_main()
TensorFlow笔记六:基于cifar10数据库的AlexNet识别的更多相关文章
- EF Core使用笔记(基于MySql数据库)
一.什么是EF Entity Framework 是适用于.NET 的对象关系映射程序 (O/RM). 二.比较 EF Core 和 EF6 1.Entity Framework 6 Entity F ...
- java之jvm学习笔记六-十二(实践写自己的安全管理器)(jar包的代码认证和签名) (实践对jar包的代码签名) (策略文件)(策略和保护域) (访问控制器) (访问控制器的栈校验机制) (jvm基本结构)
java之jvm学习笔记六(实践写自己的安全管理器) 安全管理器SecurityManager里设计的内容实在是非常的庞大,它的核心方法就是checkPerssiom这个方法里又调用 AccessCo ...
- tensorflow笔记:使用tf来实现word2vec
(一) tensorflow笔记:流程,概念和简单代码注释 (二) tensorflow笔记:多层CNN代码分析 (三) tensorflow笔记:多层LSTM代码分析 (四) tensorflow笔 ...
- tensorflow笔记(一)之基础知识
tensorflow笔记(一)之基础知识 版权声明:本文为博主原创文章,转载请指明转载地址 http://www.cnblogs.com/fydeblog/p/7399701.html 前言 这篇no ...
- Python学习笔记六
Python课堂笔记六 常用模块已经可以在单位实际项目中使用,可以实现运维自动化.无需手工备份文件,数据库,拷贝,压缩. 常用模块 time模块 time.time time.localtime ti ...
- tensorflow笔记:多层LSTM代码分析
tensorflow笔记:多层LSTM代码分析 标签(空格分隔): tensorflow笔记 tensorflow笔记系列: (一) tensorflow笔记:流程,概念和简单代码注释 (二) ten ...
- TensorFlow笔记-08-过拟合,正则化,matplotlib 区分红蓝点
TensorFlow笔记-08-过拟合,正则化,matplotlib 区分红蓝点 首先提醒一下,第7讲的最后滑动平均的代码已经更新了,代码要比理论重要 今天是过拟合,和正则化,本篇后面可能或更有兴趣, ...
- TensorFlow笔记-06-神经网络优化-损失函数,自定义损失函数,交叉熵
TensorFlow笔记-06-神经网络优化-损失函数,自定义损失函数,交叉熵 神经元模型:用数学公式比表示为:f(Σi xi*wi + b), f为激活函数 神经网络 是以神经元为基本单位构成的 激 ...
- TensorFlow笔记-05-反向传播,搭建神经网络的八股
TensorFlow笔记-05-反向传播,搭建神经网络的八股 反向传播 反向传播: 训练模型参数,在所有参数上用梯度下降,使用神经网络模型在训练数据上的损失函数最小 损失函数:(loss) 计算得到的 ...
随机推荐
- maven学习(三)——修改maven本地默认仓库
修改从Maven中心仓库下载到本地的jar包的默认存储位置 从Maven中心仓库下载到本地的jar包的默认存放在”${user.home}/.m2/repository”中,${user.home}表 ...
- Kafka 1.0版本发布
Kafka 1.0版本发布 1.0.0 2017年11月1日发布 源码下载: kafka-1.0.0-src.tgz(asc,sha512) 二进制下载: Scala 2.11 - kafka_2.1 ...
- HDU 5884 Sort(二分答案+计算WPL的技巧)
Sort Time Limit: 3000/1000 MS (Java/Others) Memory Limit: 32768/32768 K (Java/Others) Total Submi ...
- [HNOI2004][bzoj1212] L语言 [Trie+dp]
题面 传送门 思路 无后效性 显然,不管某个前缀的理解方式是怎么样的,如果它能被理解,那么前面的决策对于后面的决策而言都是等价的 因此这题可以DP DP方程 令$dp[i]$表示前缀i是否能被理解 那 ...
- 求和为s的连续正数序列
输入一个正数是s,打印出所有和为s的连续正数序列(至少含有两个数).例如输入15,由于1+2+3+4+5=4+5+6==7+8=15,所有结果打印出3个序列1-5,4-6,7-8. 代码如下: voi ...
- Struts框架详解
1.Struts应用框架介绍 (1)框架 框架最简单的形式是指已开发过并已测试过的软件的程序块,这些程序块可以在多个软件开发工程中重用.框架提供了一个概括的体系结构模版,可以用这个模板来构建特定领域中 ...
- ios UIImage 圆形图片剪切方案
@interface UIImage (Resize) //按形状切割图像 - (UIImage*)cutImageWithRadius:(int)radius; @end //图片剪切 - (UII ...
- pat 甲级 1072. Gas Station (30)
1072. Gas Station (30) 时间限制 200 ms 内存限制 65536 kB 代码长度限制 16000 B 判题程序 Standard 作者 CHEN, Yue A gas sta ...
- SQL中的CASE WHEN使用
原文发布时间为:2010-06-04 -- 来源于本人的百度文章 [由搬家工具导入] SQL的条件语句,条件判断语句,SQL的 if else语句。2009-07-20SQL_中的CASE WHEN使 ...
- 从头实现一个koa框架
koajs是最流行的nodejs后端框架之一,有很多网站都使用koa进行开发,同时社区也涌现出了一大批基于koa封装的企业级框架.然而,在这些亮眼的成绩背后,作为核心引擎的koa代码库本身,却非常的精 ...