Spring系列(二):Spring IoC应用
一、Spring IoC的核心概念
IoC(Inversion of Control 控制反转),详细的概念见Spring系列(一):Spring核心概念
二、Spring IoC的应用
1、定义Bean的信息
1.1 基于xml的形式定义Bean的信息
① 新建一个Bean:
package com.toby.ioc.component;

/**

 * @desc:

 * @author: toby

 * @date: 2019/7/13 1:49

 */

public class TobyBean{

    public TobyBean(){

        System.out.println("TobyBean Constructor");

    }

}
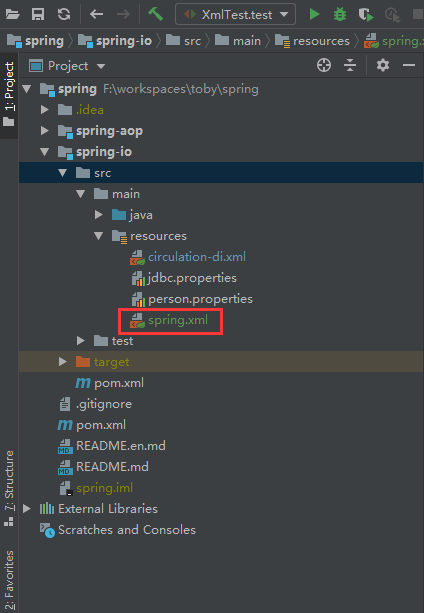
② 在resources下面新建一个spring.xml
xml配置如下:
<?xml version="1.0" encoding="UTF-8"?>

<beans xmlns="http://www.springframework.org/schema/beans"

       xmlns:xsi="http://www.w3.org/2001/XMLSchema-instance"

       xsi:schemaLocation="http://www.springframework.org/schema/beans

       http://www.springframework.org/schema/beans/spring-beans.xsd">

    <bean id="tobyBean" class="com.toby.ioc.component.TobyBean"/>

</beans>
③ 写一个测试类进行测试
package com.toby.ioc.xml;

import com.toby.ioc.component.TobyBean;

import org.junit.Before;

import org.junit.Test;

import org.springframework.context.support.ClassPathXmlApplicationContext;

/**

 * @desc: 基于xml

 * @author: toby

 * @date: 2019/8/6 17:36

 */

public class XmlTest {

    private ClassPathXmlApplicationContext context;

    @Before

    public void before(){

        context = new ClassPathXmlApplicationContext("spring.xml");

    }

    @Test

    public void test(){

        TobyBean tobyBean = context.getBean(TobyBean.class);

        System.out.println(tobyBean);

    }

}
总结:由于现在基本基于spring boot 约定大于配置,而且大量的xml配置也不易于维护,所以这里就简单介绍下基于xml的原理:首先读取资源配置文件,然后解析成BeanDefinition,最后利用反射进行相应的实例化操作。我们接下来重点讲解基于注解的方式
1.2 基于读取配置类的形式定义Bean信息
① 同上面基于xml一样,需要一个Bean
② 新建一个配置类定义相应的Bean信息
package com.toby.ioc.config;

import com.toby.ioc.component.TobyBean;

import org.springframework.context.annotation.*;

/**

 * @desc: ioc config 类

 * @author: toby

 * @date: 2019/7/13 1:10

 */

@Configuration

public class IocConfig {

    @Bean

    public TobyBean tobyBean(){

        return new TobyBean();

    }

}
③ 写一个测试类进行测试
package com.toby.ioc.configuration;

import com.toby.ioc.config.IocConfig;

import org.junit.Before;

import org.junit.Test;

import org.springframework.context.annotation.AnnotationConfigApplicationContext;

/**

 * @desc: 基于配置类

 * @author: toby

 * @date: 2019/8/6 17:59

 */

public class ConfigurationTest {

    private AnnotationConfigApplicationContext context;

    @Before

    public void before(){

        context = new AnnotationConfigApplicationContext(IocConfig.class);

    }

    @Test

    public void test(){

        System.out.println(context.getBean("tobyBean"));

    }

}
2、Spring IoC常用注解使用
2.1 @Configuration 相当于 xml配置的 <beans/>
2.2 @Bean 相当于 xml配置的 <bean/>
默认(单实例 延迟加载)
package com.toby.ioc.config;

import com.toby.ioc.component.TobyBean;

import org.springframework.context.annotation.*;

/**

 * @desc: ioc config 类

 * @author: toby

 * @date: 2019/7/13 1:10

 */

@Configuration

public class IocConfig {

    @Bean

    public TobyBean tobyBean(){

        return new TobyBean();

    }

}
配置Bean的作用域
① 在不指定@Scope的情况下,所有的bean都是单实例的bean,而且是饿汉加载(容器启动实例就创建好了)
② @Scope为prototype表示为多实例的,而且还是懒汉模式加载(IOC容器启动的时候,并不会创建对象,而是在每次使用的时候才会创建)注意:当指定多例的时候是无法解决循环依赖的后续源码会分析
@Configuration

public class IocConfig {

    @Bean

    @Scope("prototype")

    public TobyBean tobyBean(){

        return new TobyBean();

    }

}
如何测试是否多实例:
public class IocMain {

    public static void main(String[] args) {

        AnnotationConfigApplicationContext context = new AnnotationConfigApplicationContext(IocConfig.class);

        TobyBean tobyBean1 = context.getBean(TobyBean.class);

        TobyBean tobyBean2 = context.getBean(TobyBean.class);

        //单例返回true 多例返回false

        System.out.println(tobyBean1 == tobyBean2);

    }

}
③ @Scope指定的作用域取值:singleton 单实例的(默认),prototype 多实例的,request 同一次请求,session 同一个会话级别
Bean的懒加载@Lazy
Bean的懒加载@Lazy(主要针对单实例的bean在容器启动的时候,不创建对象,而在第一次使用的时候才会创建该对象,多实例bean没有懒加载一说)
@Configuration

public class IocConfig {

    @Bean

    @Lazy

    public TobyBean tobyBean(){

        return new TobyBean();

    }

}
2.3 @CompentScan 包扫描(重点)
在配置类上写@CompentScan注解来进行包扫描
① 常规用法:这样在basePackages包下面具有@Controller @Service @Repository @Component注解的组件都会被加载到spring容器中
@Configuration

@ComponentScan(basePackages = {"com.toby.ioc"})

public class IocConfig {

}
② 排除用法:excludeFilters(排除@Controller注解和TobyService)
@Configuration

@ComponentScan(basePackages = {"com.toby.ioc"},excludeFilters = {

        @ComponentScan.Filter(type = FilterType.ANNOTATION,value = {Controller.class}),

        @ComponentScan.Filter(type = FilterType.ASSIGNABLE_TYPE,value = {TobyService.class})

})

public class IocConfig {

}
③ 包含用法:includeFilters,注意:若使用包含,需要把useDefaultFilters属性设置为false(true表示扫描全部的),后续源码解析会说到这个原因
@Configuration

@ComponentScan(basePackages = {"com.toby.ioc"},includeFilters = {

        @ComponentScan.Filter(type = FilterType.ANNOTATION,value = {Controller.class, Service.class})

},useDefaultFilters = false)

public class IocConfig {

}
④ 自定义Filter用法:
自定义一个TobyTypeFilter实现TypeFilter
public class TobyTypeFilter implements TypeFilter {

    @Override

    public boolean match(MetadataReader metadataReader, MetadataReaderFactory metadataReaderFactory) throws IOException {

        //获取当前类的class的源信息

        ClassMetadata classMetadata = metadataReader.getClassMetadata();

        //类名称中包含Dao就可以被扫描到

        if(classMetadata.getClassName().contains("Dao")) {

            return true;

        }

        return false;

    }

}
配置类:
@Configuration

@ComponentScan(basePackages = {"com.toby.ioc"},includeFilters = {

        @ComponentScan.Filter(type = FilterType.CUSTOM,value = TobyTypeFilter.class)

},useDefaultFilters = false)

public class IocConfig {

}
2.4 @Conditional 条件注解(spring boot中大量用到)
① 新建2个Bean TobyA和TobyB 如下:
public class TobyA {

    public TobyA() {

        System.out.println("TobyA Constructor");

    }

}
public class TobyB {

    public TobyB() {

        System.out.println("TobyB Constructor");

    }

}
② 新建一个TobyCondition实现Condition接口
public class TobyCondition implements Condition {

    private static final String TOBY_A_BEAN_NAME = "tobyA";

    @Override

    public boolean matches(ConditionContext context, AnnotatedTypeMetadata metadata) {

        //判断容器中是否有TobyA组件

        if(context.getBeanFactory().containsBean(TOBY_A_BEAN_NAME)){

            return true;

        }

        return false;

    }

}
③ 配置类 只有当容器中有TobyA的时候才实例化TobyB
@Configuration

public class IocConfig {

    @Bean

    public TobyA tobyA(){

        return new TobyA();

    }

    @Bean

    @Conditional(TobyCondition.class)

    public TobyB tobyB(){

        return new TobyB();

    }

}
2.5 往IOC容器中添加组件的方式
① 通过@ComponentScan包扫描 + @Controller、@Service、@Repository、@Component 针对我们自己写的组件可以通过该方式来加载到容器中
② 通过@Bean的方式来导入组件(适用于导入第三方组件)
③ 通过@Import
Ⅰ 通过@Import直接导入组件(导入组件的id为全限定类名)
配置类:
@Configuration

@Import({TobyBean.class})

public class IocConfig {

}
Ⅱ 通过@Import的ImportSelector类实现组件的导入(导入组件的id为全限定类名),自定义的TobyImportSelector需要实现ImportSelector接口。
public class TobyImportSelector implements ImportSelector {

    @Override

    public String[] selectImports(AnnotationMetadata importingClassMetadata) {

        //返回全限定类名的数组

        return new String[]{"com.toby.ioc.component.TobyBean"};

    }

}
配置类:
@Configuration

@Import({TobyImportSelector.class})

public class IocConfig {

}
Ⅲ 通过@Import的ImportBeanDefinitionRegistrar导入组件 (可以指定bean的名称),自定义TobyImportBeanDefinitionRegistrar实现ImportBeanDefinitionRegistrar。
public class TobyImportBeanDefinitionRegistrar implements ImportBeanDefinitionRegistrar {

    @Override

    public void registerBeanDefinitions(AnnotationMetadata importingClassMetadata, BeanDefinitionRegistry registry) {

        //创建一个bean定义对象

        RootBeanDefinition rootBeanDefinition = new RootBeanDefinition(TobyBean.class);

        //把bean定义对象导入到容器中

        registry.registerBeanDefinition("tobyBean",rootBeanDefinition);

    }

}
配置类:
@Configuration

@Import({TobyImportBeanDefinitionRegistrar.class})

public class IocConfig {

}
④ 通过实现FactoryBean接口来实现注册组件
创建一个FactoryBean,注意要获取FactoryBean本身需要在beanName前面加上&
@Component

public class TobyBeanFactoryBean implements FactoryBean<TobyBean> {

    @Override

    public TobyBean getObject() throws Exception {

        return new TobyBean();

    }

    @Override

    public Class<?> getObjectType() {

        return TobyBean.class;

    }

    @Override

    public boolean isSingleton() {

        return false;

    }

}
单元测试:
public class FactoryBeanTest {

    private AnnotationConfigApplicationContext context;

    @Before

    public void before(){

        context = new AnnotationConfigApplicationContext(IocConfig.class);

    }

    @Test

    public void test(){

        //获取TobyBean

        System.out.println(context.getBean("tobyBeanFactoryBean"));

        //如何获取TobyBeanFactoryBean

        System.out.println(context.getBean("&tobyBeanFactoryBean"));

    }

}
2.6 Bean的生命周期

由容器管理Bean的生命周期,我们可以指定bean的初始化方法和bean的销毁方法
① 通过@Bean的initMethod和destroyMethod属性
新建一个LifeCycleBean1 Bean:
package com.toby.ioc.beanlifecycle;

/**

 * @desc: bean生命周期1

 * @author: toby

 * @date: 2019/7/13 1:26

 */

public class LifeCycleBean1 {

    public LifeCycleBean1(){

        System.out.println("LifeCycleBean1 Constructor");

    }

    public void init(){

        System.out.println("LifeCycleBean1 Init");

    }

    public void destroy(){

        System.out.println("LifeCycleBean1 Destroy");

    }

}
配置类:
@Configuration

public class IocConfig {

    @Bean(initMethod = "init",destroyMethod = "destroy")

    public LifeCycleBean1 lifeCycleBean1(){

        return new LifeCycleBean1();

    }

}
②通过实现InitializingBean, DisposableBean2个接口
新建一个LifeCycleBean2
package com.toby.ioc.beanlifecycle;

import org.springframework.beans.factory.DisposableBean;

import org.springframework.beans.factory.InitializingBean;

import org.springframework.stereotype.Component;

/**

 * @desc: bean生命周期2 通过实现2个接口

 * @author: toby

 * @date: 2019/7/13 1:30

 */

@Component

public class LifeCycleBean2 implements InitializingBean, DisposableBean {

    public LifeCycleBean2(){

        System.out.println("LifeCycleBean2 Constructor");

    }

    @Override

    public void destroy() throws Exception {

        System.out.println("LifeCycleBean2 destroy");

    }

    @Override

    public void afterPropertiesSet() throws Exception {

        System.out.println("LifeCycleBean2 afterPropertiesSet");

    }

}
③ 通过JSR250规范提供的注解@PostConstruct和@PreDestroy标注的方法
新建一个LifeCycleBean3
package com.toby.ioc.beanlifecycle;

import org.springframework.stereotype.Component;

import javax.annotation.PostConstruct;

import javax.annotation.PreDestroy;

/**

 * @desc: bean生命周期3 通过2个注解

 * @author: toby

 * @date: 2019/7/13 1:30

 */

@Component

public class LifeCycleBean3{

    public LifeCycleBean3(){

        System.out.println("LifeCycleBean3 Constructor");

    }

    @PostConstruct

    public void init(){

        System.out.println("LifeCycleBean3 init");

    }

    @PreDestroy

    public void destroy(){

        System.out.println("LifeCycleBean3 destroy");

    }

}
2.7 后置处理器(很重要,后面源码解析会讲)
① BeanPostProcessor:也称为Bean后置处理器,它是Spring中定义的接口,在Spring容器的创建过程中(具体为Bean初始化前后)会回调BeanPostProcessor中定义的两个方法。分别是postProcessBeforeInitialization(初始化之前)和postProcessAfterInitialization(初始化之后)
自定义TobyBeanPostProcessor后置处理器:
package com.toby.ioc.processor;

import com.toby.ioc.component.TobyBean;

import org.springframework.beans.BeansException;

import org.springframework.beans.factory.config.BeanPostProcessor;

import org.springframework.stereotype.Component;

/**

 * @desc: bean的后置处理器

 * @author: toby

 * @date: 2019/7/13 2:08

 */

@Component

public class TobyBeanPostProcessor implements BeanPostProcessor {

    @Override

    public Object postProcessBeforeInitialization(Object bean, String beanName) throws BeansException {

        if(bean instanceof TobyBean){

            System.out.println("马上开始初始化TobyBean了,注意下");

        }

        return bean;

    }

    @Override

    public Object postProcessAfterInitialization(Object bean, String beanName) throws BeansException {

        if(bean instanceof TobyBean){

            System.out.println("初始化完成TobyBean了,注意下");

        }

        return bean;

    }

}
② BeanFactoryPostProcessor:Bean工厂的后置处理器,触发时机bean定义注册之后bean实例化之前
自定义TobyBeanFactoryPostProcessor Bean工厂的后置处理器:
package com.toby.ioc.processor;

import org.springframework.beans.BeansException;

import org.springframework.beans.factory.config.BeanDefinition;

import org.springframework.beans.factory.config.BeanFactoryPostProcessor;

import org.springframework.beans.factory.config.ConfigurableListableBeanFactory;

import org.springframework.stereotype.Component;

/**

 * @desc: bean工厂的后置处理器 触发时机 bean定义注册之后 bean实例化之前

 * @author: toby

 * @date: 2019/7/21 23:04

 */

@Component

public class TobyBeanFactoryPostProcessor implements BeanFactoryPostProcessor {

    @Override

    public void postProcessBeanFactory(ConfigurableListableBeanFactory beanFactory) throws BeansException {

        System.out.println("调用了TobyBeanFactoryPostProcessor的postProcessBeanFactory方法");

        for(String beanName : beanFactory.getBeanDefinitionNames()){

            if("tobyBean".equals(beanName)){

                BeanDefinition beanDefinition = beanFactory.getBeanDefinition(beanName);

                beanDefinition.setLazyInit(true);

            }

        }

    }

}
③ BeanDefinitionRegistryPostProcessor:Bean定义的后置处理器,它继承了BeanFactoryPostProcessor,触发时机,在bean的定义注册之前
自定义TobyBeanDefinitionRegistryPostProcessor Bean定义的后置处理器
package com.toby.ioc.processor;

import com.toby.ioc.component.TobyBean;

import org.springframework.beans.BeansException;

import org.springframework.beans.factory.config.ConfigurableListableBeanFactory;

import org.springframework.beans.factory.support.BeanDefinitionRegistry;

import org.springframework.beans.factory.support.BeanDefinitionRegistryPostProcessor;

import org.springframework.beans.factory.support.RootBeanDefinition;

import org.springframework.stereotype.Component;

/**

 * @desc: bean定义的后置处理器

 * @author: toby

 * @date: 2019/7/21 23:11

 */

@Component

public class TobyBeanDefinitionRegistryPostProcessor implements BeanDefinitionRegistryPostProcessor {

    @Override

    public void postProcessBeanDefinitionRegistry(BeanDefinitionRegistry registry) throws BeansException {

        System.out.println("调用TobyBeanDefinitionRegistryPostProcessor的postProcessBeanDefinitionRegistry方法");

        System.out.println("bean定义的数据量:"+registry.getBeanDefinitionCount());

        RootBeanDefinition rootBeanDefinition = new RootBeanDefinition(TobyBean.class);

        registry.registerBeanDefinition("tobyBean",rootBeanDefinition);

    }

    @Override

    public void postProcessBeanFactory(ConfigurableListableBeanFactory beanFactory) throws BeansException {

        System.out.println("调用TobyBeanDefinitionRegistryPostProcessor的postProcessBeanFactory方法");

        System.out.println(beanFactory.getBeanDefinitionCount());

    }

}
2.8 Aware接口
Spring提供了大量的Aware接口,使得我们可以使用Spring的一些底层提供的容器,资源比如获取ApplicationContext就可以实现ApplicationContextAware接口,获取BeanFactory就可以实现BeanFactoryAware,这些Aware接口的回调是在Bean初始化 initializeBean() 方法中进行回调的
比如我们要使用Spring底层的ApplicationContext,则需要实现ApplicationContextAware如下:
package com.toby.ioc.aware;

import org.springframework.beans.BeansException;

import org.springframework.context.ApplicationContext;

import org.springframework.context.ApplicationContextAware;

import org.springframework.stereotype.Component;

/**

 * @desc: 应用中需要获取spring的上下文

 * @author: toby

 * @date: 2019/7/13 1:15

 */

@Component

public class TobyApplicationContextAware implements ApplicationContextAware {

    /**

     * spring上下文

     */

    private ApplicationContext applicationContext;

    @Override

    public void setApplicationContext(ApplicationContext applicationContext) throws BeansException {

        System.out.println("应用程序获取到了spring 容器");

        this.applicationContext = applicationContext;

    }

}
2.9 Lifecycle接口
每个对象都有自己生命周期的需求,主要方法:isAutoStartup()返回true时,Spring容器启动时会去执行start()方法。isRunning()返回true的时候,容器销毁时会调用stop()方法。比如eruaka启动的入口就是通过实现SmartLifecycle接口来实现
自定义TobyLifecycle实现SmartLifecycle接口:
package com.toby.ioc.lifecycle;

import org.springframework.context.SmartLifecycle;

import org.springframework.stereotype.Component;

/**

 * @desc: 每个对象都有自己生命周期的需求,比如eruaka启动的入口就是用这个实现的

 * @author: toby

 * @date: 2019/7/13 2:00

 */

@Component

public class TobyLifecycle implements SmartLifecycle {

    @Override

    public boolean isAutoStartup() {

        return true;

    }

    @Override

    public void stop(Runnable callback) {

    }

    @Override

    public void start() {

        System.out.println("TobyLifecycle start");

    }

    @Override

    public void stop() {

    }

    @Override

    public boolean isRunning() {

        return false;

    }

    @Override

    public int getPhase() {

        return 0;

    }

}
2.10 自动装配
① @Autowired 默认情况下:首先是按照类型进行装配,若在IOC容器中发现了多个相同类型的组件,那么就按照属性名称来进行装配。
② @Autowired 假设我们需要指定特定的组件来进行装配,我们可以通过使用@Qualifier("tobyDao")来指定装配的组件或者在配置类上的@Bean加上@Primary注解
@Autowired + @Qualifier:
@Service

public class TobyService {

    @Autowired

    @Qualifier("tobyDao")

    private TobyDao tobyDao;

    public TobyDao getTobyDao(){

        return this.tobyDao;

    }

}
@Bean + @Primary:
@Configuration

public class IocConfig {

    @Bean

    @Primary

    public TobyDao tobyDao(){

        return new TobyDao();

    }

    @Bean

    public TobyDao tobyDao2(){

        return new TobyDao();

    }

}
③ 假设我们指定Autowire.BY_TYPE,这时候容器出现2个及以上,那么在装配的时候就会抛出异常
@Configuration

public class PrincipleConfig {

    @Bean

    public PrincipleBean principleBean(){

        return new PrincipleBean();

    }

    @Bean(autowire = Autowire.BY_TYPE)

    public PrincipleAspect principleAspect(){

        return new PrincipleAspect();

    }

    @Bean

    public PrincipleLog principleLog(){

        return new PrincipleLog();

    }

    @Bean

    public PrincipleLog principleLog2(){

        return new PrincipleLog();

    }

}

④ @Resource(JSR250规范)功能和@AutoWired的功能差不多一样,但是不支持@Primary和@Qualifier的支持
⑤ @Inject(JSR330规范)需要导入jar包依赖功能和支持@Primary功能,但是没有Require=false的功能
总结:通过上面的示例,对Spring IoC常用注解以及接口有一定了解,Spring系列完整代码在码云:spring系列,接下来将进入:Spring系列(三):Spring IoC源码解析(干货多多)
Spring系列(二):Spring IoC应用的更多相关文章
- Spring系列二:IoC 容器
还君明珠双泪垂,恨不相逢未嫁时. 概述 Spring IoC容器是Spring框架的核心.只需要进行简单的容器配置,就可以将创建对象,使用对象,销毁对象联系在一起,从而管理从创建对象到销毁对象的整个生 ...
- Spring系列14:IoC容器的扩展点
Spring系列14:IoC容器的扩展点 回顾 知识需要成体系地学习,本系列文章前后有关联,建议按照顺序阅读.上一篇我们详细介绍了Spring Bean的生命周期和丰富的扩展点,没有阅读的强烈建议先阅 ...
- Spring系列(七) Spring MVC 异常处理
Servlet传统异常处理 Servlet规范规定了当web应用发生异常时必须能够指明, 并确定了该如何处理, 规定了错误信息应该包含的内容和展示页面的方式.(详细可以参考servlet规范文档) 处 ...
- Spring系列之Spring常用注解总结 转载
Spring系列之Spring常用注解总结 传统的Spring做法是使用.xml文件来对bean进行注入或者是配置aop.事物,这么做有两个缺点:1.如果所有的内容都配置在.xml文件中,那么.x ...
- 【Spring系列】Spring IoC
前言 IoC其实有两种方式,一种是DI,而另一种是DL,即Dependency Lookup(依赖查找),前者是当前软件实体被动接受其依赖的其他组件被IOc容器注入,而后者是当前软件实体主动去某个服务 ...
- Spring.net(二)----初探IOC容器
我在上一篇关于Spring.net的文章“Spring.NET框架简介及模块说明 ”中很详细的介绍了,本文就不旧话从提.我门就直奔主题吧. 1.首先了解两个接口. IObjectFactory接口和 ...
- Spring(二)——IOC
一.入门 1.案例 1 public class Student { 2 3 private String name; 4 5 public Student() { 6 System.out.prin ...
- Spring系列(零) Spring Framework 文档中文翻译
Spring 框架文档(核心篇1和2) Version 5.1.3.RELEASE 最新的, 更新的笔记, 支持的版本和其他主题,独立的发布版本等, 是在Github Wiki 项目维护的. 总览 历 ...
- Spring系列之Spring常用注解总结
传统的Spring做法是使用.xml文件来对bean进行注入或者是配置aop.事物,这么做有两个缺点:1.如果所有的内容都配置在.xml文件中,那么.xml文件将会十分庞大:如果按需求分开.xml文件 ...
- Spring系列(二):Spring IoC/DI的理解
这几天重新学习了一下Spring,在网上找了相关的ppt来看,当看到Spring IoC这一章节的时候,先大致浏览了一下内容,有将近50页的内容,内心窃喜~QAQ~,看完这些内容能够对IoC有更深层次 ...
随机推荐
- POJ 1651:Multiplication Puzzle(区间DP)
http://poj.org/problem?id=1651 题意:给出n个数字,每取中间一个数,就会使得权值加上中间这个数和两边的乘积,求取剩两个数最少的权值是多少. 思路:区间dp. 一开始想了挺 ...
- Ural 2072:Kirill the Gardener 3(DP)
http://acm.timus.ru/problem.aspx?space=1&num=2072 题意:有n朵花,每朵花有一个饥渴值.现在浇花,优先浇饥渴值小的(即从小到大浇),浇花需要耗费 ...
- scrapy实战4 GET方法抓取ajax动态页面(以糗事百科APP为例子):
一般来说爬虫类框架抓取Ajax动态页面都是通过一些第三方的webkit库去手动执行html页面中的js代码, 最后将生产的html代码交给spider分析.本篇文章则是通过利用fiddler抓包获取j ...
- Centos7 安装jdk,MySQL
报名立减200元.暑假直降6888. 邀请链接:http://www.jnshu.com/login/1/20535344 邀请码:20535344 学习阿里云平台的云服务器配置Java开发环境.我现 ...
- ServiceFabric极简文档-2 部署环境搭建-配置文件
类型:ClusterConfig.Unsecure.MultiMachine 说明:至少3台机子 { "name": "SampleCluster", &quo ...
- php编写刷网课自助下单系统(第三方支付实例)
此项目是由于本人刚刚入门php且在校代刷网课而编写的,由于在上课时间不方便接单,故特意写一个自助下单系统来实现客户自助下单.本项目主要实现以下功能:1.用户下单2.用户支付3.用户通过账号查询订单4. ...
- 使用ML-Agents Toolkit(0.5)训练游戏ai之环境搭建
ML-Agents toolkit目前已经更新到0.5版本了. 要想使用这个Unity插件训练人工智能需要如下软件 1.Anaconda指的是一个开源的Python发行版本,主要是让你的训练环境与其它 ...
- 【Android UI】自定义带按钮的标题栏
自定义标题栏在很多的android app中很常见,可以说是一种很有用的UI设计方法.自 己也本着学习的态度,经过一番各种坑,终于实现了,现总结如下: 一:大致流程 1. 对指定的andro ...
- 推荐 2 款超牛逼、炫酷、实用的Docker管理工具!
Docker技术的火热程度,想必每个互联网IT技术人员都能时时感受的到,的确,近些年,国内对于Docker容器技术的应用需求越来越强烈!! 人均年薪80万以上,docker到底是什么?为什么这么火? ...
- 每日一问:Android 消息机制,我有必要再讲一次!
坚持原创日更,短平快的 Android 进阶系列,敬请直接在微信公众号搜索:nanchen,直接关注并设为星标,精彩不容错过. 我 17 年的 面试系列,曾写过一篇名为:Android 面试(五):探 ...