scrapy实例:爬取天气、气温等
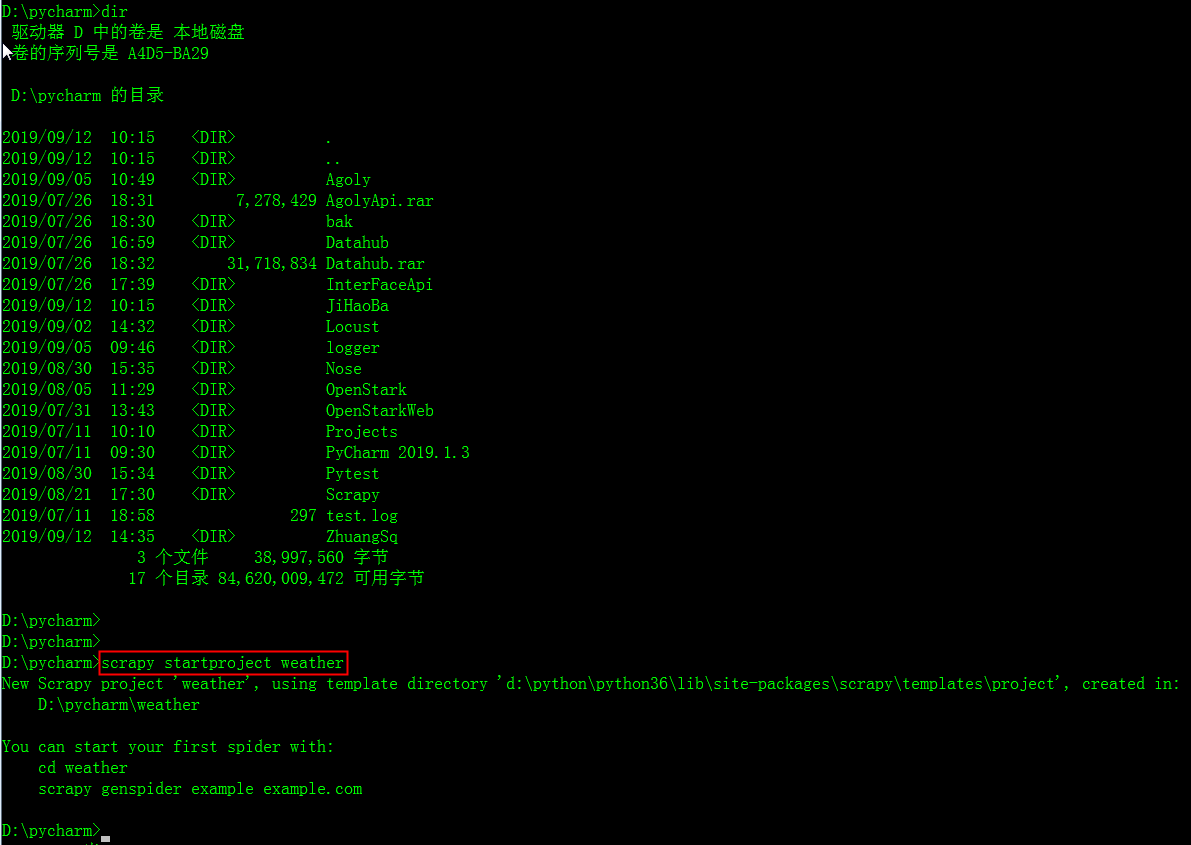
1.创建项目
scrapy startproject weather # weather是项目名称
scrapy crawl spidername开始运行,程序自动使用start_urls构造Request并发送请求,然后调用parse函数对其进行解析,
在这个解析过程中使用rules中的规则从html(或xml)文本中提取匹配的链接,通过这个链接再次生成Request,如此不断循环,直到返回的文本中再也没有匹配的链接,或调度器中的Request对象用尽,程序才停止。
2.确定爬取目标:
scrapy构建的爬虫的爬取过程:
scrapy crawl spidername开始运行,程序自动使用start_urls构造Request并发送请求,然后调用parse函数对其进行解析,在这个解析过程中使用rules中的规则从html(或xml)文本中提取匹配的链接,
通过这个链接再次生成Request,如此不断循环,直到返回的文本中再也没有匹配的链接,或调度器中的Request对象用尽,程序才停止。
allowed_domains:顾名思义,允许的域名,爬虫只会爬取该域名下的url
rule:定义爬取规则,爬虫只会爬取符合规则的url
rule有allow属性,使用正则表达式书写匹配规则.正则表达式不熟悉的话可以写好后在网上在线校验,尝试几次后,简单的正则还是比较容易的,我们要用的也不复杂.
rule有callback属性可以指定回调函数,爬虫在发现符合规则的url后就会调用该函数,注意要和默认的回调函数parse作区分.(爬取的数据在命令行里都可以看到)
rule有follow属性.为True时会爬取网页里所有符合规则的url,反之不会. 我这里设置为了False,因为True的话要爬很久.大约两千多条天气信息
import scrapy
from weather.items import WeatherItem
from scrapy.spiders import Rule, CrawlSpider
from scrapy.linkextractors import LinkExtractor class Spider(CrawlSpider):
name = 'weatherSpider'
#allowed_domains = "www.weather.com.cn"
start_urls = [
#"http://www.weather.com.cn/weather1d/101020100.shtml#search"
"http://www.weather.com.cn/forecast/"
]
rules = (
#Rule(LinkExtractor(allow=('http://www.weather.com.cn/weather1d/101\d{6}.shtml#around2')), follow=False, callback='parse_item'),
Rule(LinkExtractor(allow=('http://www.weather.com.cn/weather1d/101\d{6}.shtml$')), follow=True,callback='parse_item'),
) #多页面爬取时需要自定义方法名称,不能用parse
def parse_item(self, response):
item = WeatherItem()
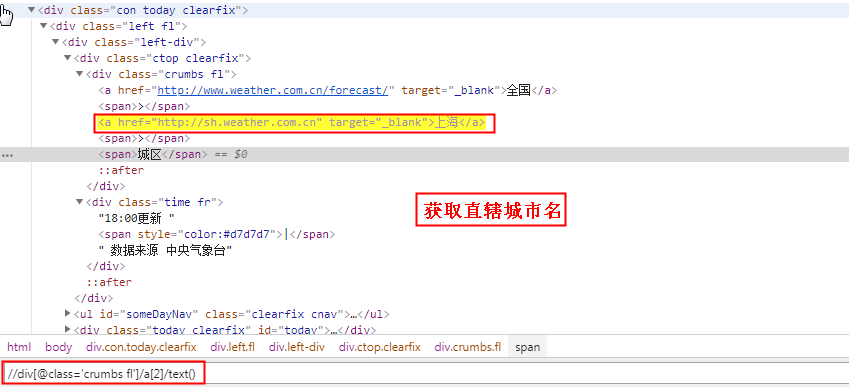
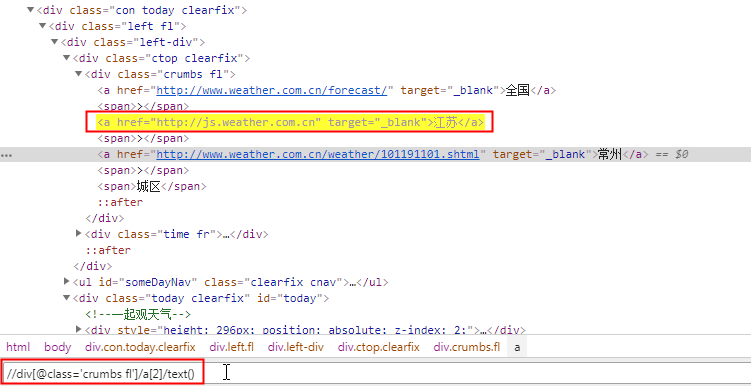
#city = response.xpath("//div[@class='crumbs fl']/a[2]/text()").extract_first()
item['city'] = response.xpath("//div[@class='crumbs fl']/a[2]/text()").extract_first() # 获取省或者直辖市名称
#if city == '>':
#item['city'] = response.xpath("//div[@class='crumbs fl']/a[last()-1]/text()").extract_first()#获取非直辖省
#item['city'] = response.xpath("//div[@class ='crumbs fl']/a[2]/text()").extract_first()#获取直辖市 #item['city_addition'] = response.xpath("//div[@class ='crumbs fl']/a[last()]/text()").extract_first()#获取直辖市
#city_addition = response.xpath("//div[@class ='crumbs fl']/a[last()]/text()").extract_first() #获取>字符
#print("aaaaa"+city)
#print("nnnnn"+city_addition)
#if city_addition != city:
#item['city_addition'] = response.xpath("//div[@class='crumbs fl']/a[2]/text()").extract_first()
item['city_addition'] = response.xpath("//div[@class ='crumbs fl']/a[last()]/text()").extract_first() # 获取城市名或者直辖市名称
#else:
#item['city_addition'] = '' #item['city_addition2'] = response.xpath("//div[@class='crumbs fl']/span[3]/text()").extract_first() weatherData = response.xpath("//div[@class='today clearfix']/input[1]/@value").extract_first() #获取当前的气温
item['data'] = weatherData[0:6] #获取日期
print("data:"+item['data'])
item['weather'] = response.xpath("//p[@class='wea']/text()").extract_first() #获取天气
item['temperatureMax'] = response.xpath("//ul[@class='clearfix']/li[1]/p[@class='tem']/span[1]/text()").extract_first() #最高温度
item['temperatureMin'] = response.xpath("//ul[@class='clearfix']/li[2]/p[@class='tem']/span[1]/text()").extract_first() #最低温度
yield item
spider.py顾名思义就是爬虫文件
在填写spider.py之前,我们先看看如何获取需要的信息
刚才的命令行应该没有关吧,关了也没关系
win+R在打开cmd,键入:scrapy shell http://www.weather.com.cn/weather1d/101020100.shtml#search #网址是你要爬取的url
这是scrapy的shell命令,可以在不启动爬虫的情况下,对网站的响应response进行处理调试等,主要是调试xpath获取元素的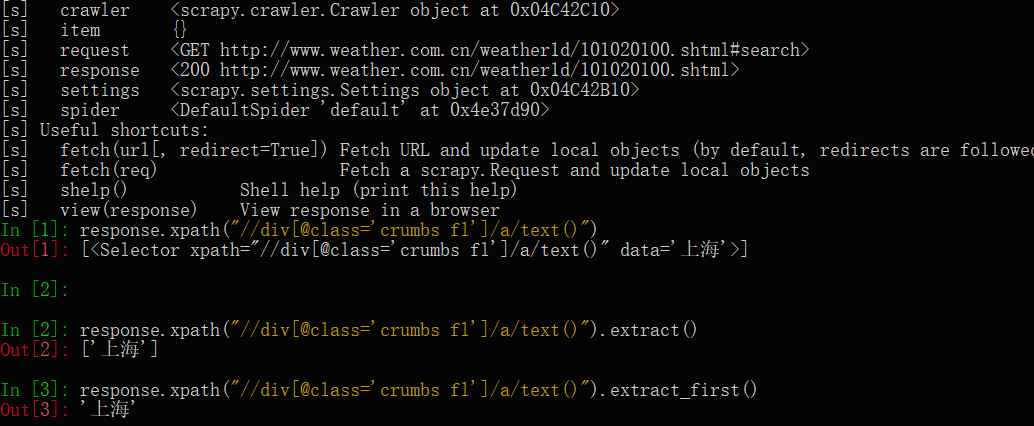
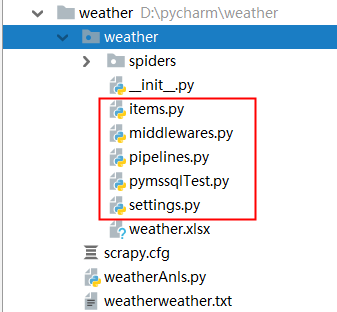
3.填写Items.py
Items.py只用于存放你要获取的字段:
给自己要获取的信息取个名字:
# -*- coding: utf-8 -*-

# Define here the models for your scraped items

#

# See documentation in:

# https://doc.scrapy.org/en/latest/topics/items.html

import scrapy

class WeatherItem(scrapy.Item):

    # define the fields for your item here like:

    # name = scrapy.Field()

    city = scrapy.Field()

    city_addition = scrapy.Field()

    city_addition2 = scrapy.Field()

    weather = scrapy.Field()

    data = scrapy.Field()

    temperatureMax = scrapy.Field()

    temperatureMin = scrapy.Field()

    pass
这里写了管道文件,还要在settings.py设置文件里启用这个pipeline:
6.填写settings.py
# -*- coding: utf-8 -*-

# Scrapy settings for weather project

#

# For simplicity, this file contains only settings considered important or

# commonly used. You can find more settings consulting the documentation:

#

#     https://doc.scrapy.org/en/latest/topics/settings.html

#     https://doc.scrapy.org/en/latest/topics/downloader-middleware.html

#     https://doc.scrapy.org/en/latest/topics/spider-middleware.html

BOT_NAME = 'weather'

SPIDER_MODULES = ['weather.spiders']

NEWSPIDER_MODULE = 'weather.spiders'

# Crawl responsibly by identifying yourself (and your website) on the user-agent

#USER_AGENT = 'weather (+http://www.yourdomain.com)'

# Obey robots.txt rules

ROBOTSTXT_OBEY = False

# Configure maximum concurrent requests performed by Scrapy (default: 16)

#CONCURRENT_REQUESTS = 32

# Configure a delay for requests for the same website (default: 0)

# See https://doc.scrapy.org/en/latest/topics/settings.html#download-delay

# See also autothrottle settings and docs

DOWNLOAD_DELAY = 1

# The download delay setting will honor only one of:

#CONCURRENT_REQUESTS_PER_DOMAIN = 16

#CONCURRENT_REQUESTS_PER_IP = 16

# Disable cookies (enabled by default)

#COOKIES_ENABLED = False

# Disable Telnet Console (enabled by default)

#TELNETCONSOLE_ENABLED = False

# Override the default request headers:

#DEFAULT_REQUEST_HEADERS = {

#   'Accept': 'text/html,application/xhtml+xml,application/xml;q=0.9,*/*;q=0.8',

#   'Accept-Language': 'en',

#}

# Enable or disable spider middlewares

# See https://doc.scrapy.org/en/latest/topics/spider-middleware.html

#SPIDER_MIDDLEWARES = {

#    'weather.middlewares.WeatherSpiderMiddleware': 543,

#}

# Enable or disable downloader middlewares

# See https://doc.scrapy.org/en/latest/topics/downloader-middleware.html

#DOWNLOADER_MIDDLEWARES = {

#    'weather.middlewares.WeatherDownloaderMiddleware': 543,

#}

# Enable or disable extensions

# See https://doc.scrapy.org/en/latest/topics/extensions.html

#EXTENSIONS = {

#    'scrapy.extensions.telnet.TelnetConsole': None,

#}

# Configure item pipelines

# See https://doc.scrapy.org/en/latest/topics/item-pipeline.html

ITEM_PIPELINES = {

    'weather.pipelines.TxtPipeline': 600,

    #'weather.pipelines.JsonPipeline': 6,

    #'weather.pipelines.ExcelPipeline': 300,

}

# Enable and configure the AutoThrottle extension (disabled by default)

# See https://doc.scrapy.org/en/latest/topics/autothrottle.html

#AUTOTHROTTLE_ENABLED = True

# The initial download delay

#AUTOTHROTTLE_START_DELAY = 5

# The maximum download delay to be set in case of high latencies

#AUTOTHROTTLE_MAX_DELAY = 60

# The average number of requests Scrapy should be sending in parallel to

# each remote server

#AUTOTHROTTLE_TARGET_CONCURRENCY = 1.0

# Enable showing throttling stats for every response received:

#AUTOTHROTTLE_DEBUG = False

# Enable and configure HTTP caching (disabled by default)

# See https://doc.scrapy.org/en/latest/topics/downloader-middleware.html#httpcache-middleware-settings

#HTTPCACHE_ENABLED = True

#HTTPCACHE_EXPIRATION_SECS = 0

#HTTPCACHE_DIR = 'httpcache'

#HTTPCACHE_IGNORE_HTTP_CODES = []

#HTTPCACHE_STORAGE = 'scrapy.extensions.httpcache.FilesystemCacheStorage'
5.填写pipeline.py
但要保存爬取的数据的话,还需写下pipeline.py
# -*- coding: utf-8 -*-

# Define your item pipelines here

#

# Don't forget to add your pipeline to the ITEM_PIPELINES setting

# See: https://doc.scrapy.org/en/latest/topics/item-pipeline.html

import os

import codecs

import json

import csv

from scrapy.exporters import JsonItemExporter

from openpyxl import Workbook

base_dir = os.getcwd()

filename = base_dir + '\\' + 'weather.txt'

with open(filename,'w+') as f:#打开文件

    f.truncate()#清空文件内容

class JsonPipeline(object):

    # 使用FeedJsonItenExporter保存数据

    def __init__(self):

        self.file = open('weather1.json','wb')

        self.exporter = JsonItemExporter(self.file,ensure_ascii =False)

        self.exporter.start_exporting()

    def process_item(self,item,spider):

        print('Write')

        self.exporter.export_item(item)

        return item

    def close_spider(self,spider):

        print('Close')

        self.exporter.finish_exporting()

        self.file.close()

class TxtPipeline(object):

    def process_item(self, item, spider):

        #获取当前工作目录

        #base_dir = os.getcwd()

        #filename = base_dir + 'weather.txt'

        #print('创建Txt')

        print("city:"+item['city'])

        print("city_addition:"+item['city_addition'])

        #从内存以追加方式打开文件,并写入对应的数据

        with open(filename, 'a') as f: #追加

            if item['city'] != item['city_addition']:

                f.write('城市:' + item['city'] + '>')

                f.write(item['city_addition'] + '\n')

            else:

                f.write('城市:' + item['city'] + '\n')

                #f.write(item['city_addition'] + '\n')

            f.write('日期:' + item['data'] + '\n')

            f.write('天气:' + item['weather'] + '\n')

            f.write('温度:' + item['temperatureMin'] + '~' + item['temperatureMax'] + '℃\n')

class ExcelPipeline(object):

    #创建EXCEL,填写表头

    def __init__(self):

        self.wb = Workbook()

        self.ws = self.wb.active

        #设置表头

        self.ws.append(['省', '市', '县(乡)', '日期', '天气', '最高温', '最低温'])

    def process_item(self, item, spider):

        line = [item['city'], item['city_addition'], item['city_addition2'], item['data'], item['weather'], item['temperatureMax'], item['temperatureMin']]

        self.ws.append(line) #将数据以行的形式添加仅xlsx中

        self.wb.save('weather.xlsx')

        return item

    '''def process_item(self, item, spider):

        base_dir = os.getcwd()

        filename = base_dir + 'weather.csv'

        print('创建EXCEL')

        with open(filename,'w') as f:

            fieldnames = ['省','市', '县(乡)', '天气', '日期', '最高温','最低温'] # 定义字段的名称

            writer = csv.DictWriter(f,fieldnames=fieldnames) # 初始化一个字典对象

            write.writeheader() # 调用writeheader()方法写入头信息

            # 传入相应的字典数据

            write.writerow(dict(item))

    '''
爬虫效果:

确定爬取目标:
这里选择中国天气网做爬取素材,爬取网页之前一定要先分析网页,要获取那些信息,怎么获取更加方便,网页源代码这里只展示部分:
<div class="ctop clearfix">

            <div class="crumbs fl">

                <a href="http://js.weather.com.cn" target="_blank">江苏</a>

                <span>></span>

                <a href="http://www.weather.com.cn/weather/101190801.shtml" target="_blank">徐州</a><span>></span>  <span>鼓楼</span>

            </div>

            <div class="time fr"></div>

        </div>
如果是非直辖市:获取省名称
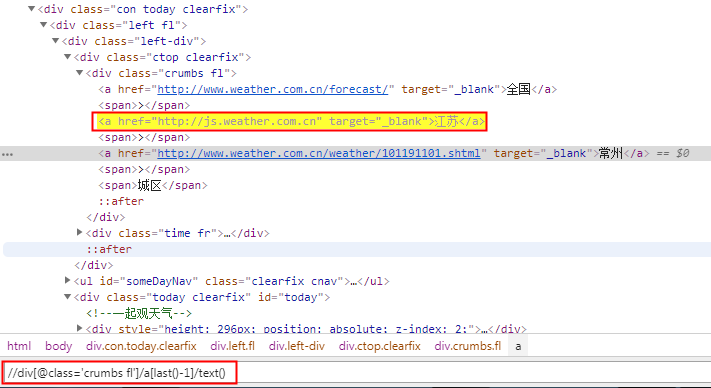
//div[@class='crumbs fl']/a[last()-1]/text()
取xpath最后一个book元素
book[last()]
取xpath最后第二个book元素
book[last()-1]
scrapy实例:爬取天气、气温等的更多相关文章
- scrapy实例:爬取中国天气网
1.创建项目 在你存放项目的目录下,按shift+鼠标右键打开命令行,输入命令创建项目: PS F:\ScrapyProject> scrapy startproject weather # w ...
- [scrapy]实例:爬取jobbole页面
工程概览: 创建工程 scrapy startproject ArticleSpider 创建spider cd /ArticleSpider/spiders/ 新建jobbole.py # -*- ...
- python爬虫爬取天气数据并图形化显示
前言 使用python进行网页数据的爬取现在已经很常见了,而对天气数据的爬取更是入门级的新手操作,很多人学习爬虫都从天气开始,本文便是介绍了从中国天气网爬取天气数据,能够实现输入想要查询的城市,返回该 ...
- 吴裕雄--天生自然PYTHON爬虫:安装配置MongoDBy和爬取天气数据并清洗保存到MongoDB中
1.下载MongoDB 官网下载:https://www.mongodb.com/download-center#community 上面这张图选择第二个按钮 上面这张图直接Next 把bin路径添加 ...
- Python脚本:爬取天气数据并发邮件给心爱的Ta
第一部分:爬取天气数据 # 在函数调用 get_weather(url = 'https://www.tianqi.com/foshan') 的 url中更改城市,foshan为佛山市 1 impor ...
- 毕设之Python爬取天气数据及可视化分析
写在前面的一些P话:(https://jq.qq.com/?_wv=1027&k=RFkfeU8j) 天气预报我们每天都会关注,我们可以根据未来的天气增减衣物.安排出行,每天的气温.风速风向. ...
- 简单的scrapy实战:爬取腾讯招聘北京地区的相关招聘信息
简单的scrapy实战:爬取腾讯招聘北京地区的相关招聘信息 简单的scrapy实战:爬取腾讯招聘北京地区的相关招聘信息 系统环境:Fedora22(昨天已安装scrapy环境) 爬取的开始URL:ht ...
- 使用scrapy框架爬取自己的博文(2)
之前写了一篇用scrapy框架爬取自己博文的博客,后来发现对于中文的处理一直有问题- - 显示的时候 [u'python\u4e0b\u722c\u67d0\u4e2a\u7f51\u9875\u76 ...
- 如何提高scrapy的爬取效率
提高scrapy的爬取效率 增加并发: 默认scrapy开启的并发线程为32个,可以适当进行增加.在settings配置文件中修改CONCURRENT_REQUESTS = 100值为100,并发设置 ...
随机推荐
- Cesium专栏-雷达遮罩动态扫描(附源码下载)
Cesium 是一款面向三维地球和地图的,世界级的JavaScript开源产品.它提供了基于JavaScript语言的开发包,方便用户快速搭建一款零插件的虚拟地球Web应用,并在性能,精度,渲染质量以 ...
- 全文检索--Lucene & ElasticSearch
全文检索--Lucene 2.1 全文检索和以前高级查询的比较 1.高级查询 缺点:1.like让数据库索引失效 2.每次查询都是查询数据库 ,如果访问的人比较多,压力也是比较大 2.全文检索框架:A ...
- 可编程实验板EPM1270T144C5使用说明
- Microsemi Libero使用技巧——使用第三方编辑器Notepad++
前言 与Xilinx的ISE和Altera的Quartus一样,Microsemi的编辑器也支持指定第三方编辑器. Microsemi自带的编辑器,没有自动补全功能,也不支持中文注释,非常不好用,为了 ...
- 算法设计与分析——n后问题(回溯法+位运算)
一.问题描述 在n×n格的国际象棋上摆放n个皇后,使其不能互相攻击,即任意两个皇后都不能处于同一行.同一列或同一斜线上,问有多少种摆法. 二.算法设计 解n后问题的回溯算法描述如下: #include ...
- 计算机组成原理——I/O接口以及I/O设备数据传送控制方式
接口可以看作是两个部件之间交接的部分.硬件与硬件之间有接口,硬件与软件之间有接口,软件与软件之间也有接口. 这里我们所说的I/O接口,一边连接着主机,一边连接着外设. I/O接口的功能 I/O接口的基 ...
- 一分钟教你编写Linux全局内置命令
前言:在linux命令使用中,有些命令总是又长又难记,就算是经常使用的命令每次都敲也真的很烦,所以今天教大家一个方法,来简化命令,创建我们自己的内建命令!!! 创建内置命令 创建命令存储目录 现在li ...
- FineUICore基础版部署到docker实战
FineUI用了好多年,最近出了FineUICore版本,一直没时间是试一下docker,前几天买了一个腾讯云服务器,1核2g,装了centos7.6,开始的时候主要是整个个人博客,在腾讯云安装了宝塔 ...
- js-07-事件
一.js事件绑定在对象上的三种方法 a:将事件绑定在元素标签的属性上 <h3 onclick="console.log('奥特曼打怪兽')">海绵宝宝历险记</h ...
- Penetration testing“Linux install Nessus”
Ax_Download www.tenable.com/products/nessus-home,need sent email. Bx_Install su ls dpkg -i [filename ...