利用Spring Boot+zxing,生成二维码还能这么简单
在网站开发中,经常会遇到要生成二维码的情况,比如要使用微信支付、网页登录等,本文分享一个Spring Boot生成二维码的例子,这里用到了google的zxing工具类。
本文目录
一、二维码简介二、编写代码生成二维码1.引入jar包2.编写工具类3.编写控制层代码4.运行并查看效果
一、二维码简介
二维码又称为QR Code,QR全称是Quick Response,是一个近几年来移动设备上超流行的一种编码方式。
二维码是用某种特定的几何图形按一定规律在平面(二维方向上)分布的黑白相间的图形记录数据符号信息的。
主要应用场景如下:
- 信息获取(名片、地图、WIFI密码、资料)
- 网站跳转(跳转到微博、手机网站、网站)
- 广告推送(用户扫码,直接浏览商家推送的视频、音频广告)
- 手机电商(用户扫码、手机直接购物下单)
- 防伪溯源(用户扫码、即可查看生产地;同时后台可以获取最终消费地)
- 优惠促销(用户扫码,下载电子优惠券,抽奖)
- 会员管理(用户手机上获取电子会员信息、VIP服务)
- 手机支付(扫描商品二维码,通过银行或第三方支付提供的手机端通道完成支付)
- 账号登录(扫描二维码进行各个网站或软件的登录)
二、编写代码生成二维码
1.引入jar包
pom.xml中引入zxing的jar包。
<!-- 二维码支持包 -->
<dependency>
    <groupId>com.google.zxing</groupId>
    <artifactId>core</artifactId>
    <version>3.2.0</version>
</dependency>
<dependency>
    <groupId>com.google.zxing</groupId>
    <artifactId>javase</artifactId>
    <version>3.2.0</version>
</dependency>
2.编写工具类
QRCodeUtil.java代码如下:
/**
 * QRCodeUtil 生成二维码工具类
 */
public class QRCodeUtil {

    private static final String CHARSET = "utf-8";
    private static final String FORMAT_NAME = "JPG";
    // 二维码尺寸
    private static final int QRCODE_SIZE = 300;
    // LOGO宽度
    private static final int WIDTH = 60;
    // LOGO高度
    private static final int HEIGHT = 60;

    private static BufferedImage createImage(String content, String imgPath, boolean needCompress) throws Exception {
        Hashtable hints = new Hashtable();
        hints.put(EncodeHintType.ERROR_CORRECTION, ErrorCorrectionLevel.H);
        hints.put(EncodeHintType.CHARACTER_SET, CHARSET);
        hints.put(EncodeHintType.MARGIN, 1);
        BitMatrix bitMatrix = new MultiFormatWriter().encode(content, BarcodeFormat.QR_CODE, QRCODE_SIZE, QRCODE_SIZE,
                hints);
        int width = bitMatrix.getWidth();
        int height = bitMatrix.getHeight();
        BufferedImage image = new BufferedImage(width, height, BufferedImage.TYPE_INT_RGB);
        for (int x = 0; x < width; x++) {
            for (int y = 0; y < height; y++) {
                image.setRGB(x, y, bitMatrix.get(x, y) ? 0xFF000000 : 0xFFFFFFFF);
            }
        }
        if (imgPath == null || "".equals(imgPath)) {
            return image;
        }
        // 插入图片
        QRCodeUtil.insertImage(image, imgPath, needCompress);
        return image;
    }

    private static void insertImage(BufferedImage source, String imgPath, boolean needCompress) throws Exception {
        File file = new File(imgPath);
        if (!file.exists()) {
            System.err.println("" + imgPath + "   该文件不存在!");
            return;
        }
        Image src = ImageIO.read(new File(imgPath));
        int width = src.getWidth(null);
        int height = src.getHeight(null);
        if (needCompress) { // 压缩LOGO
            if (width > WIDTH) {
                width = WIDTH;
            }
            if (height > HEIGHT) {
                height = HEIGHT;
            }
            Image image = src.getScaledInstance(width, height, Image.SCALE_SMOOTH);
            BufferedImage tag = new BufferedImage(width, height, BufferedImage.TYPE_INT_RGB);
            Graphics g = tag.getGraphics();
            g.drawImage(image, 0, 0, null); // 绘制缩小后的图
            g.dispose();
            src = image;
        }
        // 插入LOGO
        Graphics2D graph = source.createGraphics();
        int x = (QRCODE_SIZE - width) / 2;
        int y = (QRCODE_SIZE - height) / 2;
        graph.drawImage(src, x, y, width, height, null);
        Shape shape = new RoundRectangle2D.Float(x, y, width, width, 6, 6);
        graph.setStroke(new BasicStroke(3f));
        graph.draw(shape);
        graph.dispose();
    }

    public static void encode(String content, String imgPath, String destPath, boolean needCompress) throws Exception {
        BufferedImage image = QRCodeUtil.createImage(content, imgPath, needCompress);
        mkdirs(destPath);
        ImageIO.write(image, FORMAT_NAME, new File(destPath));
    }

    public static BufferedImage encode(String content, String imgPath, boolean needCompress) throws Exception {
        BufferedImage image = QRCodeUtil.createImage(content, imgPath, needCompress);
        return image;
    }

    public static void mkdirs(String destPath) {
        File file = new File(destPath);
        // 当文件夹不存在时,mkdirs会自动创建多层目录,区别于mkdir.(mkdir如果父目录不存在则会抛出异常)
        if (!file.exists() && !file.isDirectory()) {
            file.mkdirs();
        }
    }

    public static void encode(String content, String imgPath, OutputStream output, boolean needCompress)
            throws Exception {
        BufferedImage image = QRCodeUtil.createImage(content, imgPath, needCompress);
        ImageIO.write(image, FORMAT_NAME, output);
    }

    public static void encode(String content, OutputStream output) throws Exception {
        QRCodeUtil.encode(content, null, output, false);
    }
}
3.编写控制层代码
QrCodeController.java代码如下:
    /**
     * 根据 url 生成 普通二维码
     */
    @RequestMapping(value = "/createCommonQRCode")
    public void createCommonQRCode(HttpServletResponse response, String url) throws Exception {
        ServletOutputStream stream = null;
        try {
            stream = response.getOutputStream();
            //使用工具类生成二维码
            QRCodeUtil.encode(url, stream);
        } catch (Exception e) {
            e.getStackTrace();
        } finally {
            if (stream != null) {
                stream.flush();
                stream.close();
            }
        }
    }

    /**
     * 根据 url 生成 带有logo二维码
     */
    @RequestMapping(value = "/createLogoQRCode")
    public void createLogoQRCode(HttpServletResponse response, String url) throws Exception {
        ServletOutputStream stream = null;
        try {
            stream = response.getOutputStream();
            String logoPath = Thread.currentThread().getContextClassLoader().getResource("").getPath()
                    + "templates" + File.separator + "logo.jpg";
            //使用工具类生成二维码
            QRCodeUtil.encode(url, logoPath, stream, true);
        } catch (Exception e) {
            e.getStackTrace();
        } finally {
            if (stream != null) {
                stream.flush();
                stream.close();
            }
        }
    }
4.运行并查看效果
本项目中提供了生成普通二维码和带有logo二维码的两个接口,启动项目,我们来演示下生成下http://www.baidu.com这个url的二维码;
- 生成普通二维码
本地浏览器打开http://localhost:8080/createCommonQRCode?url=http://www.baidu.com,生成的二维码截图如下:
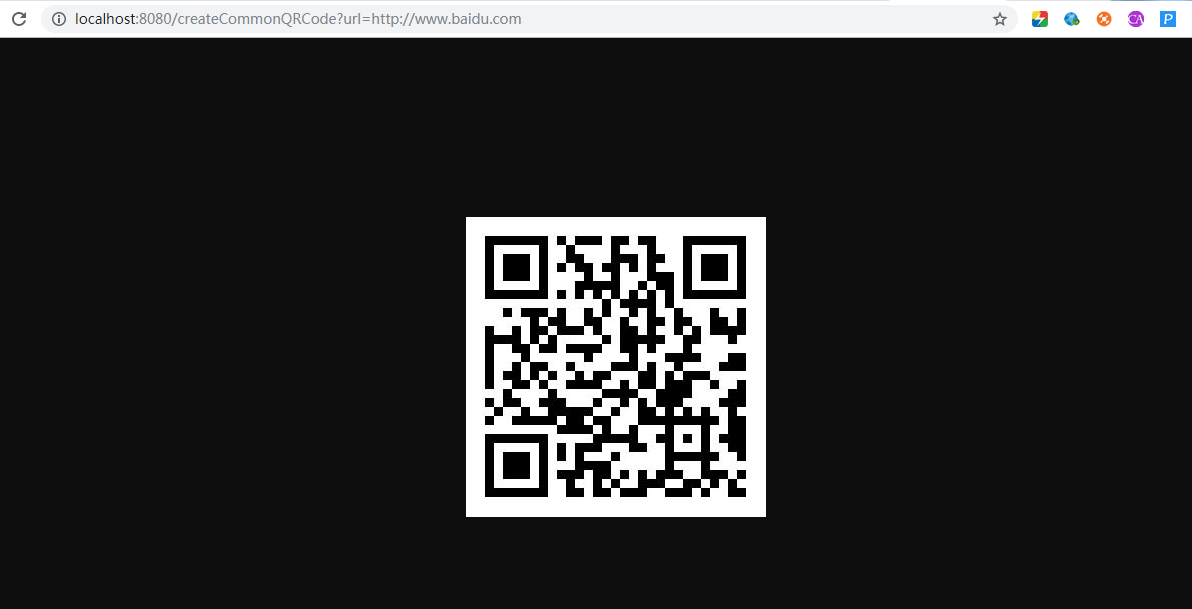
生成百度的普通二维码
- 生成带logo的二维码
本地浏览器打开http://localhost:8080/createLogoQRCode?url=http://www.baidu.com,生成的二维码截图如下:

生成百度的带logo二维码
到此Spring Boot 2.X中利用ZXing生成二维码功能全部实现,有问题欢迎留言沟通哦!
完整源码地址: https://github.com/suisui2019/springboot-study
推荐阅读
1.从技术的角度分析下为什么不要在网上发“原图”
2.Spring Boot 2.X 如何快速整合jpa?
3.Spring Boot之Profile--快速搞定多环境使用与切换
4.Spring Boot 2.X整合Spring-cache,让你的网站速度飞起来
5.利用Spring Boot+WxJava实现网站集成微信登录功能
限时领取免费Java相关资料,涵盖了Java、Redis、MongoDB、MySQL、Zookeeper、Spring Cloud、Dubbo/Kafka、Hadoop、Hbase、Flink等高并发分布式、大数据、机器学习等技术。
关注下方公众号即可免费领取:

利用Spring Boot+zxing,生成二维码还能这么简单的更多相关文章
- java二维码之利用谷歌的zxing生成二维码,解析二维码
生成二维码 @RequestMapping("/123") public void test(HttpServletRequest request,HttpServletRespo ...
- spring boot高性能实现二维码扫码登录(中)——Redis版
前言 本打算用CountDownLatch来实现,但有个问题我没有考虑,就是当用户APP没有扫二维码的时候,线程会阻塞5分钟,这反而造成性能的下降.好吧,现在回归传统方式:前端ajax每隔1秒或2秒发 ...
- spring boot高性能实现二维码扫码登录(下)——订阅与发布机制版
前言 基于之前两篇(<spring boot高性能实现二维码扫码登录(上)——单服务器版>和<spring boot高性能实现二维码扫码登录(中)——Redis版>)的基础, ...
- (转)ZXing生成二维码和带logo的二维码,模仿微信生成二维码效果
场景:移动支付需要对二维码的生成与部署有所了解,掌握目前主流的二维码生成技术. 1 ZXing 生成二维码 首先说下,QRCode是日本人开发的,ZXing是google开发,barcode4j也是老 ...
- zxing生成二维码设置边框颜色
真是研究了很久很久,满满的泪啊 zxing生成二维码,默认是可以增加空白边框的,但是并没有可以设置边框颜色的属性. 其中增加空白边框的属性的一句话是: Map hints = new HashMap( ...
- java学习-zxing生成二维码矩阵的简单例子
这个例子需要使用google的开源项目zxing的核心jar包 core-3.2.0.jar 可以百度搜索下载jar文件,也可使用maven添加依赖 <dependency> <gr ...
- 利用PHP QR Code生成二维码(带logo)
转自:http://www.cnblogs.com/txw1958/p/phpqrcode.html HP QR Code是一个PHP二维码生成类库,利用它可以轻松生成二维码,官网提供了下载和多个演示 ...
- 通过zxing生成二维码
二维码现在随处可见,在日常的开发中,也会经常涉及到二维码的生成,特别是开发一些活动或者推广方面的功能时,二维码甚至成为必备功能点.本文介绍通过 google 的 zxing 包生成带 logo 的二维 ...
- 使用google zxing生成二维码图片
生成二维码工具类: 1 import java.awt.geom.AffineTransform; 2 import java.awt.image.AffineTransformOp; 3 impor ...
随机推荐
- 写这篇博客之前,我又忘了“==”和equals的区别。
没错.嘟嘟又把==号和equals 的区别给忘掉了 ==号比较基本类型的时候比的是值,比较引用类型的时候比较的是地址.equals比较基本类型的时候.... 脑子里关于这道题的答案好模糊好没有安全感 ...
- web设计_8_数据表格内容样式分离
1.页面需要用到table的时候,样式重置CSS要设置: table{ border-collapse: collapse; border-spacing:; } 2. HTML结构 <tabl ...
- iOS Xcode6 新建OC Category文件
首先:File -> New File 接下来界面如下,选择Objective-C File,然后Next 在这里选择 Category 即可
- 多线程编程(Linux C)
多线程编程可以说每个程序员的基本功,同时也是开发中的难点之一,本文以Linux C为例,讲述了线程的创建及常用的几种线程同步的方式,最后对多线程编程进行了总结与思考并给出代码示例. 一.创建线程 多线 ...
- 浅谈NodeJS多进程服务架构基本原理
阅读目录 一:nodejs进程进化及多进程架构原理 二:node中child_process模块实现多进程 三:父子进程间如何通信? 四:理解cluster集群 回到顶部 一:nodejs进程进化及多 ...
- 解决H5微信浏览器中audio兼容-- 背景音乐无法自动播放
我们知道,ios 在safari浏览器中,audio标签不能在没有用户交互的情况下自动播放或有js直接控制播放,这是系统限制的一些原因. 但是背景音乐在微信浏览器可以设置自动播放,config配置一下 ...
- c# 多进程写信息到前台控件
private void DispMsg(string strMsg, bool clearlb = false) { if (this.lberror.InvokeRequired == false ...
- java多线程与并发(基础篇)
一.进程与线程 进程:是代码在数据集合上的一次运行活动,是系统进行资源分配和调度的基本单位. 线程:是进程的一个执行路径,一个进程中至少有一个线程,进程中的多个线程共享进程的 资源. 虽然系统是把资源 ...
- APP手机商城系统选择,混合开发与原生开发哪个好?
关于手机APP开发用混合还是原生现在说法不一,有说混合开发好:时间短.费用低.效果也不错,有说原生开发好,原生APP在性能方面比较好.而商城系统中的手机APP用混合开发还是原生开发比较好呢? 最近我参 ...
- 前端表格数据导出excel
使用tableExport.js导出bootstrap-table表格成excel并且支持中文 1. 下载tableExport.js https://github.com/hhurz/tableEx ...