API gateway 之 kong 安装 (二)
一、系统环境
[root@kong ~]# service iptables status

iptables: Firewall is not running.

[root@kong ~]# getenforce

Disabled

[root@kong ~]# cat /etc/system-release

CentOS release 6.7 (Final)

[root@kong ~]# uname -a

Linux kong 2.6.-.el6.x86_64 # SMP Thu Jul  :: UTC  x86_64 x86_64 x86_64 GNU/Linux
二、kong的安装
根据kong的官网文档进行安装 官网:https://konghq.com/install/
1、yum源配置
[root@kong ~]# cat /etc/yum.repos.d/bintray-kong-kong-community-edition-rpm.repo

[bintraybintray-kong-kong-community-edition-rpm]

name=bintray-kong-kong-community-edition-rpm

baseurl=https://kong.bintray.com/kong-community-edition-rpm/centos/6

gpgcheck=

repo_gpgcheck=

enabled=
2、安装kong 默认安装的 kong-0.10.4-1.noarch,官网已经更新到了0.13.x了,也可以手动下载最新版的rpm包安装
[root@kong ~]# yum install -y kong
如果安装是报如下错误,就在/etc/yum.conf 配置文件 sslverify=false后,重新执行上面命令
https://kong.bintray.com/kong-community-edition-rpm/centos/6/kong-community-edition-0.10.4.el6.noarch.rpm: [Errno 14] Peer cert cannot be verified or peer cert invalid
3、安装 kong 需要的数据库,默认选择的是postgreSQL,kong支持2种数据库存储(postgreSQL 和 Cassandra)
postgreSQL官网:https://www.postgresql.org/download/
Cassandra官网:http://cassandra.apache.org/download/
这里我们以postgreSQL为例进行安装
a、配置yum源
https://www.postgresql.org/download/linux/redhat/
yum install https://download.postgresql.org/pub/repos/yum/10/redhat/rhel-6-x86_64/pgdg-centos10-10-2.noarch.rpm

yum install postgresql10

yum install postgresql10-server

service postgresql- initdb

chkconfig postgresql- on
b、修改postgreSQL配置文件
/var/lib/pgsql/10/data/postgresql.conf
listen_addresses = 'localhost'

替换成如下:

listen_addresses = '*'
/var/lib/pgsql/10/data/pg_hba.conf
host    all             all             127.0.0.1/            ident

换成如下:

host    all             all             127.0.0.1/            trust
c、启动postgreSQL
service postgresql- start
d、创建kong需要的库、授权 并 把相关的数据写入库
[root@base ~]# su - postgres

-bash-4.1$ psql

psql (8.4., server 10.3)

WARNING: psql version 8.4, server version 10.0.

         Some psql features might not work.

Type "help" for help.

postgres=# CREATE USER kong; CREATE DATABASE kong OWNER kong;

CREATE ROLE

CREATE DATABASE

postgres=# quit

postgres-# \q

-bash-4.1$ exit

logout

[root@base ~]# kong migrations up

...................

response-ratelimiting migrated up to: ---321512_response-rate-limiting_policies

migrating acl for database kong

acl migrated up to: ---841841_init_acl

 migrations ran
e、修改普通用户描述符,至少4096
ulimit -HSn 65535
echo "ulimit -HSn 65535" >> /etc/rc.local
4、启动 kong
[root@base ~]# kong start

Kong started

[root@base ~]# netstat -lntp|grep nginx

tcp               0.0.0.0:                0.0.0.0:*                   LISTEN      /nginx

tcp               0.0.0.0:                0.0.0.0:*                   LISTEN      /nginx

tcp               0.0.0.0:                0.0.0.0:*                   LISTEN      /nginx

tcp               0.0.0.0:                0.0.0.0:*                   LISTEN      /nginx

[root@base ~]# curl -i -X GET http://localhost:8001/

HTTP/1.1  OK

Date: Thu,  Apr  :: GMT

Content-Type: application/json; charset=utf-

Transfer-Encoding: chunked

Connection: keep-alive

Access-Control-Allow-Origin: *

Server: kong/0.10.

{"timers":{"running":,"pending":},"configuration":{"admin_error_log":"logs\/error.log","cassandra_lb_policy":"RoundRobin","admin_access_log":"logs\/admin_access.log","ca ..................

..............................
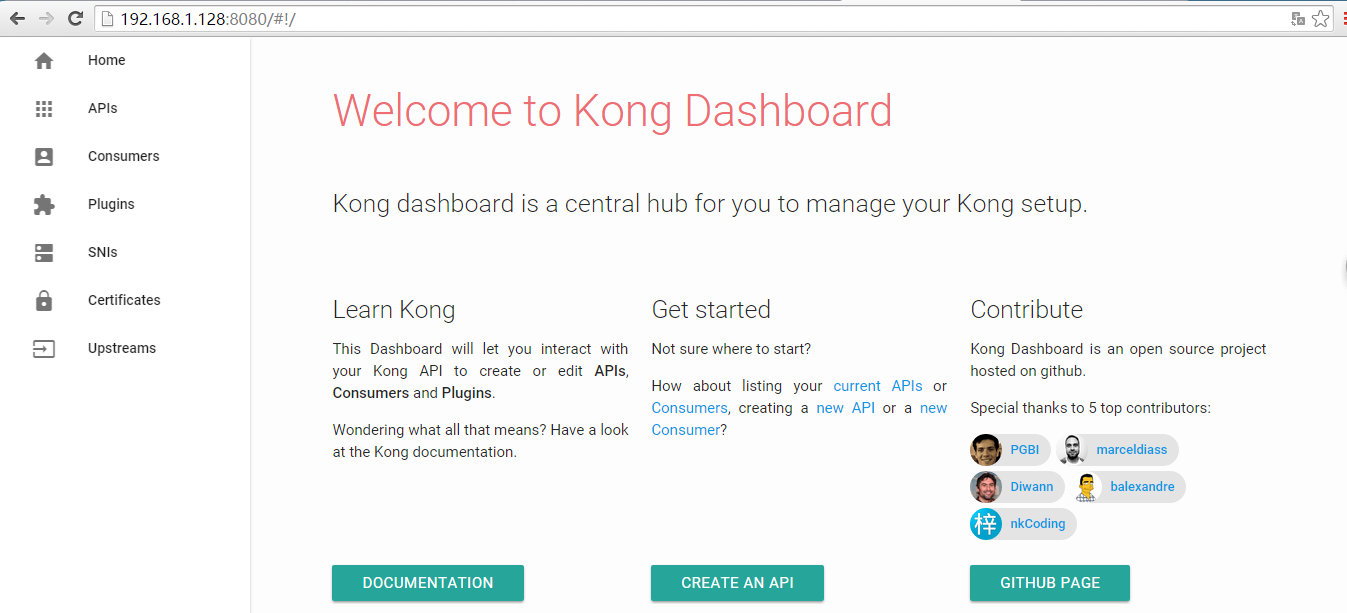
三、Kong UI管理工具
安装说明:https://github.com/PGBI/kong-dashboard
1、安装kong管理工具的环境依赖 nodejs 及 npm
nodejs 及 npm安装教程:https://nodejs.org/en/download/package-manager/#enterprise-linux-and-fedora
curl --silent --location https://rpm.nodesource.com/setup_9.x | sudo bash -

yum -y install nodejs
2、使用 npm 安装 kong-dashboard
npm install -g kong-dashboard

nohup kong-dashboard start --kong-url http://192.168.1.128:8001 &

也可以基于basic 认证,在登录是要求输入密码

nohup kong-dashboard start --kong-url http://192.168.1.128:8001 --basic-auth admin=123456 &
3、访问 kong-dashboard http://192.168.1.128:8080 (输入刚刚配置的账号密码)
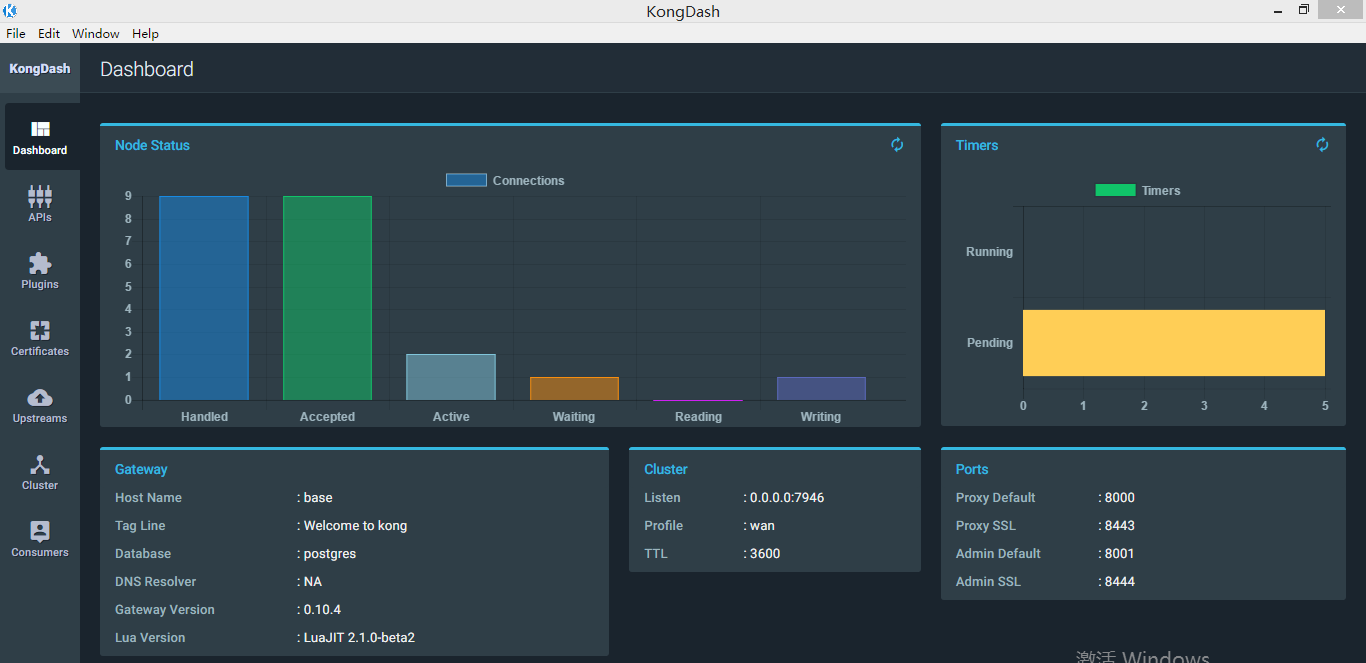
四、Kong 桌面管理工具
Kong 桌面管理工具:https://github.com/ajaysreedhar/kongdash 有linux版本,windows版本,mac版本。
下载地址:https://github.com/ajaysreedhar/kongdash/releases/download/v0.3.0/kongdash-0.3.0-ia32.exe
访问地址:http://192.168.1.128:8001/
API gateway 之 kong 安装 (二)的更多相关文章
- API gateway 之 kong 安装
kong安装: https://getkong.org/install/centos/ 下载指定版本rpm: wget https://bintray.com/kong/kong-community- ...
- API gateway 之 kong 基本操作 (三)
一.演示环境准备 1.nginx配置 [root@nginx conf.d]# pwd /etc/nginx/conf.d [root@nginx conf.d]# ls conf_bak kong_ ...
- API gateway 之 kong 基本介绍 (一)
一.API网关概念介绍 API 网关,即API Gateway,是大型分布式系统中,为了保护内部服务而设计的一道屏障,可以提供高性能.高可用的 API托管服务,从而帮助服务的开发者便捷地对外提供服务, ...
- API Gateway - KONG 安装与配置
简介 Kong,是由Mashape公司开源的,基于Nginx的API gateway 特点 可扩展,支持分布式 模块化 功能:授权.日志.ip限制.限流.api 统计分析(存在商业插件Galileo等 ...
- Docker安装Kong API Gateway并使用
我最新最全的文章都在南瓜慢说 www.pkslow.com,文章更新也只在官网,欢迎大家来喝茶~~ 1 简介 Kong不是一个简单的产品,本文讲的Kong主要指的是Kong API Gateway,即 ...
- kong API gateway
参考:https://www.cnblogs.com/chenjinxi/p/8724564.html 一.简介 Kong,是由Mashape公司开源的,基于Nginx的API gateway. 二. ...
- 关于kong | API Gateway
目录 为什么需要 API 网关(more) kong的概念 为什么使用Kong Kong 的管理方式 高可扩展性的背后-插件机制 [前言]: Kong是一个云原生,高效,可扩展的分布式 API 网关. ...
- 微服务实战(二):使用API Gateway
微服务实战(一):微服务架构的优势与不足 微服务实战(二):使用API Gateway 微服务实战(三):深入微服务架构的进程间通信 微服务实战(四):服务发现的可行方案以及实践案例 微服务实践(五) ...
- API Gateway : Kong
what problems 多个服务要写自己的log,auth,对于比较耗时的,有时还要高流量限制. solution intro 单点部署的情况: why not just haproxy log ...
随机推荐
- 你竟然不装油猴插件-Chrome神器TamperMonkey
油猴插件是一款可以在chrome浏览器中使用油猴脚本的插件.理解为脚本运行的平台 脚本 是一段代码,安装之后,有些脚本能为网站添加新的功能,有些能使网站的界面更加易用,有些则能隐藏网站上烦人的部分内容 ...
- 夯实Java基础系列17:一文搞懂Java多线程使用方式、实现原理以及常见面试题
本系列文章将整理到我在GitHub上的<Java面试指南>仓库,更多精彩内容请到我的仓库里查看 https://github.com/h2pl/Java-Tutorial 喜欢的话麻烦点下 ...
- python openpyxl内存不主动释放 ——关闭Excel工作簿后内存依旧(MemoryError)
在openpyxl对Excel读写操作过程中,发现内存没有马上释放,如果得多次读取大文件,内存爪机,后续代码就无法运行. 尝试:各种wb.save()或者with open等途径无法解决. 发现:因为 ...
- Elasticsearch全文检索学习
ElasticSearch官方网址:https://www.elastic.co ElasticSearch官方网址(中文):https://www.elastic.co/cn/ Elasticsea ...
- 软件开发工具(第9章:使用Eclipse进行C/C++开发)
一.安装MinGW MinGW是指用来生成可执行文件的编译环境,它是开发C/C++项目 的工具集.为了能够使用Eclipse CDT编译且运行C和C++程序,必须 要安装一个C/C++编译器. 下载: ...
- github仓库添加MIT许可
俩种方法 1.新建仓库 直接在选择添加即可如下图: 2.为已创建仓库后添加MIT协议 直接在给工程根目录添加LICENSE文件提交即可,内容是 MIT License Copyright (c) 年份 ...
- .NET GC垃圾回收器
GC垃圾回收器简介 全名: Garbage Collector 原理: 以应用程序的根(root)为基础,遍历应用程序堆(heap)上动态分配的所有对象,通过识别它们是否被引用来确定哪些对象是已经死亡 ...
- homebrew安装问题(Failed during: git fetch origin master:refs/remotes/origin/master --tags --force)
在mac系统中,使用homebrew可以很方便的管理包.按照官网的说明执行以下命令时总是报错: /usr/bin/ruby -e "$(curl -fsSL https://raw.gith ...
- Android Studio:多包名打包
来自:http://m.blog.csdn.net/u011315960/article/details/73251196 前言 最近有点小忙,博客都落下了,今天赶紧写点东西补上. 前几天商务找我,想 ...
- OpenCV支持Qt用户界面
在运行opencv程序的时候报下面的错误: ... The library is compiled without QT support in function ... 原因是在使用cmake安装op ...