码海拾遗:基于MySQL Connector/C++的MySQL操作(连接池)
1、MySQL安装及简单设置
(1)安装:在OSX系统下,可以使用万能的“brew install”命令来进行安装:brew isntall mysql(默认安装最新版的MySQL)
(2)启动:brew services start mysql
(3)修改密码:update user set authentication_string = password('password'), password_expired = 'N', password_last_changed = now() where user = 'root';
-->flush privileges;(让修改后的密码生效)
(4)允许远程访问:update mysql.user set host = '%' where user = 'root';
2、MySQL Connector/C++安装
(1)下载:MySQL Connector/C++源码可以从这里下载
(2)安装:解压后将“include”目录下的文件复制到“/usr/local/include”目录下,“lib”目录下的文件复制到“/usr/local/lib”目录下即可
3、示例代码(基于单例模式的懒汉模型)
CConnPool.h
/*

 * CConnPool.h

 *

 *  Created on: Mar 15, 2018

 *      Author: root

 */

#ifndef SRC_CCONNPOOL_H_

#define SRC_CCONNPOOL_H_

#include <list>

#include <string>

#include <pthread.h>

#include <mysql_connection.h>

#include <mysql_driver.h>

#include <cppconn/exception.h>

#include <cppconn/driver.h>

#include <cppconn/connection.h>

#include <cppconn/resultset.h>

#include <cppconn/prepared_statement.h>

#include <cppconn/statement.h>

using namespace sql;

using namespace std;

class CConnPool {

public:

	~CConnPool();

	void InitConnpool(string url, string user, string password, int maxSize);

	Connection* GetConnection();

	void ReleaseConnection(Connection* conn);

	static CConnPool *GetInstance();

private:

	CConnPool();

	Connection*CreateConnection(); //创建一个连接

	void InitConnection(int iInitialSize); //初始化数据库连接池

	void DestoryConnection(Connection *conn); //销毁数据库连接对象

	void DestoryConnPool(); //销毁数据库连接池

	CConnPool(string url, string user, string password, int maxSize); //构造方法

private:

	int curSize; //当前已建立的数据库连接数量

	int maxSize; //连接池中定义的最大数据库连接数

	string user;

	string password;

	string url;

	list<Connection*> connList; //连接池的容器队列  STL list 双向链表

	pthread_mutex_t lock; //线程锁

	static CConnPool *connPool;

	Driver*driver;

};

#endif /* SRC_CCONNPOOL_H_ */
CConnPool.cpp
/*

 * CConnPool.cpp

 *

 *  Created on: Mar 15, 2018

 *      Author: root

 */

#include <stdexcept>

#include <exception>

#include <cstdio>

#include "CConnPool.h"

CConnPool *CConnPool::connPool = NULL;

//CConnPool* CConnPool::connPool = new CConnPool();

CConnPool::CConnPool()

{

	// TODO Auto-generated constructor stub

}

void CConnPool::InitConnpool(string url, string user, string password,

							 int maxSize)

{

	this->maxSize = maxSize;

	this->curSize = 0;

	this->user = user;

	this->password = password;

	this->url = url;

	try

	{

		this->driver = sql::mysql::get_driver_instance();

	}

	catch (sql::SQLException &e)

	{

		perror("驱动连接出错;\n");

	}

	catch (std::runtime_error &e)

	{

		perror("运行出错了\n");

	}

	this->InitConnection(maxSize / 2);

	pthread_mutex_init(&lock, NULL);

}

CConnPool::CConnPool(string url, string user, string password, int maxSize)

{

	this->maxSize = maxSize;

	this->curSize = 0;

	this->user = user;

	this->password = password;

	this->url = url;

	try

	{

		this->driver = sql::mysql::get_driver_instance();

	}

	catch (sql::SQLException &e)

	{

		perror("驱动连接出错;\n");

	}

	catch (std::runtime_error &e)

	{

		perror("运行出错了\n");

	}

	this->InitConnection(maxSize / 2);

	pthread_mutex_init(&lock, NULL);

}

CConnPool *CConnPool::GetInstance()

{

	if (connPool == NULL)

		connPool = new CConnPool("tcp://127.0.0.1:3306", "root", "123456",

								 10);

	return connPool;

}

void CConnPool::InitConnection(int num)

{

	Connection *conn;

	pthread_mutex_lock(&lock);

	for (int i = 0; i < num; ++i)

	{

		conn = CreateConnection();

		if (conn)

		{

			connList.push_back(conn);

			++curSize;

		}

		else

		{

			perror("创建CONNECTION出错");

		}

	}

	pthread_mutex_unlock(&lock);

}

Connection *CConnPool::CreateConnection()

{

	Connection *conn;

	try

	{

		conn = driver->connect(url, user, password); //建立连接

		return conn;

	}

	catch (sql::SQLException &e)

	{

		perror(e.what());

		return NULL;

	}

	catch (std::runtime_error &e)

	{

		perror(e.what());

		return NULL;

	}

}

Connection *CConnPool::GetConnection()

{

	Connection *conn;

	pthread_mutex_lock(&lock);

	if (connList.size() > 0)

	{

		conn = connList.front();

		connList.pop_front();

		if (conn->isClosed())

		{

			delete conn;

			conn = CreateConnection();

		}

		if (conn == NULL)

			--curSize;

		pthread_mutex_unlock(&lock);

		return conn;

	}

	else

	{

		if (curSize < maxSize)

		{

			conn = CreateConnection();

			if (conn)

			{

				++curSize;

				pthread_mutex_unlock(&lock);

				return conn;

			}

			else

			{

				pthread_mutex_unlock(&lock);

				return NULL;

			}

		}

		else

		{

			pthread_mutex_unlock(&lock);

			return NULL;

		}

	}

}

void CConnPool::ReleaseConnection(Connection *conn)

{

	if (conn)

	{

		pthread_mutex_lock(&lock);

		connList.push_back(conn);

		pthread_mutex_unlock(&lock);

	}

}

CConnPool::~CConnPool()

{

	this->DestoryConnPool();

}

void CConnPool::DestoryConnPool()

{

	list<Connection *>::iterator iter;

	pthread_mutex_lock(&lock);

	for (iter = connList.begin(); iter != connList.end(); ++iter)

		this->DestoryConnection(*iter);

	curSize = 0;

	connList.clear();

	pthread_mutex_unlock(&lock);

}

void CConnPool::DestoryConnection(Connection *conn)

{

	if (conn)

	{

		try

		{

			conn->close();

		}

		catch (sql::SQLException &e)

		{

			perror(e.what());

		}

		catch (std::exception &e)

		{

			perror(e.what());

		}

		delete conn;

	}

}
main.cpp
#include <iostream>
#include <string> #include "CConnPool.h" using std::cout;
using std::endl;
using std::string; CConnPool *connpool = CConnPool::GetInstance(); int main(int argc, char *argv[])
{
Connection *conn;
Statement *state;
ResultSet *result; conn = connpool->GetConnection();
state = conn->createStatement();
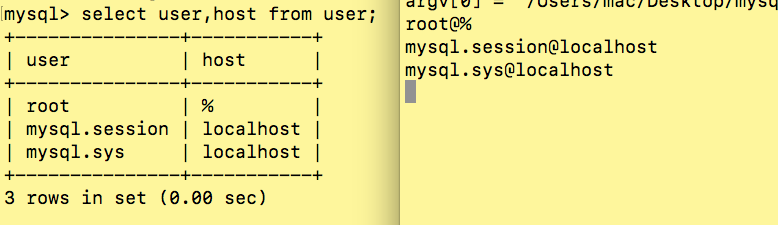
state->execute("use mysql"); result = state->executeQuery("select host,user from user");
while (result->next())
{
try
{
string user = result->getString("user");
string host = result->getString("host");
cout << user << "@" << host << endl;
}
catch (sql::SQLException &e)
{
cout << e.what() << endl;
}
} delete result;
delete state;
connpool->ReleaseConnection(conn); getchar();
return 0;
}
码海拾遗:基于MySQL Connector/C++的MySQL操作(连接池)的更多相关文章
- 基于Python3实现的各类数据库连接和连接池
基于Python3的各类数据库连接和连接池, 支持数据库有: Mysql(MariaDB), Oracle, PostgreSQL(GreenPlum), Vertica, Redis, MongoD ...
- MySql 8小时解决方案:proxool连接池
最近做的项目用的mysql数据库,前天挂在服务器上,昨天早晨上班一来,同事就说API数据接口访问不了了,我马上mstsc登陆服务器看,报错了.马上重启tomcat,结果还能正常运行,当时没管,今天过来 ...
- 【Mysql】SpringBoot阿里Druid数据源连接池配置
一.pom.xml添加 <!-- 配置数据库连接池 --> <dependency> <groupId>com.alibaba</groupId> &l ...
- 码海拾遗:strcpy()、strncpy()和strcpy_s()区别
1.strcpy() 原型:char *strcpy(char *dst,const char *src) 功能:将以src为首地址的字符串复制到以dst为首地址的字符串,包括'\0'结束符,返回ds ...
- 码海拾遗:Linux常用命令(一)
一.Linux系统安装 系统安装可以分两类:实体机安装Linux,虚拟机(常用虚拟机软件有两种:VMware和VirtualBox)安装Linux. 安装过程网上有很多教程,这里就不赘述了. 二.常用 ...
- 码海拾遗:简单Socket(TCP)类实现
最近刚开始啃Unix网络编程(卷1:套接字联网API),为加深TCP连接的建立和终止的理解与记忆,记下本文,方便以后翻看. 同时留下的还有简单的Socket(TCP)类: mySocket.h #pr ...
- 码海拾遗:Linux多线程mutex锁
多线程计数,每个线程累加10个数. 实现: #include <stdio.h> #include <stdlib.h> #include <string.h> # ...
- 码海拾遗:简述C++(一)
C++是Bjarne Stroustrup博士于1982年,在C语言的基础上引入并扩充了面向对象的概念后发明的一种新的程序语言.就与C语言的渊源而言,C++可以说是C语言的超集,它兼容C的一切(可能是 ...
- 码海拾遗:strstr()、strcmp()和strcpy()实现
1.strstr()实现 原型:char * strstr(const char * str1, const char * str2) 说明:判断str2是否为str1的子串,如果是则返回str2第一 ...
随机推荐
- swift------导入OC三方类找不到头文件的解决方法
1.首先新建个 swift工程 2.在swift 中新建 OC 类 比如新建 Request 类,会自动生成个.XXXX-Bridging-Header 类: 3.让后把 导入的第三方头文件导入进去. ...
- 常用STL的常见用法
//#pragma comment(linker, "/STACK:1024000000,1024000000") //#pragma GCC optimize(2) //#inc ...
- Docker添加root用户
0 环境 系统环境:centos7 服务器:阿里云 1 正文 1 进入rabbitmq容器中 docker exec -i -t 563 bin/bash 2 添加用户(用户名和密码) rabbitm ...
- hdu2222 (AC自动机模板)
题:http://acm.hdu.edu.cn/showproblem.php?pid=2222 学习出:https://bestsort.cn/2019/04/28/402/ 主要是fail的建立. ...
- Filter过滤器的应用
Filter过滤器作用:在每次请求服务资源时做过滤处理. 原理:Filter接口中有一个doFilter方法,当开发人员编写好Filter类实现doFilter方法,并配置对哪个web资源进行拦截后, ...
- 传统方式接口测试返回值json验证
1.返回值 2.验证方式: public void check200_N(Object obj, int ret_num) throws UnsupportedEncodingException, E ...
- fatal: remote origin already exists.
解决方法: 先删除, 再添加 1. git remote rm origin 2. git remote add origin https://github.com/zjulanjian/eshop. ...
- linux 上安装 tomcat
准备条件:安装java 一.tomcat 的安装 #新建文件夹 mkdir -p /data/tomcat #下载 tomcat8 服务器 wget http://mirrors.tuna.tsing ...
- vue 利用axios请求接口下载excel
一般有三种方法: 方法一: 通过a标签下载 // href为文件的存储路径或者地址,download为问文件名 <a href="/images/download.jpg" ...
- flash插件的安装——网页视频无法播放
1.从官网下载Adobe flash player 安装包.官方网址:https://get.adobe.com/cn/flashplayer/ 或者从我的网盘下载:链接:https://pan.ba ...