Swagger与OAuth 手动搭建WebApi 操作笔记
1、创建一个空的Web应用程序
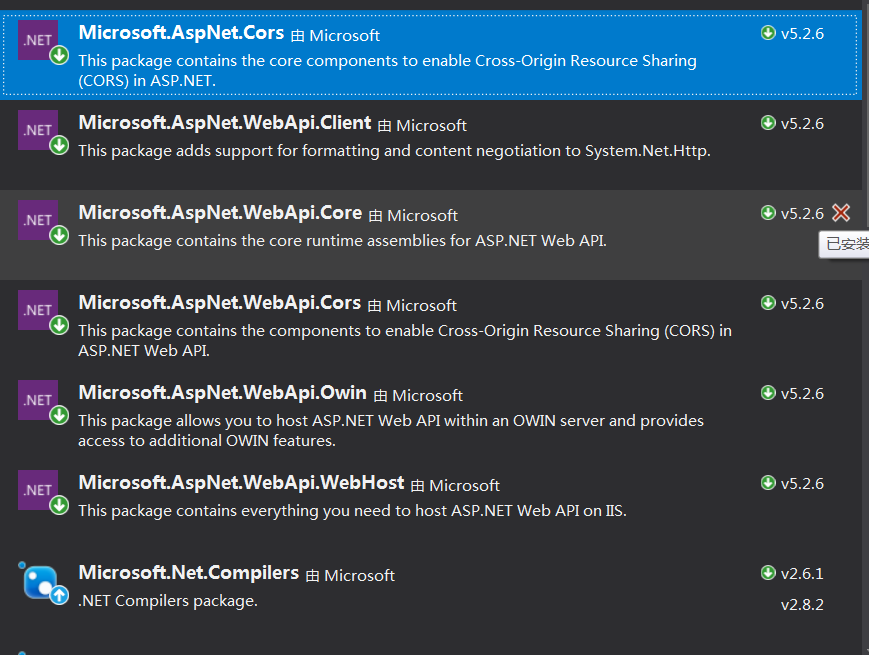
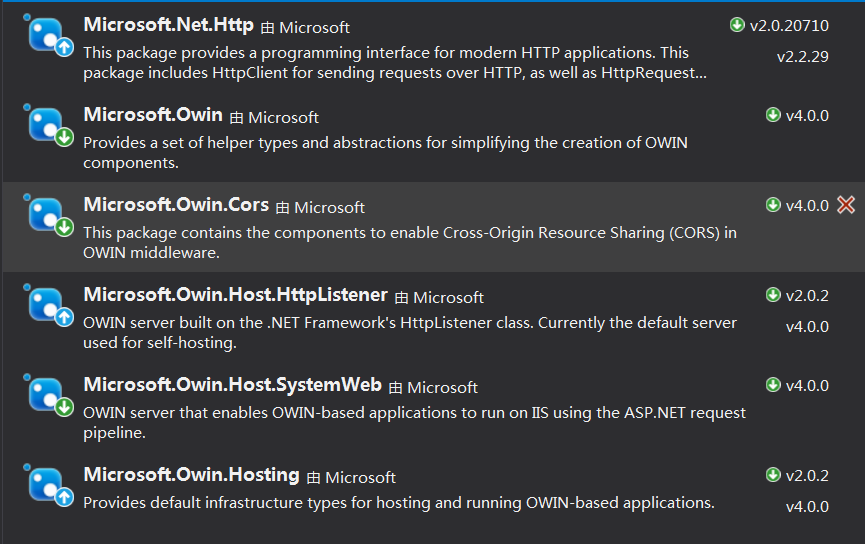
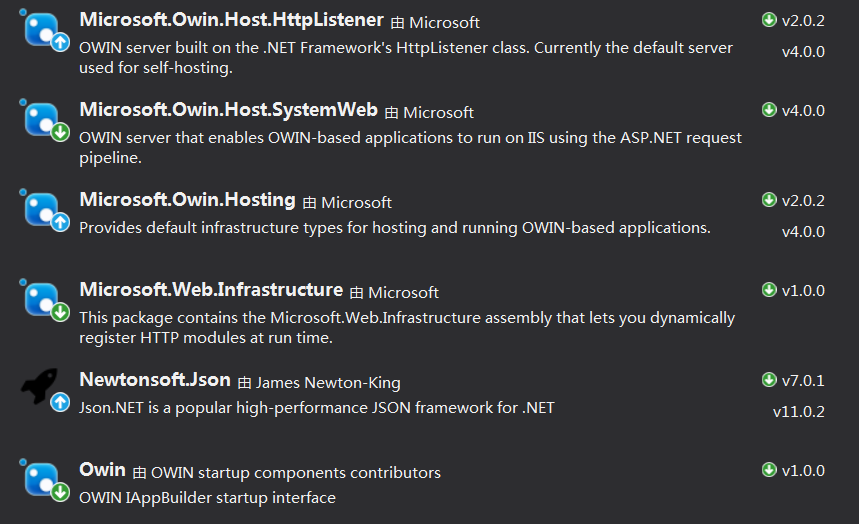
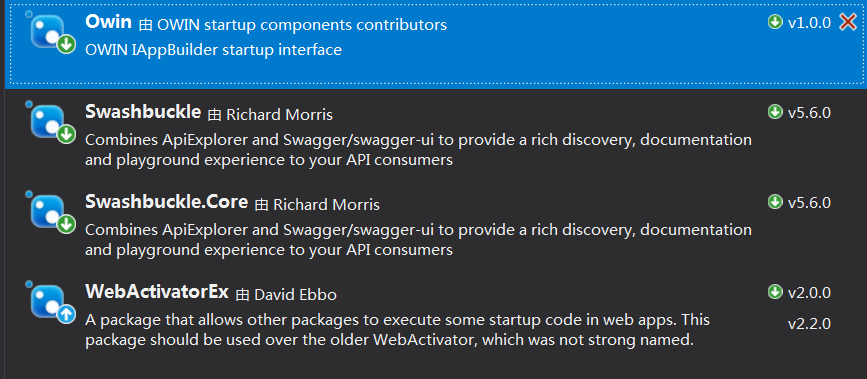
2、通过nuget 安装以下插件清单,有部分会在安装其他插件时候自动安装:
3、安装完Swagger 会生成一个目录App_Start,在这个目录中增加文件ApiConfig.cs 配置路由相关信息
  public static void Register(HttpConfiguration config)

        {

            var appsettings = ConfigurationManager.AppSettings;

            //跨域配置

            var corsAttr = new EnableCorsAttribute("*", "*", "*");

            config.EnableCors(corsAttr);

            config.MapHttpAttributeRoutes();

            config.Routes.MapHttpRoute(

               name: "Default",

               routeTemplate: "api/{controller}/{id}",

               defaults: new { id = RouteParameter.Optional }

           );

        }
添加文件 CustomApiExplorer.cs 重写ApiExplorer中的ShouldExploreController方法,对路由进行重定向
        /// <summary>

        /// 构造方法

        /// </summary>

        /// <param name="configuration"></param>

        public CustomApiExplorer(HttpConfiguration configuration) : base(configuration)

        {

        }

        //public override bool ShouldExploreAction(string actionVariableValue, HttpActionDescriptor actionDescriptor, IHttpRoute route)

        //{

        //    return base.ShouldExploreAction(actionVariableValue, actionDescriptor, route);

        //}

        public override bool ShouldExploreController(string controllerVariableValue, HttpControllerDescriptor controllerDescriptor, IHttpRoute route)

        {

            return base.ShouldExploreController(controllerVariableValue, controllerDescriptor, route);

        }
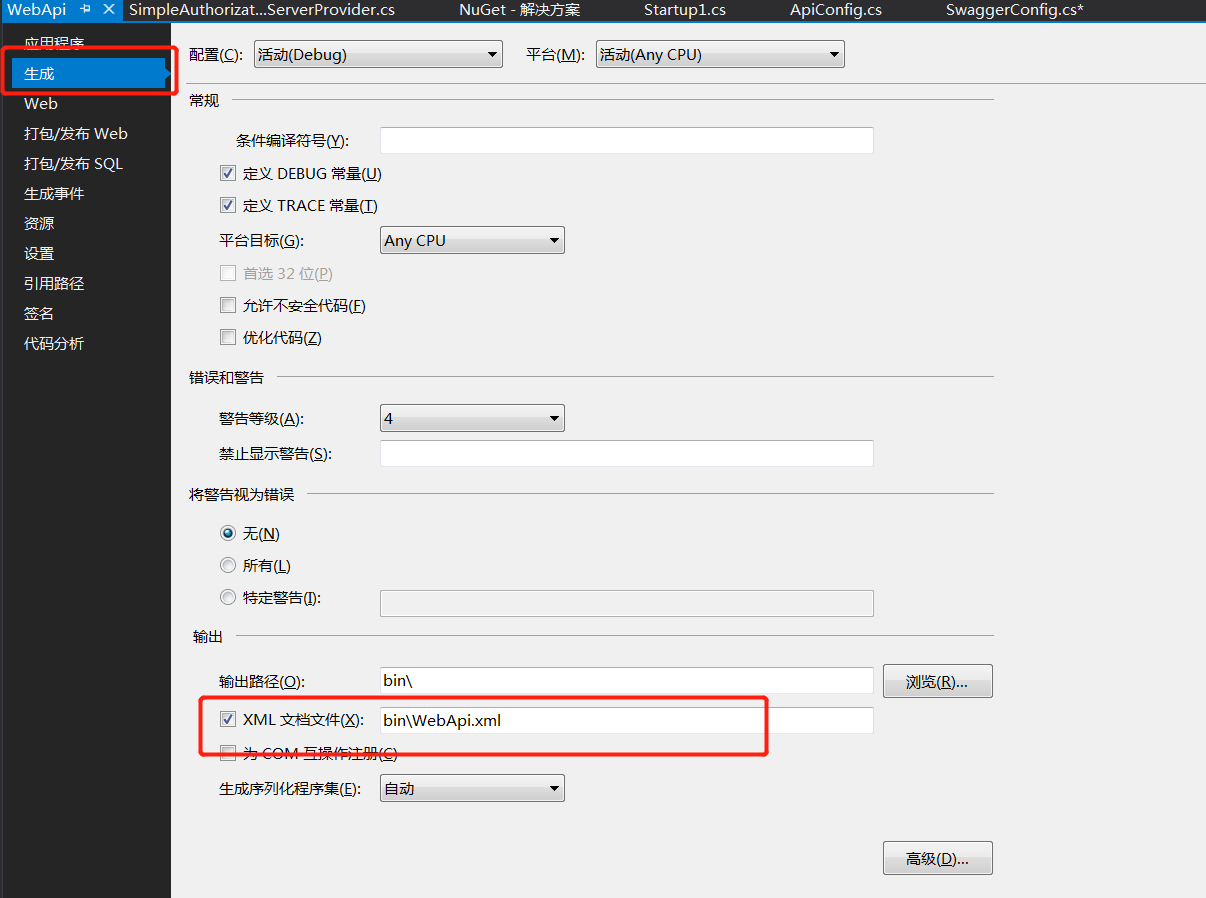
修改 SwaggerConfig中代码; WebApi.xml 中记录Swagger接口的描述信息
 public static void Register()

        {

            var thisAssembly = typeof(SwaggerConfig).Assembly;

            GlobalConfiguration.Configuration

                .EnableSwagger(c =>

                    {

                        c.SingleApiVersion("v1", "WebApi");

                        c.IncludeXmlComments(GetXmlCommentsPath());

                    })

                .EnableSwaggerUi(c =>

                    {

                    });

        }

        private static string GetXmlCommentsPath()

        {

            return System.String.Format(@"{0}\bin\WebApi.xml", System.AppDomain.CurrentDomain.BaseDirectory);

        }
修改工程配置信息
使用 OWIN 方式实现 创建 Startup 文件:
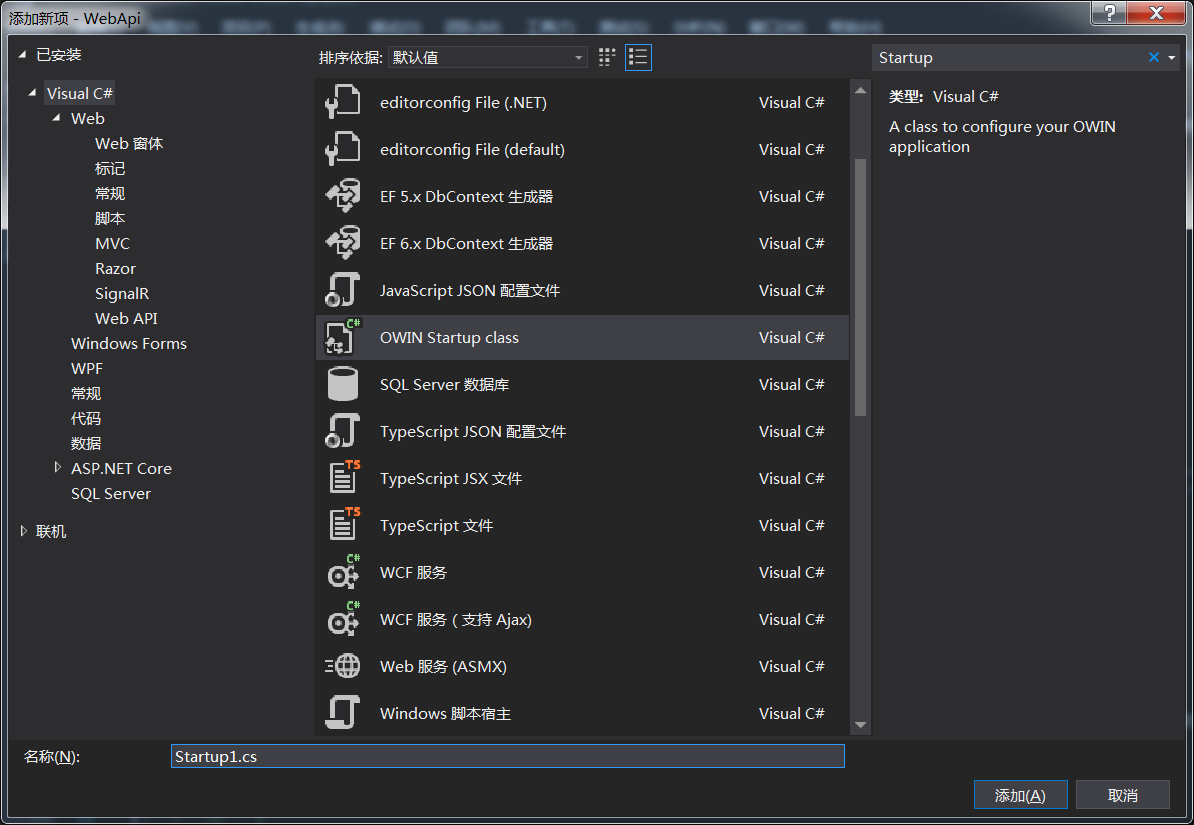
创建完成后修改代码:
 public void Configuration(IAppBuilder app)

        {

            HttpConfiguration config = new HttpConfiguration();

            ApiConfig.Register(config);

            app.UseCors(CorsOptions.AllowAll);

            app.UseWebApi(config);

            //初始化

            GlobalConfiguration.Configure(ApiConfig.Register);

            //重订路由

            GlobalConfiguration.Configuration.Services.Replace(typeof(IApiExplorer), new CustomApiExplorer(GlobalConfiguration.Configuration));

        }
使用Global.asax实现;添加全局文件Global.asax,在Application_Start方法中对路由进行重订
        protected void Application_Start(object sender, EventArgs e)

        {

            //初始化

            GlobalConfiguration.Configure(ApiConfig.Register);

            //重订路由

            GlobalConfiguration.Configuration.Services.Replace(typeof(IApiExplorer), new CustomApiExplorer(GlobalConfiguration.Configuration));

        }
到这里配置相关已经处理完成,创建Controller文件夹配置接口,在文件夹中创建文件DemoController.cs
 [RoutePrefix("api/DemoTest")]

    public class DemoController : ApiController

    {

        [HttpGet]

        [Route("Hello")]

        public string GetList()

        {

            return "Hello";

        }

    }
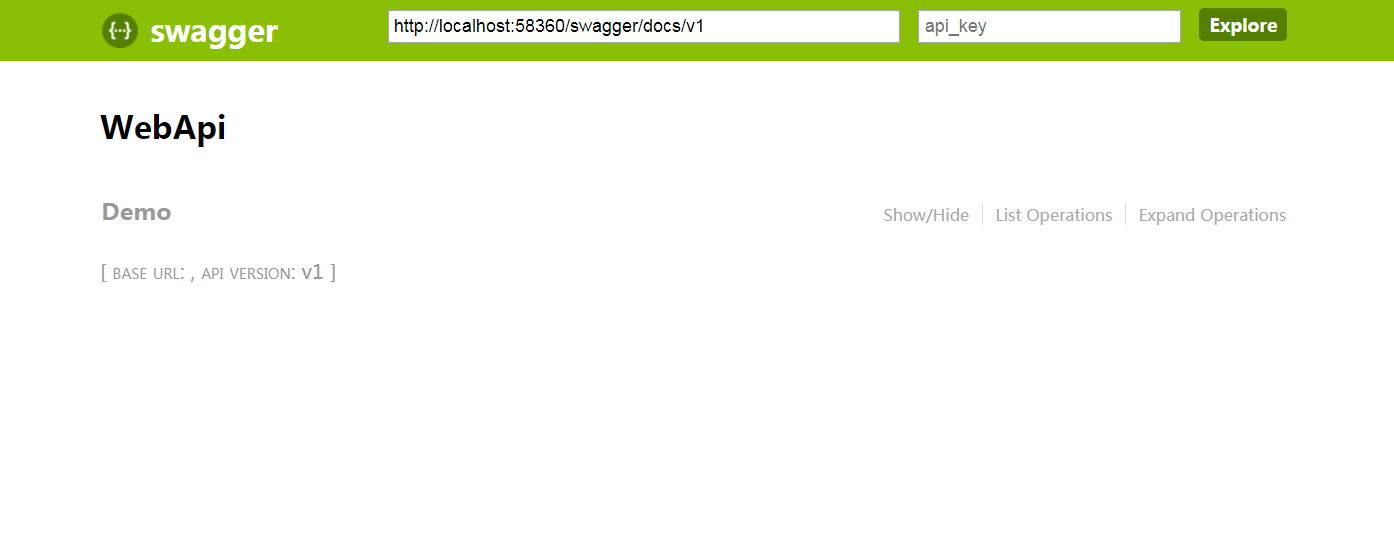
到这里Swagger配置以及全部完成,直接运行,在浏览器中输入http://localhost:58360/swagger 即可查看结果
开始配置验证功能,这里我使用的是OAuth ;
首先在Nuget中安装 Microsoft.Owin.Security.OAuth
安装完成后创建 SimpleAuthorizationServerProvider 文件,在这个文件中重写Oauth方法, 在此文件中做用户验证等操作
public class SimpleAuthorizationServerProvider : OAuthAuthorizationServerProvider
{ public override Task ValidateClientAuthentication(OAuthValidateClientAuthenticationContext context)
{
context.Validated();
return Task.FromResult<object>(null);
} public override async Task GrantResourceOwnerCredentials(OAuthGrantResourceOwnerCredentialsContext context)
{
context.OwinContext.Response.Headers.Add("Access-Control-Allow-Origin", new[] { "*" });
var isLogin = false;// UsersBase.Login(context.UserName, context.Password);
if (!isLogin)
{
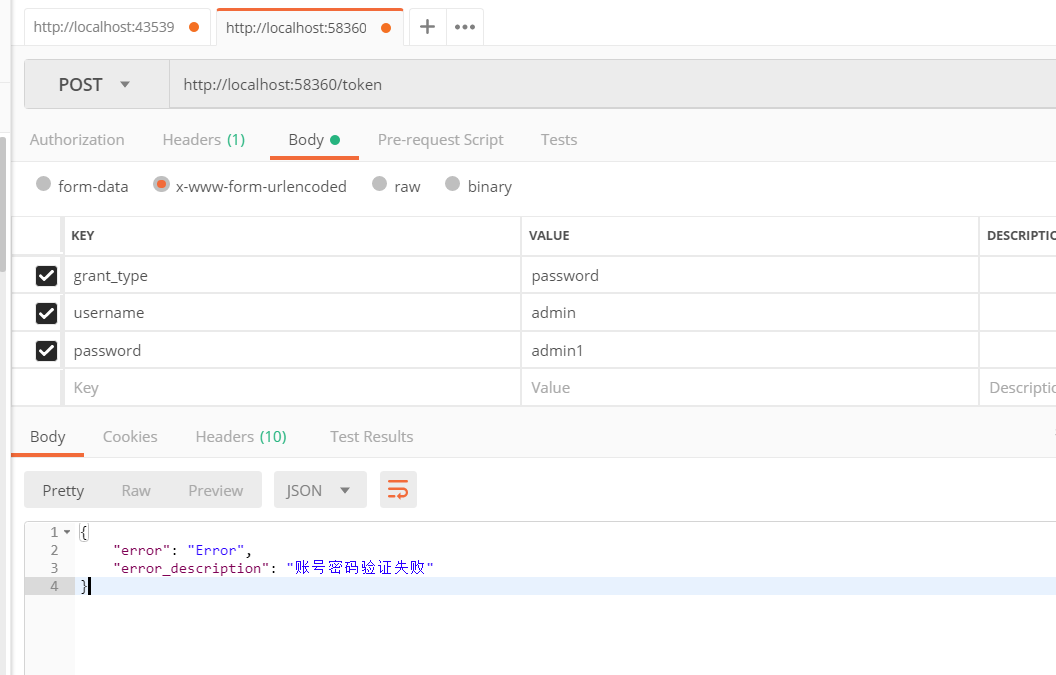
context.SetError("Error", "账号密码验证失败");
return;
}
var identity = new ClaimsIdentity(context.Options.AuthenticationType);
identity.AddClaim(new Claim("sub", context.UserName));
identity.AddClaim(new Claim("role", "user"));
context.Validated(identity); }
}
创建 SimpleRefreshTokenProvider 文件 重写OauthToken生成规则
    public class SimpleRefreshTokenProvider : AuthenticationTokenProvider

    {

        private static ConcurrentDictionary<string, string> _refreshTokens = new ConcurrentDictionary<string, string>();

        /// <summary>

        /// 生成 refresh_token

        /// </summary>

        public override void Create(AuthenticationTokenCreateContext context)

        {

            context.Ticket.Properties.IssuedUtc = DateTime.UtcNow;

            context.Ticket.Properties.ExpiresUtc = DateTime.UtcNow.AddDays();

            context.SetToken(Guid.NewGuid().ToString("n"));

            _refreshTokens[context.Token] = context.SerializeTicket();

        }

        /// <summary>

        /// 由 refresh_token 解析成 access_token

        /// </summary>

        public override void Receive(AuthenticationTokenReceiveContext context)

        {

            string value;

            if (_refreshTokens.TryRemove(context.Token, out value))

            {

                context.DeserializeTicket(value);

            }

        }

    }
修改 Startup1文件中代码
  public void Configuration(IAppBuilder app)

        {

            ConfigAuth(app);

            HttpConfiguration config = new HttpConfiguration();

            ApiConfig.Register(config);

            app.UseCors(CorsOptions.AllowAll);

            app.UseWebApi(config);

            //初始化

            GlobalConfiguration.Configure(ApiConfig.Register);

            //重订路由

            GlobalConfiguration.Configuration.Services.Replace(typeof(IApiExplorer), new CustomApiExplorer(GlobalConfiguration.Configuration));

        }

        public void ConfigAuth(IAppBuilder app)

        {

            OAuthAuthorizationServerOptions option = new OAuthAuthorizationServerOptions()

            {

                AllowInsecureHttp = true,

                TokenEndpointPath = new PathString("/token"), //获取 access_token 授权服务请求地址

                AccessTokenExpireTimeSpan = TimeSpan.FromDays(), //access_token 过期时间

                Provider = new SimpleAuthorizationServerProvider(), //access_token 相关授权服务

                RefreshTokenProvider = new SimpleRefreshTokenProvider() //refresh_token 授权服务

            };

            app.UseOAuthAuthorizationServer(option);

            app.UseOAuthBearerAuthentication(new OAuthBearerAuthenticationOptions());

        }
接口启用验证;[Authorize] 代表此模块需要身份验证, [AllowAnonymous] 代表此方法不需要验证
    [RoutePrefix("api/DemoTest")]

    [Authorize]

    public class DemoController : ApiController

    {

        [HttpGet]

        [Route("Hello")]

        [AllowAnonymous]

        public string GetList()

        {

            return "Hello";

        }

        [HttpPost]

        [Route("Hello2")]

        public string GetToken(string userName,string userPwd)

        {

            //new SimpleRefreshTokenProvider().Create(new AuthenticationTokenCreateContext(Owin.IAppBuilder) context);

            return "Hello";

        }

    }
Oauth已经配置完成,现在直接运行项目,由于是Post请求我这边使用Postman进行验证接口
Swagger与OAuth 手动搭建WebApi 操作笔记的更多相关文章
- WebAPI调用笔记 ASP.NET CORE 学习之自定义异常处理 MySQL数据库查询优化建议 .NET操作XML文件之泛型集合的序列化与反序列化 Asp.Net Core 轻松学-多线程之Task快速上手 Asp.Net Core 轻松学-多线程之Task(补充)
WebAPI调用笔记 前言 即时通信项目中初次调用OA接口遇到了一些问题,因为本人从业后几乎一直做CS端项目,一个简单的WebAPI调用居然浪费了不少时间,特此记录. 接口描述 首先说明一下,基于 ...
- ASP.NET WebAPI 集成 Swagger 启用 OAuth 2.0 配置问题
在 ASP.NET WebAPI 集成 Swagger 后,由于接口使用了 IdentityServer 做的认证,调试起来很不方便:看了下 Swashbuckle 的文档 ,是支持 OAuth2.0 ...
- 从零开始搭建WebAPI Core_SqlSugar管理系统 (持续更新中......)
从零开始搭建WebAPI Core_SqlSugar管理系统 前言 本系列皆在从零开始逐步搭建,后台管理系统服务端部分,后续还会推出前端部分. 这次的目的是搭出一个功能完善的 本次系列技术栈以下几个部 ...
- 手动从0搭建ABP框架-ABP官方完整解决方案和手动搭建简化解决方案实践
本文主要讲解了如何把ABP官方的在线生成解决方案运行起来,并说明了解决方案中项目间的依赖关系.然后手动实践了如何从0搭建了一个简化的解决方案.ABP官方的在线生成解决方案源码下载参考[3],手动搭 ...
- php 手动搭建环境
php手动搭建环境有好多种组合,版本号不一致,会导致搭建失败. 我搭建的组合是: php5.6+MySQL5.6+Apache2.4的组合. 一.PHP语言包下载 首先从官网上下载php5.6 htt ...
- 混合式app ionic2.x 手动搭建开发环境教程分享(nodejs,jdk,ant,androidsdk)
1.ionic简介 为什么选用ionic: 彻底开源且免费 性能优异 基于红的发紫的AngularJs 漂亮的UI 强大的命令行(基于更热门的nodejs) 开发团队非常活跃 ngCordova,将主 ...
- PHP手动搭建环境
php手动搭建环境有好多种组合,版本号不一致,会导致搭建失败. 我搭建的组合是: php5.6+MySQL5.6+Apache2.4的组合. 一.PHP语言包下载 首先从官网上下载php5.6 htt ...
- Centos7系统下修改主机名操作笔记
习惯了在Centos6系统下修改主机名的操作,但是Centos7下修改主机名的操作却大不相同!操作笔记如下: 在CentOS中,有三种定义的主机名:静态的(static),瞬态的(transient) ...
- SSM框架手动搭建
SSM框架手动搭建 创建web项目 IDEA创建Maven项目 [File]-->[new]-->[project..] 将项目变为web项目 [File]-->[Project S ...
随机推荐
- Common Subsequence POJ - 1458 最长公共子序列 线性DP
#include <iostream> #include <algorithm> #include <string> #include <cstring> ...
- 简单的登录验证小程序_python
一.要求 输入用户名密码,验证成功之后显示欢迎信息,输错三次后锁定. 程序: #!/usr/bin/env python# _*_ coding:utf-8 _*_#Author:chenxz #将黑 ...
- [HNOI2004] 树的计数 - prufer序列
给定树每个节点的 degree,问满足条件的树的数目. \(n\leq 150, ans \leq 10^{17}\) Solution 注意特判各种坑点 \(\sum d_i - 1 = n-2\) ...
- PP: GRU-ODE-Bayes: Continuous modeling of sporadically-observed time series
From: KU Leuven; ESAT-STADIUS比利时鲁汶大学 ?? How to model real-world multidimensional time series? especi ...
- Vue之生命周期activated与created使用
created activated 触发顺序 组件创建最初始 created => mounted =>activated 触发次数 只在组件刚创建时创建 在使用keep-alive标 ...
- ArcMap空间参考警告窗口关了怎么重新打开
有时候加载的数据没有空间参考或者空间参考和数据框的空间参考不一致,都会弹出警告的对话框 如果选中不再向我发出警告复选框,之后又想显示它,可启动 AdvancedArcMapSettings.exe 工 ...
- Deepin安装常用软件
Deepin安装常用软件 安装git sudo apt-get install git sudo是Debian系列以管理员运行的前缀 卸载软件 sudo apt-get remove package_ ...
- 删除表 (truncate 、delete 、drop)
来源:http://www.cnblogs.com/dieyaxianju/p/7238936.html 删除表中内容分为三种情况. 1.删除表中所有数据,但保留表结构(可用以下两个语句): trun ...
- c# 嵌入资源并读取
原文:c# 嵌入资源并读取 1. 右键点击项目,选择资源,然后选择资源的类型,插入资源. 2. 这时候在项目的目录树上会出现一个Resource的文件夹,找到嵌入的资源文件,右击属性,在 Build ...
- 获取 Android APP 版本信息工具类(转载)
获取 Android APP 版本信息工具类 获取手机APP版本信息工具类 1.获取版本名称 2.获取版本号 3.获取App的名称 package com.mingyue.nanshuibeidiao ...