springboot第一个项目【创建】
1.new project,不勾选create from archetype,直接选择
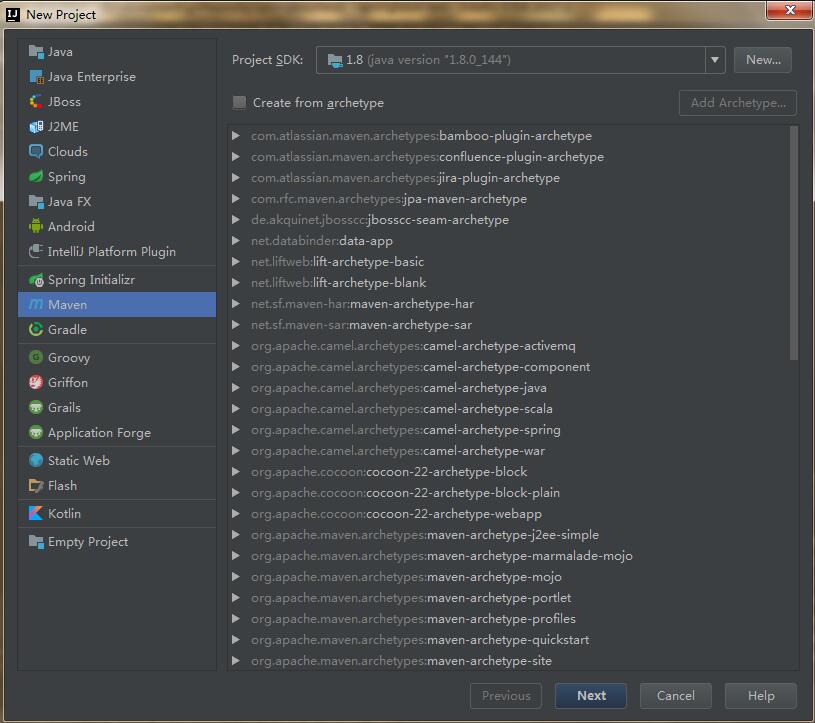
2.next下一步
在Maven依赖管理中,唯一标识一个依赖项是由该依赖项的三个属性构成的,分别是groupId、artifactId以及version。这三个属性可以唯一确定一个组件(Jar包或者War包)。groupId和artifactId是为了保证项目唯一性提出的。
参照maven中的groupId和artifactId到底指的是什么?
groupId:一般分为多段,第一段为域(org: 非营利组织,com:商业组织,cn:中国)。第二段为公司名称,第三段为公司内部的部门,如qa等。
artifactId:项目名称
version: snapshot和正式版本。快照版本和正式版本的主要区别在于:本地获取这些依赖的机制不同。
- 正式版本:如果依赖一个库的正式版本,那构建时会先在仓库中查找是否已经有,如果没有才会去远程拉
- snapshot:依赖snapshot库,每次构建项目时就会去远程拉它所依赖的版本。在配置Maven的Repository的时候中有个配置项,可以配置对于SNAPSHOT版本向远程仓库中查找的频率。频率共有四种,分别是always、daily、interval、never。 
3.pom.xml配置
- 在properties中配置版本信息,接下来可以用${java-version}来使用该版本号
 <properties>

       <java.version>1.8</java.version>

</properties> - 配置依赖的jar包,以<dependency></dependency>放在<dependencies></dependencies>中
 <dependencies>

         <dependency>

             <groupId>org.springframework.boot</groupId>

             <artifactId>spring-boot-starter-web</artifactId>

         </dependency>

</dependencies> - 在distributionManagement段中配置的是snapshot快照库和release发布库的地址,主要是id和url的配置,配置后就可以通过mvn deploy进行发布了
 <distributionManagement>

    <repository>

        <id>deployment</id>

        <name>internal repository for releases</name>

        <url>http://repo.caimi-inc.com/nexus/content/repositories/releases/</url>

     </repository>

</distributionManagement> - parent:配置被继承的父项目的具体信息,可以继承父项目的配置信息,如dependencies等
 <parent>

        <groupId>org.springframework.boot</groupId>

        <artifactId>spring-boot-starter-parent</artifactId>

        <version>1.1.0</version>

</parent> - 构建中依赖的插件
 <build>

        <plugins>

            <plugin>

                <groupId>org.springframework.boot</groupId>

                <artifactId>spring-boot-maven-plugin</artifactId>

            </plugin>

        </plugins>

</build> - 资源配置:也是在build中配置的。无需编译,是一些properties或XML配置文件,构建过程中会往往会将资源文件从源路径复制到指定的目标路径
 <build>

    <resources>

      <resource>

        <targetPath>META-INF/plexus</targetPath>

        <filtering>false</filtering>

        <directory>${basedir}/src/main/plexus</directory>

        <includes>

          <include>configuration.xml</include>

        </includes>

        <excludes>

          <exclude>**/*.properties</exclude>

        </excludes>

      </resource>

    </resources>

 </build>

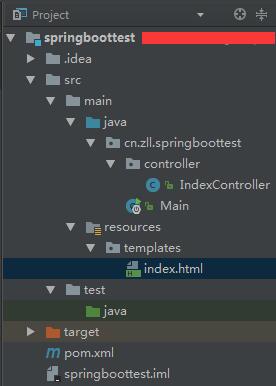
4.项目结构
- src—main下创建java目录,且右键选择mark directory as sources root
- 在java目录下创建包,包名应该全为小写,包名前缀为groupId.artifactId.XXX
- 在包下创建类 Main,作为程序入口
- target是存放编译后的文件
5.添加代码
- 在Main类中添加一个main函数
 package cn.zll.testproject.controller; //这个要改成自己的包名

 import org.springframework.boot.SpringApplication;

 import org.springframework.boot.autoconfigure.SpringBootApplication;

 //添加注解SpringBootApplication,是一个复合注解,包含下面三个:

 //@Configuration:表示将该类作用springboot配置文件类。

 //@EnableAutoConfiguration:表示程序启动时,自动加载springboot默认的配置

 //@ComponentScan:表示程序启动是,自动扫描当前包及子包下所有类

 @SpringBootApplication public class Main {

     public static void main(String[] args){

         //创建一个SpringApplication

         SpringApplication app = new SpringApplication(Main.class);

         app.run(args);

     }

 }
- 在包名下创建一个controller包,并添加一个类IndexController
 package cn.zll.springboottest.controller;

 import org.springframework.stereotype.Controller;

 import org.springframework.web.bind.annotation.RequestMapping;

 import org.springframework.web.bind.annotation.RequestMethod;

 //用Controller注解为控制器

 @Controller

 public class IndexController {

     //拦截/路径的get请求,返回index.html中的内容

     @RequestMapping(value = "/", method = RequestMethod.GET)

     public String index(){

         return "index";

     }

 }
- 在resources下添加templates,并添加index.html文档
注:需要在pom.xml中添加依赖
 <dependency>

         <groupId>org.springframework.boot</groupId>

         <artifactId>spring-boot-starter-thymeleaf</artifactId>

 </dependency>
6.执行
右键Main类,直接Run —> 打开浏览器,输入localhost:8080,就可以访问
springboot第一个项目【创建】的更多相关文章
- springboot 多模块项目创建
1.File>new>project 直接点击next 2.输入groupId .artifactId 3.选择项目保存路劲 finish 4.成功创建多模块项目的根模块 5.创建子 ...
- springboot第一个项目【mybatis】
1.resources下添加spring 添加spring-context.xml,设置controller的路径,以及引入数据库配置 <beans xmlns="http://www ...
- SpringBoot项目创建与第一个SSM项目示例
本节介绍SpringBoot创建第一个示例SSM项目的完整过程,使用工具STS,与IDEA操作基本类似. 示例代码在:https://github.com/laolunsi/spring-boot-e ...
- springboot web项目创建及自动配置分析(thymeleaf+flyway)
@ 目录 源码分析 webjars thymeleaf thymeleaf语法 springmvc 启动配置原理 集成flyway插件 springboot 创建web项目只需要引入对应的web-st ...
- Django 创建第一个项目(转)
转自(http://www.runoob.com/django/django-first-app.html) 前面写了不少python程序,由于之前都是作为工具用,所以命令行就足够了,最近写的测试用例 ...
- Angular安装及创建第一个项目
Angular简介 AngularJS 诞生于2009年,由Misko Hevery 等人创建,后为Google所收购.是一款优秀的前端JS框架,已经被用于Google的多款产品当中.AngularJ ...
- 利用IntelliJ IDEA 创建第一个项目
1.创建项目 打开后点击第一个按钮
- django创建第一个项目helloworld
环境:centos 7,已安装python 3.6环境 1.安装django并创建django第一个项目 1.1.使用pip安装django# pip install Django或指定安装版本# p ...
- python+Django创建第一个项目
1.首先搭建好环境 1.1 安装pyhton,Linux系统中,python是系统自带的所以就不用安装 1.2 安装Django框架 使用pip安装: pip install django 1.3 检 ...
随机推荐
- NSScanner类的基本用法
NSScanner是一个类,用于在字符串中扫描指定的字符,尤其是把它们翻译/转换为数字和别的字符串.可以在创建NSScaner时指定它的string属性,然后scanner会按照你的要求从头到尾地扫描 ...
- 三十五、minishell(3)
35.1 内容 在当前的 minishell 中,如果执行 date clear 命令等,minishell 会停止: 这是因为引入进程组的时候,mshell 放置在前台进程组,同时之后在子进程中又创 ...
- php serialize(),unserialize()
序列化serialize()与反序列化unserialize(): 序列化serialize():就是将一个变量所代表的 “内存数据”转换为“字符串”的形式,并持久保存在硬盘(写入文件中保存)上的一种 ...
- git 配置ssh key
第一次生成 ssh key 进入ssh目录 cd ~/.ssh,再输入:ls ,查看文件,如果有.pub的文件,说明已有ssh key 如果没有, 则生成秘钥:ssh-keygen -t rsa - ...
- Tomcat多应用启动报错:org.apache.catalina.loader.WebappClassLoaderBase.checkStateForResourceLoading Illegal access: this web application instance has been stopped already. Could not load [].
Loaded org.apache.tomcat.util.net.NioBlockingSelector$BlockPoller$RunnableRemove from .M22/lib/tomca ...
- 让table中td的内容靠上对齐
valign=“top”; <td valign="top"></td> 点此查看详细table的td的valign属性
- redis架构~哨兵模式
一 哨兵模式稳定版本 redis哨兵模式是redis自带的高可用框架,稳定版本为redis2.8以上二 哨兵模式建立 1 避免单点故障,建立启动多个哨兵进程 2 哨兵模式启动命令 redis-s ...
- 什么是openstack
什么是openstack OpenStack是一个云平台管理的项目,它不是一个软件. 这个项目由几个主要的组件组合起来完成一些具体的工作. 想要了解openstack,第一步我们可以观察他的概念图: ...
- Oracle Audit 审计功能的认识与使用
1.Audit的概念 Audit是监视和记录用户对数据库进行的操作,以供DBA进行问题分析.利用Audit功能,可以完成以下任务: 监视和收集特定数据库活动的数据.例如管理员能够审计哪些表被更新,在某 ...
- mysql定时任务用到存储过程和定时任务
需求: 需要将t_app_message中的消息(将要被发送的消息)给每一个学生发送一遍,并且在发送完成后,将消息置为已发送状态已发送状态. 一言不合上代码 /*删除存储过程*/ drop proce ...