10 SpringBoot全面接管SpringMVC
Spring Boot官方文档描述
If you want to keep Spring Boot MVC features and you want to add additional MVC configuration (interceptors, formatters, view controllers, and other features), you can add your own @Configuration class of type WebMvcConfigurer but without @EnableWebMvc. If you wish to provide custom instances of RequestMappingHandlerMapping, RequestMappingHandlerAdapter, or ExceptionHandlerExceptionResolver, you can declare a WebMvcRegistrationsAdapter instance to provide such components.
If you want to take complete control of Spring MVC, you can add your own @Configuration annotated with @EnableWebMvc.
在实际开发中,仅靠SpringBoot的这点自动配置是不够用的。比如,以前有SpringMVC配置文件的时候:
1. 原来的SpringMVC配置方式:
<mvc:view-controller path="/hello" view-name="success"/><!-- 配置文件设置页面跳转,发一个请求到页面,就没必要写空方法了,配一下即可 -->

<mvc:interceptors>

    <mvc:interceptor><!-- SpringMvc 拦截器 -->

        <mvc:mapping path="/hello"/>

        <bean class=""></bean>

    </mvc:interceptor>

</mvc:interceptors>
2. 现在的SpringBoot方式实现:
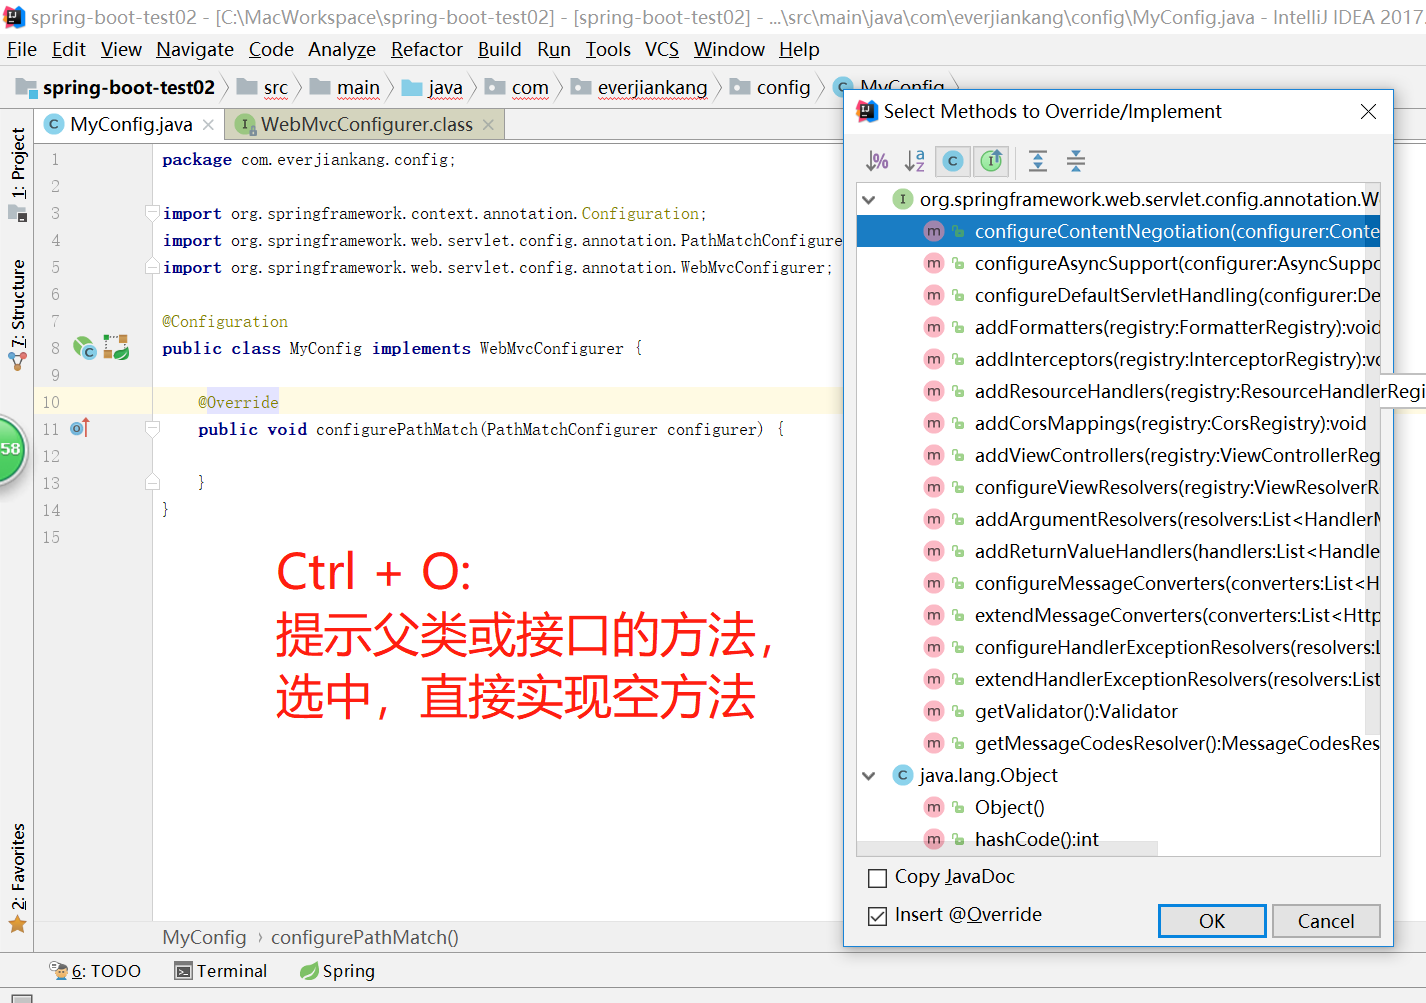
add your own @Configuration class of type WebMvcConfigurer but without @EnableWebMvc
编写一个配置类(@Configuration),是WebMvcConfigurer(SpringBoot2.1.0))【WebMvcConfigurerAdapter(SpringBoot1.5.10)】类型;不能标注@EnableWebMvc
既保留了所有的自动配置,也能用我们扩展的配置;
@Configuration
public class MyConfig implements WebMvcConfigurer {
/**
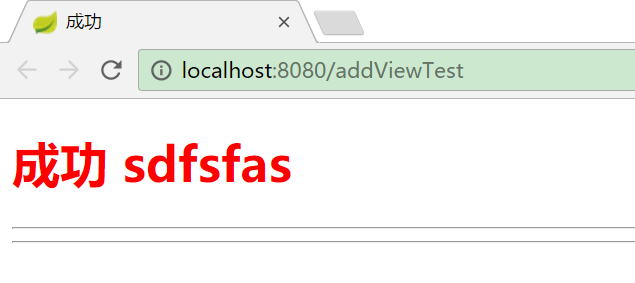
* 浏览器发送addViewTest请求,来到success页面
* 发请求到页面,就没有必要在Controller里写空方法了,直接来做视图映射
*/
@Override
public void addViewControllers(ViewControllerRegistry registry) {
registry.addViewController("/addViewTest").setViewName("success");
} }
原理
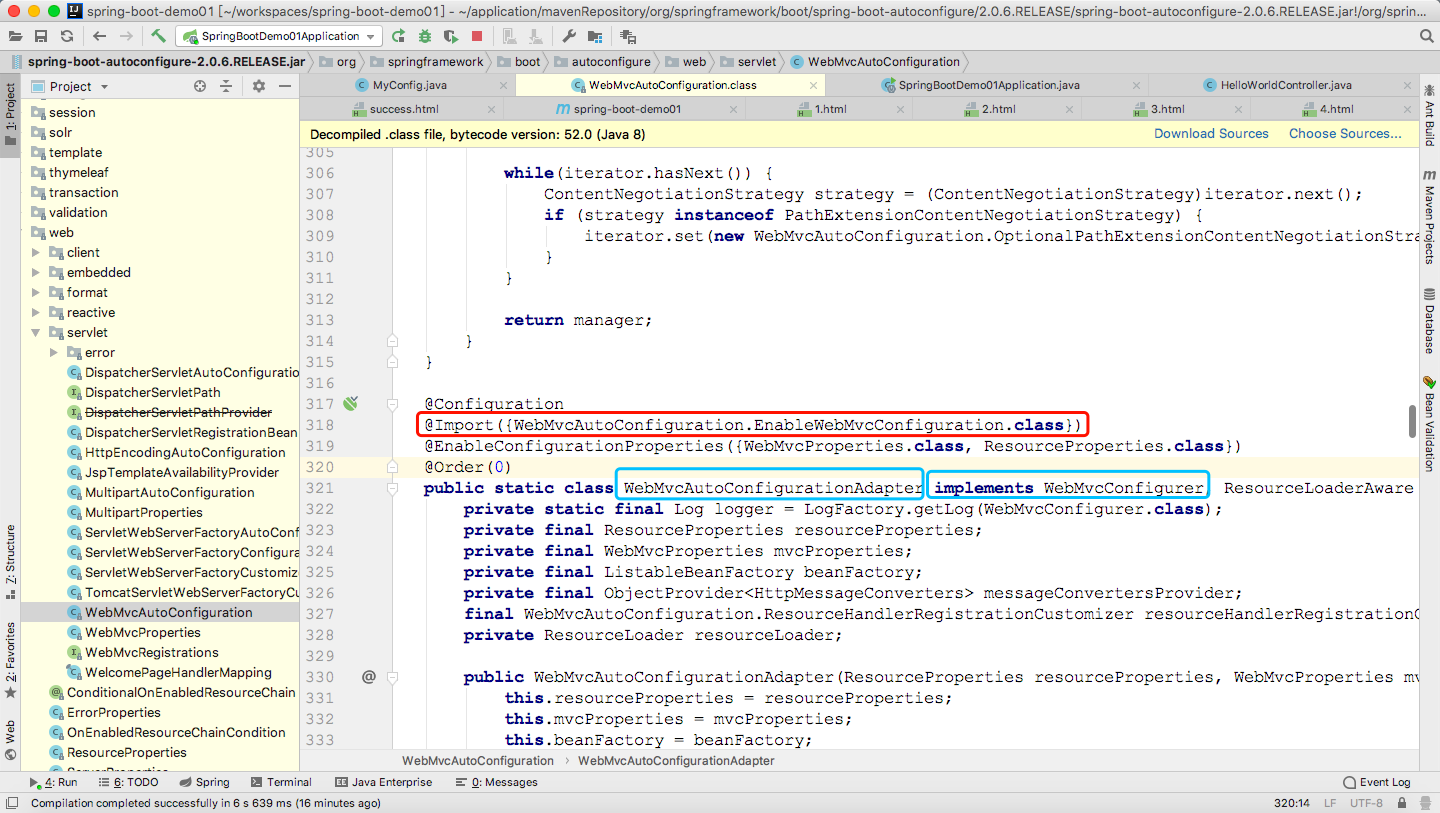
public class WebMvcAutoConfiguration {

    @Configuration

    @Import({WebMvcAutoConfiguration.EnableWebMvcConfiguration.class})

    @EnableConfigurationProperties({WebMvcProperties.class, ResourceProperties.class})

    @Order(0)

    public static class WebMvcAutoConfigurationAdapter implements WebMvcConfigurer, ResourceLoaderAware {

    }

    @Configuration

    public static class EnableWebMvcConfiguration extends DelegatingWebMvcConfiguration {

    }

}
@Configuration
public class DelegatingWebMvcConfiguration extends WebMvcConfigurationSupport {
private final WebMvcConfigurerComposite configurers = new WebMvcConfigurerComposite(); public DelegatingWebMvcConfiguration() {
} /*从容器中注入所有的WebMvcConfigurer*/
@Autowired(
required = false
)
public void setConfigurers(List<WebMvcConfigurer> configurers) {
if (!CollectionUtils.isEmpty(configurers)) {
this.configurers.addWebMvcConfigurers(configurers);
} }
/*格式化*/
protected void addFormatters(FormatterRegistry registry) {
this.configurers.addFormatters(registry);
}
/*拦截器*/
protected void addInterceptors(InterceptorRegistry registry) {
this.configurers.addInterceptors(registry);
}
/*资源文件*/
protected void addResourceHandlers(ResourceHandlerRegistry registry) {
this.configurers.addResourceHandlers(registry);
}
/*视图映射*/
protected void addViewControllers(ViewControllerRegistry registry) {
this.configurers.addViewControllers(registry);
}
protected void configureViewResolvers(ViewResolverRegistry registry) {
this.configurers.configureViewResolvers(registry);
}
/*参数解析*/
protected void addArgumentResolvers(List<HandlerMethodArgumentResolver> argumentResolvers) {
this.configurers.addArgumentResolvers(argumentResolvers);
} ......
}真正调用的实现类
class WebMvcConfigurerComposite implements WebMvcConfigurer {

    private final List<WebMvcConfigurer> delegates = new ArrayList();

  //在上一个类中的依赖注入方法中调用的正是此方法,将所有的容器中的配资类加载到本地成员变量中

    public void addWebMvcConfigurers(List<WebMvcConfigurer> configurers) {

        if (!CollectionUtils.isEmpty(configurers)) {

            this.delegates.addAll(configurers);

        }

    }
  /**
   * 以下的每一个方法都是循环遍历容器中实现了WebMvcConfigurer接口的所有的bean,并调用相应的处理方法
*/
public void configurePathMatch(PathMatchConfigurer configurer) {
Iterator var2 = this.delegates.iterator(); while(var2.hasNext()) {
WebMvcConfigurer delegate = (WebMvcConfigurer)var2.next();
delegate.configurePathMatch(configurer);
} }
//遍历所有的WebConfiguration类 并调用视图解析方法
public void addViewControllers(ViewControllerRegistry registry) {
Iterator var2 = this.delegates.iterator(); while(var2.hasNext()) {
WebMvcConfigurer delegate = (WebMvcConfigurer)var2.next();
delegate.addViewControllers(registry);
} }public void addFormatters(FormatterRegistry registry) {...} ..........}
3)、容器中所有的WebMvcConfigurer都会一起起作用;
4)、所以我们的配置类MyConfig也会被调用()
效果:SpringMVC的自动配置 和 我们的扩展配置 都会起作用;
3、全面接管SpringMVC
SpringBoot对SpringMVC的自动配置不需要了,所有都是我们自己配置;所有的SpringMVC的自动配置都失效了
If you want to take complete control of Spring MVC, you can add your own @Configuration annotated with @EnableWebMvc.
我们需要在配置类中添加@EnableWebMvc即可,(除非功能简单,你想节省内存空间,要不然不建议全面接管)
-
//使用WebMvcConfigurerAdapter可以来扩展SpringMVC的功能

@EnableWebMvc

@Configuration

public class MyMvcConfig extends WebMvcConfigurerAdapter {

    @Override

    public void addViewControllers(ViewControllerRegistry registry) {

       // super.addViewControllers(registry);

        //浏览器发送 /atguigu 请求来到 success

        registry.addViewController("/atguigu").setViewName("success");

    }

}
原理:
为什么@EnableWebMvc自动配置就失效了;
1)@EnableWebMvc的核心
@Import(DelegatingWebMvcConfiguration.class)

public @interface EnableWebMvc {
2)、
@Configuration

public class DelegatingWebMvcConfiguration extends WebMvcConfigurationSupport {
3)、
@Configuration

@ConditionalOnWebApplication

@ConditionalOnClass({ Servlet.class, DispatcherServlet.class,

        WebMvcConfigurerAdapter.class })

//容器中没有这个组件的时候,这个自动配置类才生效

@ConditionalOnMissingBean(WebMvcConfigurationSupport.class)

@AutoConfigureOrder(Ordered.HIGHEST_PRECEDENCE + 10)

@AutoConfigureAfter({ DispatcherServletAutoConfiguration.class,

        ValidationAutoConfiguration.class })

public class WebMvcAutoConfiguration {
4)、@EnableWebMvc将WebMvcConfigurationSupport组件导入进来;
5)、导入的WebMvcConfigurationSupport只是SpringMVC最基本的功能;
5、如何修改SpringBoot的默认配置模式:
1)、SpringBoot在自动配置很多组件的时候,先看容器中有没有用户自己配置的(@Bean、@Component)如果有就用用户配置的,如果没有,才自动配置;
如果有些组件可以有多个(ViewResolver)将用户配置的和自己默认的组合起来;
2)、在SpringBoot中会有非常多的xxxConfigurer帮助我们进行扩展配置
3)、在SpringBoot中会有很多的xxxCustomizer帮助我们进行定制配置
10 SpringBoot全面接管SpringMVC的更多相关文章
- SpringBoot接管SpringMvc
SpringBoot接管SpringMvc Spring Web MVC framework(通常简称为“Spring MVC”)是一个丰富的“model 视图控制器”web framework. S ...
- 【串线篇】spring boot全面接管springMvc
一.Spring MVC auto-configuration Spring Boot 自动配置好了SpringMVC 以下是SpringBoot对SpringMVC的默认配置:(WebMvcAutoC ...
- SpringBoot中对SpringMVC的自动配置
https://docs.spring.io/spring-boot/docs/1.5.10.RELEASE/reference/htmlsingle/#boot-features-developin ...
- Springboot学习:SpringMVC自动配置
Spring MVC auto-configuration Spring Boot 自动配置好了SpringMVC 以下是SpringBoot对SpringMVC的默认配置:==(WebMvcAuto ...
- SpringBoot:扩展SpringMVC、定制首页、国际化
目录 扩展使用SpringMVC 如何扩展SpringMVC 为何这么做会生效(原理) 全面接管SpringMVC 首页实现 页面国际化 SpringBoot扩展使用SpringMVC.使用模板引擎定 ...
- SpringBoot | 4.1 SpringMVC的自动配置
目录 前言 1. SpringMVC框架的设计与流程 1.1 SpringMVC框架的示意图 1.2 SpringMVC的组件流程 2. *自动配置的源码分析 2.1 导入Web场景启动器 2.2 找 ...
- 10.spring-boot基于角色的权限管理页面实现
10.spring-boot基于角色的权限管理页面实现
- 58、springmvc-定制与接管SpringMVC
58.springmvc-定制与接管SpringMVC 定制SpringMVC: 1).@EnableWebMvc:开启SpringMVC定制配置功能: <mvc:annotation-driv ...
- 0011SpringBoot的@EnableWebMvc全面接管SpringMVC的自动配置(源码)
所谓的@EnableWebMvc全面接管SpringMVC的自动配置,是指@EnableWebMvc注解会使SpringMVC的自动配置失效,原理如下: 1.查看@EnableWebMvc的源码,如下 ...
随机推荐
- TCPDF打印从入门到精通
1. TCPDF的模块导入 TCPDF的官网为https://tcpdf.org 官方文档有几十个例子:详情参看官方文档! 2. 使用 TCPDF打印 例如:横版表格打印并自动分页 /** * 打印 ...
- Delphi中的Sender:TObject对象解析
Delphi中的Sender:TObject对象解析 procedure TForm1.Button1Click(Sender: TObject); begin end; 解析:Procedure是过 ...
- Bootstrap排版——HTML元素的样式重定义
前面的话 Bootstrap对默认的HTML元素进行了CSS样式定义,使得各种基本结构套用出来的HTML页面更加美观.本文将详细介绍Bootstrap中排版相关的内容 标题 [h] HTML 中的所有 ...
- 深度学习中 Batch Normalization
深度学习中 Batch Normalization为什么效果好?(知乎) https://www.zhihu.com/question/38102762
- Python连接字符串用join还是+
我们先来看一下用join和+连接字符串的例子 str1 = " ".join(["hello", "world"]) str2 = &quo ...
- Codeforces Round #381 (Div. 2)C Alyona and mex
Alyona's mother wants to present an array of n non-negative integers to Alyona. The array should be ...
- git上传到码云
touch README.md git init git add README.md git add "你的文件" git commit -m "first commit ...
- bzoj2142: 礼物
2142: 礼物 Description 一年一度的圣诞节快要来到了.每年的圣诞节小E都会收到许多礼物,当然他也会送出许多礼物.不同的人物在小E心目中的重要性不同,在小E心中分量越重的人,收到的礼物会 ...
- SharePoint “File not found” 错误
Troubleshooting the SharePoint "File not found" Error Have you ever come across a "Fi ...
- xrandr: 命令行修改分辨率工具
常用功能举例 查看支持的分辨率 xrandr -q 将分辨率设为1024×768 xrandr -s 1024×768 恢复到默认分辨率 xrandr -s 0