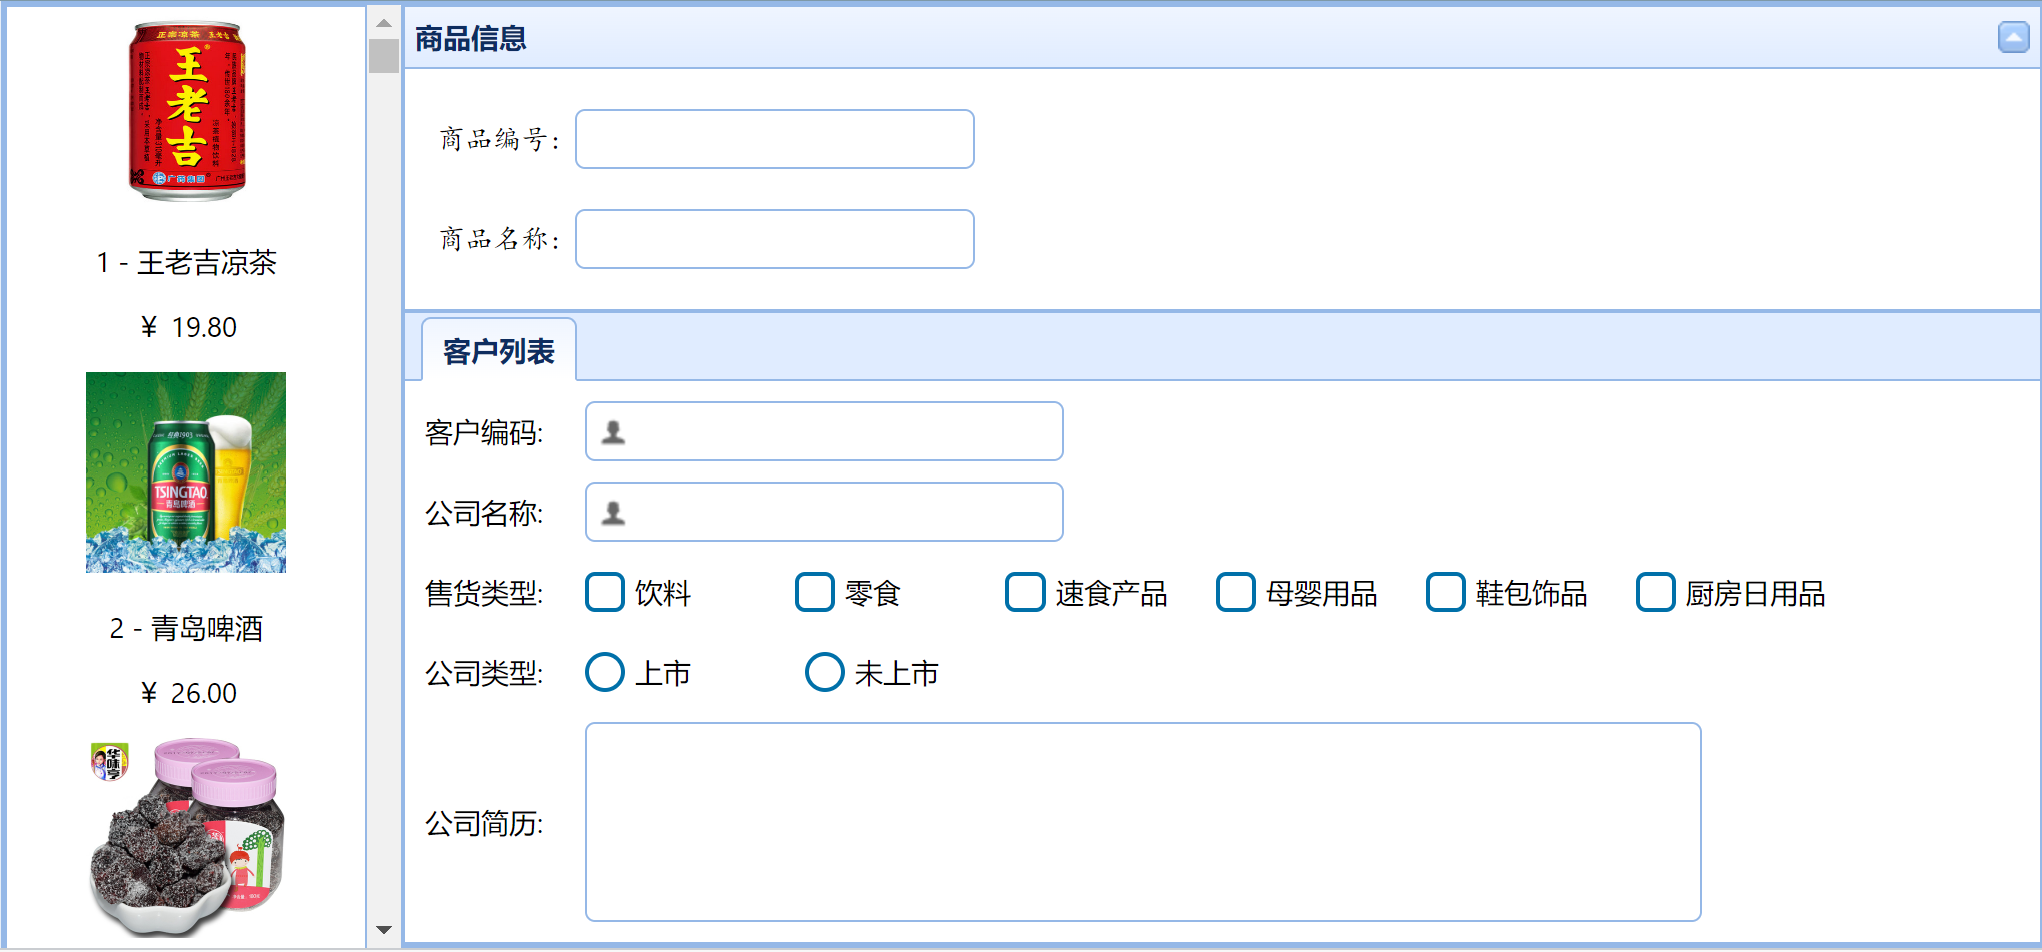
效果图:


import React from 'react';
import { Form, FormField, Layout,DataList,LayoutPanel,Panel, Label, CheckBox, TextBox,Tabs,TabPanel, DateBox, NumberBox, RadioButton, ComboBox, LinkButton } from 'rc-easyui';
import '../css/style.css';
import * as demo from 'rc-easyui/dist/locale/easyui-lang-zh_CN.js';
import { reqdoSQL } from '../../api/functions.js';
import 'rc-easyui/dist/themes/gray/radiobutton.css';
import 'rc-easyui/dist/themes/gray/checkbox.css';
export default class Page401 extends React.Component {
  constructor(props) {
    super(props);
    this.state = {
     product:{},
     data:[],
     topic:["饮料","零食","速食产品","母婴用品","鞋包饰品","厨房日用品"],
     topicchecked:[],
     onlist:["上市","未上市"],
     onlists:"",
     datetime:new Date(),
     listtime:[]
    }
  }
  getImage(row) {
    return "/myServer/mybase/products/"+row.productid+".jpg";
  }
  async componentDidMount() {
    let p={};
    p.selectsql='select productid,productname,unitprice from products';
    let rs= await reqdoSQL(p);
    this.setState({data:rs.rows});
   
  }
  renderItem({ row }) {
    return (
      <div key={row.productid}>
        <img src={this.getImage(row)} style={{width:"100px",height:"100px"}} />
        <div>
          <p>{row.productid} - {row.productname}</p>
 
          <p>¥ {row.unitprice}</p>
        </div>
      </div>
    )
  }
  handleChange(name, value) {  //同一个函数,用name来区分
 
    let product = Object.assign({}, this.state.product);
    product[name] = value;
    this.setState({product: product,open:false });
    console.log(name,value);
  }
handleSelectionChange(row){
    this.setState({product:row})
    console.log(111111,row);
  }
  handleChangelist(value, checked) {
    if (checked) {
      this.setState({ onlists: value },() => {
        setTimeout(()=>{
          if(this.state.onlists=="上市"){
            var listtime=[];
            listtime.push(<div style={{ margin: '10px'}}>
          <Label htmlFor="onlisttime" align="left">上市时间:</Label>
          <DateBox inputId="onlisttime" id="onlisttime" value={this.state.datetime} onChange={(value) => this.datetimeChange(value)} format="yyyy-MM-dd"
          style={{width:"300px",fontFamily:"楷体",height:"30px"}}></DateBox>
          </div>);
            this.setState({listtime:listtime})
     
          }else{
     
            this.setState({listtime:[]});
          }
        },100);
     
    });
   
  }
}
  datetimeChange(value){
    this.setState({datetime: value});
  }
  render() {
    return (
      <div>
        <Layout style={{width:"100%",height:"100%",position:"absolute"}}>
          <LayoutPanel region="west" style={{width:200}}>
            <div>
            <DataList
          style={{ width: "100%", height: "100%" ,textAlign:"center"}}
          renderItem={this.renderItem.bind(this)}
          data={this.state.data}
          selectionMode="single"
          onSelectionChange={this.handleSelectionChange.bind(this)}
          />
                  </div>
          </LayoutPanel>
          <LayoutPanel region="center" >
       
         
        <Panel title="商品信息" collapsible >
          <div style={{position:'relative', height:120}} >
          <Label htmlFor="productid" className="labelStyle" style={{position:'absolute', top:'20px', left:'16px'}}>商品编号:</Label>
          <TextBox inputId="productid" id="productid" value={this.state.product.productid}
          onChange={(value) => this.handleChange("pid", value)}
          style={{position:'absolute', top:'20px', left:'85px', width:'200px'}}></TextBox>
          <Label htmlFor="productname" className="labelStyle" style={{position:'absolute', top:70, left:'16px'}}>商品名称:</Label>
          <TextBox inputId="productname" id="productname" value={this.state.product.productname} onChange={(value) => this.handleChange("productname", value)}
          style={{position:'absolute', top:'70px', left:'85px', width:200}}></TextBox>
         
         </div>
        </Panel>
        <div>
        <Tabs tabPosition='top'  >
       
        <TabPanel ref={ref => this.myTab1 = ref} key="myTab1" title="客户列表">
        <div style={{margin:"10px"}}>
            <Label htmlFor="customerid" align="left">客户编码:</Label>
            <TextBox inputId="customerid" iconCls="icon-man" style={{ width: '30%' }}></TextBox>
        </div>
         
        <div style={{margin:"10px"}}>
            <Label htmlFor="companyname" align="left">公司名称:</Label>
            <TextBox inputId="companyname" iconCls="icon-man" style={{ width: '30%' }}></TextBox>
        </div>
        <div style={{margin:"10px"}}>
        <Label htmlFor="companyname" align="left">售货类型:</Label>
        {
          this.state.topic.map(topic => {
            return (
              <div key={topic} style={{display:"inline-block"}}>
                <CheckBox inputId={topic} multiple value={topic} values={this.state.topicchecked} onChange={this.handleChange.bind(this)}></CheckBox>
                <Label htmlFor={topic} style={{margin:'0px 0px 0px 5px'}}>{topic}</Label>
              </div>
            )
          })
         
        }
        </div>
        <div style={{margin:"10px"}}>
        <Label htmlFor="onlist" align="left">公司类型:</Label>
        {
  this.state.onlist.map(onlist => {
    return (
      <div key={onlist} style={{display:"inline-block"}}>
        <RadioButton
          inputId={onlist}
          value={onlist}
          groupValue={this.state.onlists}
          onChange={(checked) => this.handleChangelist(onlist, checked)}
        />
        <Label htmlFor={onlist} style={{ margin: '0 5px' }}>{onlist}</Label>
      </div>
    )
  })
}
</div>
{this.state.listtime}
        <div style={{ margin: '10px' }}>
            <Label htmlFor="note" align="left">公司简历:</Label>
            <TextBox inputId="note" multiline value={this.state.description} style={{ width: '70%', height: 100 }}></TextBox>
        </div>
        </TabPanel>
        </Tabs>
      </div>
        </LayoutPanel>
        </Layout>
      </div>
    );
  }
}


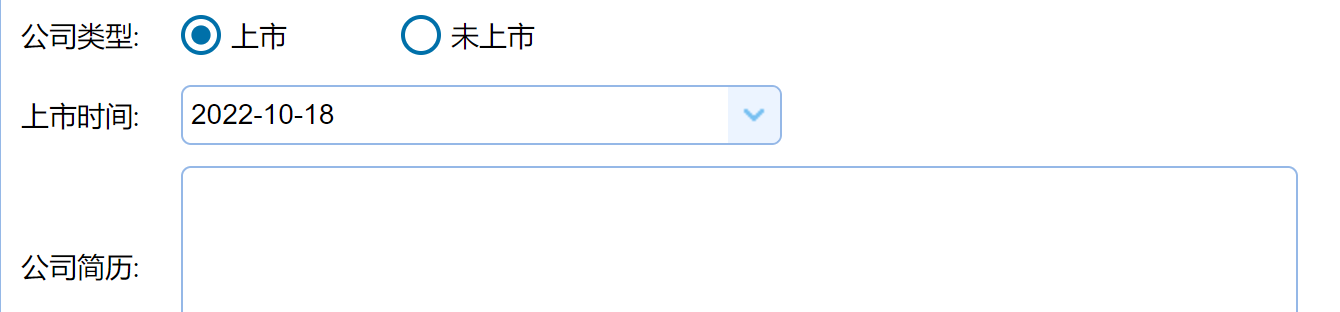
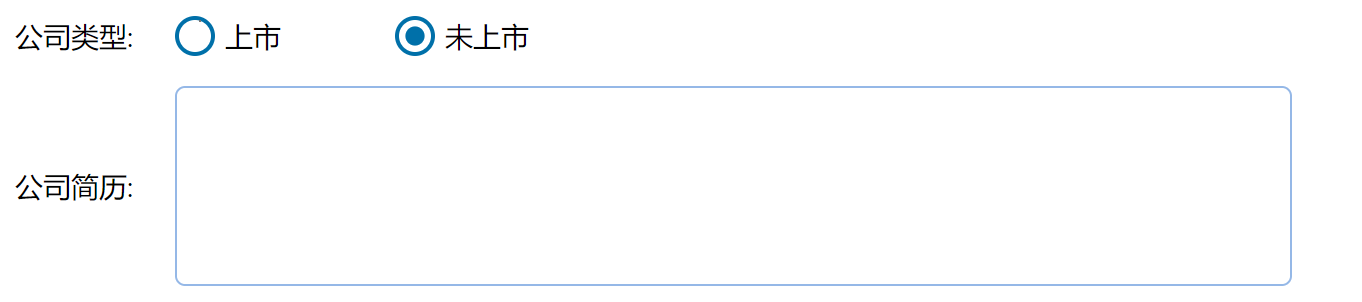
做了个选中才出现的信息框,开始做有异步,点击“上市”不出现“上市时间”,点击“未上市”才出现,后来还是用setTimeout()做的,如果有更好的方法可以指点指点的。
 
 handleChangelist(value, checked) {
    if (checked) {
      this.setState({ onlists: value },() => {
        setTimeout(()=>{
          if(this.state.onlists=="上市"){
            var listtime=[];
            listtime.push(<div style={{ margin: '10px'}}>
          <Label htmlFor="onlisttime" align="left">上市时间:</Label>
          <DateBox inputId="onlisttime" id="onlisttime" value={this.state.datetime} onChange={(value) => this.datetimeChange(value)} format="yyyy-MM-dd"
          style={{width:"300px",fontFamily:"楷体",height:"30px"}}></DateBox>
          </div>);
            this.setState({listtime:listtime})
     
          }else{
     
            this.setState({listtime:[]});
          }
        },100);
     
    });
   
  }

}


react.js+easyui 做一个简单的商品表的更多相关文章

  1. 使用React并做一个简单的to-do-list

    1. 前言 说到React,我从一年之前就开始试着了解并且看了相关的入门教程,而且还买过一本<React:引领未来的用户界面开发框架 >拜读.React的轻量组件化的思想及其virtual ...

  2. 【 D3.js 入门系列 --- 3 】 做一个简单的图表!

    前面说了几节,都是对文字进行处理,这一节中将用 D3.js 做一个简单的柱形图. 做柱形图有很多种方法,比如用 HTML 的 div 标签,或用 svg . 推荐用 SVG 来做各种图形.SVG 意为 ...

  3. 【 D3.js 入门系列 — 3 】 做一个简单的图表!

    图1. 柱形图 1. 柱形图 前几章的例子,都是对文字进行处理.本章中将用 D3 做一个简单的柱形图.制作柱形图有很多种方法,比如用 HTML 的 <div> 标签,或在 SVG 上绘制 ...

  4. MUI框架-05-用MUI做一个简单App

    MUI框架-05-用MUI做一个简单App MUI 是一个前端框架,前端框架就像 Bootstrap,EasyUI,Vue ,为了做 app 呢,就有了更加高效的 MUI,我觉得前端框架有很多,也没有 ...

  5. 使用 jquery 的 上传文件插件 uploadify 3.1 配合 java 来做一个简单的文件上次功能。并且在界面上有radio 的选择内容也要上传

    使用 jquery 的 上传文件插件 uploadify 3.1 配合 java 来做一个简单的文件上次功能.并且在界面上有radio 的选择内容也要上传 uploadify 插件的 下载和文档地址  ...

  6. 第四章 .net core做一个简单的登录

    项目目标部署环境:CentOS 7+ 项目技术点:.netcore2.0 + Autofac +webAPI + NHibernate5.1 + mysql5.6 + nginx 开源地址:https ...

  7. .Net Core 3.0后台使用httpclient请求网络网页和图片_使用Core3.0做一个简单的代理服务器

    目标:使用.net core最新的3.0版本,借助httpclient和本机的host域名代理,实现网络请求转发和内容获取,最终显示到目标客户端! 背景:本人在core领域是个新手,对core的使用不 ...

  8. 【Bugly干货分享】一起用 HTML5 Canvas 做一个简单又骚气的粒子引擎

    Bugly 技术干货系列内容主要涉及移动开发方向,是由Bugly邀请腾讯内部各位技术大咖,通过日常工作经验的总结以及感悟撰写而成,内容均属原创,转载请标明出处. 前言 好吧,说是“粒子引擎”还是大言不 ...

  9. 一起用HTML5 canvas做一个简单又骚气的粒子引擎

    前言 好吧,说是"粒子引擎"还是大言不惭而标题党了,离真正的粒子引擎还有点远.废话少说,先看demo 本文将教会你做一个简单的canvas粒子制造器(下称引擎). 世界观 这个简单 ...

随机推荐

  1. inotify 目录文件变更实时监控

    # inotify 软件 # 安装:通过epel,安装在客户端 # 功能:实时监控目录下文件的更变 # 监控事件:创建.删除.修改.移动... # 安装位置:客户端 # 安装命令: sudo apt- ...

  2. 关于hive分区,你知道多少呢?

    ​ 文末查看关键字,回复赠书 一.理论基础 1.Hive分区背景 在Hive Select查询中一般会扫描整个表内容,会消耗很多时间做没必要的工作.有时候只需要扫描表中关心的一部分数据,因此建表时引入 ...

  3. Auto.js 调用系统短信、电话

    本文所有教程及源码.软件仅为技术研究.不涉及计算机信息系统功能的删除.修改.增加.干扰,更不会影响计算机信息系统的正常运行.不得将代码用于非法用途,如侵立删! Auto.js 调用系统短信.电话 操作 ...

  4. ROS机械臂 Movelt 学习笔记4 | Move Group 接口 Python

    Python 的使用总是比 C++ 简单许多,Move Group 的 Python 接口更为便捷,也为使用者提供了很多用于操纵机器人和机械臂的函数,能够和 C++ 接口实现相同的功能: 设置机械臂的 ...

  5. 彻底弄懂JS中的this

    首先,用一句话解释this,就是:指向执行当前函数的对象. 当前执行,理解一下,也就是说this的指向在函数定义的时候是确定不了的,只有函数执行的时候才能确定.this到底指向谁?this的最终指向的 ...

  6. CF906C Party (状压DP)(未完成//鬼知道啥情况)

    CF上下了数据,本地能过,一交就错 这状压不用解释,看代码就懂. #include <iostream> #include <cstdio> #include <cstr ...

  7. 盘点Vue2和Vue3的10种组件通信方式(值得收藏)

    Vue中组件通信方式有很多,其中Vue2和Vue3实现起来也会有很多差异:本文将通过选项式API 组合式API以及setup三种不同实现方式全面介绍Vue2和Vue3的组件通信方式.其中将要实现的通信 ...

  8. Dreamweaver8 网站制作软件使用教程

    Dreamweaver是我喜欢做网站的软件.之所以喜欢Dreamweaver 8 是因为这个版本有折叠功能. 下面说说它的使用方法. 1.创建站点文件.注意看截图的顺序,如下图 2.选择你喜欢的编辑模 ...

  9. HOSMEL:一种面向中文的可热插拔模块化实体链接工具包

    HOSMEL: A Hot-Swappable Modularized Entity Linking Toolkit for Chinese ACL 2022 论文地址:https://aclanth ...

  10. Springboot连接数据库(解决报错2)

    好家伙, 新建项目,不出意外的话总是会出点意外的 第一天正常运行,第二天就炸了. 1.看报错 百度一下找解决方案 试着将 application.properties中的 com.mysql.jdbc ...