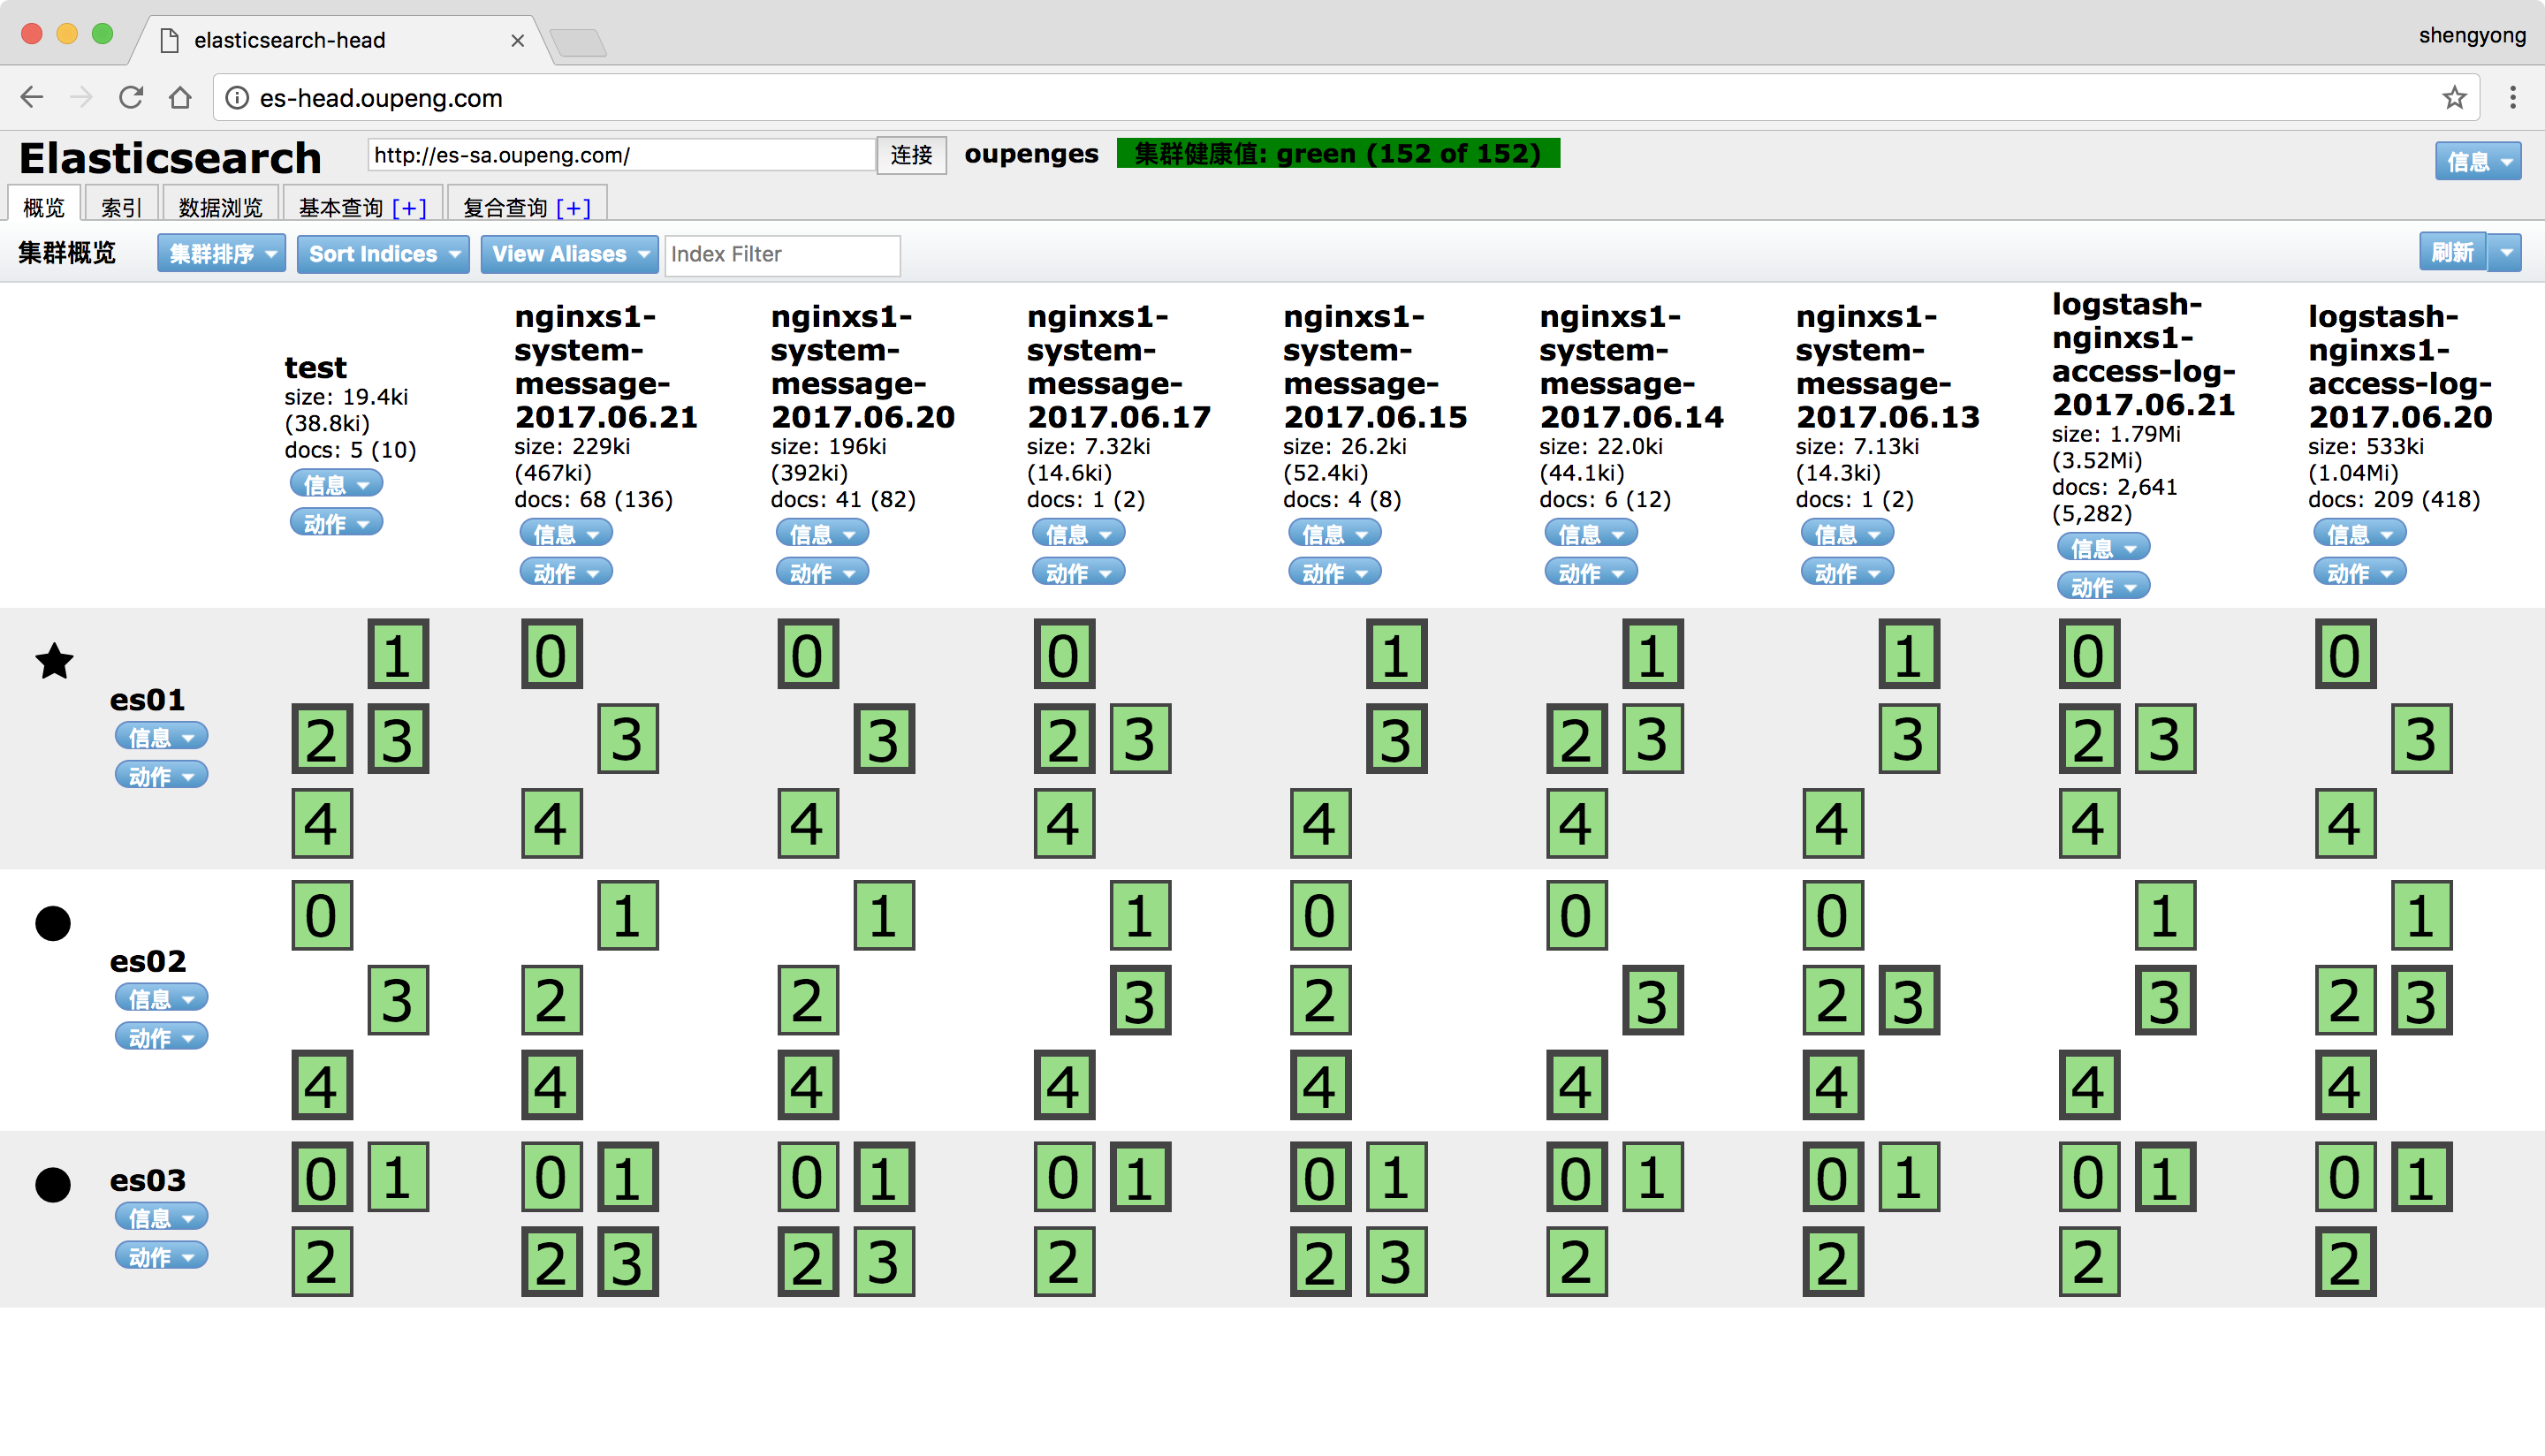
安装elasticsearch5.4.1集群和head插件
这里用的系统版本是CentOS6.6。
192.168.3.56    ES01

192.168.3.49    ES02

192.168.3.57    ES03
1、为三个节点安装java环境
# yum install -y java java-1.8.0-openjdk-devel

# vim /etc/profile.d/java.sh

export JAVA_HOME=/usr

# source /etc/profile.d/java.sh
2、同步时间
# ntpdate pool.ntp.org
3、上官网下载rpm包,或者按照guide设置官方repo,分别为三个节点安装ES
# yum install -y elasticsearch-5.4.1.rpm
https://www.elastic.co/guide/en/elasticsearch/reference/current/install-elasticsearch.html
4、修改配置文件
节点1,ES01:
# vim /etc/elasticsearch/elasticsearch.yml

cluster.name: oupenges

node.name: es01

bootstrap.system_call_filter: false

http.cors.enabled: true

http.cors.allow-origin: "*"

bootstrap.memory_lock: true

network.host: 192.168.3.56

discovery.zen.ping.unicast.hosts: ["192.168.3.56", "192.168.3.49", "192.168.3.57"]
节点2,ES02:
# vim /etc/elasticsearch/elasticsearch.yml

cluster.name: oupenges

node.name: es02

bootstrap.system_call_filter: false

http.cors.enabled: true

http.cors.allow-origin: "*"

bootstrap.memory_lock: true

network.host: 192.168.3.49

discovery.zen.ping.unicast.hosts: ["192.168.3.56", "192.168.3.49", "192.168.3.57"]
节点3,ES03:
# vim /etc/elasticsearch/elasticsearch.yml

cluster.name: oupenges

node.name: es03

bootstrap.system_call_filter: false

http.cors.enabled: true

http.cors.allow-origin: "*"

bootstrap.memory_lock: true

network.host: 192.168.3.57

discovery.zen.ping.unicast.hosts: ["192.168.3.56", "192.168.3.49", "192.168.3.57"]
两个http参数的含义可以参考这里:
https://www.elastic.co/guide/en/elasticsearch/reference/current/modules-http.html
5、修改limits.conf,系统默认的1024太小,这里需要至少2048才能启动服务
# vim /etc/security/limits.conf

*               hard    nofile  65536

*               soft    nofile  65536

*               hard    memlock unlimited

*               soft    memlock unlimited

elasticsearch   hard    nproc   514834

elasticsearch   soft    nproc   514834
https://www.elastic.co/guide/en/elasticsearch/reference/current/setting-system-settings.html#limits.conf
https://www.elastic.co/guide/en/elasticsearch/reference/current/_memory_lock_check.html
6、启动服务
# service elasticsearch start

# chkconfig elasticsearch on
7、通过cluster API查看集群状态:
# curl -XGET 'http://192.168.3.56:9200/_cluster/health?pretty=true'

{

  "cluster_name" : "oupenges",

  "status" : "green",

  "timed_out" : false,

  "number_of_nodes" : 3,

  "number_of_data_nodes" : 3,

  "active_primary_shards" : 71,

  "active_shards" : 142,

  "relocating_shards" : 0,

  "initializing_shards" : 0,

  "unassigned_shards" : 0,

  "delayed_unassigned_shards" : 0,

  "number_of_pending_tasks" : 0,

  "number_of_in_flight_fetch" : 0,

  "task_max_waiting_in_queue_millis" : 0,

  "active_shards_percent_as_number" : 100.0

}
8、安装head插件(需要事先安装nodejs和phantomjs,这里只说一下phantomjs)
安装phantomjs:
# wget https://bitbucket.org/ariya/phantomjs/downloads/phantomjs-2.1.1-linux-x86_64.tar.bz2

# tar xvf phantomjs-2.1.1-linux-x86_64.tar.bz2

# cd phantomjs-2.1.1-linux-x86_64/

# ln -sv /root/phantomjs-2.1.1-linux-x86_64/bin/phantomjs /usr/bin/
运行head:
# git clone https://github.com/mobz/elasticsearch-head.git

# cd elasticsearch-head/

# npm install

# nohup npm run start &
默认监听9100端口,用浏览器访问:http://192.168.3.56:9100/

安装elasticsearch5.4.1集群和head插件的更多相关文章
- ElasticSearch-5.3.1集群环境搭建,安装ElasticSearch-head插件,安装错误解决
说起来甚是惭愧,博主在写这篇文章的时候,还没有系统性的学习一下ES,只知道可以拿来做全文检索,功能很牛逼,但是接到了任务不想做也不行, leader让我搭建一下分布式的ES集群环境,用来支持企业信用数 ...
- windows安装elasticsearch服务以及elasticsearch5.6.10集群的配置(elasticsearch5.6.10配置跟1.1.1的配置不太相同,有些1.1.1版本下的配置指令在5.6.10中不能使用)
1.下载elasticsearch5.6.10安装包 下载地址为: https://artifacts.elastic.co/downloads/elasticsearch/elasticsearc ...
- 【Nutch2.3基础教程】集成Nutch/Hadoop/Hbase/Solr构建搜索引擎:安装及运行【集群环境】
1.下载相关软件,并解压 版本号如下: (1)apache-nutch-2.3 (2) hadoop-1.2.1 (3)hbase-0.92.1 (4)solr-4.9.0 并解压至/opt/jedi ...
- Cloudera Manager安装_搭建CDH集群
2017年2月22日, 星期三 Cloudera Manager安装_搭建CDH集群 cpu 内存16G 内存12G 内存8G 默认单核单线 CDH1_node9 Server || Agent ...
- 使用kubeadm安装kubernetes高可用集群
kubeadm安装kubernetes高可用集群搭建 第一步:首先搭建etcd集群 yum install -y etcd 配置文件 /etc/etcd/etcd.confETCD_NAME=inf ...
- centos7安装redis-4.0.1集群
试验机操作系统:CentOS Linux release 7.2.1511 (Core) 本文的目的是教会大家快速搭建redis集群,完了再深入学习. 试问如果不上手试验,看的资料再多有个毛用? 下载 ...
- Linux系统下安装Redis和Redis集群配置
Linux系统下安装Redis和Redis集群配置 一. 下载.安装.配置环境: 1.1.>官网下载地址: https://redis.io/download (本人下载的是3.2.8版本:re ...
- 基于CentOS与VmwareStation10搭建Oracle11G RAC 64集群环境:3.安装Oracle RAC-3.6.集群管理命令
3.6. 集群管理命令 3.6.1. RAC的启动与关闭 oracle rac默认会开机自启动,如需维护时可使用以下命令: 关闭: crsctl stop cluster 停止本节点集群服务 crsc ...
- 完整安装sqlserver always on集群
准备工作 1. 四台已安装windows server 2008 r2 系统的虚拟机,配置如下: CPU : 1核 MEMORY : 2GB DISK : 40GB(未分区) NetAdapter ...
随机推荐
- java中JVM的原理
转载:https://blog.csdn.net/witsmakemen/article/details/28600127 一.java虚拟机的生命周期: Java虚拟机的生命周期 一个运行中的Jav ...
- 进阶:2.GBDT算法梳理
GBDT算法梳理 学习内容: 1.前向分布算法 2.负梯度拟合 3.损失函数 4.回归 5.二分类,多分类 6.正则化 7.优缺点 8.sklearn参数 9.应用场景 1.前向分布算法 在学习模型时 ...
- Tree - Decision Tree with sklearn source code
After talking about Information theory, now let's come to one of its application - Decision Tree! No ...
- Linux 系统安全检查(shell)
脚本内容: #!/bin/bash echo " (__)" echo " (oo)" echo " /------\/ " echo &q ...
- pwd命令详解
基础命令学习目录首页 原文链接:https://blog.csdn.net/gnail_oug/article/details/70664458 pwd是Print Working Directory ...
- hostname命令详解
基础命令学习目录首页 原文链接:https://idc.wanyunshuju.com/cym/68.html Linux操作系统的hostname是一个kernel变量,可以通过hostname命令 ...
- linux命令系列 grep
grep, egrep, fgrep - print lines matching a pattern SYNOPSIS grep [OPTIONS] PATTERN [FILE...] grep [ ...
- Scrum立会报告+燃尽图(十二月六日总第三十七次):程序功能逻辑优化
此作业要求参见:https://edu.cnblogs.com/campus/nenu/2018fall/homework/2284 项目地址:https://git.coding.net/zhang ...
- java 转载
这几天忙于其他的事情,编程的习惯没有继续下去,偶然间看到了这篇文章,感觉收益颇丰,言归正传,下面即入主题 java基础知识小总结 在一个独立的原始程序里,只能有一个 public 类,却可以有许多 n ...
- lintcode-517-丑数
517-丑数 写一个程序来检测一个整数是不是丑数. 丑数的定义是,只包含质因子 2, 3, 5 的正整数.比如 6, 8 就是丑数,但是 14 不是丑数以为他包含了质因子 7. 注意事项 可以认为 1 ...
