
IOS之UITabBarController
在学习IOS开发过程中,针对于UITabBarController的使用也不少出现,UITabBarController和UINavigationController类似,UITabBarController也可以轻松地管理多个控制器,轻松完成控制器之间的切换
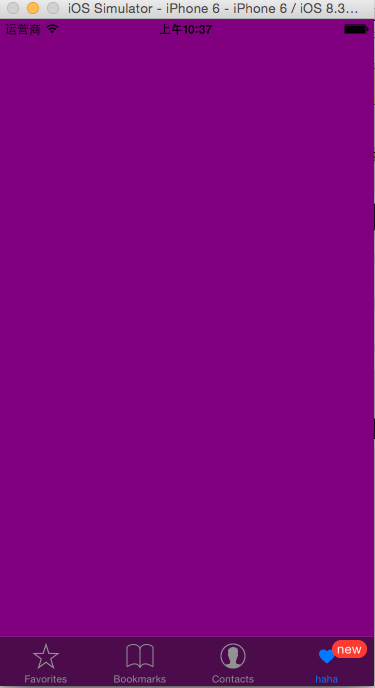
使用步骤:
1初始化UITabBarController
2设置UIWindow的rootViewController为UITabBarController
3创建相应的子控制器(viewcontroller)
4把子控制器添加到UITabBarController
代码如下
//初始化视图控制器

    UIViewController * vc1=[[UIViewController alloc] init];

    vc1.view.backgroundColor=[UIColor redColor];

    UIViewController * vc2=[[UIViewController alloc] init];

    vc2.view.backgroundColor=[UIColor greenColor];

    UIViewController * vc3=[[UIViewController alloc] init];

    vc3.view.backgroundColor=[UIColor yellowColor];

    UIViewController * vc4=[[UIViewController alloc] init];

    vc4.view.backgroundColor=[UIColor orangeColor];

    UIViewController * vc5=[[UIViewController alloc] init];

    vc5.view.backgroundColor=[UIColor purpleColor];

    //为tabbarController添加控制器

    UITabBarController * tabVC=[[UITabBarController alloc] init];

    tabVC.delegate=self;

    tabVC.viewControllers=@[vc1,vc2,vc3,vc4,vc5 ];

    //初始化系统UITabBarItem

    UITabBarItem * item1=[[UITabBarItem alloc] initWithTabBarSystemItem:UITabBarSystemItemFavorites tag:];

    vc1.tabBarItem=item1;

    UITabBarItem * item2=[[UITabBarItem alloc] initWithTabBarSystemItem:UITabBarSystemItemBookmarks tag:];

    vc2.tabBarItem=item2;

    //初始化带图片的UITabBarItem

    UIImage * selImage=[UIImage imageNamed:@"tabbar_cate_f"];

    selImage=[selImage imageWithRenderingMode:UIImageRenderingModeAlwaysOriginal];

    UITabBarItem * item3=[[UITabBarItem alloc] initWithTitle:@"最近" image:[UIImage imageNamed:@"tabbar_cate"] selectedImage:selImage];

    NSDictionary * dic=@{NSFontAttributeName:[UIFont systemFontOfSize:],NSForegroundColorAttributeName:[UIColor redColor]};

    [item3 setTitleTextAttributes:dic forState:UIControlStateSelected];

    vc3.tabBarItem=item3;

    //初始化带图片的UITabBarItem

    UITabBarItem * item4=[[UITabBarItem alloc] initWithTitle:@"你好" image:[UIImage imageNamed:@"tabbar_fov"] tag:];

    vc4.tabBarItem=item4;

    UITabBarItem * item5=[[UITabBarItem alloc] initWithTabBarSystemItem:UITabBarSystemItemSearch tag:];

    vc5.tabBarItem=item5;

    //将TabBarController设置为窗口的根控制器

self.window.rootViewController=tabVC;
2.UITabBar自己有一些方法是可以改变自身状态,但是对于UITabBarController自带的tabBar还是不能满足需求的,因此们需要用到自定义
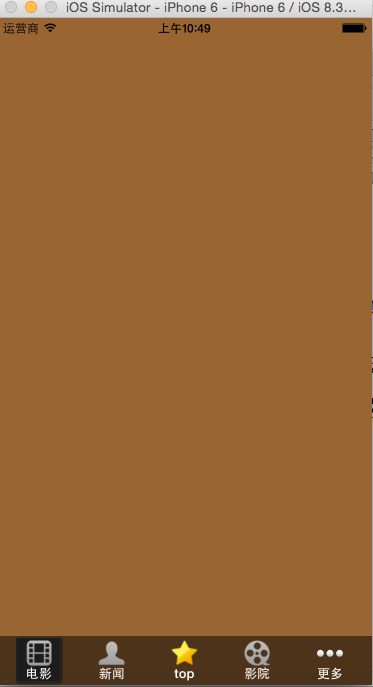
思路如下: 我们需要自定义一个tabbar,这里我们用UIView来替代,同时我们需要在tabbar上面来增加Item,从而达到点击控制视图控制器的目的。Item涉及到点击事件因此我们可以考虑用Button来完成,同时在button上面添加图标和标题。
1 我们自定义类JRTabBarController.h
2 分别实现三个方法

代码如下
#pragma mark - loadVC

- (void) _loadVC{

    self.tabBar.hidden=YES;

    //1 创建视图控制器

    JRViewController * vc1=[[JRViewController alloc] init];

    UIViewController * vc2=[[UIViewController alloc] init];

    vc2.view.backgroundColor=[UIColor greenColor];

    UIViewController * vc3=[[UIViewController alloc] init];

    vc3.view.backgroundColor=[UIColor yellowColor];

    UIViewController * vc4=[[UIViewController alloc] init];

    vc4.view.backgroundColor=[UIColor blueColor];

    self.viewControllers=@[vc1,vc2,vc3,vc4];

}

#pragma mark - _makeTabBar

- (void)_makeTabBar{

    //1 >定制tabbar

    UIView * bgview=[[UIView alloc] initWithFrame:CGRectMake(, kHeight-, kWidth, )];

    bgview.backgroundColor=[UIColor colorWithRed: green: blue: alpha:0.5];

    [self.view addSubview:bgview];

    //2 >定制btn

    CGFloat space=(kWidth-*kLeftSpace-*kBtSize)/4.0+kBtSize;

    for(int i=;i<;i++){

        NSDictionary * dic=_array[i];

        //1 初始化button大小

        JRButton * button= [[JRButton alloc] initWithFrame:CGRectMake(kLeftSpace+i*space, /2.0-kBtSize/2.0, kBtSize, kBtSize)];

        //2 初始化button的标题和图片

        [button initButtonWithTitle:dic[@"title"] andImage:dic[@"image"]];

        //3 为button 设置tag 和代理

        button.tag=i;

        button.delegate=self;

        [bgview addSubview:button];

        //4 将button 加入到数组,来调整选中背景的位置

        [_btArray addObject:button];

    }

    //3 >增加选中图标

    _selectView=[[UIImageView alloc] initWithFrame:CGRectMake(, /2.0-(kBtSize+)/2.0, kBtSize+, kBtSize+)];

    UIButton * button=_btArray[];

    _selectView.center=button.center;

    _selectView.image=[UIImage imageNamed:@"bg"];

    [bgview addSubview:_selectView];

    [bgview sendSubviewToBack:_selectView];

}

#pragma mark - 加载数据

- (void) _loadData{

    _btArray=[NSMutableArray array];

    NSDictionary * dic1=@{@"title":@"电影",@"image":[UIImage imageNamed:@"movie_cinema"]};

    NSDictionary * dic2=@{@"title":@"新闻",@"image":[UIImage imageNamed:@"msg_new"]};

    NSDictionary * dic3=@{@"title":@"top",@"image":[UIImage imageNamed:@"star_top250"]};

    NSDictionary * dic4=@{@"title":@"影院",@"image":[UIImage imageNamed:@"icon_cinema"]};

    NSDictionary * dic5=@{@"title":@"更多",@"image":[UIImage imageNamed:@"more_select_setting"]};

    _array=@[dic1,dic2,dic3,dic4,dic5];

}
2、这里还有一个需要完成的功能就是点击事件,当每个Item被点击的时候我们需要进行视图控制器的切换,在切换视图控制器的同时我们还需要控制黑色背景小图片的移动,下面我们来实现这个方法

#pragma mark - ButtonDelegate

- (void)changePage:(NSInteger)index{

    //1 改变选中图片

    UIButton * button=_btArray[index];

    [UIView beginAnimations:nil context:nil];

    _selectView.center=button.center;

    [UIView commitAnimations];

    //2 切换视图控制器

    self.selectedIndex=index;

}
3 、Item的定义,这里我们自定义一个button用来自定义Item,分别在button上面增加图片和标题来达到我们的效果,同时,通过代理实现控件的控制,代码如下:
/**

 *  初始化图片和标题

 *

 *  @param title 标题

 *  @param image 图片

 */

- (void) initButtonWithTitle:(NSString *) title andImage:(UIImage *) image{

    if(self) {

       //1> 添加Image

        UIImageView * imageView=[[UIImageView alloc] initWithFrame:CGRectMake(self.frame.size.width/2.0-kImageSize/2.0, , kImageSize, kImageSize)];

        imageView.contentMode=UIViewContentModeScaleAspectFit;

        imageView.image=image;

        [self addSubview:imageView];

       //2> 添加title

        UILabel * label=[[UILabel alloc] initWithFrame:CGRectMake(, kImageSize, self.frame.size.width, self.frame.size.height-kImageSize)];

        label.text=title;

        label.textColor=[UIColor whiteColor];

        label.textAlignment=NSTextAlignmentCenter;

        label.font=[UIFont boldSystemFontOfSize:];

        [self addSubview:label];

        [self addTarget:self action:@selector(showClick) forControlEvents:UIControlEventTouchUpInside];

    }

}
出处:http://www.cnblogs.com/jerehedu/
版权声明:本文版权归烟台杰瑞教育科技有限公司和博客园共有,欢迎转载,但未经作者同意必须保留此段声明,且在文章页面明显位置给出原文连接,否则保留追究法律责任的权利。
技术咨询:

IOS之UITabBarController的更多相关文章
- iOS programming UITabBarController
iOS programming UITabBarController 1.1 View controllers become more interesting when the user's acti ...
- iOS中 UITabBarController中自定义UITabBar
1.创建多个视图控制器,放如UITabBarController中 AViewController *aa = [[AViewController alloc] init]; UINavigation ...
- iOS开发-UITabBarController详解
我们在开发中经常会使用到UITabBarController来布局App应用,使用UITabBarController可以使应用看起来更加的清晰,iOS系统的闹钟程序,ipod程序都是非常好的说明和A ...
- IOS开发 UITabBarController
UITabBarController使用详解 UITabBarController是IOS中很常用的一个viewController,例如系统的闹钟程 序,ipod程序等.UITabBarContro ...
- iOS 自定义UITabBarController的tabBar
#import <UIKit/UIKit.h> @interface AppDelegate : UIResponder <UIApplicationDeleg ...
- ios更改UITabBarController背景以及选中背景图片的方法
一.背景图片 1.5.0以上版本 UIImage *image = [UIImage imageNamed:@"system_tabbar_bg.png"]; [ ...
- iPad编程
1. iPad 现有型号: iPad Pro, iPad Air, iPad mini 均配备Retina显示屏.早期还有iPad 依次对应的坐标系及分辨率: iPad Pro 坐标系:1366 x ...
- iOS 怎么设置 UITabBarController 的第n个item为第一响应者?
iOS 怎么设置 UITabBarController 的第n个item为第一响应者? UITabBarController 里面有个属性:selectedIndex @property(nonato ...
- iOS UITabBarController的使用
UITabBarController 和 UINavigationController 几乎是iOS APP的标配. UITabBarController分栏(标签栏)控制器, 和UINavigati ...
随机推荐
- CSS基础-DAY1
CSS 概述CSS 指层叠样式表 (Cascading Style Sheets),样式定义了如何显示 HTML文件中的标签元素,CSS是一种用来表现HTML(标准通用标记语言的一个应用)或XML(标 ...
- 磁盘备份工具dcfldd
磁盘备份工具dcfldd dcfldd是Kali Linux自带的一款磁盘备份工具.该工具是dd工具的增强版,更适合渗透测试和安全领域.dcfldd提供实时哈希校验功能,确保数据的安全.同时,它还 ...
- disable_functions php-fpm root
php.ini disable_functions 禁用某些函数 需要时注意打开 php-fpm 对应conf user group为root时 ERROR: [pool www] please sp ...
- 20162327WJH第三次实验——查找与排序2
20162327WJH第三次实验--查找与排序2 实 验 报 告 课程:程序设计与数据结构 班级: 1623 姓名: 王旌含 学号:20162327 成绩: 指导教师:娄嘉鹏 王志强 实验日期:11月 ...
- GIT(3)----问题汇总
1.git pull出现的合并问题: Please enter a commit message to explain why this merge is necessary,especially i ...
- Bus Blaster
http://dangerousprototypes.com/docs/Bus_Blaster Bus Blaster v2 is an experimental, high-speed JTAG d ...
- dmesg命令的使用
dmesg命令用于打印Linux系统开机启动信息,kernel会将开机信息存储在ring buffer中.您若是开机时来不及查看信息,可利用dmesg来查看(print or control the ...
- How to install WP 8.0 SDK if WP 8.1 SDK is installed?
I have the Windows Phone 8.1 SDK on my dev pc installed together with VS 2013. I need to open some W ...
- 编译Opencv的GPU,利用CUDA加速
首先检查自己的机器是否支持,否则都是白搭(仅仅有NVIDIA的显卡才支持.可在设备管理器中查看) 假设不用GPU.能够直接官网下载预编译好的库 环境: 1 VS2013 2 Opencv2.4.9 3 ...
- KJBitmap与KJHttp的深度用法
摘要 本文原创,转载请注明地址:http://kymjs.com/code/2015/09/24/01这篇文章是对KJFrameForAndroid使用的一个深入学习 之前写过一些有关KJFrame的 ...