FolderSync :The various features and how to use them
Help


If you want to use Samba/Windows shares, FTP, SFTP or WebDAV, you have to set it up on a server or your home PC, or have access to an existing account. Explaining how setup this is not in the scope of this help text, but try using Google.
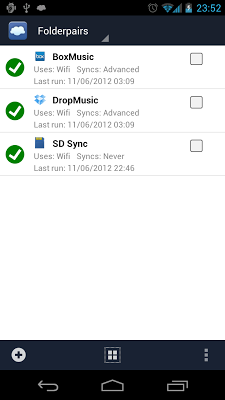
Create a folderpair
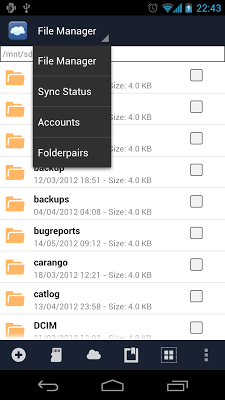
A FolderPair is a definition of a sync that you want this application to perform. A folderpair defines a sync between a local folder on your device and a remote folder for your chosen provider type. A sync can sync files to remote cloud storage, to your local storage or both ways. Select [Folderpairs] from the top drowdown menu.

- General
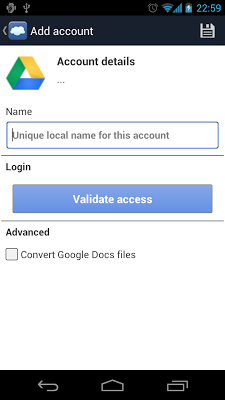
- Name: Unique name of your choice.
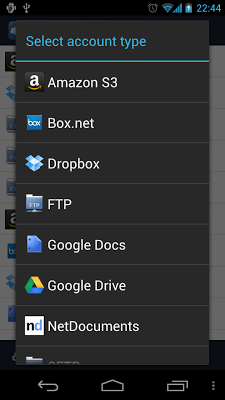
- Account: The account to sync to or from (must be configured first on account page).
- Remote folder: The remote folder to sync to or from. Can be selected after an account has been chosen.
- Local folder: The local folder on the device to sync to or from.
- Sync type: The type of sync - one-way to local or remote or two-way sync. Default: To local folder.
- Scheduling
- Use scheduled sync: Check this if you want to sync on a schedule (and not solely by manual start or Tasker).
- Sync interval: Choose how often you want to sync.
- Sync days: If sync interval is set to advanced, then this option is shown. Choose which days to sync.
- Sync times: If sync interval is set to advanced, then this option is shown. Choose which time of day to sync.
- Sync options
- Instant sync: Select this for instant sync on change. Only detects changes on local device. Use with care!
- Copy files to time-stamped folder: For one-way sync only. If enabled , this creates a time-stamped folder at target location, so all source files are synced every time into a new folder at target location.
- Exclude from force sync: Check this if this sync should be excluded from sync all action on sync status screen.
- Sync sub-folders: Check this if sub-folders are to be synced. Enabled by default.
- Sync hidden files: Check this if hidden files are to be synced. Enabled by default.
- Delete source files after sync: For one-way sync only. After syncing of files, the source files are deleted. Use with care! Disabled by default.
- Sync deletions: Check this if deletions are to be mirrored. Use with care! Disabled by default.
- Overwrite old files: Choose what to do if a file already exist at target. Default setting is to overwrite the old file, so the newest file is used.
- If conflicting modifications: Choose what to do if a conflicting modification is detected. A conflicting modification is one where both the source and target file has been changed since last recorded sync. Default is to skip file, which will result in sync warnings.
- Connection
- Use WiFi: Check this setting, if this Folderpair is allowed to sync on WiFi.
- Turn on WiFi for scheduled syncs: Check this if WiFi can be turned on for this sync.
- Allowed WiFi SSID's: Enter a list of allowed WiFi SSID's to sync on. If empty, all WiFi networks are allowed.
- Disallowed Wifi SSID's: Enter a list of disallowed WiFi SSID's.
- Use Edge/3G/4G: Check this setting, if this FolderPair is allowed to sync on mobile networks.
- Use other connections: Enable this if other connection types should be allowed (Bluetooth, USB, etc.).
- Sync when roaming: Enable this to allow sync while roaming on mobile networks (use with care).
- Notifications
- Show notification when syncing: Show persistent notification while syncing folderpair.
- Show notification on sync success: Show dismiss-able notification on sync success .
- Show notification when changes occur: Show dismiss-able notification if transfers/deletions happened.
- Show notification on sync error: Show dismiss-able notification if syncs fail for any reason.
- Advanced
- Only sync if charging: Check this setting if FolderPair should only sync when charging.
- Rescan media library: Check this if media library should be updated for deleted or added media files.
- Use MD5 checksums: Check this setting if MD5 checksum should be calculated for files. May decrease sync speed and use extra battery, but can also result in less download and upload traffic. Enabled by default.
- Use temp-file scheme: Check this setting, if you want to use temp-file scheme. Temp-file scheme means files are transferred using temporary name, and upon completion of transfer is renamed to the final filename. This may break the functionality of some cloud providers (proper revisions etc.). Enabled by default.
- Disable file-size check: Check this if transferred files should not be validated against source by comparing file-size. Some providers adds bytes to certain files when uploaded, so this setting can help in those cases.
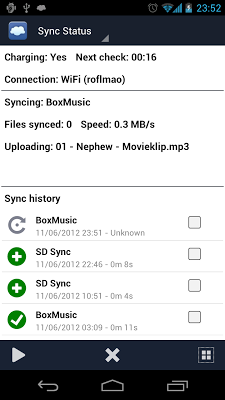
Syncing
Syncing occurs according to the schedule you have defined for each folderpair. If a schedule is not defined the folderpair will only be synced if you manually initiate it. If no network connection is set to be allowed for a folderpair it will never sync, not even if you manually initiate it. This is to ensure you are not accidentally charged for expensive network traffic. Files are compared using their last modification date and optionally using MD5 hashes (for local files).
Two-way sync
Two-way sync copies files in both directions, overwriting older files if duplicate files are found. It will also detect cases where modifications have happened on both local and cloud storage. If this happens, the latest modified file will be used or the file will be skipped, according to what you specify in for the folderpair.
Mirroring of deletions
If the "Do not sync deletions" option is not enabled, deletions will also be synced, for all types of sync. FolderSync has an internal database of synced files. If a previously synced filed is deleted at either end, the deletion will also happen at the opposite end (if the file at the opposite end has not changed since last sync). Use this option only if you are sure what you are doing, and at your own risk!
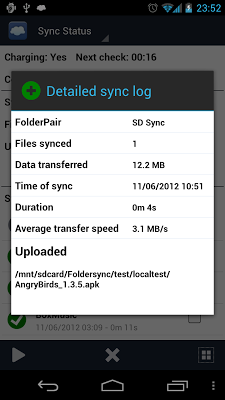
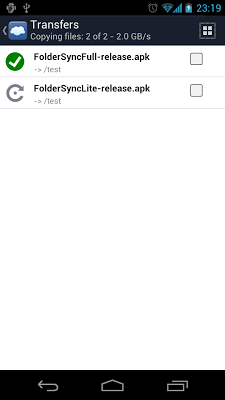
Sync status
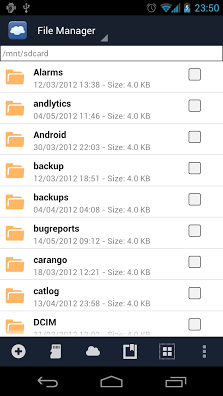
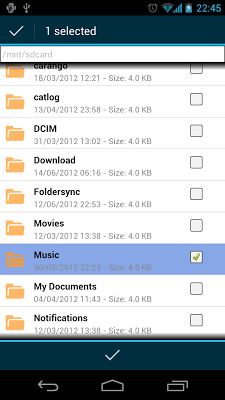
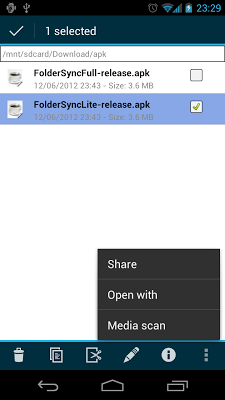
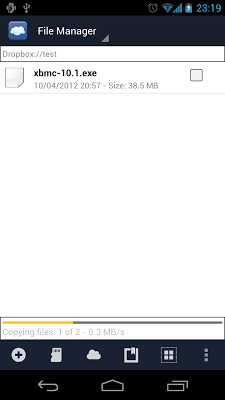
File manager
The file manager allows you to copy/move files to and from your accounts from the local sdcard, as well as move/copy files in a remote storage space. You can also rename files and folders and create new folders. Copying from one remote account to another is not supported, as this is not possible without using the local sdcard as a temporary storage space.
- Toogle view of hidden files
- Sort (with options to sort files on different criteria)
- Refresh (refreshes the files and folder view)
- Manage transfers (opens a window with transfers)
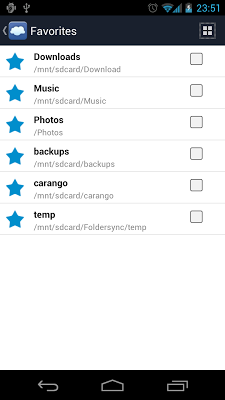
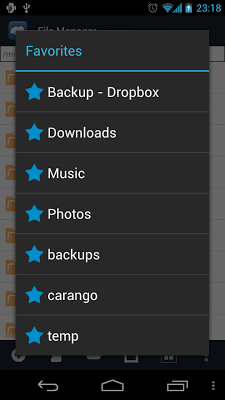
- Manage favorites
- Delete
- Copy
- Cut
- Rename (single selection only)
- Details
(single selection only) - Add favorite (single selection only)
- Media scan
- Delete
- Copy
- Cut
- Rename (single selection only)
- Details (single selection only)
- Share (single selection only)
- Open with
(single selection only) - Media scan

Settings
The settings panel allow you to backup/restore the underlying database. The backup is saved to the default folder /mnt/sdcard/Foldersync/backup/ (or another folder which you can select). You can also disable notifications, if you do not want to be bothered with these when syncs occur.

Amazon endpoint is only used in regards to creating a bucket in this application - all other operations are targeted to a specific bucket you specify, no matter with which endpoint it was created. Using Amazon S3 can incur costs on your part.
Dropbox has a 150 MB upload limitation - files over this size will probably not succeed in uploading.
FolderSync :The various features and how to use them的更多相关文章
- 论文笔记之: Hierarchical Convolutional Features for Visual Tracking
Hierarchical Convolutional Features for Visual Tracking ICCV 2015 摘要:跟卢湖川的那个文章一样,本文也是利用深度学习各个 layer ...
- 论文笔记之:Heterogeneous Image Features Integration via Multi-Modal Semi-Supervised Learning Model
Heterogeneous Image Features Integration via Multi-Modal Semi-Supervised Learning Model ICCV 2013 本文 ...
- OpenCV探索之路(二十八):Bag of Features(BoF)图像分类实践
在深度学习在图像识别任务上大放异彩之前,词袋模型Bag of Features一直是各类比赛的首选方法.首先我们先来回顾一下PASCAL VOC竞赛历年来的最好成绩来介绍物体分类算法的发展. 从上表我 ...
- 泡泡一分钟:Using Geometric Features to Represent Near-Contact Behavior in Robotic Grasping
张宁 Using Geometric Features to Represent Near-Contact Behavior in Robotic Grasping链接:https://pan.ba ...
- Computer Vision_33_SIFT:Distinctive Image Features from Scale-Invariant Keypoints——2004
此部分是计算机视觉部分,主要侧重在底层特征提取,视频分析,跟踪,目标检测和识别方面等方面.对于自己不太熟悉的领域比如摄像机标定和立体视觉,仅仅列出上google上引用次数比较多的文献.有一些刚刚出版的 ...
- Computer Vision_33_SIFT:Speeded-Up Robust Features (SURF)——2006
此部分是计算机视觉部分,主要侧重在底层特征提取,视频分析,跟踪,目标检测和识别方面等方面.对于自己不太熟悉的领域比如摄像机标定和立体视觉,仅仅列出上google上引用次数比较多的文献.有一些刚刚出版的 ...
- 论文笔记:Learning Region Features for Object Detection
中心思想 继Relation Network实现可学习的nms之后,MSRA的大佬们觉得目标检测器依然不够fully learnable,这篇文章类似之前的Deformable ROI Pooling ...
- MVC之前的那点事儿系列(2):HttpRuntime详解分析(上)
文章内容 从上章文章都知道,asp.net是运行在HttpRuntime里的,但是从CLR如何进入HttpRuntime的,可能大家都不太清晰.本章节就是通过深入分析.Net4的源码来展示其中的重要步 ...
- MATLAB 图像分类 Image Category Classification Using Bag of Features
使用MATLAB实现图像的识别,这是MATLAB官网上面的例子,学习一下. http://cn.mathworks.com/help/vision/examples/image-category-cl ...
随机推荐
- 【Android开发日记】之入门篇(五)——Android四大组件之Service
这几天忙着驾校考试,连电脑都碰不到了,今天总算告一段落了~~Service作为Android的服务组件,默默地在后台为整个程序服务,辅助应用与系统中的其他组件或系统服务进行沟通.它跟Activity的 ...
- python基础学习之路No.5 数学函数以及操作
python的基本数学函数 函数 返回值 ( 描述 ) abs(x) 返回数字的绝对值,如abs(-10) 返回 10 ceil(x) 返回数字的上入整数,如math.ceil(4.1) 返回 5 c ...
- JS、JQ实现焦点图轮播效果
JS实现焦点图轮播效果 效果图: 代码如下,复制即可使用: (不过里面的图片路径需要自己改成自己的图片路径,否则是没有图片显示的哦) <!DOCTYPE html> <html> ...
- java 多线程总结篇2之——Thread类及常用函数
此片文章主要总结的是Thread类及相关的基础概念和API,首先需要厘清线程调度中的几个基本概念: 一.线程调度的基本方法 1.调整线程优先级:Java线程有优先级,优先级高的线程会获得较多的运行机会 ...
- AdvStringGrid 滚动条问题
1.默认水平方向 滚动条是 小的 滚动的时候 数据会随着滚动 而 滚动的. 2.默认垂直方向 滚动条是 小的 滚动的时候 数据不会随着滚动 而滚动的.ScrollSynch := True; 垂直方向 ...
- Java字符串拼接效率对比
1.来自:http://blog.csdn.net/Zen99T/article/details/51255418 2.来自:http://blog.csdn.net/kimsoft/article/ ...
- centos7.2下caffe的安装及编译
1.前期准备 安装依赖 sudo yum install protobuf-devel leveldb-devel snappy-devel opencv-devel boost-devel hdf5 ...
- 如何在VS2013创建WebService并在IIS中发布
第一步:打开VS2013,选择文件->新建->项目. 第二步:选择[ASP.net 空web应用程序],将其命名为自己想的工程名称. 第三步:然后右键点击工程,添加->web服务.然 ...
- MySQL学习笔记:计算机服务中找不到MySQL服务
不知道什么原因,连接了远程服务器之后,本地服务就连接不上. 经排查,发现服务中的MySQL服务居然不见,一番搜索之后,在CMD中进入到MySQL安装目录的bin下执行以下语句: mysqld.exe ...
- MySQL权限问题
1.修改MySQL用户密码 .先来看一个PASSWORD()函数,MYSQL使用MD5加密 SELECT PASSWORD(‘root’); .使用mysql数据库,查看用户表 USE mysql; ...