linux系统下安装单台Redis
注意:搭建redis前一定要安装gcc
redis安装方式一
1.安装gcc命令:yum install -y gcc
#安装gcc

[root@localhost src]# yum install -y gcc

#出现如下信息则安装成功

Installed:

gcc.x86_64 0:4.4.7-17.el6

Dependency Installed:

cloog-ppl.x86_64 0:0.15.7-1.2.el6 cpp.x86_64 0:4.4.7-17.el6 mpfr.x86_64 0:2.4.1-6.el6 ppl.x86_64 0:0.10.2-11.el6

Complete

#查看gcc方式1

[root@localhost src]# gcc -v

Using built-in specs.

Target: x86_64-redhat-linux

Configured with: ../configure --prefix=/usr --mandir=/usr/share/man --infodir=/usr/share/info......

Thread model: posix

gcc version 4.4.7 20120313 (Red Hat 4.4.7-17) (GCC)

#查看gcc方式2

[root@localhost src]# rpm -q gcc

gcc-4.4.7-17.el6.x86_64
2.下载网址
redis官网地址:http://www.redis.io/
redis下载地址:http://download.redis.io/releases/
3.以centos6.5系统,redis3.2.4版本为例,把下载好的redis压缩包传到linxu系统中,进行解压.
[root@localhost redis]# tar zxvf redis-3.2.4.tar.gz
4.编译安装,执行命令 make
#执行命令

[root@localhost redis-3.2.4]# make

#出现以下信息则表示安装完成

Hint: It's a good idea to run 'make test' ;)

make[1]: Leaving directory `/usr/redis/redis-3.2.4/src'
5.启动redis
[root@localhost redis-3.2.4]# src/redis-server
6.安装出现错误情况
(1)执行make命令出现如下错误,则没有安装gcc,按照上面安装方法安装gcc
[root@localhost redis]# cd redis-3.2.4/
[root@localhost redis-3.2.4]# make

cd src && make all

sh: ./mkreleasehdr.sh: Permission denied

make[1]: Entering directory `/usr/redis/redis-3.2.4/src'

rm -rf redis-server redis-sentinel redis-cli redis-benchmark redis-check-rdb redis-check-aof *.o *.gcda *.gcno *.gcov redis.info lcov-html

(cd ../deps && make distclean)

make[2]: Entering directory `/usr/redis/redis-3.2.4/deps'

(cd hiredis && make clean) > /dev/null || true

(cd linenoise && make clean) > /dev/null || true

(cd lua && make clean) > /dev/null || true

(cd geohash-int && make clean) > /dev/null || true

(cd jemalloc && [ -f Makefile ] && make distclean) > /dev/null || true

(rm -f .make-*)

make[2]: Leaving directory `/usr/redis/redis-3.2.4/deps'

(rm -f .make-*)

echo STD=-std=c99 -pedantic -DREDIS_STATIC='' >> .make-settings

echo WARN=-Wall -W >> .make-settings

echo OPT=-O2 >> .make-settings

echo MALLOC=jemalloc >> .make-settings

echo CFLAGS= >> .make-settings

echo LDFLAGS= >> .make-settings

echo REDIS_CFLAGS= >> .make-settings

echo REDIS_LDFLAGS= >> .make-settings

echo PREV_FINAL_CFLAGS=-std=c99 -pedantic -DREDIS_STATIC='' -Wall -W -O2 -g -ggdb   -I../deps/geohash-int -I../deps/hiredis -I../deps/linenoise -I../deps/lua/src -DUSE_JEMALLOC -I../deps/jemalloc/include >> .make-settings

echo PREV_FINAL_LDFLAGS=  -g -ggdb -rdynamic >> .make-settings

(cd ../deps && make hiredis linenoise lua geohash-int jemalloc)

make[2]: Entering directory `/usr/redis/redis-3.2.4/deps'

(cd hiredis && make clean) > /dev/null || true

(cd linenoise && make clean) > /dev/null || true

(cd lua && make clean) > /dev/null || true

(cd geohash-int && make clean) > /dev/null || true

(cd jemalloc && [ -f Makefile ] && make distclean) > /dev/null || true

(rm -f .make-*)

(echo "" > .make-ldflags)

(echo "" > .make-cflags)

MAKE hiredis

cd hiredis && make static

make[3]: Entering directory `/usr/redis/redis-3.2.4/deps/hiredis'

gcc -std=c99 -pedantic -c -O3 -fPIC  -Wall -W -Wstrict-prototypes -Wwrite-strings -g -ggdb  net.c

make[3]: gcc: Command not found

make[3]: *** [net.o] Error 127

make[3]: Leaving directory `/usr/redis/redis-3.2.4/deps/hiredis'

make[2]: *** [hiredis] Error 2

make[2]: Leaving directory `/usr/redis/redis-3.2.4/deps'

make[1]: [persist-settings] Error 2 (ignored)

    CC adlist.o

/bin/sh: cc: command not found

make[1]: *** [adlist.o] Error 127

make[1]: Leaving directory `/usr/redis/redis-3.2.4/src'

make: *** [all] Error 2
(2)执行maker出现如下错误,则没有权限执行命令,要在 /src 目录执行授权命令:chmod 777 mkreleasehdr.sh
#1.执行make报错,则没有权限执行命令

[root@localhost redis-3.2.4]# make

cd src && make all

sh: ./mkreleasehdr.sh: Permission denied

make[1]: Entering directory `/usr/redis/redis-3.2.4/src'

    CC adlist.o

In file included from adlist.c:34:

zmalloc.h:50:31: error: jemalloc/jemalloc.h: No such file or directory

zmalloc.h:55:2: error: #error "Newer version of jemalloc required"

make[1]: *** [adlist.o] Error 1

make[1]: Leaving directory `/usr/redis/redis-3.2.4/src'

make: *** [all] Error 2

#2.授权

[root@localhost src]# chmod 777 mkreleasehdr.sh
(3)执行make出现如下错误,则要配置变量
#1.错误信息

make[1]: Entering directory `/usr/redis/redis-3.2.4/src'

    CC adlist.o

In file included from adlist.c:34:

zmalloc.h:50:31: error: jemalloc/jemalloc.h: No such file or directory

zmalloc.h:55:2: error: #error "Newer version of jemalloc required"

make[1]: *** [adlist.o] Error 1

make[1]: Leaving directory `/usr/redis/redis-3.2.4/src'

make: *** [all] Error 2

#2.添加变量

[root@localhost src]# make MALLOC=libc
(4)执行 make MALLOC=libc 命令报错 或 还有其他错误,建议删除redis所有文件重新装,或者按照下面的方式安装.
redis安装方式二
1.在线下载redis(默认下载 /root 文件下)
[root@localhost ~]# wget http://download.redis.io/releases/redis-3.2.4.tar.gz

#要是出现如下错误则没有配置好linux环境变量
#bash:command not found
2.新建一个redis文件夹,移动到指定文件夹下,进行解压
#在/usr下面新建redis文件夹
[root@localhost usr]# mkdir redis
#移动文件

[root@localhost ~]# mv /root/redis-3.2.4.tar.gz /usr/redis

#解压文件

[root@localhost ~]# tar -xzvf redis-3.2.4.tar.gz
3.执行make编译
[root@localhost redis-3.2.4]# make

#出现以下信息则安装完成

Hint: It's a good idea to run 'make test' ;)

make[1]: Leaving directory `/usr/redis/redis-3.2.4/src'
4.启动redis
#启动后不会在后台运行,按Ctrl+C就会停止
[root@localhost redis-3.2.4]# src/redis-server #加&符号启动后在后台运行
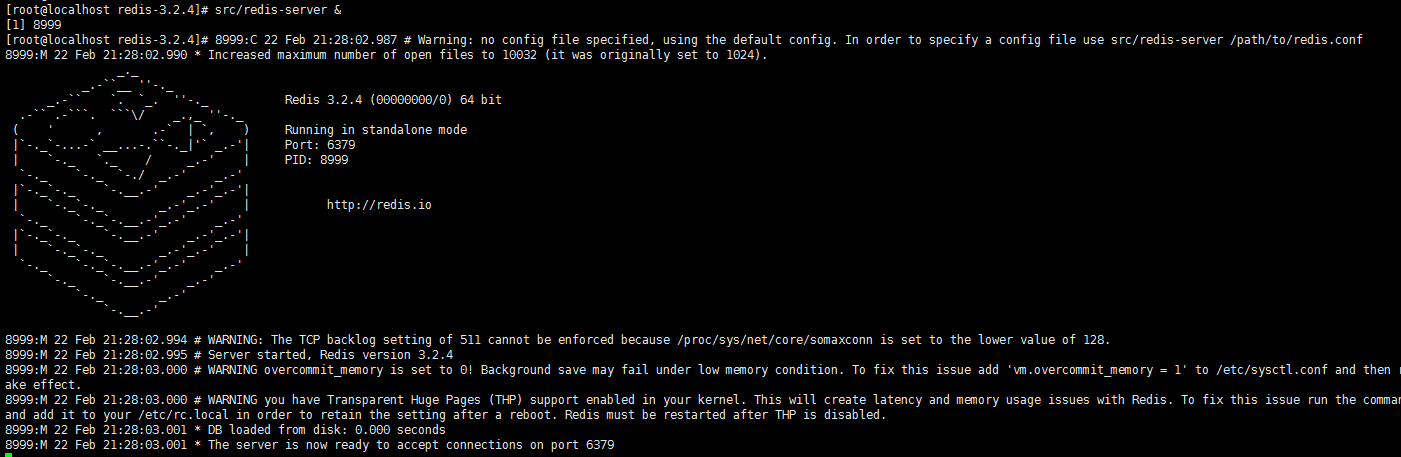
[root@localhost redis]# src/redis-server &
5.启动成功
6.查看redis版本号
进入redis的安装目录src下面
#方式1

[root@svr-zk src]# redis-cli -v

redis-cli 3.2.4

#方式2

[root@svr-zk src]# redis-cli --version

redis-cli 3.2.4

#方式3

[root@svr-zk src]# redis-server -v

Redis server v=3.2.4 sha=00000000:0 malloc=jemalloc-4.0.3 bits=64 build=54077ebb4b018819
linux系统下安装单台Redis的更多相关文章
- Linux系统下安装Redis和Redis集群配置
Linux系统下安装Redis和Redis集群配置 一. 下载.安装.配置环境: 1.1.>官网下载地址: https://redis.io/download (本人下载的是3.2.8版本:re ...
- 在Linux系统下安装大于mysql5.5版本的数据库
linux下mysql 5.5的安装方法: 1.安装所需要系统库相关库文件 gcc等开发包,在安装linux系统的时候安装. 2.创建mysql安装目录 # mkdir -p /usr/lo ...
- Linux 系统下安装 rz/sz 命令及使用说明
Linux 系统下安装 rz/sz 命令及使用说明 rz/sz命令,实现将本地的文件上传到服务器或者从服务器上下载文件到本地,但是很多Linux系统初始并没有这两个命令,以下为安装和使用的具体步骤: ...
- Linux 系统下安装 python-skimage
Linux 系统下安装 python-skimage 安装必须的依赖 // python-mumpy // python-scipy // python-matplotlib $ sudo apt-g ...
- Linux系统下安装Gitlab
Linux系统下安装Gitlab 一.简介 GitLab是利用 Ruby on Rails 一个开源的版本管理系统,实现一个自托管的Git项目仓库,可通过Web界面进行访问公开的或者私人项目.它拥有与 ...
- 在虚拟机的Linux系统下安装wineqq
| 版权声明:本文为博主原创文章,未经博主允许不得转载. 本文参考教程:http://www.ubuntukylin.com/ukylin/forum.php?mod=viewthread& ...
- 【linux配置】Linux系统下安装rz/sz命令以及使用说明
Linux系统下安装rz/sz命令以及使用说明 对于经常使用Linux系统的人员来说,少不了将本地的文件上传到服务器或者从服务器上下载文件到本地,rz / sz命令很方便的帮我们实现了这个功能,但是很 ...
- linux系统下安装jdk,mysql,tomcat 和redis 和jedis入门案例
Day47笔记Linux+redis入门 Day47 知识讲解:Jedis 1.Linux上jdk,mysql,tomcat安装(看着文档安装) 准备工作: 因为JDK,TOMCAT,MYSQL的 ...
- Linux环境下安装、配置Redis
linux下安装redis 官网下载链接:https://redis.io/download 安装 下载redis压缩包 1.选择Stable(5.0)下的Download 5.0.0 链接进行下载 ...
随机推荐
- 使用Docker跑MySQL 作为Django的存储后端
Docker的好处不科普了,用过的都说好. 不想污染自己开发机器上的文件环境,本萌新使用Docker运行Mysql,Redis来作为Django的存储后端和缓存. 在第一次安装过程中,我遇到了一些问题 ...
- tungsten-replicator安装
需要环境 ruby1.8.5 or laterJava1.6 or later 应用程序对外开放接口 3306 (MySQL database)2112 (Tungsten THL)10000 (Tu ...
- cocos2dx3.2移植android
LOCAL_PATH := $(call my-dir)LOCAL_MYDIR = $(LOCAL_PATH)/../../Classesinclude $(CLEAR_VARS) $(call im ...
- 《java.util.concurrent 包源码阅读》04 ConcurrentMap
Java集合框架中的Map类型的数据结构是非线程安全,在多线程环境中使用时需要手动进行线程同步.因此在java.util.concurrent包中提供了一个线程安全版本的Map类型数据结构:Concu ...
- NullSafe基于Runtime的深度解析
Objective-C是一门动态语言,一个函数是由一个selector(SEL),和一个implement(IML)组成的. 执行一个方法时如果系统找不到方法会给几次机会寻找方法,实在没有此方法就会抛 ...
- vue.js的学习中的简单案例
今天学习了近年来挺火的一门JS技术,叫vue.js下面是它的一个简单案例: <html> <head> <title>$Title$</title> / ...
- 树莓派远程桌面配置-开机自启SSH
必须先安装tightvncserver sudo apt-get install tightvncserver 再安装xrdp服务. sudo apt-get install xrdp 如果开着防火墙 ...
- layer,Jquery,validate实现表单验证,刷新页面,关闭子页面
1.表单验证 //获取父层 var index = parent.layer.getFrameIndex(window.name); //刷新父层 parent.location.reload(); ...
- Python中的列表生成器,迭代器的理解
首先,思考一个问题,比如,我们想生成0-100的列表,我们怎么做? 当然,可以写成 list1=[1,2,3...,100] 可以看出,这种方法不适合生成长的列表,那么Python中就可以利用已有的列 ...
- Python中的选择排序
选择排序 选择排序(Selection sort)是一种简单直观的排序算法.它的工作原理如下.首先在未排序序列中找到最小(大)元素,存放到排序序列的起始位置,然后,再从剩余未排序元素中继续寻找最小(大 ...