spring MVC 环境搭建
绿色版Spring MVC(单纯的springMVC)
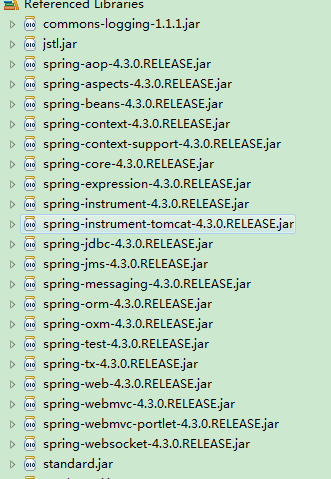
一、导包,为了获取请求数据多添加一个 包
包
二、web.xml配置
<?xml version="1.0" encoding="UTF-8"?>

<web-app xmlns:xsi="http://www.w3.org/2001/XMLSchema-instance"

         xmlns="http://java.sun.com/xml/ns/javaee"

         xsi:schemaLocation="http://java.sun.com/xml/ns/javaee http://java.sun.com/xml/ns/javaee/web-app_2_5.xsd"

         id="WebApp_ID" version="2.5">

  <!-- 这就是一个名字 -->

  <display-name>webSpringMVC</display-name>

  <!-- 加载spring容器 -->

  <!-- 初始化参数-->

  <context-param>

    <param-name>contextConfigLocation</param-name>

    <param-value>/WEB-INF/classes/applicationContext.xml</param-value>

  </context-param>

  <!-- 监听 -->

  <listener>

    <listener-class>

            org.springframework.web.context.ContextLoaderListener

        </listener-class>

  </listener>

  <!-- springmvc前端控制器 -->

  <servlet>

    <servlet-name>dispatcherServlet</servlet-name>

    <servlet-class>

            org.springframework.web.servlet.DispatcherServlet

        </servlet-class>

    <init-param>

      <param-name>contextConfigLocation</param-name>

      <param-value>/WEB-INF/classes/springMvc.xml</param-value>

    </init-param>

    <load-on-startup></load-on-startup>

  </servlet>

  <servlet-mapping>

    <servlet-name>dispatcherServlet</servlet-name>

    <url-pattern>*.action</url-pattern>

  </servlet-mapping>

  <!-- 配置过滤器 -->

  <!-- post乱码过虑器 -->

  <filter>

    <filter-name>CharacterEncodingFilter</filter-name>

    <filter-class>

            org.springframework.web.filter.CharacterEncodingFilter

        </filter-class>

    <init-param>

      <param-name>encoding</param-name>

      <param-value>utf-</param-value>

    </init-param>

    <init-param>

      <param-name>forceEncoding</param-name>

      <param-value>true</param-value>

    </init-param>

  </filter>

  <filter-mapping>

    <filter-name>CharacterEncodingFilter</filter-name>

    <url-pattern>/*</url-pattern>

  </filter-mapping>

  <!-- 首页 -->

  <welcome-file-list>

    <welcome-file>index.jsp</welcome-file>

  </welcome-file-list>

  <!-- session超时 -->

  <!--分钟为单位

      设置为0,-1 表示永不超时 -->

  <session-config>

    <session-timeout>30</session-timeout>

  </session-config>

</web-app>
三、springMvc.xml配置
<?xml version="1.0" encoding="UTF-8"?>

<beans xmlns="http://www.springframework.org/schema/beans"

       xmlns:xsi="http://www.w3.org/2001/XMLSchema-instance"

       xmlns:mvc="http://www.springframework.org/schema/mvc"

       xmlns:p="http://www.springframework.org/schema/p"

       xmlns:context="http://www.springframework.org/schema/context"

       xmlns:aop="http://www.springframework.org/schema/aop"

       xmlns:tx="http://www.springframework.org/schema/tx"

       xsi:schemaLocation="http://www.springframework.org/schema/beans

            http://www.springframework.org/schema/beans/spring-beans-3.0.xsd

            http://www.springframework.org/schema/context

            http://www.springframework.org/schema/context/spring-context-3.0.xsd

            http://www.springframework.org/schema/aop

            http://www.springframework.org/schema/aop/spring-aop-3.0.xsd

            http://www.springframework.org/schema/tx

            http://www.springframework.org/schema/tx/spring-tx-3.0.xsd

            http://www.springframework.org/schema/mvc

            http://www.springframework.org/schema/mvc/spring-mvc-3.0.xsd

            http://www.springframework.org/schema/context

            http://www.springframework.org/schema/context/spring-context-3.0.xsd">

<!-- 启用 spring 注解 -->

<context:component-scan base-package="test" />

<bean class="org.springframework.web.servlet.mvc.annotation.AnnotationMethodHandlerAdapter"/>

<!-- prefix和suffix:查找视图页面的前缀和后缀(前缀[逻辑视图名]后缀)

    比如传进来的逻辑视图名为hello,则该该jsp视图页面应该存放在“WEB-INF/jsp/hello.jsp” -->

<bean

    class="org.springframework.web.servlet.view.InternalResourceViewResolver">

    <property name="prefix" value="/jsp/" />

    <property name="suffix" value=".jsp" />

</bean>

</beans>
四、applicationContext.xml
即使没有内容也要配置,否则不能运行。
<?xml version="1.0" encoding="UTF-8"?>

<beans xmlns="http://www.springframework.org/schema/beans"

       xmlns:xsi="http://www.w3.org/2001/XMLSchema-instance"

       xmlns:mvc="http://www.springframework.org/schema/mvc"

       xmlns:p="http://www.springframework.org/schema/p"

       xmlns:context="http://www.springframework.org/schema/context"

       xmlns:aop="http://www.springframework.org/schema/aop"

       xmlns:tx="http://www.springframework.org/schema/tx"

       xsi:schemaLocation="http://www.springframework.org/schema/beans

            http://www.springframework.org/schema/beans/spring-beans-3.0.xsd

            http://www.springframework.org/schema/context

            http://www.springframework.org/schema/context/spring-context-3.0.xsd

            http://www.springframework.org/schema/aop

            http://www.springframework.org/schema/aop/spring-aop-3.0.xsd

            http://www.springframework.org/schema/tx

            http://www.springframework.org/schema/tx/spring-tx-3.0.xsd

            http://www.springframework.org/schema/mvc

            http://www.springframework.org/schema/mvc/spring-mvc-3.0.xsd

            http://www.springframework.org/schema/context

            http://www.springframework.org/schema/context/spring-context-3.0.xsd">

</beans>
四、hello.jsp
<%@ page language="java" pageEncoding="UTF-8"%>

<html>

<head>

<title>SpringMVC</title>

</head>

<body>

您好,${user }!

</body>

</html>
五、Controller
package test;

import java.util.Date;

import javax.servlet.http.HttpServletRequest;

import javax.servlet.http.HttpServletResponse;

import org.springframework.stereotype.Controller;

import org.springframework.web.bind.annotation.RequestMapping;

import org.springframework.web.servlet.ModelAndView;

@Controller

//可以配置也可以不配 多一级目录

//@RequestMapping("/hello")

public class HelloController{

    @SuppressWarnings("deprecation")

    public ModelAndView handleRequest(HttpServletRequest request,

            HttpServletResponse response) {

        ModelAndView mv = new ModelAndView();

        // 添加模型数据 可以是任意的POJO对象

        mv.addObject("user", request.getParameter("user") + "-->" + new Date().toLocaleString());

        // 设置逻辑视图名,视图解析器会根据该名字解析到具体的视图页面

        mv.setViewName("hello");

        return mv;

    }

    @SuppressWarnings("deprecation")

    @RequestMapping("/hello")

    public String hello(HttpServletRequest request,HttpServletResponse response){

        request.setAttribute("user", request.getParameter("user") + "-->" + new Date().toLocaleString());

        return "hello";

    }

}
六、tomcat部署好后访问地址
 http://localhost:8080/springMvc/hello.action?user=SpringMMM

 代码见 https://github.com/fangxiongwei007/springMvc
spring MVC 环境搭建的更多相关文章
- Spring MVC 环境搭建(二)
在Spring MVC 环境搭建(一)中我们知道 spring 的配置是通过 urlmapping 映射到控制器,然后通过实现Controller接口的handlerequest方法转向页面. 但这存 ...
- Spring MVC 环境搭建(一)
一.建立 JavaWeb 项目 1.建立一个 Java 项目. 2.在项目下新建一个文件夹 webapp (命名可自取,这个目录即是网站根目录),再在该文件夹下新建一个 WEB-INF 文件夹(命名固 ...
- Spring MVC 环境搭建(maven+SpringMVC+mybatis+Freemarker)
Spring MVC 环境搭建(maven+SpringMVC+mybatis+Freemarker) 一.准备工作 1.Eclipse Java EE IDE(4.4.1) 2.JDK 3.Tomc ...
- Java学习笔记之:Spring MVC 环境搭建
一.创建项目 1.新建java动态项目 2.在web-inf/lib文件夹下导入jar 3.创建所需要的包和文件 二.搭建SpringMVC 1.配置web.xml(WEB-INF下) <?xm ...
- [Spring MVC] - Spring MVC环境搭建
1) 复制Spring所需要的lib包 (这是SSH所需要的lib包,如果只使用spring,可以移除一些包) 2) 配置web.xml <?xml version=" ...
- spring MVC环境搭建
1.新建web项目,并在web.xml加入spring mvc的servlet <!-- spring mvc容器和servlet的定义 --> <servlet> <s ...
- Spring MVC环境搭建和配置
1. 创建Dynamic web project 2. 修改WEB-INF/web.xml,内容如下: <?xml version="1.0" encoding=" ...
- Spring MVC: 环境搭建并实现简易的HelloWorld
第一步:使用配置Tomcat服务器的Eclipse新建一个名为“TestSpringMVC”的web项目 第二步:将所使用的jar包复制到WEB-INF/lib目录下 第三步:在web.xml中配置D ...
- spring mvc 框架搭建及详解
现 在主流的Web MVC框架除了Struts这个主力 外,其次就是Spring MVC了,因此这也是作为一名程序员需要掌握的主流框架,框架选择多了,应对多变的需求和业务时,可实行的方案自然就多了.不 ...
随机推荐
- 201521123081《Java程序设计》 第9周学习总结
1. 本周学习总结 1.1 以你喜欢的方式(思维导图或其他)归纳总结异常相关内容. 参考资料:XMIND 2. 书面作业 本次PTA作业题集 异常 常用异常 Q1. 题目5-1 1.1 截图你的提交结 ...
- Java项目生成Jar文件
打开 Jar 文件向导 Jar 文件向导可用于将项目导出为可运行的 jar 包. 打开向导的步骤为: 在 Package Explorer 中选择你要导出的项目内容.如果你要导出项目中所有的类和资源, ...
- ajax中的suceess函数使用this
今天在写ajax的时候,后台返回数据给前台,可是总是不能把数据正常显示在页面上... 明明已经进入了success函数了,并且在该代码的前后都能够正常执行.. success: function (r ...
- mybatis-basedao的实现
package com.yangwei.shop.dao; import java.util.HashMap; import java.util.List; import java.util.Map; ...
- 基于jquery开发的UI框架整理分析
根据调查得知,现在市场中的UI框架差不多40个左右,不知大家都习惯性的用哪个框架,现在市场中有几款UI框架稍微的成熟一些,也是大家比较喜欢的一种UI框架,那应该是jQuery,有部分UI框架都是根据j ...
- String,StringBuffer,StringBuilder的区别及其源码分析
String,StringBuffer,StringBuilder的区别这个问题几乎是面试必问的题,这里做了一些总结: 1.先来分析一下这三个类之间的关系 乍一看它们都是用于处理字符串的java类,而 ...
- 开源API集成测试工具 Hitchhiker v0.1.3 - 参数化请求
Hitchhiker 是一款开源的 Restful Api 集成测试工具,你可以轻松部署到本地,和你的team成员一起管理Api. 详细介绍请看: http://www.cnblogs.com/bro ...
- php数组合并,反转,去重,添加元素等;
//参数默认值//function abc($a,$b,$c = 0){// echo $a,$b,$c;//}//abc(1,3);//结果等于130://echo "<br> ...
- ObjectSNMP
下面的例子,就是使用ObjectSNMP获取RFC1213-MIB的例子:其中的system和ifTable对象就是对应的SNMPMIB中的system组合interface中的ifTable表. p ...
- java一些问题的思考
1.思考 为什么java规定作为程序入口点的main() 方法静态的? 在java中,main()方法是java应用程序的入口方法,也就是说,程序在运行的时候,第一个执行的方法就是main()方法,这 ...