
openstack--2--控制节点安装mysql和rabbitmq
生产中可以把mysql数据库单独安装到一台机器上,这里因为实验机器有限,就把mysql安装到了控制节点
其实openstack每个组件都可以安装到单独的机器上。
RabbitMQ介绍
RabbitMQ是一个消息队列产品
MQ全称为Message Queue, 消息队列(MQ)是一种应用程序对应用程序的通信方法。应用程序通过读写出入队列的消息(针对应用程序的数据)来通信,而无需专用连接来链接它们。
消息传递指的是程序之间通过在消息中发送数据进行通信,而不是通过直接调用彼此来通信,直接调用通常是用于诸如远程过程调用的技术。排队指的是应用程序通过 队列来通信。
队列的使用除去了接收和发送应用程序同时执行的要求
MQ是消费-生产者模型的一个典型的代表,一端往消息队列中不断写入消息,而另一端则可以读取或者订阅队列中的消息。
消息队列让程序做到异步处理,而这种异步处理的方式大大的节省了服务器的请求响应时间,从而提高了系统的吞吐量。

安装和配置mariadb
大多数 OpenStack 服务使用 SQL 数据库来存储信息。 典型地,数据库运行在控制节点上。OpenStack 服务也支持其他 SQL 数据库,包括PostgreSQL
安装下面3个包。mariadb这里精确到版本号了,是因为最新版的(mariadb-server-10.1.18-3.el7.x86_64.rpm) 安装和一些lib文件有冲突
[root@linux-node1 ~]# yum install mariadb-5.5.52-1.el7.x86_64  -y

Package 1:mariadb-5.5.52-1.el7.x86_64 already installed and latest version

Nothing to do

[root@linux-node1 ~]# yum install mariadb-server-5.5.52-1.el7.x86_64  -y

Package 1:mariadb-server-5.5.52-1.el7.x86_64 already installed and latest version

Nothing to do

[root@linux-node1 ~]# yum install  python2-PyMySQL -y

Package python2-PyMySQL-0.7.9-2.el7.noarch already installed and latest version

Nothing to do
[root@linux-node1 ~]# cat /etc/my.cnf

[mysqld]

datadir=/var/lib/mysql

socket=/var/lib/mysql/mysql.sock

# Disabling symbolic-links is recommended to prevent assorted security risks

symbolic-links=0

# Settings user and group are ignored when systemd is used.

# If you need to run mysqld under a different user or group,

# customize your systemd unit file for mariadb according to the

# instructions in http://fedoraproject.org/wiki/Systemd

[mysqld_safe]

log-error=/var/log/mariadb/mariadb.log

pid-file=/var/run/mariadb/mariadb.pid

#

# include all files from the config directory

#

!includedir /etc/my.cnf.d

[root@linux-node1 ~]#
default-storage-engine = innodb   默认存储引擎innodb

innodb_file_per_table        设置独享的表空间,如果不设置,会是共享表空间

collation-server = utf8_general_ci     校对规则

init-connect = 'SET NAMES utf8'    链接字符集

character-set-server = utf8         数据库建库字符集

max_connections = 4096      最大连接数

bind-address              mysql监听地址
[root@linux-node1 ~]# touch /etc/my.cnf.d/openstack.cnf

[root@linux-node1 ~]# vim /etc/my.cnf.d/openstack.cnf

[root@linux-node1 ~]# cat /etc/my.cnf.d/openstack.cnf

[mysqld]

bind-address = 0.0.0.0

default-storage-engine = innodb

innodb_file_per_table

max_connections = 4096

collation-server = utf8_general_ci

character-set-server = utf8

[root@linux-node1 ~]#
[root@linux-node1 ~]# systemctl enable mariadb.service

Created symlink from /etc/systemd/system/multi-user.target.wants/mariadb.service to /usr/lib/systemd/system/mariadb.service.

[root@linux-node1 ~]# systemctl start mariadb.service

[root@linux-node1 ~]#
[root@linux-node1 ~]# netstat -lntp | grep 3306

tcp        0      0 0.0.0.0:3306            0.0.0.0:*               LISTEN      1965/mysqld

[root@linux-node1 ~]#
为了保证数据库服务的安全性,运行mysql_secure_installation脚本,进行一些安全方面的配置,删除匿名用户,删除test库,设置root密码等
[root@linux-node1 ~]# mysql_secure_installation

NOTE: RUNNING ALL PARTS OF THIS SCRIPT IS RECOMMENDED FOR ALL MariaDB

      SERVERS IN PRODUCTION USE!  PLEASE READ EACH STEP CAREFULLY!

In order to log into MariaDB to secure it, we'll need the current

password for the root user.  If you've just installed MariaDB, and

you haven't set the root password yet, the password will be blank,

so you should just press enter here.

Enter current password for root (enter for none):

OK, successfully used password, moving on...

Setting the root password ensures that nobody can log into the MariaDB

root user without the proper authorisation.

Set root password? [Y/n] Y

New password:

Re-enter new password:

Password updated successfully!

Reloading privilege tables..

 ... Success!

By default, a MariaDB installation has an anonymous user, allowing anyone

to log into MariaDB without having to have a user account created for

them.  This is intended only for testing, and to make the installation

go a bit smoother.  You should remove them before moving into a

production environment.

Remove anonymous users? [Y/n] Y

 ... Success!

Normally, root should only be allowed to connect from 'localhost'.  This

ensures that someone cannot guess at the root password from the network.

Disallow root login remotely? [Y/n] Y

 ... Success!

By default, MariaDB comes with a database named 'test' that anyone can

access.  This is also intended only for testing, and should be removed

before moving into a production environment.

Remove test database and access to it? [Y/n] Y

 - Dropping test database...

 ... Success!

 - Removing privileges on test database...

 ... Success!

Reloading the privilege tables will ensure that all changes made so far

will take effect immediately.

Reload privilege tables now? [Y/n] Y

 ... Success!

Cleaning up...

All done!  If you've completed all of the above steps, your MariaDB

installation should now be secure.

Thanks for using MariaDB!

[root@linux-node1 ~]#
Openstack组件建库和授权
建库和授权,之前说过,除了Horizon,其它组件都用到了数据库。 可以在安装响应组件之前建库和授权。
这里我们提前建好,复制下面语句,直接在命令行执行即可,注意root密码根据自己的密码。
这里M版本的openstack,除了新建nova库,还需要新建一个nova_api库。
mysql -u root -p123456 -e "CREATE DATABASE keystone;"

mysql -u root -p123456 -e "GRANT ALL  ON keystone.* TO 'keystone'@'localhost' IDENTIFIED BY 'keystone';"

mysql -u root -p123456 -e "GRANT ALL  ON keystone.* TO 'keystone'@'%' IDENTIFIED BY 'keystone';"

mysql -u root -p123456 -e "CREATE DATABASE glance;"

mysql -u root -p123456 -e "GRANT ALL  ON glance.* TO 'glance'@'localhost' IDENTIFIED BY 'glance';"

mysql -u root -p123456 -e "GRANT ALL  ON glance.* TO 'glance'@'%' IDENTIFIED BY 'glance';"

mysql -u root -p123456 -e "CREATE DATABASE nova;"

mysql -u root -p123456 -e "GRANT ALL  ON nova.* TO 'nova'@'localhost' IDENTIFIED BY 'nova';"

mysql -u root -p123456 -e "GRANT ALL  ON nova.* TO 'nova'@'%' IDENTIFIED BY 'nova';"

mysql -u root -p123456 -e "CREATE DATABASE nova_api;"

mysql -u root -p123456 -e "GRANT ALL  ON nova_api.* TO 'nova'@'localhost' IDENTIFIED BY 'nova';"

mysql -u root -p123456 -e "GRANT ALL  ON nova_api.* TO 'nova'@'%' IDENTIFIED BY 'nova';"

mysql -u root -p123456 -e "CREATE DATABASE neutron;"

mysql -u root -p123456 -e "GRANT ALL  ON neutron.* TO 'neutron'@'localhost' IDENTIFIED BY 'neutron';"

mysql -u root -p123456 -e "GRANT ALL  ON neutron.* TO 'neutron'@'%' IDENTIFIED BY 'neutron';"
检查库和用户
[root@linux-node1 ~]# mysql -u root -p123456 -e "show databases ;" |egrep "glance|keystone|neutron|nova|nova_api"

glance

keystone

neutron

nova

nova_api

[root@linux-node1 ~]# mysql -u root -p123456 -e "select user,host from mysql.user ;" |egrep "cinder|glance|keystone|neutron|nova"

glance	%

keystone	%

neutron	%

nova	%

glance	localhost

keystone	localhost

neutron	localhost

nova	localhost

[root@linux-node1 ~]#
OpenStack 使用 message queue 协调操作和各服务的状态信息。消息队列服务一般运行在控制节点上。OpenStack支持好几种消息队列服务包括 RabbitMQ, Qpid, 和 ZeroMQ。
不过,大多数发行版本的OpenStack包支持特定的消息队列服务。本指南安装 RabbitMQ 消息队列服务,因为大部分发行版本都支持它。
1. 安装包:
yum install rabbitmq-server -y
2. 启动消息队列服务并将其配置为随系统启动:
systemctl enable rabbitmq-server.service

systemctl start rabbitmq-server.service
3. 添加 openstack 用户,并设置密码(这里我实验环境设置密码也是openstack):
rabbitmqctl add_user openstack openstack
4. 给openstack用户配置写和读权限:
rabbitmqctl set_permissions openstack ".*" ".*" ".*"
[root@linux-node1 ~]# systemctl enable rabbitmq-server.service

Created symlink from /etc/systemd/system/multi-user.target.wants/rabbitmq-server.service to /usr/lib/systemd/system/rabbitmq-server.service.

[root@linux-node1 ~]# systemctl start rabbitmq-server.service

[root@linux-node1 ~]# rabbitmqctl add_user openstack openstack

Creating user "openstack" ...

[root@linux-node1 ~]# rabbitmqctl set_permissions openstack ".*" ".*" ".*"

Setting permissions for user "openstack" in vhost "/" ...

[root@linux-node1 ~]#
[root@linux-node1 ~]# netstat -lntp

Active Internet connections (only servers)

Proto Recv-Q Send-Q Local Address           Foreign Address         State       PID/Program name

tcp        0      0 0.0.0.0:25672           0.0.0.0:*               LISTEN      2607/beam.smp

tcp        0      0 0.0.0.0:3306            0.0.0.0:*               LISTEN      1580/mysqld

tcp        0      0 0.0.0.0:111             0.0.0.0:*               LISTEN      1/systemd

tcp        0      0 0.0.0.0:4369            0.0.0.0:*               LISTEN      1/systemd

tcp        0      0 192.168.122.1:53        0.0.0.0:*               LISTEN      1656/dnsmasq

tcp        0      0 0.0.0.0:22              0.0.0.0:*               LISTEN      1158/sshd

tcp6       0      0 :::5672                 :::*                    LISTEN      2607/beam.smp

tcp6       0      0 :::111                  :::*                    LISTEN      1/systemd

tcp6       0      0 :::22                   :::*                    LISTEN      1158/sshd

[root@linux-node1 ~]#
rabbitmq默认带了个web的插件,可以通过web来看rabbit的状态
它有下面这么多插件
列出rabbitmq的插件:
[root@linux-node1 ~]#  rabbitmq-plugins list

 Configured: E = explicitly enabled; e = implicitly enabled

 | Status:   * = running on rabbit@linux-node1

 |/

[  ] amqp_client                       3.6.5

[  ] cowboy                            1.0.3

[  ] cowlib                            1.0.1

[  ] mochiweb                          2.13.1

[  ] rabbitmq_amqp1_0                  3.6.5

[  ] rabbitmq_auth_backend_ldap        3.6.5

[  ] rabbitmq_auth_mechanism_ssl       3.6.5

[  ] rabbitmq_consistent_hash_exchange 3.6.5

[  ] rabbitmq_event_exchange           3.6.5

[  ] rabbitmq_federation               3.6.5

[  ] rabbitmq_federation_management    3.6.5

[  ] rabbitmq_jms_topic_exchange       3.6.5

[  ] rabbitmq_management               3.6.5

[  ] rabbitmq_management_agent         3.6.5

[  ] rabbitmq_management_visualiser    3.6.5

[  ] rabbitmq_mqtt                     3.6.5

[  ] rabbitmq_recent_history_exchange  1.2.1

[  ] rabbitmq_sharding                 0.1.0

[  ] rabbitmq_shovel                   3.6.5

[  ] rabbitmq_shovel_management        3.6.5

[  ] rabbitmq_stomp                    3.6.5

[  ] rabbitmq_top                      3.6.5

[  ] rabbitmq_tracing                  3.6.5

[  ] rabbitmq_trust_store              3.6.5

[  ] rabbitmq_web_dispatch             3.6.5

[  ] rabbitmq_web_stomp                3.6.5

[  ] rabbitmq_web_stomp_examples       3.6.5

[  ] sockjs                            0.3.4

[  ] webmachine                        1.10.3

[root@linux-node1 ~]#
开机自启动rabbitmq的管理插件(这些官方文档没有):
[root@linux-node1 ~]#  rabbitmq-plugins enable rabbitmq_management

The following plugins have been enabled:

  mochiweb

  webmachine

  rabbitmq_web_dispatch

  amqp_client

  rabbitmq_management_agent

  rabbitmq_management

Applying plugin configuration to rabbit@linux-node1... started 6 plugins.

[root@linux-node1 ~]#
[root@linux-node1 ~]# systemctl restart rabbitmq-server.service

[root@linux-node1 ~]#
[root@linux-node1 ~]# netstat -lntp

Active Internet connections (only servers)

Proto Recv-Q Send-Q Local Address           Foreign Address         State       PID/Program name

tcp        0      0 0.0.0.0:25672           0.0.0.0:*               LISTEN      3455/beam.smp

tcp        0      0 0.0.0.0:3306            0.0.0.0:*               LISTEN      1965/mysqld

tcp        0      0 0.0.0.0:111             0.0.0.0:*               LISTEN      1/systemd

tcp        0      0 0.0.0.0:4369            0.0.0.0:*               LISTEN      1/systemd

tcp        0      0 192.168.122.1:53        0.0.0.0:*               LISTEN      1337/dnsmasq

tcp        0      0 0.0.0.0:22              0.0.0.0:*               LISTEN      1153/sshd

tcp        0      0 0.0.0.0:15672           0.0.0.0:*               LISTEN      3455/beam.smp

tcp        0      0 127.0.0.1:25            0.0.0.0:*               LISTEN      1277/master

tcp6       0      0 :::5672                 :::*                    LISTEN      3455/beam.smp

tcp6       0      0 :::111                  :::*                    LISTEN      1/systemd

tcp6       0      0 :::22                   :::*                    LISTEN      1153/sshd

tcp6       0      0 ::1:25                  :::*                    LISTEN      1277/master

[root@linux-node1 ~]#
用户名 guest 密码 guest
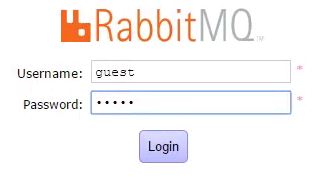
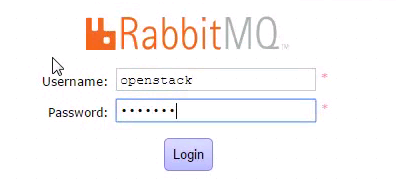
现在使用openstack用户是无法登录的
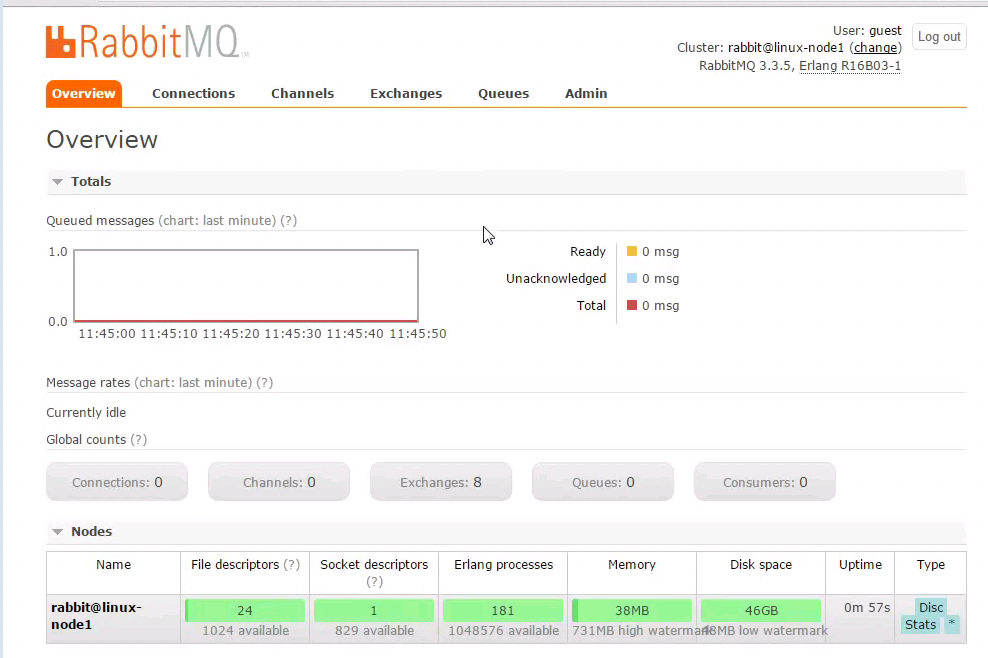

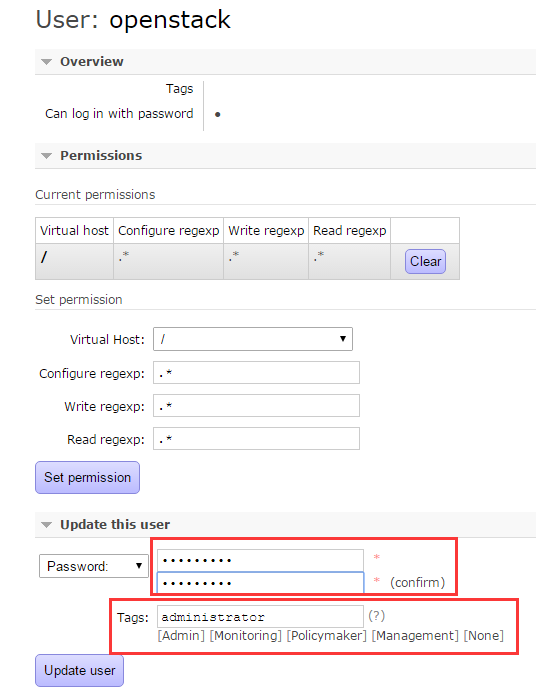
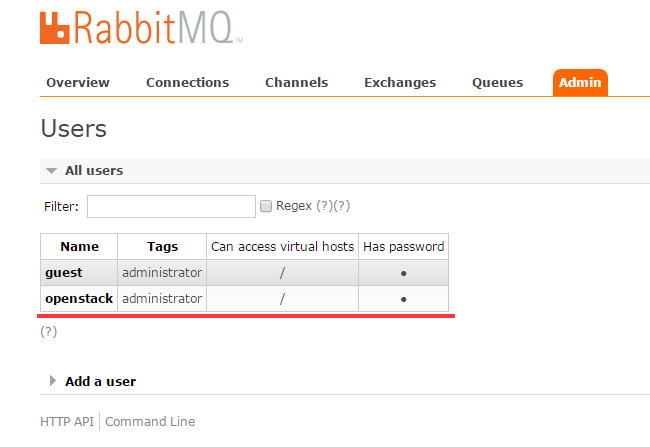

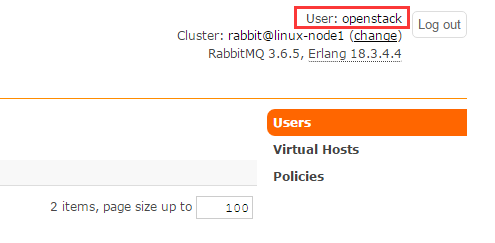

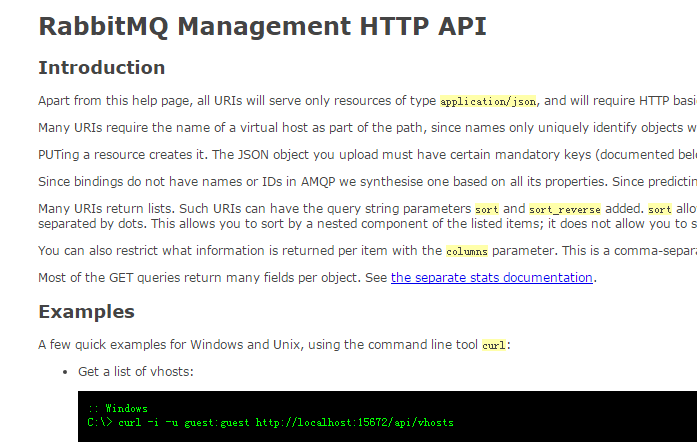
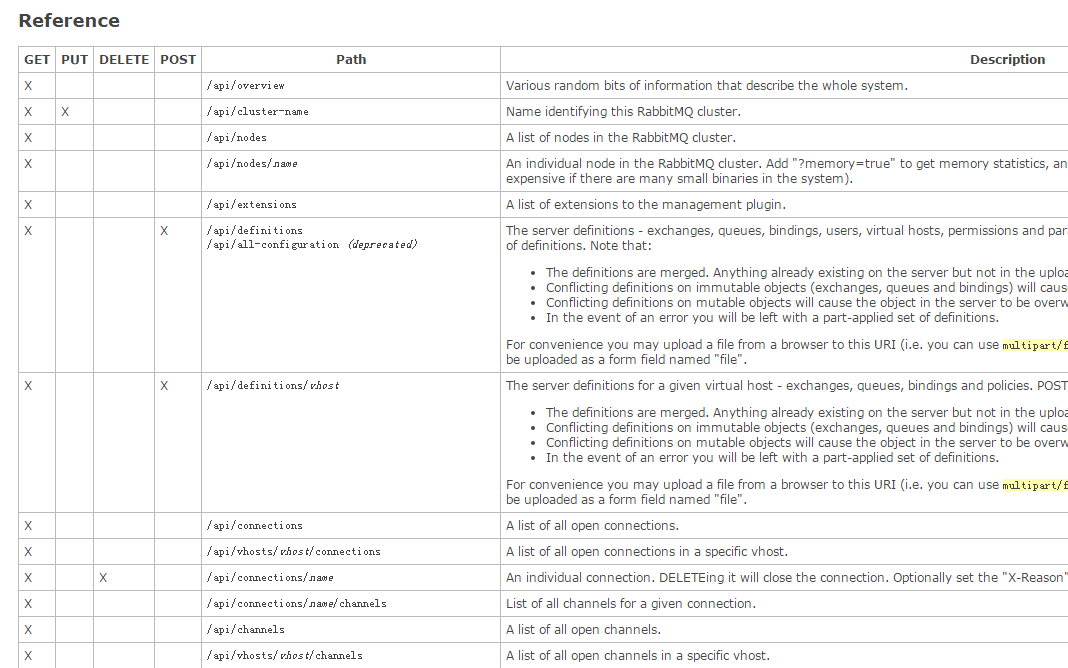
点击进去,看到如下所示,暂时和我们的实验无关。就不深入研究它了
[root@linux-node1 ~]# yum install ntpdate -y

[root@linux-node1 ~]# ntpdate time1.aliyun.com

17 Feb 16:32:15 ntpdate[3951]: adjust time server 115.28.122.198 offset 0.010747 sec

[root@linux-node1 ~]# ntpdate time1.aliyun.com

17 Feb 16:32:28 ntpdate[3962]: adjust time server 115.28.122.198 offset 0.007115 sec

[root@linux-node1 ~]# date

Fri Feb 17 16:32:29 CST 2017

[root@linux-node1 ~]#
openstack--2--控制节点安装mysql和rabbitmq的更多相关文章
- openstack grizzly版cloud控制节点安装
openstack-ubuntu-create 参考官方文档 三个节点:cloud :控制节点内网:10.10.10.10外网:172.16.56.252 network:网络节点内网:10.10.1 ...
- OpenStack之三: 安装MySQL,rabbitmq, memcached
官网地址:https://docs.openstack.org/install-guide/environment-sql-database-rdo.html #:安装mysql [root@mysq ...
- 安装Rocky版OpenStack 1控制节点+1计算节点环境部署脚本
在上一篇文章中叙述了具体的安装部署过程,在这里把相应的部署脚本写出来,供大家参考: 一.执行部署的setup.sh脚本: #!/bin/bash ########################### ...
- 脚本安装Rocky版OpenStack 1控制节点+1计算节点环境部署
视频安装指南请访问: http://39.96.203.138/wordpress/document/%E8%84%9A%E6%9C%AC%E5%AE%89%E8%A3%85rocky%E7%89%8 ...
- openstack的控制节点部署
openstack的控制节点部署 主要是使用了本地安装的那个镜像. 会出现几个问题, 1.重启服务无法启动. 2.环境变量无法正确配置可以自己配置
- Openstak(M版)控制节点安装
#############修改hosts文件 # controller10.0.0.11 controller# compute110.0.0.31 compute1# block110.0.0.41 ...
- Kubernetes控制节点安装配置
#环境安装Centos 7 Linux release 7.3.1611网络: 互通配置主机名设置各个服务器的主机名hosts#查找kubernetes支持的docker版本Kubernetes v1 ...
- openstack ocata版(脚本)控制节点安装
一.初始化环境: 1.更换yum源: yum install -y wget mv /etc/yum.repos.d/CentOS-Base.repo /etc/yum.repos.d/CentOS- ...
- CentOS7安装OpenStack(Rocky版)-01.控制节点的系统环境准备
分享一下Rocky版本的OpenStack安装管理经验: OpenStack每半年左右更新一版,目前是版本是201808月发布的版本-R版(Rocky),目前版本安装方法优化较好,不过依然是比较复杂 ...
随机推荐
- fk makefile文件的一些问题
除了要按具神说的makefile修改之外,还发现了另外一个问题: 不然就改成SACLIB=-L/usr/local/sac/lib
- Problem D: 求(x-y+z)*2
Description 编写一个程序,求解以下三个函数: f(x,y,z)=2*(x-y+z) f(x,y) =2*(x-y) f(x) =2*(x-1) 函数调用格式见append.cc. ...
- 一个灵活的AssetBundle打包工具
尼尔:机械纪元 上周介绍了Unity项目中的资源配置,今天和大家分享一个AssetBundle打包工具.相信从事Unity开发或多或少都了解过AssetBundle,但简单的接口以及众多的细碎问题 ...
- javascript前进、后退、刷新的实现
go(-1): 返回上一页, 原页面表单中的内容会丢失; back(-1): 返回上一页, 原页表表单中的内容会保留. <input type=button value=刷新 onclick=& ...
- Tap 模拟手势点击坐标
前言:有时候元素怎么都定位不到,没办法就只能坐标定位了,不过这个坐标定位不准确,换个手机就可能定位不到了,这是一个下下策的定位方式. tap用法 1.tap是模拟手指点击页面上元素语法有两个参数,第一 ...
- chromium ⑤
我们都知道chromium是用webkit完成页面显示的, 那么chromium是怎样集成和封装webkit的呢? 是怎样将webkit整合到自己的框架中,并将一个页面渲染出来的? 这篇我 ...
- OSPF路由协议(一)
实验要求:使用OSPF协议,使各个PC之间能够相互通信 拓扑如下: 配置如下: R1enableconfigure terminal interface f0/0ip address 192.168. ...
- C语音,关于可变参数的宏定义
typedef char * va_list; // TC中定义为void* //为了满足需要内存对齐的系统 #define _INTSIZEOF(n) ((sizeof(n)+sizeof(int) ...
- base标签对svg的影响
页面地址:http://127.0.0.1:8080/fullLink_node.html?project_id=2 base:<base href="http://127.0.0.1 ...
- templates的语法
1.变量 1.作用:将后端的数据传递到模板进行显示 2.允许作为变量的数据类型 字符串,整数,列表,元组,字典,函数,对象 3.变量的语法 变量传递给前端必须要封装到字典中才能传递给模板 1.使用 l ...