ActiveMQ配置文档
本文介绍一对一、一对多、持久化、非持久化消息配置方式
一、创建项目
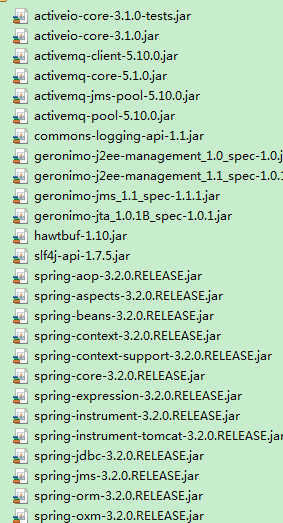
导入jar

二、创建MQ.xml
    <!-- 配置JMS连接工厂 -->

    <bean id="connectionFactory" class="org.apache.activemq.ActiveMQConnectionFactory">

        <property name="brokerURL" value="failover:(tcp://192.168.1.168:61616)" />

    </bean>
集群MQ时value="failover:(tcp://192.168.1.87:61616, tcp://192.168.1.87:61616,tcp://192.168.1.87:61616)
三、队列queue模式(一对一模式)
此模式是一对一的,每条消息只能被一个人使用,类似QQ私聊,其他人看不到消息
1.监听模式
当有消息发出时,会自动接收
①在上面创建的MQ.xml配置文件中添加
    <!-- 定义消息队列(Queue),监听一个新的队列,queue2 -->

    <bean id="queueDestination2" class="org.apache.activemq.command.ActiveMQQueue">

        <!-- 设置消息队列的名字 -->

        <constructor-arg>

            <value>queue2</value>

        </constructor-arg>

    </bean>

    <!-- 配置JMS模板(Queue),Spring提供的JMS工具类,它发送、接收消息。 -->

    <bean id="jmsTemplate" class="org.springframework.jms.core.JmsTemplate">

        <property name="connectionFactory" ref="connectionFactory" />

        <property name="defaultDestination" ref="queueDestination2" />

        <property name="receiveTimeout" value="10000" />

    </bean>

    <!--queue消息生产者 -->

    <bean id="producerService" class="com.sh.test.Jms_send">

        <property name="jmsTemplate" ref="jmsTemplate"></property>

    </bean>

    <!-- 配置消息队列监听者(Queue),代码下面给出,只有一个onMessage方法 -->

    <bean id="queueMessageListener" class="com.sh.test.Jms_jie_auto" />

    <!-- 消息监听容器(Queue),配置连接工厂,监听的队列是queue2,监听器是上面定义的监听器 -->

    <bean id="jmsContainer"

        class="org.springframework.jms.listener.DefaultMessageListenerContainer">

        <property name="connectionFactory" ref="connectionFactory" />

        <property name="destination" ref="queueDestination2" />

        <property name="messageListener" ref="queueMessageListener" />

    </bean>
“queueMessageListener”这个class需在项目中写,实例下面有
②创建一个类Jms_jie_auto.java,添加接收消息代码
package com.sh.test;

import javax.jms.JMSException;

import javax.jms.Message;

import javax.jms.MessageListener;

import javax.jms.TextMessage;

public class Jms_jie_auto implements MessageListener {

     //当收到消息时,自动调用该方法。

    public void onMessage(Message message) {

        TextMessage tm = (TextMessage) message;

        try {

            System.out.println("ConsumerMessageListener收到了文本消息:\t"+ tm.getText());

        } catch (JMSException e) {

            e.printStackTrace();

        }

    }

}
③创建一个类Jms_send.java添加发送消息代码
package com.sh.test;

import javax.jms.Destination;

import javax.jms.JMSException;

import javax.jms.Message;

import javax.jms.Session;

import javax.jms.TextMessage;

import org.springframework.jms.core.JmsTemplate;

import org.springframework.jms.core.MessageCreator;

public class Jms_send implements ProducerService{

      private JmsTemplate jmsTemplate;

      public void setJmsTemplate(JmsTemplate jmsTemplate) {

            this.jmsTemplate = jmsTemplate;

      }

      /**

       * 向指定队列发送消息

       */

      public void sendMessage(Destination destination, final String msg) {

        System.out.println("向队列" + destination.toString() + "发送了消息------------" + msg);

        jmsTemplate.send(destination, new MessageCreator() {

          public Message createMessage(Session session) throws JMSException {

            return session.createTextMessage(msg);

          }

        });

      }

    /**

     * 向默认队列发送消息

     */

      public void sendMessage(final String msg) {

        String destination =  jmsTemplate.getDefaultDestination().toString();

        System.out.println("向队列" +destination+ "发送了消息------------" + msg);

        jmsTemplate.send(new MessageCreator() {

          public Message createMessage(Session session) throws JMSException {

            return session.createTextMessage(msg);

          }

        });

      }

      public void sendMessage(Destination destination, final String msg, final Destination response) {

            System.out.println("ProducerService向队列" + destination + "发送了消息:\t" + msg);

            jmsTemplate.send(destination, new MessageCreator() {

              public Message createMessage(Session session) throws JMSException {

                TextMessage textMessage = session.createTextMessage(msg);

                textMessage.setJMSReplyTo(response);

                return textMessage;

              }

            });

      }

}
④创建ProducerService.java,发送消息实体类
package com.sh.test;

import javax.jms.Destination;

public interface ProducerService {

     /**

       * 发消息,向默认的 destination

       *

       * @param msg String 消息内容

       */

      public void sendMessage(String msg);

      /**

       * 发消息,向指定的 destination

       *

       * @param destination 目的地

       * @param msg String 消息内容

       */

      public void sendMessage(Destination destination, String msg);

      /**

       * 发消息,向指定的 destination

       *

       * @param destination 目的地

       * @param msg String 消息内容

       */

      /**

       * 向指定的destination发送消息,消费者接受消息后,把回复的消息写到response队列

       *

       * @param destination 目的地

       * @param msg String 消息内容

       * @param response 回复消息的队列

       */

      public void sendMessage(Destination destination, String msg, Destination response);

}
⑤创建Jms_test.java,发送消息测试方法
package com.sh.test;

import javax.jms.Destination;

import javax.jms.JMSException;

import javax.jms.Message;

import javax.jms.Session;

import javax.servlet.http.HttpServletRequest;

import javax.servlet.http.HttpServletResponse;

import org.springframework.beans.factory.annotation.Autowired;

import org.springframework.beans.factory.annotation.Qualifier;

import org.springframework.jms.core.JmsTemplate;

import org.springframework.jms.core.MessageCreator;

import org.springframework.stereotype.Controller;

import org.springframework.web.bind.annotation.RequestMapping;

import org.springframework.web.bind.annotation.RequestMethod;

import org.springframework.web.servlet.ModelAndView;

@Controller

public class Jms_test {

    /**

     * 队列名queue2-监听模式队列

     */

    @Autowired

    private Destination queueDestination2;

    /**

     * 队列消息生产者

     */

    @Autowired

    @Qualifier("producerService")

    private ProducerService producer;

    /**

     * 测试生产者向queue1发送消息

     */

    @RequestMapping(value="/shengchanzhe",method=RequestMethod.GET)

    public ModelAndView testProduce(HttpServletRequest request, HttpServletResponse response) {

        String msg = "Hello world!";

        producer.sendMessage(queueDestination2, msg+":auto");//监听模式队列,发送消息后在jms_jie_auto中自动出发事件

        return null;

    }

}
执行结果

2.非监听模式
此模式当有消息进入指定队列时,需调用方法接收消息
①在上面创建的MQ.xml配置文件中添加
注意:如果是在上面配置的基础上添加,只需添加下面代码中的queueDestination和consumerService
<!-- 定义消息队列(Queue) -->

    <bean id="queueDestination" class="org.apache.activemq.command.ActiveMQQueue">

        <!-- 设置消息队列的名字 -->

        <constructor-arg>

            <value>queue1</value>

        </constructor-arg>

    </bean>

    <!-- 配置JMS模板(Queue),Spring提供的JMS工具类,它发送、接收消息。 -->

    <bean id="jmsTemplate" class="org.springframework.jms.core.JmsTemplate">

        <property name="connectionFactory" ref="connectionFactory" />

        <property name="defaultDestination" ref="queueDestination" />

        <property name="receiveTimeout" value="10000" />

    </bean>

    <!--queue消息生产者 -->

    <bean id="producerService" class="com.sh.test.Jms_send">

        <property name="jmsTemplate" ref="jmsTemplate"></property>

    </bean>

    <!--queue消息消费者 -->

    <bean id="consumerService" class="com.sh.test.Jms_jie_notauto">

        <property name="jmsTemplate" ref="jmsTemplate"></property>

    </bean>
②添加Jms_jie_notauto.java,接收消息代码
package com.sh.test;

import javax.jms.Destination;

import javax.jms.JMSException;

import javax.jms.TextMessage;

import org.springframework.jms.core.JmsTemplate;

/**

 * 接收jms消息,非监听模式

 * @author Administrator

 *

 */

public class Jms_jie_notauto implements ConsumerService {

    private JmsTemplate jmsTemplate;

    public void setJmsTemplate(JmsTemplate jmsTemplate) {

        this.jmsTemplate = jmsTemplate;

    }

    /**

     * 接受消息

     */

    public void receive(Destination destination) {

        TextMessage tm = (TextMessage) jmsTemplate.receive(destination);

        try {

            System.out.println("从队列" + destination.toString() + "收到了消息:\t"

                    + tm.getText());

        } catch (JMSException e) {

            e.printStackTrace();

        }

    }

}
③添加ConsumerService.java,消费消息的类
package com.sh.test;

import javax.jms.Destination;

public interface ConsumerService {

     public void receive(Destination queueDestination);

}
④发送消息测试方法,在上面Jms_test.java 中添加
    /**

     * 测试生产者向queue1发送消息

     */

    @RequestMapping(value="/shengchanzhe",method=RequestMethod.GET)

    public ModelAndView testProduce(HttpServletRequest request, HttpServletResponse response) {

        String msg = "Hello world!";

        producer.sendMessage(queueDestination, msg); //非监听模式队列,发送消息后需调用testConsume()方法接收

        return null;

    }
⑤接收消息测试方法,在上面Jms_test.java 中添加,分别执行shengchanzhe,fjt_jieshouzhe,即可看到结果
    /**

     * 队列消息接收者

     */

    @Autowired

    @Qualifier("consumerService")

    private ConsumerService consumer;

    /**

     * 队列名queue1-非监听模式队列

     */

    @Autowired

    private Destination queueDestination;

/**

     * 非监听模式,测试消费者从queue1接受消息

     */

    @RequestMapping(value="/fjt_jieshouzhe",method=RequestMethod.GET)

    public ModelAndView testConsume(HttpServletRequest request, HttpServletResponse response) {

        consumer.receive(queueDestination);

        return null;

    }
四、订阅topic模式(一对多)
此模式是一对多的,每条消息能被多个人使用,类似QQ群聊
①在上面创建的MQ.xml配置文件中添加
<!-- 定义消息主题(Topic) -->

    <bean id="topicDestination" class="org.apache.activemq.command.ActiveMQTopic">

        <constructor-arg>

            <value>topic_name</value>

        </constructor-arg>

    </bean>

    <!-- 配置JMS模板(Topic),pubSubDomain="true"-->

    <bean id="topicJmsTemplate" class="org.springframework.jms.core.JmsTemplate">

        <property name="connectionFactory" ref="connectionFactory" />

        <property name="defaultDestination" ref="topicDestination" />

        <property name="pubSubDomain" value="true" /><!-- 此项关了就变成了队列模式 -->

        <property name="receiveTimeout" value="10000" />

    </bean>

    <!--topic消息发布者 -->

    <bean id="topicProvider" class="com.sh.test.Jms_topic_send">

        <property name="topicJmsTemplate" ref="topicJmsTemplate"></property>

    </bean>

    <!-- 消息主题监听者 和 主题监听容器 可以配置多个,即多个订阅者 -->

    <!-- 消息主题监听者(Topic) -->

    <bean id="topicMessageListener" class="com.sh.test.Jms_topic_jie" />

    <!-- 主题监听容器 (Topic) -->

    <bean id="topicJmsContainer"

        class="org.springframework.jms.listener.DefaultMessageListenerContainer">

        <property name="connectionFactory" ref="connectionFactory" />

        <property name="destination" ref="topicDestination" />

        <property name="messageListener" ref="topicMessageListener" />

    </bean>
②添加Jms_topic_jie.java 接收信息代码
package com.sh.test;

import javax.jms.JMSException;

import javax.jms.Message;

import javax.jms.MessageListener;

import javax.jms.TextMessage;

/**

 * 订阅者监听端,代码和队列监听一样,需要把这个类配置到xml配置到订阅配置中

 * @author Administrator

 *

 */

public class Jms_topic_jie implements MessageListener {

    public void onMessage(Message message) {

        TextMessage tm = (TextMessage) message;

        try {

            System.out.println("TopicMessageListener \t" + tm.getText());

        } catch (JMSException e) {

            e.printStackTrace();

        }

    }

}
③添加Jms_topic_send.java,发送代码
package com.sh.test;

import javax.jms.Destination;

import javax.jms.JMSException;

import javax.jms.Message;

import javax.jms.Session;

import org.springframework.jms.core.JmsTemplate;

import org.springframework.jms.core.MessageCreator;

/**

 * 发布订阅消息

 * @author Administrator

 *

 */

public class Jms_topic_send {

    private JmsTemplate topicJmsTemplate;

    /**

     * 向指定的topic发布消息

     *

     * @param topic

     * @param msg

     */

    public void publish(final Destination topic, final String msg) {

        topicJmsTemplate.send(topic, new MessageCreator() {

            public Message createMessage(Session session) throws JMSException {

                System.out.println("topic name 是" + topic.toString()

                        + ",发布消息内容为:\t" + msg);

                return session.createTextMessage(msg);

            }

        });

    }

    public void setTopicJmsTemplate(JmsTemplate topicJmsTemplate) {

        this.topicJmsTemplate = topicJmsTemplate;

    }

}
④发送消息测试方法,在上面Jms_test.java 中添加
/**

     * 订阅队列 topic_name

     */

    @Autowired

    @Qualifier("topicDestination")

    private Destination topic;

    /**

     * 订阅消息发布者

     */

    @Autowired

    private Jms_topic_send topicProvider;

    /**

     * 发布订阅消息,发布后自动在jms_topic_jie中接收

     */

    @RequestMapping(value="/sendDy",method=RequestMethod.GET)

    public ModelAndView sendDingYue(HttpServletRequest request, HttpServletResponse response){

        for(int i=0;i<11;i++){

            topicProvider.publish(topic, "订阅发布"+i);

        }

        return null;

    }
以上配置是非持久化订阅,既发送发在接收方服务器关闭情况下发送消息,接收方启动后是无法收到的,下面是持久化订阅
替换上面xml中对应配置即可
   <!-- 配置JMS模板(Topic),pubSubDomain="true"-->

    <bean id="topicJmsTemplate" class="org.springframework.jms.core.JmsTemplate">

        <property name="connectionFactory" ref="connectionFactory" />

        <property name="defaultDestination" ref="topicDestination" />

        <property name="pubSubDomain" value="true" /><!-- 此项关了就变成了队列模式 -->

        <property name="receiveTimeout" value="10000" />

        <!--设置持久化:1,非持久化;2,持久化-->

        <property name="deliveryMode" value="2" />

         <!-- deliveryMode, priority, timeToLive 的开关,要生效,必须配置为true,默认false -->

        <property name="explicitQosEnabled" value="true" />

    </bean>

 <!-- 主题监听容器 (Topic) -->

    <bean id="topicJmsContainer"

        class="org.springframework.jms.listener.DefaultMessageListenerContainer">

        <property name="connectionFactory" ref="connectionFactory" />

        <property name="destination" ref="topicDestination" />

        <property name="messageListener" ref="topicMessageListener" />

        <!-- 持久化订阅 start -->

        <property name="subscriptionDurable" value="true" />

        <property name="pubSubDomain" value="true" />

        <property name="clientId" value="clientId_001" /> <!-- id唯一 -->

        <property name="durableSubscriptionName" value="clientId_001" />

        <!-- 持久化订阅 end -->

    </bean>
有问题(BUG)请反馈,谢谢
ActiveMQ配置文档的更多相关文章
- ActiveMQ+Zookeeper集群配置文档
Zookeeper + ActiveMQ 集群整合配置文档 一:使用ZooKeeper实现的MasterSlave实现方式 是对ActiveMQ进行高可用的一种有效的解决方案, 高可用的原理:使用Zo ...
- MYSQL服务器my.cnf配置文档详解
MYSQL服务器my.cnf配置文档详解 硬件:内存16G [client] port = 3306 socket = /data/3306/mysql.sock [mysql] no-auto-re ...
- 转!!Java代码规范、格式化和checkstyle检查配置文档
为便于规范各位开发人员代码.提高代码质量,研发中心需要启动代码评审机制.为了加快代码评审的速度,减少不必要的时间,可以加入一些代码评审的静态检查工具,另外需要为研发中心配置统一的编码模板和代码格式化模 ...
- Hibernate配置文档详解
Hibernate配置文档有框架总部署文档hibernate.cfg.xml 和映射类的配置文档 ***.hbm.xml hibernate.cfg.xml(文件位置直接放在src源文件夹即可) (在 ...
- Java代码规范、格式化和checkstyle检查配置文档
http://www.blogjava.net/amigoxie/archive/2014/05/31/414287.html 文件下载: http://files.cnblogs.com/files ...
- Spring Hibernate4 整合配置文档
1 applicationContext.xml配置文档 <?xml version="1.0" encoding="UTF-8"?><bea ...
- Kerberos主从配置文档
Kerberos主从配置文档 1. Kerberos主从同步机制 在Master上通过以下命令同步数据: kdb5_util dump /var/kerberos/krb5kdc/slave_db ...
- python常用模块-配置文档模块(configparser)
python常用模块-配置文档模块(configparser) 作者:尹正杰 版权声明:原创作品,谢绝转载!否则将追究法律责任. ConfigParser模块用于生成和修改常见配置文档,当前模块的名称 ...
- azkaban编译安装配置文档
azkaban编译安装配置文档 参考官方文档: http://azkaban.github.io/azkaban/docs/latest/ azkaban的配置文件说明:http://azkaban. ...
随机推荐
- oppo 手机不能连接appium,提示does not have permission android.permission.CLEAR_APP_USER_DATA to clear data
1)增加配置项noReset=true 2)除了常见开发者选项中打开usb调试,同时还需要开启以下2项,然后重启手机即可
- 帝国 cms 修改登录次数的两种方法
1.找到数据库表 注:我把这里的5改成50了. 2.找打e ==>> config ==>> config.php ==>> loginnum的5修改一下即可
- 第四篇 HTML 表单深入了解、注释和a标签的运用
表单深入了解.注释和a标签的运用 注释,HTML中的注释格式: 开头 <!-- 结束 --> 例子: <!-- <div>我被注释了</div> - ...
- Python爬虫之简单爬虫框架实现
简单爬虫框架实现 目录 框架流程 调度器url管理器 网页下载器 网页解析器 数据处理器 具体演示效果 框架流程 调度器 #导入模块 import Url_Manager import parser_ ...
- SSD源码解读——损失函数的构建
之前,对SSD的论文进行了解读,可以回顾之前的博客:https://www.cnblogs.com/dengshunge/p/11665929.html. 为了加深对SSD的理解,因此对SSD的源码进 ...
- c++ 实现https网页上的图片爬取
一.主要的原理 我们通过发送一个http请求,获得目标网页的html源代码,然后通过正则表达式获取到图片的URL,把该网页的所有的图片都保存到一个文件夹,这就是整个软件的流程. 二.具体的实践 现在很 ...
- 第01章 部署虚拟环境安装Linux系统
在VMware中安装RHEL系统和其它Linux系统一样,注意的是: ……前边一直操作下边的步骤后: 重启系统后将看到系统的初始化界面,单击 LICENSE INFORMATION 选项. 选中 I ...
- 08ServletContext
1. 概念 代表整个web应用,可以和程序的容器(服务器)来通信 2. 获取 1. 通过request对象获取 request.getServletContext();2. 通过HttpServlet ...
- ecshop新建增加独立页面的方法
ecshop是通过php文件来指向dwt文件的,比如index.php是程序文件,那么其模板文件就是index.dwt 那么如果新建一个php文件来单独做其他作用呢?其实很简单 第一步: 将index ...
- 10个不为人知的 Python 冷知识
转载: 1. 省略号也是对象 ...这是省略号,在Python中,一切皆对象.它也不例外. 在 Python 中,它叫做 Ellipsis . 在 Python 3 中你可以直接写…来得到这玩意. 而 ...