SpringBoot整合三大组建(Servlet、Listener、Filter)
>[更多资源和教程请关注公众号:**非科班的科班**。
如果觉得我写的还可以请给个赞,谢谢大家,你的鼓励是我创作的动力](https://blog.csdn.net/qq_43255017)
## 3.SpringBoot整合Servlet
## 3.1.方式一
步骤:
- 写一个类MyFirstServlet继承HttpServlet,并重写doGet方法。
- 在类的上面用@WebServlet标识Servlet并指明name和urlPatterns。
- 在标识有@SpringBootApplication的主类上加上@ServletComponentScan。
FirstServlet.java
```
package com.example.servlet.myservlet;
import javax.servlet.http.HttpServlet;
import java.io.IOException;
import javax.servlet.ServletException;
import javax.servlet.annotation.WebServlet;
import javax.servlet.http.HttpServletRequest;
import javax.servlet.http.HttpServletResponse;
/**
*SpringBoot整合Servlet方式一
*@WebServlet(name="MyFirstServlet",urlPatterns="/myFirst")相当于如下:
*
*<servlet>
* <servlet-name>MyFirstServlet</servlet-name>
* <servlet-class>ah.szxy.servlet.FirstServlet</servlet-class>
*</servlet>
*<servlet-mapping>
* <servlet-name>MyFirstServlet</servlet-name>
* <url-pattern>/first</url-pattern>
*</servlet-mapping>
*
*/
@WebServlet(name="MyFirstServlet",urlPatterns="/myFirst")
public class FirstServlet extends HttpServlet {
@Override
protected void doGet(HttpServletRequest req, HttpServletResponse resp) throws ServletException, IOException {
System.out.println("MyFirstServlet init............");
}
}
```
ServletApplication.java
```
package com.example.servlet;
import org.springframework.boot.SpringApplication;
import org.springframework.boot.autoconfigure.SpringBootApplication;
import org.springframework.boot.web.servlet.ServletComponentScan;
@SpringBootApplication
@ServletComponentScan //在springBoot启动时会扫描@WebServlet,并将该类实例化
public class ServletApplication {
public static void main(String[] args) {
SpringApplication.run(ServletApplication.class, args);
}
}
```
然后启动项目
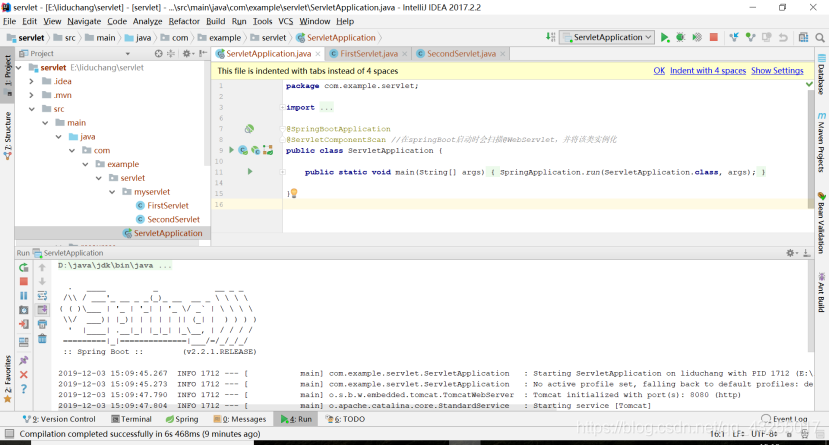
最后在浏览器输入localhost:8080/myFirstServlet,页面显示空白,在控制台打印MyFirstServlet init............
## 3.2.方式二
步骤:
- 创建一个类SecondServlet继承HttpServlet,并重写doGet方法。
- 在@SpringBootApplication标识的主类中加@Bean的一个方法。
SecondServlet.java
```
package com.example.servlet.myservlet;
import javax.servlet.ServletException;
import javax.servlet.http.HttpServlet;
import javax.servlet.http.HttpServletRequest;
import javax.servlet.http.HttpServletResponse;
import java.io.IOException;
/**
* 整合Servlet的第二种方式
*/
public class SecondServlet extends HttpServlet {
@Override
protected void doGet(HttpServletRequest req, HttpServletResponse resp) throws ServletException, IOException {
System.out.println("MySecondServlet init..........");
}
}
```
ServletApplication.java
```
package com.example.servlet;
import com.example.servlet.myservlet.SecondServlet;
import org.springframework.boot.SpringApplication;
import org.springframework.boot.autoconfigure.SpringBootApplication;
import org.springframework.boot.web.servlet.ServletComponentScan;
import org.springframework.boot.web.servlet.ServletRegistrationBean;
import org.springframework.context.annotation.Bean;
@SpringBootApplication
//@ServletComponentScan //在springBoot启动时会扫描@WebServlet,并将该类实例化
public class ServletApplication {
public static void main(String[] args) {
SpringApplication.run(ServletApplication.class, args);
}
/**
* 整合Servlet的第二种方式,创建ServletRegistrationBean并添加路径
* @return
*/
@Bean
public ServletRegistrationBean getServletRegistrationBean(){
ServletRegistrationBean bean = new ServletRegistrationBean(new SecondServlet());
bean.addUrlMappings("/mySecond");
return bean;
}
```
然后启动项目,在浏览器中访问localhost:8080/mySecondServlet,页面也是空白,在控制台就会打印MySecondServlet init..........
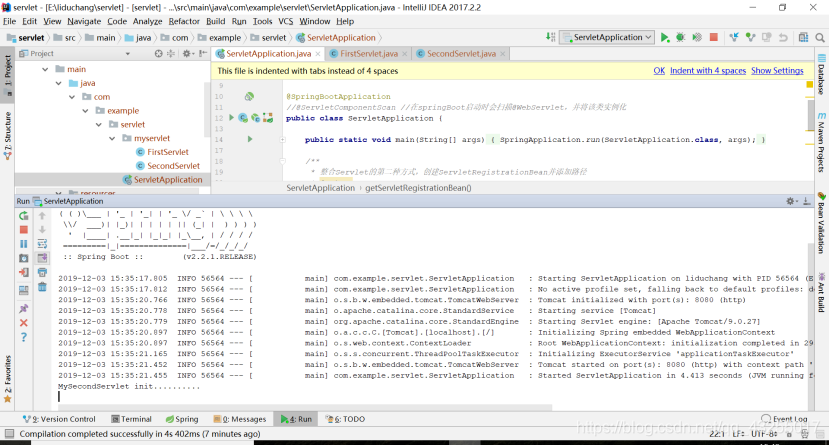
项目,结构如图所示
结论:
- 上面的两种方式推荐使用第一种基于注解的整合。
- 虽然现在几乎用不到servlet了,但是学习SpringBoot整合servlet有助于学习的深入了解,更好的理解框架。
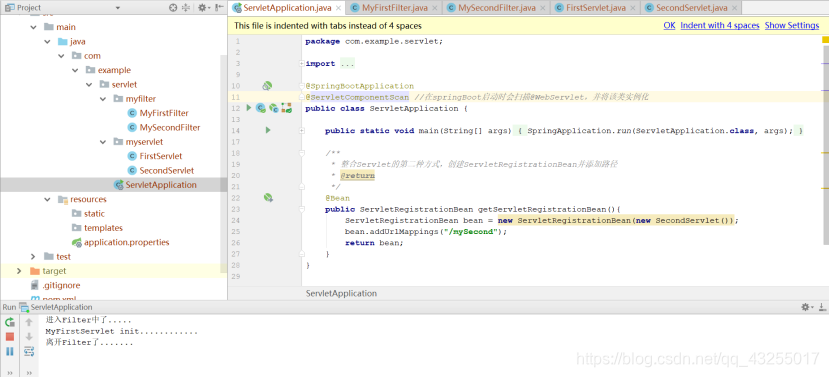
## 4.SpringBoot整合Filter
## 4.1.方式一
步骤:
- 创建一个MyFirstFilter类实现Filter接口,并在类上面标注@WebFilter。
- 在@SpringBootApplication的主类上加上@ServletComponentScan注解。
MyFirstFilter.java
```
package com.example.servlet.myfilter;
import javax.servlet.*;
import javax.servlet.annotation.WebFilter;
import java.io.IOException;
/**
* 基于@WebFilter注解整合Filter方式一
*/
@WebFilter(filterName = "MyFirstFilter",urlPatterns = "/myFirst")
public class MyFirstFilter implements Filter {
@Override
public void init(FilterConfig filterConfig) throws ServletException {
}
@Override
public void doFilter(ServletRequest arg0, ServletResponse arg1, FilterChain arg2) throws IOException, ServletException {
System.out.println("进入Filter中了.....");
arg2.doFilter(arg0,arg1);
System.out.println("离开Filter了.......");
}
@Override
public void destroy() {
}
}
```
ServletApplication.java
```
package com.example.servlet;
import com.example.servlet.myservlet.SecondServlet;
import org.springframework.boot.SpringApplication;
import org.springframework.boot.autoconfigure.SpringBootApplication;
import org.springframework.boot.web.servlet.ServletComponentScan;
import org.springframework.boot.web.servlet.ServletRegistrationBean;
import org.springframework.context.annotation.Bean;
@SpringBootApplication
@ServletComponentScan //在springBoot启动时会扫描@WebServlet,并将该类实例化
public class ServletApplication {
public static void main(String[] args) {
SpringApplication.run(ServletApplication.class, args);
}
/**
* 整合Servlet的第二种方式,创建ServletRegistrationBean并添加路径
* @return
*/
@Bean
public ServletRegistrationBean getServletRegistrationBean(){
ServletRegistrationBean bean = new ServletRegistrationBean(new SecondServlet());
bean.addUrlMappings("/mySecond");
return bean;
}
}
```
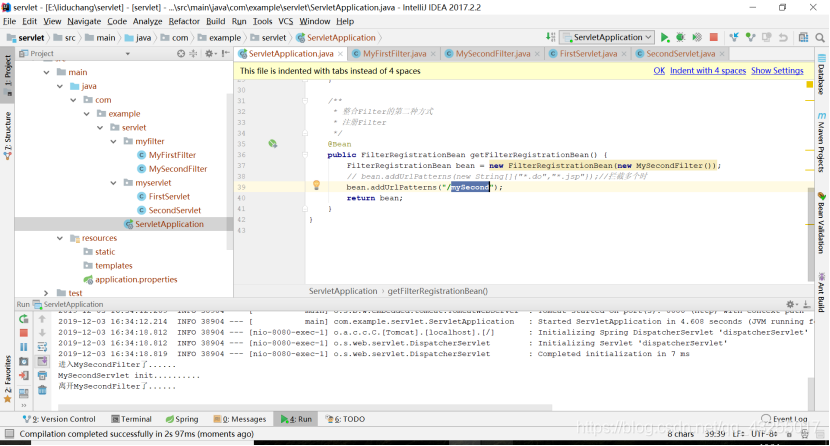
## 4.2.方式二
步骤:
- 创建一个类MySecondFilter实现Filter接口,重写方法。
- 在@SpringBootApplication标识的主类中加@Bean的一个方法,将MySecondFilter对象注入容器中。
MySecondFilter.java
```
package com.example.servlet.myfilter;
import javax.servlet.*;
import java.io.IOException;
/**
* 整合Filter的第二种方式
*/
public class MySecondFilter implements Filter {
@Override
public void init(FilterConfig filterConfig) throws ServletException {
}
@Override
public void doFilter(ServletRequest arg0, ServletResponse arg1, FilterChain arg2) throws IOException, ServletException {
System.out.println("进入MySecondFilter了......");
arg2.doFilter(arg0, arg1);
System.out.println("离开MySecondFilter了......");
}
@Override
public void destroy() {
}
}
```
ServletApplication.java
```
package com.example.servlet;
import com.example.servlet.myfilter.MySecondFilter;
import com.example.servlet.myservlet.SecondServlet;
import org.springframework.boot.SpringApplication;
import org.springframework.boot.autoconfigure.SpringBootApplication;
import org.springframework.boot.web.servlet.FilterRegistrationBean;
import org.springframework.boot.web.servlet.ServletComponentScan;
import org.springframework.boot.web.servlet.ServletRegistrationBean;
import org.springframework.context.annotation.Bean;
@SpringBootApplication
//@ServletComponentScan //在springBoot启动时会扫描@WebServlet,并将该类实例化
public class ServletApplication {
public static void main(String[] args) {
SpringApplication.run(ServletApplication.class, args);
}
/**
* 整合Filter的第二种方式
* 注册Filter
*/
@Bean
public FilterRegistrationBean getFilterRegistrationBean() {
FilterRegistrationBean bean = new FilterRegistrationBean(new MySecondFilter());
// bean.addUrlPatterns(new String[]{"*.do","*.jsp"});//拦截多个时
bean.addUrlPatterns("/mySecond");
return bean;
}
}
```
然后在浏览器访问localhost:8080/mySecond,就可以看到控制台打印如下
## 5.SpringBoot整合Listener
## 5.1.方式一
步骤:
- 创建一个类MyFirstListener实现ServletContextListener接口,重写方法
- 在该类上加上@WebListener注解
```
package com.example.servlet.mylistener;
import javax.servlet.ServletContextEvent;
import javax.servlet.ServletContextListener;
import javax.servlet.annotation.WebListener;
/**
* springBoot 整合Listener第一种方式
* 创建一个Servlet上下文的监听器
* @WebListener 自动注册,相当于在web.xml中添加如下代码
*
*<listener>
* <listener-class>ah.szxy.listener.FirstListener</listener-class>
*</listener>
*/
@WebListener
public class MyFirstListener implements ServletContextListener {
@Override
public void contextDestroyed(ServletContextEvent arg0) {
// TODO Auto-generated method stub
System.out.println("MyFirstListener执行销毁了。。。");
}
@Override
public void contextInitialized(ServletContextEvent arg0) {
// TODO Auto-generated method stub
System.out.println("MyFirstListener执行初始化了。。。");
}
}
```
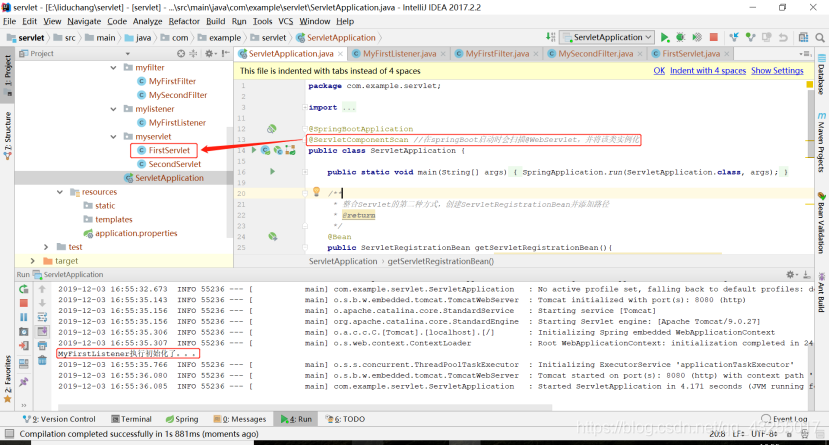
执行项目会打印如下,因为用了@ServletComponentScan注解,在项目启动的时候就会扫描包中是否含有servlet,若有就初始化。由于FirstServlet是基于注解初始化的,所以在项目启动的时候,就会执行初始化servlet,被Listener监听到
## 5.1.方式二
步骤:
- 创建一个类MySecondListener实现ServletContextListener接口,重写方法。
- 在@SpringBootApplication标识的主类中加@Bean的一个方法,将MySecondListener对象注入容器中。
```
package com.example.servlet.mylistener;
import javax.servlet.ServletContextEvent;
import javax.servlet.ServletContextListener;
/**
* 整合Listener的第二种方式
*/
public class MySecondListener implements ServletContextListener {
@Override
public void contextDestroyed(ServletContextEvent arg0) {
// TODO Auto-generated method stub
System.out.println("MySecondListener执行销毁了。。。");
}
@Override
public void contextInitialized(ServletContextEvent arg0) {
// TODO Auto-generated method stub
System.out.println("MySecondListener执行初始化了。。。");
}
}
```
```
package com.example.servlet;
import com.example.servlet.myfilter.MySecondFilter;
import com.example.servlet.mylistener.MySecondListener;
import com.example.servlet.myservlet.SecondServlet;
import org.springframework.boot.SpringApplication;
import org.springframework.boot.autoconfigure.SpringBootApplication;
import org.springframework.boot.web.servlet.FilterRegistrationBean;
import org.springframework.boot.web.servlet.ServletComponentScan;
import org.springframework.boot.web.servlet.ServletListenerRegistrationBean;
import org.springframework.boot.web.servlet.ServletRegistrationBean;
import org.springframework.context.annotation.Bean;
@SpringBootApplication
@ServletComponentScan //在springBoot启动时会扫描@WebServlet,并将该类实例化
public class ServletApplication {
public static void main(String[] args) {
SpringApplication.run(ServletApplication.class, args);
}
/**
* 注册listener
*/
@Bean
public ServletListenerRegistrationBean<MySecondListener> getServletListenerRegistrationBean() {
ServletListenerRegistrationBean<MySecondListener> bean = new ServletListenerRegistrationBean<MySecondListener>(
new MySecondListener());
return bean;
}
}
```
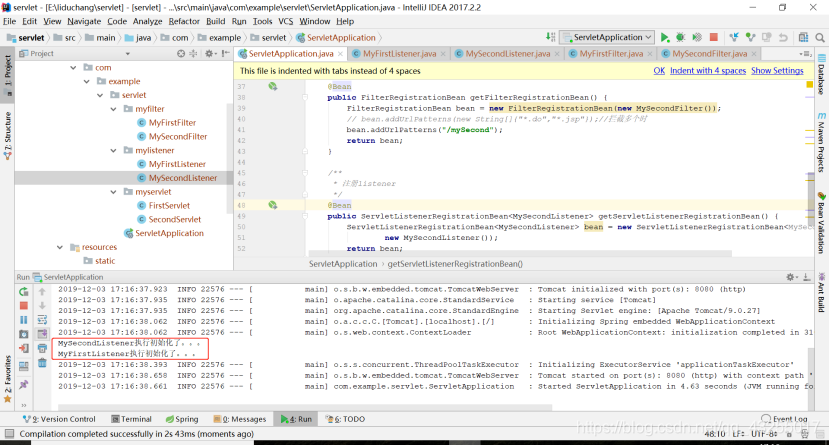
执行项目,在控制台可以看到输出如下,两个Servlet监听器都执行了
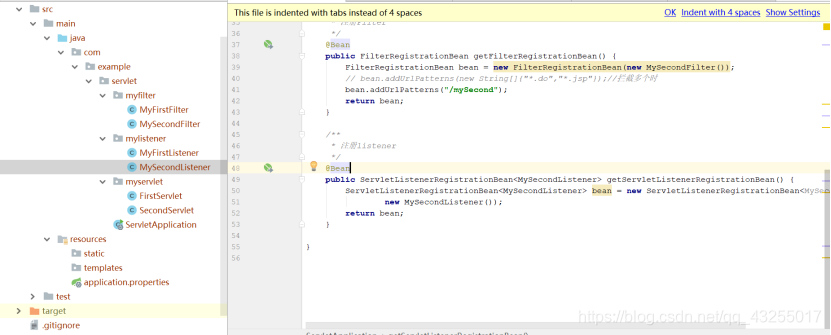
总的项目目录包结构如下:
>[更多资源和教程请关注公众号:**非科班的科班**。
如果觉得我写的还可以请给个赞,谢谢大家,你的鼓励是我创作的动力](https://blog.csdn.net/qq_43255017)
SpringBoot整合三大组建(Servlet、Listener、Filter)的更多相关文章
- springboot扫描自定义的servlet和filter代码详解_java - JAVA
文章来源:嗨学网 敏而好学论坛www.piaodoo.com 欢迎大家相互学习 这几天使用spring boot编写公司一个应用,在编写了一个filter,用于指定编码的filter,如下: /** ...
- JavaEE--JavaWeb三大组件Servlet、Filter、Listener
Servlet.Filter.Listener是JavaEE Web服务规定的服务器动态组件,由开发者编写由Web容器创建,并保证单例以及线程安全性,其中加载顺序为Linstener -> Fl ...
- servlet,listener,filter,interceptor的关系
1.servlet:servlet是一种运行服务器端的java应用程序,具有独立于平台和协议的特性,并且可以动态的生成web页面,它工作在客户端请求与服务器响应的中间层.最早支持 Servlet 技术 ...
- 18. Spring Boot 、注册Servlet三大组件Servlet、Filter、Listener
由于SpringBoot默认是以jar包的方式启动嵌入式的Servlet容器来启动SpringBoot的web应用,没有web.xml文件 public class MyServlet extends ...
- SpringBoot初始教程之Servlet、Filter、Listener配置(七)
1.介绍 通过之前的文章来看,SpringBoot涵盖了很多配置,但是往往一些配置是采用原生的Servlet进行的,但是在SpringBoot中不需要配置web.xml的 因为有可能打包之后是一个ja ...
- SpringBoot初始教程之Servlet、Filter、Listener配置
1.介绍通过之前的文章来看,SpringBoot涵盖了很多配置,但是往往一些配置是采用原生的Servlet进行的,但是在SpringBoot中不需要配置web.xml的 因为有可能打包之后是一个jar ...
- SpringBoot初始教程之Servlet、Filter、Listener配置详解
1.介绍 通过之前的文章来看,SpringBoot涵盖了很多配置,但是往往一些配置是采用原生的Servlet进行的,但是在SpringBoot中不需要配置web.xml的 因为有可能打包之后是一个ja ...
- SpringBoot(四)-- 整合Servlet、Filter、Listener
SpringBoot中有两种方式可以添加 Servlet.Filter.Listener. 1.代码注册 通过ServletRegistrationBean. FilterRegistrationBe ...
- springboot(3):整合Servlet,filter,listener
1.springboot整合Servlet(2种方式) 添加maven依赖:spring-boot-starter-web 1>通过注解扫描完成Servlet组件的注册(方式1) 步骤:需要3步 ...
随机推荐
- 纵我不往,知识不来--学习Java第一周心得
暑假第一周,也是开始学习java的第一周. 本周的主要时间花在了小学期的任务上,但也草草开始了java的学习.首先安装好了所需要的软件,然后在网上下载了一份<Java基础笔记>,看了前五章 ...
- Java并发编程系列-(8) JMM和底层实现原理
8. JMM和底层实现原理 8.1 线程间的通信与同步 线程之间的通信 线程的通信是指线程之间以何种机制来交换信息.在编程中,线程之间的通信机制有两种,共享内存和消息传递. 在共享内存的并发模型里,线 ...
- Java中的Redis 哨兵高可用性
让我们探索Redis Sentinel,看看如何在Java上运行它,一起来看看,最近get了很多新知识,分享给大家参考学习.需要详细的java架构思维导图路线也可以评论获取! 什么是Redis哨兵? ...
- mysql主从之配置验证
实验环境: master 192.168.132.121 主库 slave 192.168.132.122 从库 一 mysql主从复制的配置 1.1 mysql主库给从库复制的权限 mys ...
- Spring Security入门(基于SSM环境配置)
一.前期准备 配置SSM环境 二.不使用数据库进行权限控制 配置好SSM环境以后,配置SpringSecurity环境 添加security依赖 <dependency> <gr ...
- oracle mysql sql 根据一张表更新另一张表
update CDINFO.Dept_Dict tab1 set PART_FLAG = (select PART_FLAG from DICT.DEPARTMENT_DICT@zyhis4 tab2 ...
- Java 发展简史:初生遇低谷,崛起于互联网
Java 起源与诞生 20世纪90年代,单片式计算机系统诞生,单片式计算机系统不仅廉价,而且功能强大,使用它可以大幅度提升消费性电子产品的智能化程度. SUN公司为了抢占市场先机,在1991年成立了一 ...
- caffe实战笔记
Caffe简要介绍: Caffe还没有windows版本,所以我需要远程登录linux服务器 Caffe主要处理图片/图片序列 Caffe读取的数据格式 从专用的数据库中读取(lmdb.leveldb ...
- POJ 2318 TOYS(叉积+二分)
题目传送门:POJ 2318 TOYS Description Calculate the number of toys that land in each bin of a partitioned ...
- 原生javascript 基础动画函数封装(二)
<!DOCTYPE html> <html> <head> <title></title> <style type="tex ...