SpringBoot之使用Druid连接池,SQL监控和spring监控
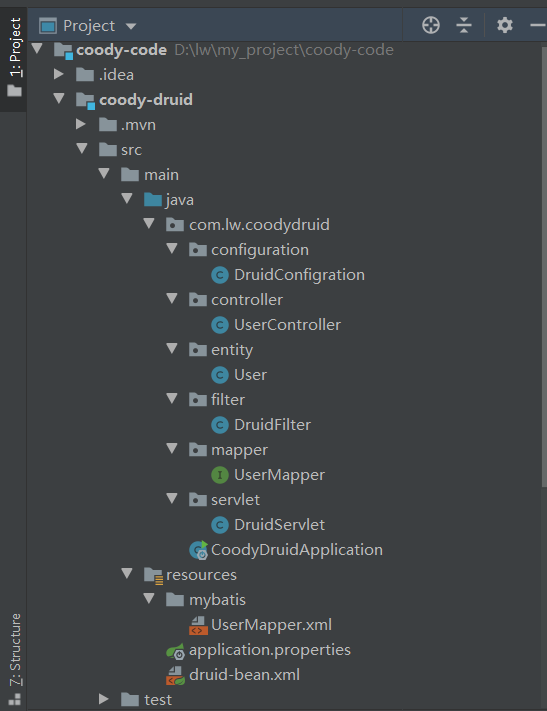
项目结构
1.引入maven依赖
<dependencies>

        <dependency>

            <groupId>org.springframework.boot</groupId>

            <artifactId>spring-boot-starter</artifactId>

        </dependency>

        <dependency>

            <groupId>org.springframework.boot</groupId>

            <artifactId>spring-boot-starter-web</artifactId>

        </dependency>

        <dependency>

            <groupId>com.alibaba</groupId>

            <artifactId>druid</artifactId>

            <version>1.1.10</version>

        </dependency>

        <dependency>

            <groupId>mysql</groupId>

            <artifactId>mysql-connector-java</artifactId>

            <scope>runtime</scope>

        </dependency>

        <dependency>

            <groupId>javax.servlet</groupId>

            <artifactId>javax.servlet-api</artifactId>

            <scope>provided</scope>

        </dependency>

        <dependency>

            <groupId>org.mybatis.spring.boot</groupId>

            <artifactId>mybatis-spring-boot-starter</artifactId>

            <version>1.2.2</version>

        </dependency>

        <dependency>

            <groupId>org.springframework.boot</groupId>

            <artifactId>spring-boot-starter-test</artifactId>

            <scope>test</scope>

            <exclusions>

                <exclusion>

                    <groupId>org.junit.vintage</groupId>

                    <artifactId>junit-vintage-engine</artifactId>

                </exclusion>

            </exclusions>

        </dependency>
2.在application.properties配置文件中加入druid配置
### mysql ###

spring.datasource.url=jdbc:mysql://localhost:3306/lw_test?useUnicode=true&characterEncoding=utf-8&serverTimezone=GMT

spring.datasource.username=root

spring.datasource.password=123456

spring.datasource.driver-class-name=com.mysql.jdbc.Driver

### mybatis ###

mybatis.mapper-locations=classpath:mybatis/*.xml

### durid ###

spring.datasource.type=com.alibaba.druid.pool.DruidDataSource

# 初始化大小,最小,最大

spring.datasource.initialSize=5

spring.datasource.minIdle=5

spring.datasource.maxActive=20

# 配置获取连接等待超时的时间

spring.datasource.maxWait=60000

# 配置间隔多久才进行一次检测,检测需要关闭的空闲连接,单位是毫秒

spring.datasource.timeBetweenEvictionRunsMillis=60000

# 配置一个连接在池中最小生存的时间,单位是毫秒

spring.datasource.minEvictableIdleTimeMillis=300000

# 校验SQL,Oracle配置 spring.datasource.validationQuery=SELECT 1 FROM DUAL,如果不配validationQuery项,则下面三项配置无用

spring.datasource.validationQuery=SELECT 'x'

spring.datasource.testWhileIdle=true

spring.datasource.testOnBorrow=false

spring.datasource.testOnReturn=false

# 打开PSCache,并且指定每个连接上PSCache的大小

spring.datasource.poolPreparedStatements=true

spring.datasource.maxPoolPreparedStatementPerConnectionSize=20

# 配置监控统计拦截的filters,去掉后监控界面sql无法统计,'wall'用于防火墙

spring.datasource.filters=stat,wall,log4j

# 通过connectProperties属性来打开mergeSql功能;慢SQL记录

spring.datasource.connectionProperties=druid.stat.mergeSql=true;druid.stat.slowSqlMillis=5000

# 合并多个DruidDataSource的监控数据

spring.datasource.useGlobalDataSourceStat=true

### log4j ###

log4j.rootLogger=DEBUG,Console

log4j.appender.Console=org.apache.log4j.ConsoleAppenderlog4j.appender.Console.layout=org.apache.log4j.PatternLayout

og4j.appender.Console.layout.ConversionPattern=%d [%t] %-5p [%c] - %m%n

log4j.logger.org.apache=INFO
3.配置webServlet
package com.lw.coodydruid.servlet;

import com.alibaba.druid.support.http.StatViewServlet;

import javax.servlet.annotation.WebInitParam;

import javax.servlet.annotation.WebServlet;

@WebServlet(urlPatterns = "/druid/*",

            initParams = {

//              @WebInitParam(name="allow",value="172.16.10.128,127.0.0.1"),// IP白名单 (没有配置或者为空,则允许所有访问)

//              @WebInitParam(name="deny",value="172.16.10.129"),// IP黑名单 (存在共同时,deny优先于allow)

                @WebInitParam(name = "loginUsername", value = "admin"),// 用户名

                @WebInitParam(name = "loginPassword", value = "123456"),// 密码

                @WebInitParam(name = "resetEnable", value = "false")// 禁用HTML页面上的“Reset All”功能

        })

public class DruidServlet extends StatViewServlet {

    private static final long serialVersionUID = 1L;

}
4.配置webFitler
package com.lw.coodydruid.filter;

import com.alibaba.druid.support.http.WebStatFilter;

import javax.servlet.annotation.WebFilter;

import javax.servlet.annotation.WebInitParam;

@WebFilter(filterName = "druidWebStatFilter", urlPatterns = "/*",

        initParams = {

                @WebInitParam(name = "exclusions", value = "*.js,*.gif,*.jpg,*.bmp,*.png,*.css,*.ico,/druid/*") // 忽略资源

        })

public class DruidFilter extends WebStatFilter {

}
5.在springboot启动类上,加上注解@ServletComponentScan,扫描filter和servlet
package com.lw.coodydruid;

import org.springframework.boot.SpringApplication;

import org.springframework.boot.autoconfigure.SpringBootApplication;

import org.springframework.boot.web.servlet.ServletComponentScan;

import org.springframework.context.annotation.ImportResource;

@SpringBootApplication

@ServletComponentScan

@ImportResource(locations = { "classpath:druid-bean.xml" })

public class CoodyDruidApplication {

    public static void main(String[] args) {

        SpringApplication.run(CoodyDruidApplication.class, args);

    }

}
6.此处为手动初始化DataSource,也可以采用spring boot自动配置功能
package com.lw.coodydruid.configuration;

import com.alibaba.druid.pool.DruidDataSource;

import org.springframework.beans.factory.annotation.Value;

import org.springframework.context.annotation.Bean;

import org.springframework.context.annotation.Primary;

import org.springframework.stereotype.Component;

import javax.sql.DataSource;

import java.sql.SQLException;

/**

 * @Classname DruidConfigration

 * @Description 手动初始化DataSource

 * @Date 2019/11/5 8:48

 * @Created by lw

 */

@Component

public class DruidConfigration {

    @Value("${spring.datasource.url}")

    private String dbUrl;

    @Value("${spring.datasource.username}")

    private String username;

    @Value("${spring.datasource.password}")

    private String password;

    @Value("${spring.datasource.driver-class-name}")

    private String driverClassName;

    @Value("${spring.datasource.initialSize}")

    private int initialSize;

    @Value("${spring.datasource.minIdle}")

    private int minIdle;

    @Value("${spring.datasource.maxActive}")

    private int maxActive;

    @Value("${spring.datasource.maxWait}")

    private int maxWait;

    @Value("${spring.datasource.timeBetweenEvictionRunsMillis}")

    private int timeBetweenEvictionRunsMillis;

    @Value("${spring.datasource.minEvictableIdleTimeMillis}")

    private int minEvictableIdleTimeMillis;

    @Value("${spring.datasource.validationQuery}")

    private String validationQuery;

    @Value("${spring.datasource.testWhileIdle}")

    private boolean testWhileIdle;

    @Value("${spring.datasource.testOnBorrow}")

    private boolean testOnBorrow;

    @Value("${spring.datasource.testOnReturn}")

    private boolean testOnReturn;

    @Value("${spring.datasource.poolPreparedStatements}")

    private boolean poolPreparedStatements;

    @Value("${spring.datasource.maxPoolPreparedStatementPerConnectionSize}")

    private int maxPoolPreparedStatementPerConnectionSize;

    @Value("${spring.datasource.filters}")

    private String filters;

    @Value("${spring.datasource.connectionProperties}")

    private String connectionProperties;

    @Value("${spring.datasource.useGlobalDataSourceStat}")

    private boolean useGlobalDataSourceStat;

    @Bean

    @Primary //在同样的DataSource中,首先使用被标注的DataSource

    public DataSource dataSource() {

        DruidDataSource datasource = new DruidDataSource();

        datasource.setUrl(this.dbUrl);

        datasource.setUsername(username);

        datasource.setPassword(password);

        datasource.setDriverClassName(driverClassName);

        //configuration

        datasource.setInitialSize(initialSize);

        datasource.setMinIdle(minIdle);

        datasource.setMaxActive(maxActive);

        datasource.setMaxWait(maxWait);

        datasource.setTimeBetweenEvictionRunsMillis(timeBetweenEvictionRunsMillis);

        datasource.setMinEvictableIdleTimeMillis(minEvictableIdleTimeMillis);

        datasource.setValidationQuery(validationQuery);

        datasource.setTestWhileIdle(testWhileIdle);

        datasource.setTestOnBorrow(testOnBorrow);

        datasource.setTestOnReturn(testOnReturn);

        datasource.setPoolPreparedStatements(poolPreparedStatements);

        datasource.setMaxPoolPreparedStatementPerConnectionSize(maxPoolPreparedStatementPerConnectionSize);

        datasource.setUseGlobalDataSourceStat(useGlobalDataSourceStat);

        try {

            datasource.setFilters(filters);

        } catch (SQLException e) {

            System.err.println("druid configuration initialization filter: " + e);

        }

        datasource.setConnectionProperties(connectionProperties);

        return datasource;

    }

}
7.spring监控之方法名正则匹配拦截配置druid-bean.xml
<?xml version="1.0" encoding="UTF-8"?>

<beans xmlns="http://www.springframework.org/schema/beans"

       xmlns:aop="http://www.springframework.org/schema/aop" xmlns:xsi="http://www.w3.org/2001/XMLSchema-instance"

       xsi:schemaLocation="

        http://www.springframework.org/schema/beans

        http://www.springframework.org/schema/beans/spring-beans.xsd

        http://www.springframework.org/schema/aop

        http://www.springframework.org/schema/aop/spring-aop.xsd">

    <!-- 配置_Druid和Spring关联监控配置 -->

    <bean id="druid-stat-interceptor"

          class="com.alibaba.druid.support.spring.stat.DruidStatInterceptor"/>

    <!-- 方法名正则匹配拦截配置 -->

    <bean id="druid-stat-pointcut" class="org.springframework.aop.support.JdkRegexpMethodPointcut"

          scope="prototype">

        <property name="patterns">

            <list>

                <value>com.lw.coodydruid.mapper.*</value>

            </list>

        </property>

    </bean>

    <aop:config proxy-target-class="true">

        <aop:advisor advice-ref="druid-stat-interceptor" pointcut-ref="druid-stat-pointcut"/>

    </aop:config>

</beans>
8.在springboot启动类上,引入配置druid-bean.xml
@ImportResource(locations = { "classpath:druid-bean.xml" })
9.controller类
package com.lw.coodydruid.controller;

import com.lw.coodydruid.entity.User;

import com.lw.coodydruid.mapper.UserMapper;

import org.springframework.beans.factory.annotation.Autowired;

import org.springframework.web.bind.annotation.GetMapping;

import org.springframework.web.bind.annotation.RequestMapping;

import org.springframework.web.bind.annotation.RestController;

import java.util.List;

@RestController

@RequestMapping("/user")

public class UserController {

    @Autowired

    private UserMapper userMapper;

    @GetMapping(value = "/get")

    public User get() {

        return userMapper.getById(1);

    }

    @GetMapping(value = "/list")

    public List<User> list() {

        return userMapper.getList();

    }

}
10.Mapper和mapper xml
package com.lw.coodydruid.mapper;

import com.lw.coodydruid.entity.User;

import org.apache.ibatis.annotations.Mapper;

import java.util.List;

@Mapper

public interface UserMapper {

    public List<User> getList();

    public User getById(int id);

}
<?xml version="1.0" encoding="UTF-8" ?>

<!DOCTYPE mapper

        PUBLIC "-//mybatis.org//DTD Mapper 3.0//EN" "http://mybatis.org/dtd/mybatis-3-mapper.dtd">

<mapper namespace="com.lw.coodydruid.mapper.UserMapper">

    <resultMap type="com.lw.coodydruid.entity.User" id="userMap">

        <id column="id" property="id"/>

        <result column="name" property="name"/>

        <result column="sex" property="sex"/>

        <result column="age" property="age"/>

        <result column="address" property="address"/>

        <result column="date_created" property="dateCreated"/>

    </resultMap>

    <select id="getList" resultMap="userMap">

        select * from user

    </select>

    <select id="getById" parameterType="java.lang.Integer" resultMap="userMap">

        select * from user where id=#{id}

    </select>

</mapper>
11.测试
- 1.启动springboot启动类,在浏览器上输入http://localhost:8080/druid/index.html,进入Druid登录页面
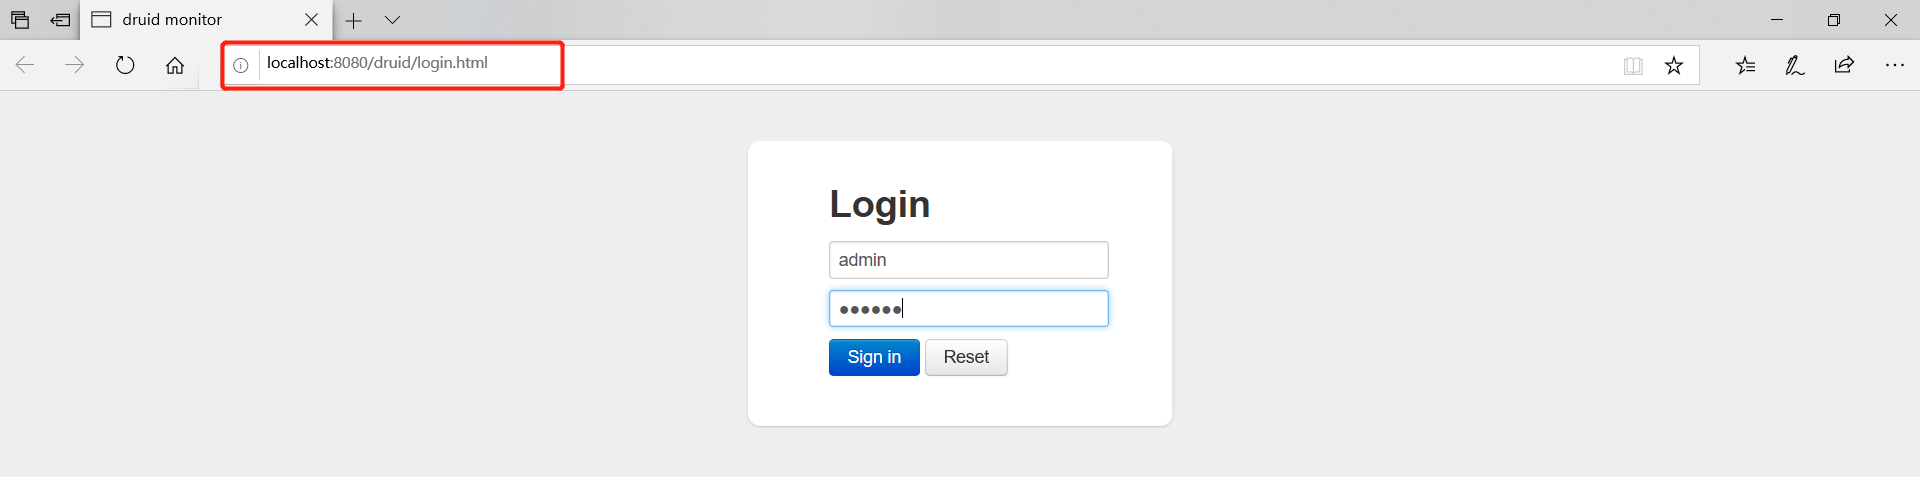
输入用户名和密码,点击Sign in登录

- 2.访问controller中的方法,http://localhost:8080/user/get

- 3.Druid监控页面---SQL监控

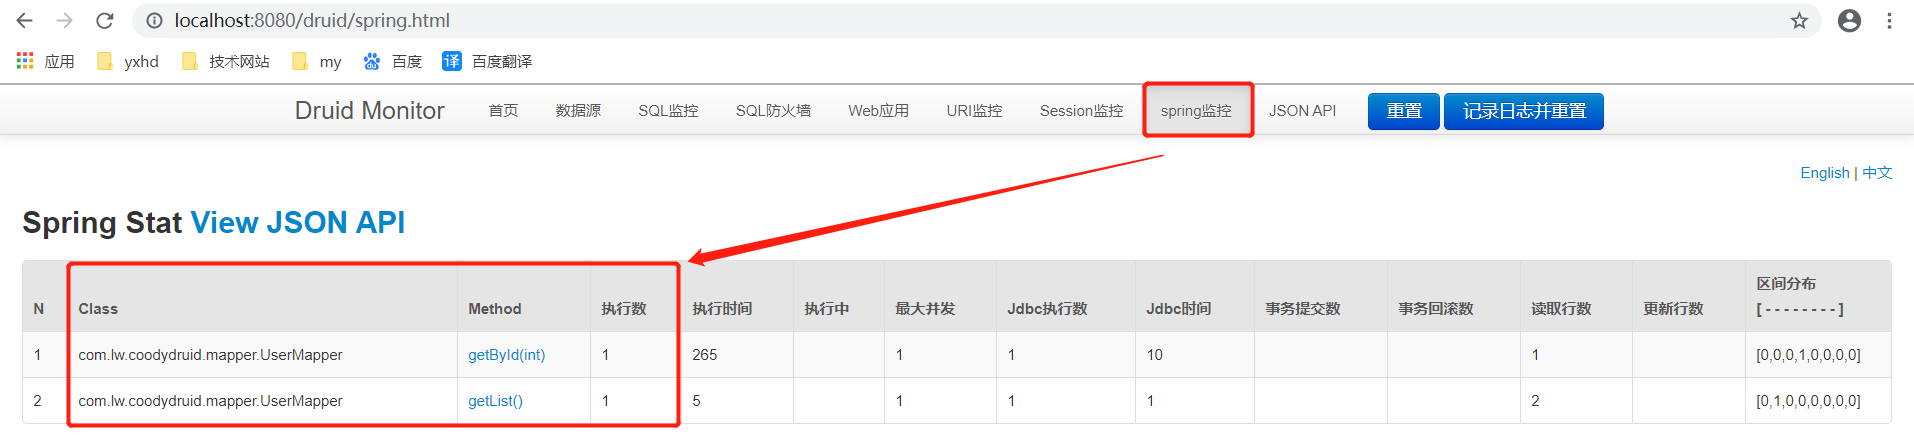
- 4.Druid监控页面---spring监控
SpringBoot之使用Druid连接池,SQL监控和spring监控的更多相关文章
- (二十二)SpringBoot之使用Druid连接池以及SQL监控和spring监控
一.引入maven依赖 <dependencies> <dependency> <groupId>org.springframework.boot</grou ...
- SpringBoot之使用Druid连接池以及SQL监控和spring监控
一.引入maven依赖 <dependencies> <dependency> <groupId>org.springframework.boot</grou ...
- 使用MyBatis集成阿里巴巴druid连接池(不使用spring)
在工作中发现mybatis默认的连接池POOLED,运行时间长了会报莫名其妙的连接失败错误.因此采用阿里巴巴的Druid数据源(码云链接 ,中文文档链接). mybatis更多数据源参考博客链接 . ...
- SpringBoot 配置阿里巴巴Druid连接池
在Spring Boot下默认提供了若干种可用的连接池(dbcp,dbcp2, tomcat, hikari),当然并不支持Druid,Druid来自于阿里系的一个开源连接池,它提供了非常优秀的监控功 ...
- SSM项目下Druid连接池的配置及数据源监控的使用
一,连接池的配置 在pom.xml中添加,druid的maven信息 <dependency> <groupId>com.alibaba</groupId> < ...
- SpringBoot配置MySql数据库和Druid连接池
1.pom文件增加相关依赖 <dependency> <groupId>mysql</groupId> <artifactId>mysql-connec ...
- springboot项目整合druid数据库连接池
Druid连接池是阿里巴巴开源的数据库连接池项目,后来贡献给Apache开源: Druid的作用是负责分配.管理和释放数据库连接,它允许应用程序重复使用一个现有的数据库连接,而不是再重新建立一个: D ...
- springboot整合druid连接池、mybatis实现多数据源动态切换
demo环境: JDK 1.8 ,Spring boot 1.5.14 一 整合durid 1.添加druid连接池maven依赖 <dependency> <groupId> ...
- 六:SpringBoot-集成Druid连接池,配置监控界面
SpringBoot-集成Druid连接池,配置监控界面 1.Druid连接池 1.1 Druid特点 2.SpringBoot整合Druid 2.1 引入核心依赖 2.2 数据源配置文件 2.3 核 ...
随机推荐
- 【题解】Luogu P5358 [SDOI2019]快速查询
原题传送门 神鱼说这道题是强制离线(smog 我们珂以把被单点修改,单点查询的点单独拿出来处理,把每个数表示成\(mul*x+plus\) 初始状态下\(mul=1,plus=0\) 操作1:在总和中 ...
- ComPtr的介绍以及使用
ComPtr是为COM而设计的智能指针.它支持WindowsRT,也支持传统Win32.相比ATL里的CComPtr类,它有了一些提升. ComPtr包含在Windows 8.x SDK and Wi ...
- 用lua求两个数组的交集、并集和补集。
-- 克隆 function Clone(object) local lookup_table = { } local function _copy(object) if type(object) ~ ...
- 利用windows服务实现整点报时功能
程序语言:C# 实现目标:程序托管自动运行,每到整点播放语音报时. 准备素材:00——23点的整点报时声音文件. 实现过程: 1.新建windows服务项目 2.添加安装程序 3.设置服务属性 [添加 ...
- MySQL数据库汇总
-- mysql的最大连接数:默认为 100 -- mysql的增删改查 -- mysql统计各个字段(case when 用法 注:也可以使用其他的) select (case when ...
- 使pre的内容自动换行(转)小知识
<pre> 元素可定义预格式化的文本.被包围在 pre 元素中的文本通常会保留空格和换行符.而文本也会呈现为等宽字体. <pre> 标签的一个常见应用就是用来表示计算机的源代码 ...
- 设计模式-依赖倒置-Dependency Inversion Principle
依赖倒置原则: 一般来说我们认为作为底层基础框架的逻辑是不应该依赖于上层逻辑的, 所以我们设计软件时也经常是: 需求 - 上层逻辑(直接实现需求) - 发现需要固化的逻辑 - 开发底层模块 - 然后上 ...
- Newtonsoft.Json.Linq.JObject 遍历验证每个属性内容
业务需求,拦截器验证每个请求inputstream(实际是application/json流)的数据,但是json反序列化实体格式不同. var req = filterContext.Request ...
- rabbitmq:新建用户登陆rabbitmq management失败
参考文档:https://www.rabbitmq.com/management.html#permissions 安装好rabbitmq之后,遇到一个问题,新建的账号无法在rabbitmq的UI界面 ...
- 【RAC】 RAC For W2K8R2 安装--安装过程中碰到的问题(九)
[RAC] RAC For W2K8R2 安装--安装过程中碰到的问题(九) 一.1 BLOG文档结构图 一.2 前言部分 一.2.1 导读 各位技术爱好者,看完本文后,你可以掌握如下的技能,也 ...