15个Spring的核心注释示例
众所周知,Spring DI和Spring IOC是Spring Framework的核心概念。让我们从org.springframework.beans.factory.annotation和org.springframework.context.annotation包中探索一些Spring核心注释。我们经常将这些称为“Spring核心注释”,我们将在本文中对它们进行讲解。
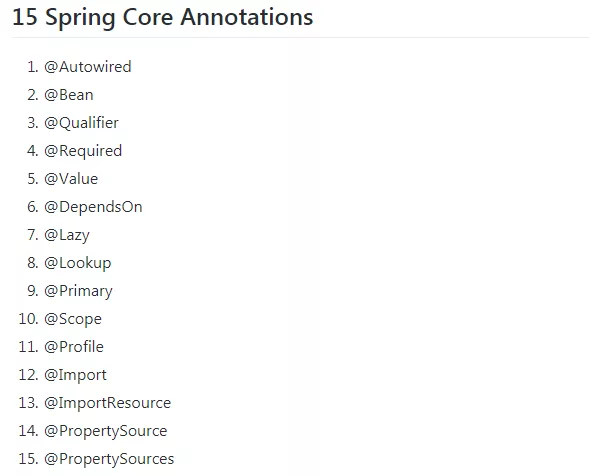
这是所有已知的Spring核心注释的列表。
@Autowired
我们可以使用@Autowired注释来标记Spring将要解析和注入的依赖关系。我们可以将这个注释与构造函数,setter或字段注入一起使用
- 构造器注入
@RestController
public class CustomerController { private CustomerService customerService; @Autowired
public CustomerController(CustomerService customerService) {
this.customerService=customerService;
} } - setter注入
import org.springframework.beans.factory.annotation.Autowired;
import org.springframework.web.bind.annotation.RestController; @RestController
public class CustomerController { private CustomerService customerService; @Autowired
public void setCustomerService(CustomerService customerService) {
this.customerService=customerService;
} } - 领域注入
import org.springframework.beans.factory.annotation.Autowired;

import org.springframework.web.bind.annotation.RestController;

@RestController

public class CustomerController {

    @Autowired

    private CustomerService customerService;

}
@Bean
- @Bean是方法级注释,是XML元素的直接模拟。 注释支持一些提供的属性,例如init-method,destroy-method,auto-wiring和name。
- 您可以在
@Configuration注解或@Component注解类中使用@Bean批注 - 以下是方法声明的简单示例
import org.springframework.context.annotation.Bean;
import org.springframework.context.annotation.Configuration;
import com.companyname.projectname.customer.CustomerService;
import com.companyname.projectname.order.OrderService; @Configuration
public class Application { @Bean
public CustomerService customerService() {
return new CustomerService();
} @Bean
public OrderService orderService() {
return new OrderService();
} } - 上述配置等效于以下Spring XML:
<beans>

    <bean id="customerService"class="com.companyname.projectname.CustomerService"/>

    <bean id="orderService" class="com.companyname.projectname.OrderService"/>

</beans>
@Qualifier
此注释有助于微调基于注释的自动布线。 可能存在这样的情况:我们创建多个相同类型的bean,并且只想使用属性连接其中一个bean。 这可以使用@ Qualifier注释以及 @Autowired注释来控制。
示例:考虑使用EmailService和SMSService类来实现单个MessageService接口
- 为多个消息服务实现创建MessageService接口。
public interface MessageService {

    public void sendMsg(String message);

} - 接下来,创建实现:EmailService和SMSService。
public class SMSService implements MessageService {

    public void sendMsg(String message) {

        System.out.println(message);

    }

}

public class EmailService implements MessageService {

    public void sendMsg(Stringmessage) {

        System.out.println(message);

    }

} - 这时候该看看 @Qualifier注释的用法了
public interface MessageProcessor {

    public void processMsg(String message);

}

public class MessageProcessorImpl implements MessageProcessor {

    private MessageService messageService;

    // setter based DI

    @Autowired

    @Qualifier("emailService")

    public void setMessageService(MessageService messageService) {

        this.messageService=messageService;

    }

    // constructor based DI

    @Autowired

    public MessageProcessorImpl(@Qualifier("emailService")MessageService messageService) {

        this.messageService = messageService;

    }

    public void processMsg(String message) {

        messageService.sendMsg( message);

    }

}
@Required
@Required 注释是一个方法级注释,并应用于bean的setter方法。此注释仅指示必须将setter方法配置为在配置时使用值依赖注入。
例如,对setter方法的 @Required标记了我们想要通过XML填充的依赖项:
@Required

void setColor(String color){

    this.color= color;

}

<bean class="com.javaguides.spring.Car">

    <property name = "color" value="green"/>

</bean>
否则,将抛出BeanInitializationException。
@Value
Spring @Value 注释用于为变量和方法参数指定默认值。我们可以使用@Value 注释来读取Spring环境变量以及系统变量 。Spring @Value 注释也支持SpEL。让我们看一下使用@Value 注释的一些示例 。
示例:我们可以使用@Value 注释为类属性指定默认值 。
@Value("Default DBConfiguration")

private String defaultName;
该 @Value 注释参数可以是只有字符串,但春天尝试将其转换为指定的类型。以下代码将正常工作,并将布尔值和整数值分配给变量。
@Value("true")

private boolean defaultBoolean;

@Value("10")

private int defaultInt;
这演示了Spring @Value - Spring环境变量
@Value("${APP_NAME_NOT_FOUND}")

private String defaultAppName;
接下来,使用 @Value 注释分配系统变量 。
@Value("${java.home}")

private String javaHome;

@Value("${HOME}")

private String homeDir;
Spring @Value – SpEL
@Value("#{systemProperties['java.home']}")

private String javaHome;
@DependsOn
该 @DependsOn 注释可以强制的Spring IoC容器中的bean,它是由注释之前初始化一个或多个bean @DependsOn 注释。
所述 @DependsOn 注释可以在直接或间接地注释与任何类使用 @Component 或与所述注解的方法 @Bean。
示例:让我们创建 FirstBean 和 SecondBean 类。在此示例中, SecondBean 在 bean之前初始化 FirstBean。
public class FirstBean{

    @Autowired

    private SecondBean secondBean;

}

public class SecondBean

{

    public SecondBean()

    {

        System.out.println("SecondBean Initialized via Constuctor");

    }

}
基于配置类在Java中声明上述bean。
@Configuration

public class AppConfig

{

    @Bean("firstBean")

    @DependsOn(value={"secondBean"})

    public FirstBean firstBean()

    {

        return new FirstBean();

    }

    @Bean("secondBean")

    public SecondBean secondBean()

    {

        return new SecondBean();

    }

}
@Lazy
默认情况下,Spring IoC容器在应用程序启动时创建并初始化所有单例bean。我们可以通过使用 @Lazy 注释来防止单例bean的这种预初始化 。
所述 @Lazy 注释可以在任何类中使用,与直接或间接地注释 @Component 或与所述注解的方法 @Bean。
示例:考虑我们有两个bean - FirstBean 和 SecondBean。在此示例中,我们将FirstBean 使用 @Lazy注释显式加载。
public class FirstBean{

    public void test()

    {

        System.out.println("Method of FirstBean Class");

    }

}

public class SecondBean{

    public void test(){

        System.out.println("Method of SecondBean Class");

    }

}
基于配置类在Java中声明上述bean。
@Configuration

public class AppConfig {

    @Lazy( value =true)

    @Bean

    public FirstBean firstBean() {

        return new FirstBean();

    }

    @Bean

    public SecondBean secondBean() {

        return  new SecondBean ();

    }

}
我们可以看到,bean secondBean 由Spring容器初始化,而bean firstBean 则被显式初始化。
@Lookup
注释的方法 @Lookup 告诉Spring在我们调用它时返回方法返回类型的实例。
@Primary
我们使用 @Primary 当存在多个相同类型的bean时,我们使用它 给bean更高的优先级。
@Component

@Primary

class Car implements Vehicle {}

@Component

class Bike implements Vehicle {}

@Component

class  Driver {

    @Autowired

    Vehicle vehicle;

}

@Component

class Biker {

    @Autowired

    @Qualifier( "bike")

    Vehicle vehicle;

}
@Scope
我们使用@ Scope注释来定义 @Component类的范围或 @Bean定义。 它可以是单例,原型,请求,会话,globalSession或某些自定义范围。 举个例子:
@Component

@Scope(value= ConfigurableBeanFactory.SCOPE_SINGLETON)

public class TwitterMessageService implements MessageService {

}

@Component

@Scope(value =ConfigurableBeanFactory.SCOPE_PROTOTYPE)

public class TwitterMessageService implements MessageService {

}
@Profile
如果我们希望Spring仅在特定配置文件处于活动状态时使用 @Component类或 @Bean方法,我们可以使用 @Profile标记它。 我们可以使用注释的value参数配置配置文件的名称:
@Component

@Profile("sportDay")

class Bike implements Vehicle {

}
@Import
该 @Import 注释指示一个或多个 @Configuration类进口。
例如:在基于Java的配置中,Spring提供了 @Import注释,允许从另一个配置类加载 @Bean定义。
@Configuration

public class ConfigA {

    @Bean

    public A a() {

        return new A();

    }

}

@Configuration

@Import(ConfigA.class)

public class ConfigB {

    @Bean

    public B b() {

        return new  B  ();

    }

}
现在,在实例化上下文时,不需要同时指定ConfigA类和ConfigB类,只需要显式提供ConfigB。
@ImportResource
Spring提供了一个 @ImportResource注释,用于将 applicationContext.xml文件中的bean加载到ApplicationContext中。
例如:考虑我们在类路径上有 applicationContext.xmlSpring bean配置XML文件。
@Configuration

@ImportResource( {"classpath*:applicationContext.xml"})

public class XmlConfiguration {

}
@PropertySource
该 @PropertySource 注释提供了一种方便的声明性机制,用于添加 PropertySource Spring的Eenvironment以与@Configuration类一起使用 。
例如,我们从文件config.properties文件中读取数据库配置,并使用Environment 将这些属性值设置为 DataSourceConfig类。
import org.springframework.beans.factory.InitializingBean;

import org.springframework.beans.factory.annotation.Autowired;

import org.springframework.context.annotation.Configuration;

import org.springframework.context.annotation.PropertySource;

import org.springframework.core.env.Environment;

@Configuration

@PropertySource("classpath:config.properties")

public class ProperySourceDemo implements InitializingBean {

    @Autowired

    Environment env;

    @Override

    public void afterPropertiesSet()throws Exception {

        setDatabaseConfig();

    }

    private void setDatabaseConfig() {

        DataSourceConfig config = new DataSourceConfig();

        config.setDriver( env.getProperty("jdbc.driver"));

        config.setUrl(env.getProperty("jdbc.url"));

        config.setUsername(env.getProperty("jdbc.username"));

        config.setPassword(env.getProperty("jdbc.password"));

        System.out.println(config.toString());

    }

}
@PropertySources
我们可以使用此批注指定多个 @PropertySource配置:
@PropertySources( {

    @PropertySource("classpath:config.properties"),

    @PropertySource("classpath:db.properties")

})

public class AppConfig {

    //...

}
15个Spring的核心注释示例的更多相关文章
- 【SpringBoot】15. Spring Boot核心注解
Spring Boot核心注解 1 @SpringBootApplication 代表是Spring Boot启动的类 2 @SpringBootConfiguration 通过bean对象来获取配置 ...
- spring IOC核心原理
下面来了解一下Spring到底是怎么运行的. public static void main(String[] args) { ApplicationContext context = new Fil ...
- Spring学习总结(六)——Spring整合MyBatis完整示例
为了梳理前面学习的内容<Spring整合MyBatis(Maven+MySQL)一>与<Spring整合MyBatis(Maven+MySQL)二>,做一个完整的示例完成一个简 ...
- Spring集成MyBatis完整示例
该文详细的通过Spring IOC.MyBatis.Servlet.Maven及Spring整合MyBatis的等技术完成一个简单的图书管理功能,实现图书列表.删除.多删除.编辑.新增功能.梳理前面学 ...
- 【转载-好文】使用 Spring 2.5 注释驱动的 IoC 功能
在 IBM Bluemix 云平台上开发并部署您的下一个应用. 开始您的试用 原文链接:https://www.ibm.com/developerworks/cn/java/j-lo-spring25 ...
- JAVA WEB快速入门之通过一个简单的Spring项目了解Spring的核心(AOP、IOC)
接上篇<JAVA WEB快速入门之从编写一个JSP WEB网站了解JSP WEB网站的基本结构.调试.部署>,通过一个简单的JSP WEB网站了解了JAVA WEB相关的知识,比如:Ser ...
- 使用 Spring 2.5 注释驱动的 IoC 功能
概述 注释配置相对于 XML 配置具有很多的优势: 它可以充分利用 Java 的反射机制获取类结构信息,这些信息可以有效减少配置的工作.如使用 JPA 注释配置 ORM 映射时,我们就不需要指定 PO ...
- 使用 Spring 2.5 注释驱动的 IoC 功能(转)
基于注释(Annotation)的配置有越来越流行的趋势,Spring 2.5 顺应这种趋势,提供了完全基于注释配置 Bean.装配 Bean 的功能,您可以使用基于注释的 Spring IoC 替换 ...
- 7 -- Spring的基本用法 -- 3... Spring 的核心机制 : 依赖注入
7.3 Spring 的核心机制 : 依赖注入 Spring 框架的核心功能有两个. Spring容器作为超级大工厂,负责创建.管理所有的Java对象,这些Java对象被称为Bean. Spring容 ...
随机推荐
- 洛谷 P2335 [SDOI2005]位图
OJ检测链接:https://www.luogu.org/problem/show?pid=2335 题目描述 现在我们给出一个n*m的单色位图,且该图中至少含有一个白色的像素.我们用(i, j)来代 ...
- LR函数基础(一)(二)
LR函数基础(一) 函数用到:web_reg_find(). lr_log_message(). lr_eval_string().strcmp().atoi() Action(){ web_r ...
- Ubuntu x86-64汇编(4) 数值操作指令
整数乘法指令 Integer Multiplication 对于有符号数的乘法有特殊的规则, 因此无符号数乘法和有符号数乘法对应着不同的指令mul和imul. 乘法会产生两倍尺寸的数值结果, 即两个n ...
- 转:Ogre源码分析之Root类、Facade模式
Ogre源码分析(一)Root类,Facade模式 Ogre中的Root对象是一个Ogre应用程序的主入口点.因为它是整个Ogre引擎的外观(Façade)类.通过Root对象来开启和停止Ogre是最 ...
- Redis持久化之RDB与AOF
1. Redis的持久化方式 Redis作为高效的缓存件,它的数据存放在内存中,如果没有配置持久化,那么数据会在重启后丢失,因此如果不是仅用Redis做缓存的话,需要开启Redis的持久化功能,将数据 ...
- Kubernetes滚动更新介绍及使用-minReadySeconds
滚动升级Deployment 现在我们将刚刚保存的yaml文件中的nginx镜像修改为 nginx:1.13.3,然后在spec下面添加滚动升级策略: 1 2 3 4 5 6 7 minReady ...
- Swift3 获取系统音量和监听系统音量
使用时: //定义滑动条用于显示音量 @IBOutlet weak var volumSlider: UISlider! //处理声音,获取当前音量,并添加监听 handleVolum() 方法内容: ...
- ubuntu源列表(清华,阿里,官方,选一即可)
Ubuntu的源列表在/etc/apt/sources.list中,替换即可 #清华的源deb http://mirrors.tuna.tsinghua.edu.cn/ubuntu/ xenial m ...
- 【SQL】SQL 中Select语句完整的执行顺序
SQL Select语句完整的执行顺序: 1.from子句组装来自不同数据源的数据: 2.where子句基于指定的条件对记录行进行筛选: 3.group by子句将数据划分为多个分组: 4.使用聚集函 ...
- 兼容chrome和ie的wav音乐播放(Ie7 Ie8 Ie9 均测试过 )
<!DOCTYPE html PUBLIC "-//W3C//DTD XHTML 1.0 Transitional//EN" "http://www.w3.org/ ...