ping IP 带时间戳循环显示并写入日志(windos版+linux版)
在工作中,判断网络是否通畅,首选命令就是ping,但有时候我们需要持续ping一个或多个地址时,需要加 -t 即可,但有时候需要在ping的时候加入时间戳并把ping记录写入到日志里面,方法如下:
windos版:
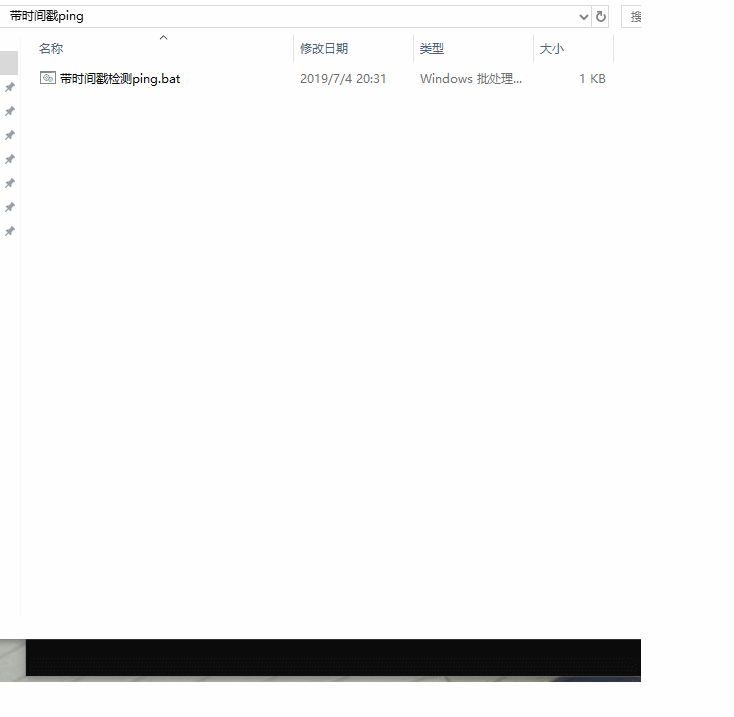
首选把下面代码复制到文本里去,然后把扩展名更改为.bat
@echo off

@echo.----------------------------------------------------------

@echo.       一   Author: aゞ锦衣卫

@echo.       键   Reminder:请以管理员身份运行

@echo.       ★   Description:一键ping+时间戳+写日志服务

@echo.       服   Blog:www.cnblogs.com/su-root

@echo.       务   Email:@qq.com VX:zikun868686

@echo.-----------------------------------------------------------

@echo.  ※温馨提醒:终止执行请按: Ctrl+C

@echo.-----------------------------------------------------------

@echo off

set /p host=请输入需要检测的IP地址:

set logfile=Log_%host%.log

echo Target Host = %host% >%logfile%

for /f "tokens=*" %%A in ('ping %host% -n 1 ') do (echo %%A>>%logfile% && GOTO Ping)

:Ping

for /f "tokens=* skip=2" %%A in ('ping %host% -n 1 ') do (

    echo %date% %time:~,%:%time:~,%:%time:~,% %%A>>%logfile%

    echo %date% %time:~,%:%time:~,%:%time:~,% %%A

    timeout  >NUL

    GOTO Ping)
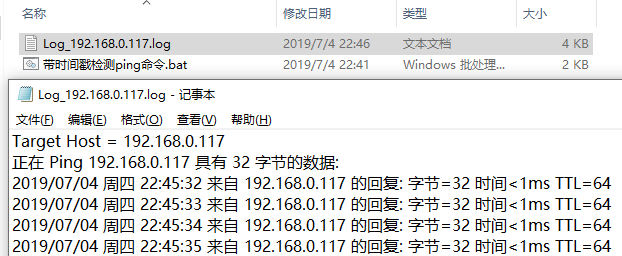
运行.bat文件效果如下:
注:.bat文件放到哪里执行,就会在本地生成相应的.log日志文件。
我们打开日志文件看看:
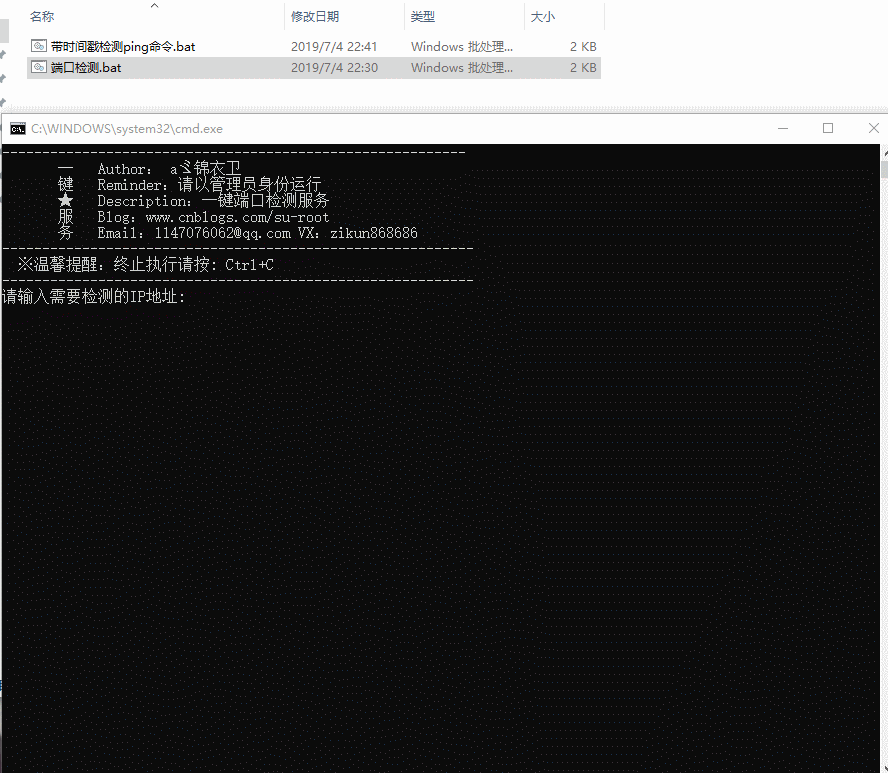
如果我们需要检测某IP地址的指定端口可将上面代码稍加改动即可:
@echo off

@echo.----------------------------------------------------------

@echo.       一   Author: aゞ锦衣卫

@echo.       键   Reminder:请以管理员身份运行

@echo.       ★   Description:一键端口检测服务

@echo.       服   Blog:www.cnblogs.com/su-root

@echo.       务   Email:@qq.com VX:zikun868686

@echo.-----------------------------------------------------------

@echo.  ※温馨提醒:终止执行请按: Ctrl+C

@echo.-----------------------------------------------------------

@echo off

set /p host=请输入需要检测的IP地址:

set /p port=请输入需要检测的端口号:

set logfile=Log_%host%.log

echo Target Host = %host% >>%logfile%

for /f "tokens=*" %%A in ('tcping -d -t -n 1 %host% %port%') do (echo %%A>>%logfile% && GOTO Ping)

:Ping

for /f "tokens=* skip=2" %%A in ('tcping -d -t -n 1 %host% %port%') do (

    echo %date% %time:~,%:%time:~,%:%time:~,% %%A>>%logfile%

    echo %date% %time:~,%:%time:~,%:%time:~,% %%A

    timeout  >NUL

    GOTO Ping)
执行效果如下:
注:去官网下载tcping工具(根据自身系统选择32位/64位)https://elifulkerson.com/projects/tcping.php tcping工具具体用法可参看:https://www.cnblogs.com/su-root/p/10924758.html
我们打开日志文件看看:

linux版:
[root@bqh- ~]# ping 192.168.0.117|awk '{print strftime("%c",systime()) "\t"$0}'

2019年07月04日 星期四 23时14分35秒    PING 192.168.0.117 (192.168.0.117) () bytes of data.

2019年07月04日 星期四 23时14分35秒     bytes from 192.168.0.117: icmp_seq= ttl= time=0.223 ms

2019年07月04日 星期四 23时14分36秒     bytes from 192.168.0.117: icmp_seq= ttl= time=0.385 ms

2019年07月04日 星期四 23时14分37秒     bytes from 192.168.0.117: icmp_seq= ttl= time=0.420 ms

2019年07月04日 星期四 23时14分38秒     bytes from 192.168.0.117: icmp_seq= ttl= time=0.291 ms

2019年07月04日 星期四 23时14分39秒     bytes from 192.168.0.117: icmp_seq= ttl= time=1.21 ms

2019年07月04日 星期四 23时14分40秒     bytes from 192.168.0.117: icmp_seq= ttl= time=1.45 ms
把输出信息写入到log日志中:
[root@bqh- ~]# ping 192.168.0.117 -c |awk '{print strftime("%c",systime()) "\t"$0}' >ping.log

[root@bqh- ~]# cat ping.log

2019年07月04日 星期四 23时15分06秒    PING 192.168.0.117 (192.168.0.117) () bytes of data.

2019年07月04日 星期四 23时15分06秒     bytes from 192.168.0.117: icmp_seq= ttl= time=0.231 ms

2019年07月04日 星期四 23时15分07秒     bytes from 192.168.0.117: icmp_seq= ttl= time=0.331 ms

2019年07月04日 星期四 23时15分08秒     bytes from 192.168.0.117: icmp_seq= ttl= time=0.185 ms

2019年07月04日 星期四 23时15分09秒     bytes from 192.168.0.117: icmp_seq= ttl= time=0.347 ms

2019年07月04日 星期四 23时15分10秒     bytes from 192.168.0.117: icmp_seq= ttl= time=0.259 ms

2019年07月04日 星期四 23时15分11秒     bytes from 192.168.0.117: icmp_seq= ttl= time=0.377 ms

2019年07月04日 星期四 23时15分11秒

2019年07月04日 星期四 23时15分11秒    --- 192.168.0.117 ping statistics ---

2019年07月04日 星期四 23时15分11秒     packets transmitted,  received, % packet loss, time 5038ms

2019年07月04日 星期四 23时15分11秒    rtt min/avg/max/mdev = 0.185/0.288/0.377/0.069 ms
我们也可把任务放到后台运行
[root@bqh- ~]# ping 192.168.0.117 -c |awk '{print strftime("%c",systime()) "\t"$0}' >ping.log &

[]

[root@bqh- ~]#
当然也有其他方法检测,以上方法不是唯一的。
ping IP 带时间戳循环显示并写入日志(windos版+linux版)的更多相关文章
- Tools:实现ping操作带时间戳【windows+linux】
[windows下]: ping.vbs Dim args, flag, unsuccOut args="" otherout="" flag= If WScr ...
- 长ping域名带时间戳
ping www.baidu.com |awk '{print $0 "\t" strftime("%Y:%m:%d-%H:%M:%S",systime())} ...
- 串口助手下载-带时间戳的串口助手-极简串口助手-V1.1 自动保存配置参数 能显示收发时间方便调试
1.串口助手下载 2.带时间戳的串口助手,每次收发指令带上了时间戳,方便调试 3.极简串口助手 4.简单易用 高速稳定 5.每次修改的参数都能自动保存,免去了重复配置的工作 下载地址:http://w ...
- ping域名和ping IP时速度不同的原因
不知道大家在ping的时候有没有遇到过这样的问题:当你ping一个域名的时候,ping结果返回得很慢,但是如果直接ping这个域名的ip,结果却快很多. 直接ping ip的时候,每两次发包之间没有明 ...
- 批量ping IP并检测IP延迟率和丢包率脚本
脚本文件如下: #!/bin/bash #Author:Mr.Ding #Created Time:2018-08-26 07:23:44 #Name:ping.sh #Description: sh ...
- 批量Ping IP
刚刚接触Python 想做点什么 听说Python 在网络方便很厉害 后来总结如下: 第一:发现公司都固定IP 每次新来同事都要猜一个没有人用的IP 很费劲 第二:我们公司有的IP可以上QQ 有的不 ...
- wxPython制作跑monkey工具(python3)-带事件百分比显示界面
一. wxPython制作跑monkey工具(python3)-带事件百分比显示界面 源代码 Run Monkey.py #!/usr/bin/env python import wx import ...
- shell 编写脚本批量Ping IP
服务器总是一下子买了很多的段的ip.通过绑定后,也不知道这些ip是否绑定成功,所以就写了一个shell脚本,把ip输好,批量ping一下,看是不是都能ping通. 脚本如下: 此外.还有一个ip文件, ...
- Linux下长时间ping网络加时间戳并记录到文本
Linux下长时间ping网络加时间戳并记录到文本 由于一些原因,比如需要检查网络之间是否存在掉包等问题,会长时间去ping一个地址,由于会输出大量的信息而且最好要有时间戳,因此我们可以使用简单的 ...
随机推荐
- Eclipse下代码字体背景变红/变绿/变黄原因
如下图所示:不知道怎么,在eclipse IDE手抖按了啥,就成这样了. 后来在stackoverflow提问后,找到了原因.eclipse 有测试代码覆盖率的功能,也就是执行Run——>Cov ...
- PAT 甲级 1070 Mooncake (25 分)(结构体排序,贪心,简单)
1070 Mooncake (25 分) Mooncake is a Chinese bakery product traditionally eaten during the Mid-Autum ...
- 使用SoapUI测试wsdl
webservice服务wsdl地址:http://localhost:8080/services/HelloWorld?wsdl new project: new soap project: 调用测 ...
- [导航教程] [C#基类库大全]官方产品发布与源码下载---苏飞版
http://www.sufeinet.com/thread-655-1-1.html
- 改进初学者的PID-修改整定参数
最近看到了Brett Beauregard发表的有关PID的系列文章,感觉对于理解PID算法很有帮助,于是将系列文章翻译过来!在自我提高的过程中,也希望对同道中人有所帮助.作者Brett Beaure ...
- vue-cli4.0 基于 antd-design-vue 二次封装发布到 npm 仓库
1. 安装 cli npm install -g @vue/cli vue create winyh-ui 2.安装 antd-design-vue cnpm i ant-design-vue --s ...
- 【超分辨率】—图像超分辨率(Super-Resolution)技术研究
一.相关概念 1.分辨率 图像分辨率指图像中存储的信息量,是每英寸图像内有多少个像素点,分辨率的单位为PPI(Pixels Per Inch),通常叫做像素每英寸.一般情况下,图像分辨率越高,图像中包 ...
- dockerfile中设置环境变量
设置环境变量要用 ENV ENV JAVA_HOME /usr/local/jdk1.8.0_171 ENV PATH $JAVA_HOME/bin:$PATH 用 echo "JAVA_H ...
- STM32F405的 ADC参考电压选择问题
1. STM32F405没有参考电压的输入引脚,那么可能是接的VDDA和VSSA 2. 看下文档的说明
- Flutter 路由传入中文参数报错无法push问题
flutter自带路由传递参数和使用第三方库fluro路由传递参数都可以通过一下方式解决问题 String jsonString = json.encode(mapValue); var jsons ...