Spring boot 入门(四):集成 Shiro 实现登陆认证和权限管理
本文是接着上篇博客写的:Spring boot 入门(三):SpringBoot 集成结合 AdminLTE(Freemarker),利用 generate 自动生成代码,利用 DataTable 和 PageHelper 进行分页显示。按照前面的博客,已经可以搭建一个简单的 Spring Boot 系统,本篇博客继续对此系统进行改造,主要集成了 Shiro 权限认证框架,关于 Shiro 部分,在本人之前的博客(认证与Shiro安全框架)有介绍到,这里就不做累赘的介绍。
此系列的博客为实践部分,以代码和搭建系统的过程为主,如遇到专业名词,自行查找其含义。
1.Shiro 配置类
系统搭建到目前为止,主要用到了3个配置类,均与 Shiro 有关,后期随着项目的扩大,配置文件也会随之增多。
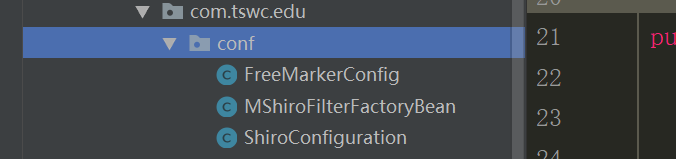
- FreeMarkerConfig:主要针对 FreeMarker 页面显示的配置,关于 Shiro 部分,为 Shiro 标签设置了共享变量
,如果不设置此变量,FreeMarker 页面将不能识别 Shiro 的标签,其主要代码如下:
configuration.setSharedVariable("shiro", new ShiroTags());
- MShiroFilterFactoryBean:设置了过滤器,当然也可以在 Config 文件里面配置过滤器,其缺点是:
在每次请求里面都做了 session 的读取和更新访问时间等操作,这样在集群部署 session 共享的情况下,数量级的加大了处理量负载。本项目后期将用到分布式,因此这里就直接将过滤器与 Config 配置文件分离,提高效率。
 private final class MSpringShiroFilter extends AbstractShiroFilter {

         protected MSpringShiroFilter(WebSecurityManager webSecurityManager, FilterChainResolver resolver) {

             super();

             if (webSecurityManager == null) {

                 throw new IllegalArgumentException("WebSecurityManager property cannot be null.");

             }

             setSecurityManager(webSecurityManager);

             if (resolver != null) {

                 setFilterChainResolver(resolver);

             }

         }

         @Override

         protected void doFilterInternal(ServletRequest servletRequest, ServletResponse servletResponse,

                                         FilterChain chain) throws ServletException, IOException {

             HttpServletRequest request = (HttpServletRequest) servletRequest;

             String str = request.getRequestURI().toLowerCase();

             boolean flag = true;

             int idx = 0;

             if ((idx = str.indexOf(".")) > 0) {

                 str = str.substring(idx);

                 if (ignoreExt.contains(str.toLowerCase()))

                     flag = false;

             }

             if (flag) {

                 super.doFilterInternal(servletRequest, servletResponse, chain);

             } else {

                 chain.doFilter(servletRequest, servletResponse);

             }

         }

     }
- ShiroConfiguration:通用配置文件,此配置文件为 Shiro 的基础通用配置文件,只要是集成 Shiro,必有此文件,主要配置 Shiro 的登录认证相关的信息,其代码如下:
 /**

      * 设置shiro的缓存,缓存参数均配置在xml文件中

      * @return

      */

     @Bean

     public EhCacheManager getEhCacheManager() {

         EhCacheManager em = new EhCacheManager();

         em.setCacheManagerConfigFile("classpath:ehcache/ehcache-shiro.xml");

         return em;

     }

     /**

      * 凭证匹配器

      * (由于我们的密码校验交给Shiro的SimpleAuthenticationInfo进行处理了

      *  所以我们需要修改下doGetAuthenticationInfo中的代码;

      * )

      * @return

      */

     @Bean

     public HashedCredentialsMatcher hashedCredentialsMatcher(){

        HashedCredentialsMatcher hashedCredentialsMatcher = new HashedCredentialsMatcher();

        hashedCredentialsMatcher.setHashAlgorithmName("md5");//散列算法:这里使用MD5算法;

        hashedCredentialsMatcher.setHashIterations(1);//散列的次数,比如散列两次,相当于 md5(md5(""));

        return hashedCredentialsMatcher;

     }

     /**

      *

      * 主文件

      */

     @Bean(name = "myShiroRealm")

     public UserRealm myShiroRealm(EhCacheManager cacheManager) {

         UserRealm realm = new UserRealm();

         realm.setCacheManager(cacheManager);

         realm.setCredentialsMatcher(hashedCredentialsMatcher());

         return realm;

     }

    //会话ID生成器

     @Bean(name = "sessionIdGenerator")

     public JavaUuidSessionIdGenerator javaUuidSessionIdGenerator(){

         JavaUuidSessionIdGenerator javaUuidSessionIdGenerator = new JavaUuidSessionIdGenerator();

         return javaUuidSessionIdGenerator;

     }

     @Bean(name = "sessionIdCookie")

     public SimpleCookie getSessionIdCookie(){

         SimpleCookie sessionIdCookie = new SimpleCookie("sid");

         sessionIdCookie.setHttpOnly(true);

         sessionIdCookie.setMaxAge(-1);

         return sessionIdCookie;

     }

     /*<!-- 会话DAO -->*/

     @Bean(name = "sessionDAO")

     public EnterpriseCacheSessionDAO enterpriseCacheSessionDAO(){

         EnterpriseCacheSessionDAO sessionDao = new EnterpriseCacheSessionDAO();

         sessionDao.setSessionIdGenerator(javaUuidSessionIdGenerator());

         sessionDao.setActiveSessionsCacheName("shiro-activeSessionCache");

         return sessionDao;

     }

     @Bean(name = "sessionValidationScheduler")

     public ExecutorServiceSessionValidationScheduler getExecutorServiceSessionValidationScheduler() {

         ExecutorServiceSessionValidationScheduler scheduler = new ExecutorServiceSessionValidationScheduler();

         scheduler.setInterval(1800000);

         return scheduler;

     }

     @Bean(name = "sessionManager")

     public DefaultWebSessionManager sessionManager(EnterpriseCacheSessionDAO sessionDAO){

         DefaultWebSessionManager sessionManager = new DefaultWebSessionManager();

         sessionManager.setGlobalSessionTimeout(1800000);

         sessionManager.setDeleteInvalidSessions(true);

         sessionManager.setSessionValidationSchedulerEnabled(true);

         sessionManager.setSessionValidationScheduler(getExecutorServiceSessionValidationScheduler());

         sessionManager.setSessionDAO(sessionDAO);

         sessionManager.setSessionIdCookieEnabled(true);

         sessionManager.setSessionIdCookie(getSessionIdCookie());

         return sessionManager;

     }

     @Bean(name = "lifecycleBeanPostProcessor")

     public LifecycleBeanPostProcessor getLifecycleBeanPostProcessor() {

         return new LifecycleBeanPostProcessor();

     }

     @Bean

     public DefaultAdvisorAutoProxyCreator getDefaultAdvisorAutoProxyCreator() {

         DefaultAdvisorAutoProxyCreator daap = new DefaultAdvisorAutoProxyCreator();

         daap.setProxyTargetClass(true);

         return daap;

     }

     @Bean(name = "securityManager")

     public DefaultWebSecurityManager getDefaultWebSecurityManager(UserRealm myShiroRealm, DefaultWebSessionManager sessionManager) {

         DefaultWebSecurityManager dwsm = new DefaultWebSecurityManager();

         dwsm.setRealm(myShiroRealm);

 //      <!-- 用户授权/认证信息Cache, 采用EhCache 缓存 -->

         dwsm.setCacheManager(getEhCacheManager());

         dwsm.setSessionManager(sessionManager);

         return dwsm;

     }

     /**

      *  开启shiro aop注解支持.

      *  使用代理方式;所以需要开启代码支持;

      * @param securityManager

      * @return

      */

     @Bean

     public AuthorizationAttributeSourceAdvisor getAuthorizationAttributeSourceAdvisor(DefaultWebSecurityManager securityManager) {

         AuthorizationAttributeSourceAdvisor aasa = new AuthorizationAttributeSourceAdvisor();

         aasa.setSecurityManager(securityManager);

         return aasa;

     }

     /**

      * ShiroFilter<br/>

      * 注意这里参数中的 StudentService 和 IScoreDao 只是一个例子,因为我们在这里可以用这样的方式获取到相关访问数据库的对象,

      * 然后读取数据库相关配置,配置到 shiroFilterFactoryBean 的访问规则中。实际项目中,请使用自己的Service来处理业务逻辑。

      *

      */

     @Bean(name = "shiroFilter")

     public ShiroFilterFactoryBean getShiroFilterFactoryBean(DefaultWebSecurityManager securityManager) {

         ShiroFilterFactoryBean shiroFilterFactoryBean = new MShiroFilterFactoryBean();

         // 必须设置 SecurityManager

         shiroFilterFactoryBean.setSecurityManager(securityManager);

         // 如果不设置默认会自动寻找Web工程根目录下的"/login.jsp"页面

         shiroFilterFactoryBean.setLoginUrl("/login");

         // 登录成功后要跳转的连接

         shiroFilterFactoryBean.setSuccessUrl("/certification");

         //shiroFilterFactoryBean.setSuccessUrl("/index");

         shiroFilterFactoryBean.setUnauthorizedUrl("/403");

         loadShiroFilterChain(shiroFilterFactoryBean);

         return shiroFilterFactoryBean;

     }

     /**

      * 加载shiroFilter权限控制规则(从数据库读取然后配置)

      *

      */

     private void loadShiroFilterChain(ShiroFilterFactoryBean shiroFilterFactoryBean){

         /////////////////////// 下面这些规则配置最好配置到配置文件中 ///////////////////////

         Map<String, String> filterChainDefinitionMap = new LinkedHashMap<String, String>();

         // authc:该过滤器下的页面必须验证后才能访问,它是Shiro内置的一个拦截器org.apache.shiro.web.filter.authc.FormAuthenticationFilter

         filterChainDefinitionMap.put("/login", "authc");

         filterChainDefinitionMap.put("/logout", "logout");

         // anon:它对应的过滤器里面是空的,什么都没做

         logger.info("##################从数据库读取权限规则,加载到shiroFilter中##################");

 //        filterChainDefinitionMap.put("/user/edit/**", "authc,perms[user:edit]");// 这里为了测试,固定写死的值,也可以从数据库或其他配置中读取

         shiroFilterFactoryBean.setFilterChainDefinitionMap(filterChainDefinitionMap);

     }
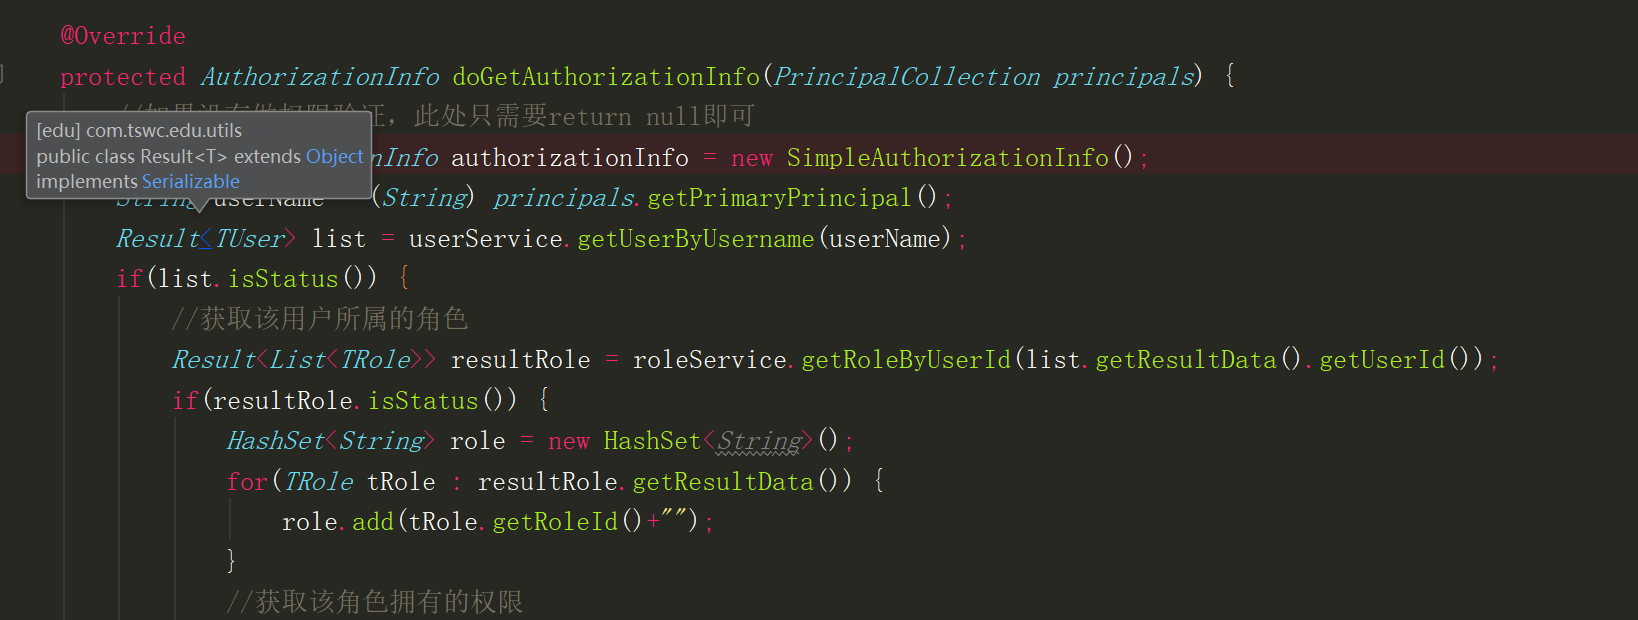
2.登录认证与权限管理
主要重写了 Realm域,完成权限认证和权限管理:
protected AuthorizationInfo doGetAuthorizationInfo(PrincipalCollection principals) {
//如果没有做权限验证,此处只需要return null即可
SimpleAuthorizationInfo authorizationInfo = new SimpleAuthorizationInfo();
String userName = (String) principals.getPrimaryPrincipal();
Result<TUser> list = userService.getUserByUsername(userName);
if(list.isStatus()) {
//获取该用户所属的角色
Result<List<TRole>> resultRole = roleService.getRoleByUserId(list.getResultData().getUserId());
if(resultRole.isStatus()) {
HashSet<String> role = new HashSet<String>();
for(TRole tRole : resultRole.getResultData()) {
role.add(tRole.getRoleId()+"");
}
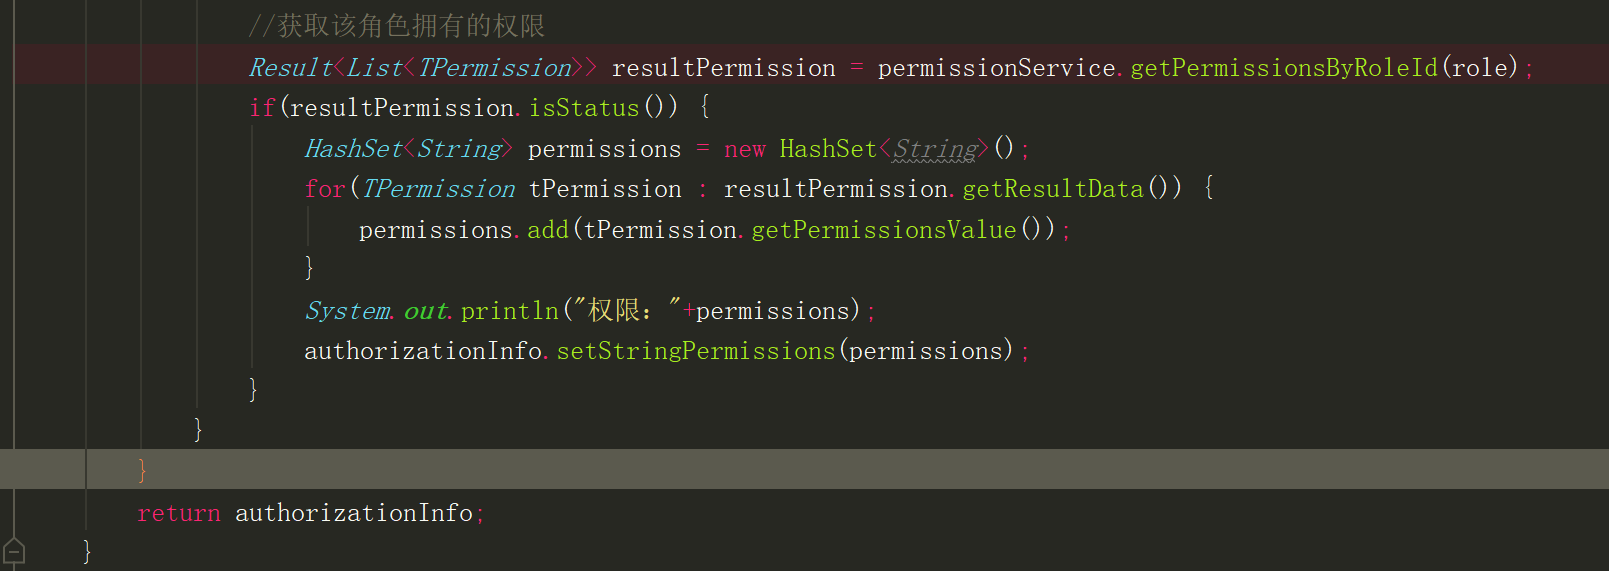
//获取该角色拥有的权限
Result<List<TPermission>> resultPermission = permissionService.getPermissionsByRoleId(role);
if(resultPermission.isStatus()) {
HashSet<String> permissions = new HashSet<String>();
for(TPermission tPermission : resultPermission.getResultData()) {
permissions.add(tPermission.getPermissionsValue());
}
System.out.println("权限:"+permissions);
authorizationInfo.setStringPermissions(permissions);
}
}
}
//return null;
return authorizationInfo;
}
@Override
protected AuthenticationInfo doGetAuthenticationInfo(AuthenticationToken authenticationToken) throws AuthenticationException {
//认证登录
String username = (String) authenticationToken.getPrincipal();
//String password = new String((char[]) authenticationToken.getCredentials());
Result<TUser> result = userService.getUserByUsername(username);
if (result.isStatus()) {
TUser user = result.getResultData();
return new SimpleAuthenticationInfo(user.getUsername(), user.getPassword(), getName());
}
//return new SimpleAuthenticationInfo(user., "123456", getName());
return null;
}
}
2.1.登录认证
首先创建一个前端登录界面,做一个简单的登录 Form 表单

点击登录即想后台发送一个请求,必须是Post请求,否则Shiro不能识别,认证部分主要在 Ream 中完成,新建一个类,继承 AuthorizingRealm ,然后在重写 doGetAuthenticationInfo 方法:

new SimpleAuthenticationInfo(user.getUsername(), user.getPassword(), getName())),我们可以自己重新定义密码比较器,密码比较器的写法较多,在认证与Shiro安全框架中,直接将密码比较器写入到Ream中,耦合度太高,本项目通过配置的方式重写密码比较器,具体代码请参考参考ShiroConfiguration配置类:

在具体的 Login 方法中,写入一些登录失败的异常即可,主要用户将此失败结果存入 Session,并显示在页面上:
     @RequestMapping(value = "/login", method = RequestMethod.POST)

     public String postLogin(RedirectAttributes redirectAttributes, HttpServletRequest request, HttpSession session) {

         // 登录失败从request中获取shiro处理的异常信息。

         // shiroLoginFailure:就是shiro异常类的全类名.

         String exception = (String) request.getAttribute("shiroLoginFailure");

         System.out.println("exception=" + exception);

         String msg = "";

         if (exception != null) {

             if (UnknownAccountException.class.getName().equals(exception)) {

                 System.out.println("UnknownAccountException -- > 账号不存在:");

                 msg = "用户不存在!";

             } else if (IncorrectCredentialsException.class.getName().equals(exception)) {

                 System.out.println("IncorrectCredentialsException -- > 密码不正确:");

                 msg = "密码不正确!";

             } else if ("kaptchaValidateFailed".equals(exception)) {

                 System.out.println("kaptchaValidateFailed -- > 验证码错误");

                 msg = "验证码错误!";

             } else {

                 //msg = "else >> "+exception;

                 msg = "密码不正确!";

                 System.out.println("else -- >" + exception);

             }

         }

         redirectAttributes.addFlashAttribute("msg", msg);

         session.setAttribute("msg", msg);

         //return redirect("/login");

         return "redirect:login";

         //return msg;

     }
此时登录认证部门已经完成:一个页面+后台2个函数(1个认证函数+1个Login函数)
2.2.权限管理
总体来说,权限管理只需要在界面增加 Shiro 的权限标签即可,可以使用角色的标签,也可以使用权限的标签,一般情况下2种标签配合使用,效果最好 <@shiro.hasPermission name="xtgl-yhgl:read"> <@shiro.hasRolen name="xtgl-yhgl:read">
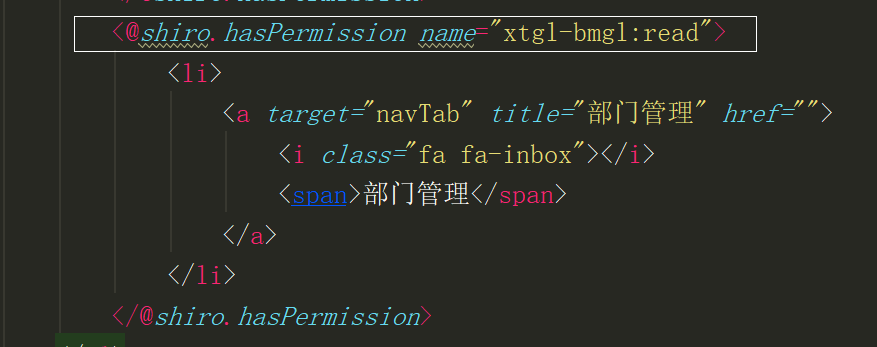
authorizationInfo.setStringPermissions(permissions); authorizationInfo.setRoles(role);
本项目也是通过此逻辑完成权限管理的
上面2张截图表示的是一个函数。
到此,Spring Boot集成Shiro框架的权限认证已经搭建完毕,可以实现简单的权限管理。
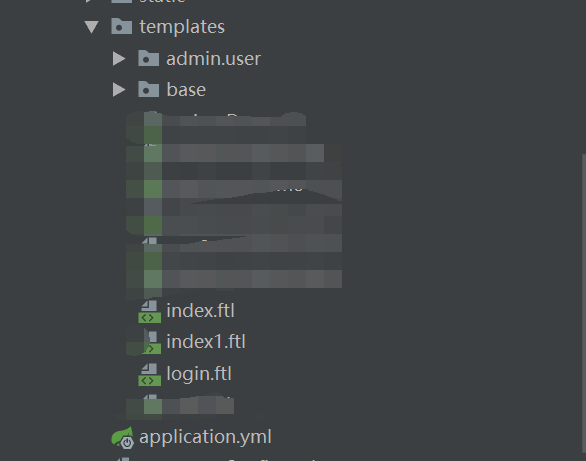
3.新增文件
较上一篇博客,Shiro 部分新增加的文件

Spring boot 入门(四):集成 Shiro 实现登陆认证和权限管理的更多相关文章
- Spring Boot入门(四):开发Web Api接口常用注解总结
本系列博客记录自己学习Spring Boot的历程,如帮助到你,不胜荣幸,如有错误,欢迎指正! 在程序员的日常工作中,Web开发应该是占比很重的一部分,至少我工作以来,开发的系统基本都是Web端访问的 ...
- Spring集成shiro做登陆认证
一.背景 其实很早的时候,就在项目中有使用到shiro做登陆认证,直到今天才又想起来这茬,自己抽空搭了一个spring+springmvc+mybatis和shiro进行集成的种子项目,当然里面还有很 ...
- Spring Cloud之路:(七)SpringBoot+Shiro实现登录认证和权限管理
版权声明:本文为博主原创文章,未经博主允许不得转载. https://blog.csdn.net/sage_wang/article/details/79592269一.Shiro介绍1.Shiro是 ...
- spring boot 2.0 集成 shiro 和 pac4j cas单点登录
新开的项目,果断使用 spring boot 最新版本 2.0.3 ,免得后期升级坑太多,前期把雷先排了. 由于对 shiro 比较熟,故使用 shiro 来做权限控制.同时已经存在了 cas ...
- Spring boot 入门四:spring boot 整合mybatis 实现CRUD操作
开发环境延续上一节的开发环境这里不再做介绍 添加mybatis依赖 <dependency> <groupId>org.mybatis.spring.boot</grou ...
- Spring Boot确保Web应用安全(登陆认证)
Spring Boot官方提供了一个登陆认证的清晰易懂的 例子 , 我们在次以此例展开演示Spring Boot是如何实现登陆认证的. 首先我们去 https://start.spring.io/ 下 ...
- Apache Shiro(五)-登录认证和权限管理ssm
创建一个web动态项目 jar包 web.xml web.xml做了如下几件事情1. 指定spring的配置文件有两个 applicationContext.xml: 用于链接数据库的 applica ...
- Apache Shiro(二)-登录认证和权限管理数据库操作
数据库支持 在上一篇中使用ini 配置文件进行了相关权限数据的配置. 但是实际工作中,我们都会把权限相关的内容放在数据库里. 所以本知识点讲解如何放在数据库里来撸. RBAC 概念 RBAC 是当下权 ...
- Apache Shiro(一)-登录认证和权限管理初识
What is Apache Shiro? Apache Shiro是一个功能强大.灵活的,开源的安全框架.它可以干净利落地处理身份验证.授权.企业会话管理和加密. Apache Shiro的首要目标 ...
随机推荐
- python接口自动化(十三)--cookie绕过验证码登录(详解)
简介 有些登录的接口会有验证码:短信验证码,图形验证码等,这种登录的话验证码参数可以从后台获取的(或者查数据库最直接).获取不到也没关系,可以通过添加cookie的方式绕过验证码.(注意:并不是所有的 ...
- 这年头做开源项目,被冷嘲热讽,FreeSql 0.0.4
FreeSql 项目大概在20天前想着要做的,今天发布0.0.4在群里被一位大神讽刺. 这位无名氏哥们的观点,先声明这不是找安慰的文章,更加不是报复打击的目的. 1 所以这个比EF好在哪里 2 毕竟E ...
- 深度学习之卷积神经网络(CNN)的应用-验证码的生成与识别
验证码的生成与识别 本文系作者原创,转载请注明出处:https://www.cnblogs.com/further-further-further/p/10755361.html 目录 1.验证码的制 ...
- 【4】Asp.Net Core2.2中间件多扩展对应应用
[前言] 上一篇完成了Asp.Net Core 2.2全新的管道处理模型解析,“俄罗斯套娃”式的委托嵌套和传递,组建了扩展性无与伦比的管道模型!与此同时,委托嵌套过于复杂,使用起来并不友好,然后多种扩 ...
- DSAPI多功能.NET函数库组件
DSAPI.dll不定期更新,增加功能,故无法每次都发到网上,如果需要获得最新版DSAPI.dll的,请到QQ群:419130936群共享里下载. 简介 dsapi.dll是一款基于.net平 ...
- 设计模式之创建类模式PK
创建类模式包括: 工厂方法模式 建造者模式 抽象工厂模式 单例模式 原型模式 创建类模式能够提供对象的创建和管理职责. 其中单例模式和原型模式非常容易理解, 单例模式是要保持在内存中只有一个对象,原型 ...
- Multi Reflection (Pro Only)
Case 14 - Double Injection in HTML Context with Double Quotes https://brutelogic.com.br/multi/double ...
- sqlserver的over开窗函数(与排名函数或聚合函数一起使用)
首先初始化表和数据 create table t_student( Id INT, Name varchar(), Score int, ClassId INT ); insert i ...
- SQLServer之附加数据库
附加数据库注意事项 必须首先分离数据库. 尝试附加未分离的数据库将返回错误. 附加数据库时,所有数据文件(MDF 文件和 LDF 文件)都必须可用. 如果任何数据文件的路径不同于首次创建数据库或上次附 ...
- 解决Maven无法下载fastdfs-client-java依赖,Dependency 'org.csource:fastdfs-client-java:1.27-SNAPSHOT' not found.
因为fastdfs-client-java-1.27-SNAPSHOT.jar这个依赖包在maven中央仓库是没有的, 需要自己编译源码成jar本地安装到maven 的本地仓库,安装完以后就能正常引用 ...