Elasticsearch之索引模板index template与索引别名index alias
为什么需要索引模板?
在实际工作中针对一批大量数据存储的时候需要使用多个索引库,如果手工指定每个索引库的配置信息(settings和mappings)的话就很麻烦了。
所以,这个时候,就存在创建索引模板的必要了!!1
索引可使用预定义的模板进行创建,这个模板称作Index templates。模板设置包括settings和mappings,通过模式匹配的方式使得多个索引重用一个模板。
更多,请见
https://www.elastic.co/guide/en/elasticsearch/reference/2.4/indices-templates.html
索引别名的应用场景:
比如,公司使用es收集应用的运行日志,每个星期创建一个索引库,这样时间长了就会创建很多的索引库,操作和管理的时候很不方便。
由于新增索引数据只会操作当前这个星期的索引库,所以就创建了两个别名。
curr_week:这个别名指向这个星期的索引库,新增数据操作这个索引库。
last_3_month:这个别名指向最近三个月的所有索引库,因为我们的需求是查询最近三个月的日志信息。
后期只需要修改这两个别名和索引库之间的指向关系即可。应用层代码不需要任何改动。
还要把三个月以前的索引库close掉,留存最近一年的日志数据,一年以前的数据删除掉。
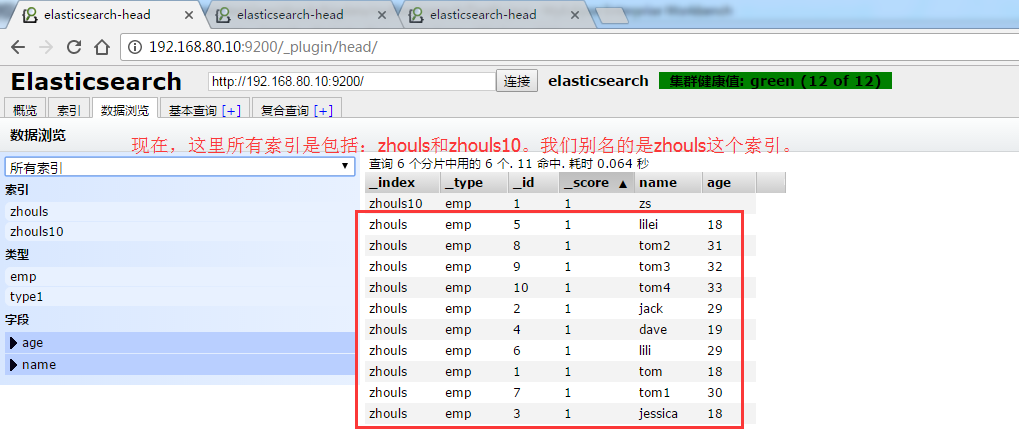
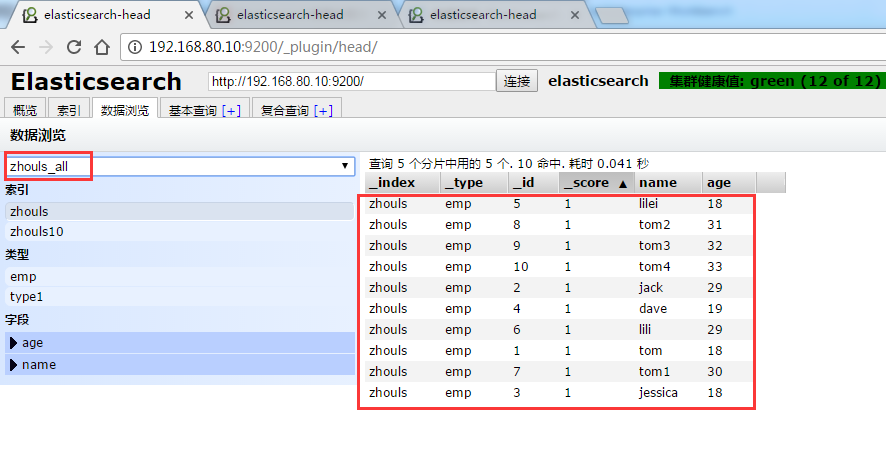
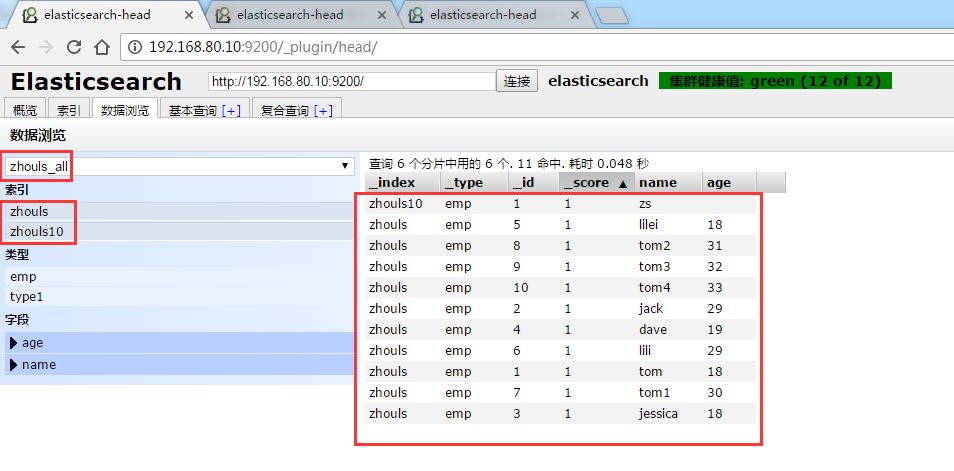
说明:可以类似,指定多个索引库查询。定义一个索引别名,如zhouls_all,将索引zhouls1映射到这个别名上,把索引zhouls2,把索引zhoulsn,也映射到这个别名上。
那么,在通过别名来查询时,直接同查询别名zhouls_all,就可以把对应所有的索引zhouls,1,2,...n都一次性查询完了。
但是,如果你是具体要插入和操作数据,则,就不方便使用别名了。而是具体到某个索引zhoulsn了。
一、索引模板index template操作示例
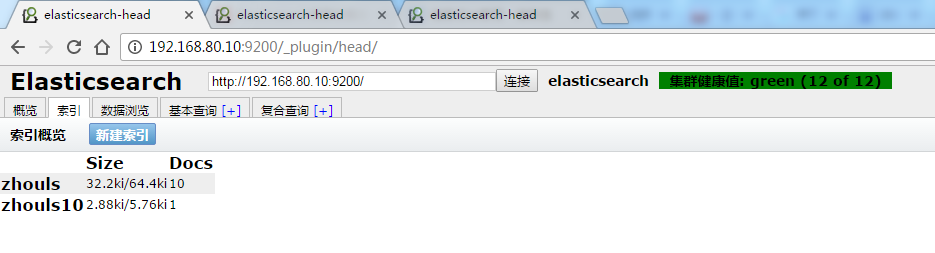
比如,我们会创建zhouls,zhouls1,zhouls2,,,等这样的索引库。那么,我们创建模板索引库指定是zhouls*。
那么,
1、创建自定义模板
在es的安装目录下,输入,如下,回车
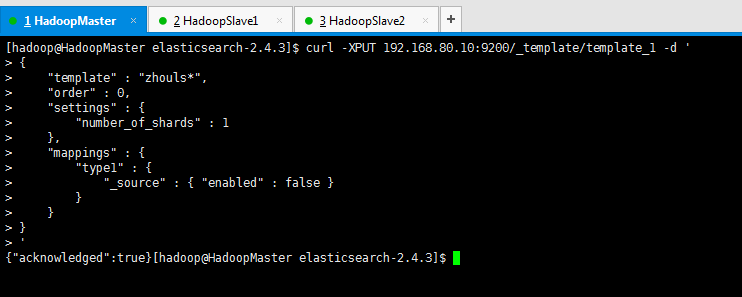
curl -XPUT 192.168.80.10:9200/_template/template_1 -d '

{

    "template" : "zhouls*",

    "order" : 0,

    "settings" : {

        "number_of_shards" : 1

    },

    "mappings" : {

        "type1" : {

            "_source" : { "enabled" : false }

        }

    }

}

'
说明: (1)模板template_1匹配所有的以zhouls开头的索引。
(2)索引模板是template_1,索引是zhouls*。

[hadoop@HadoopMaster elasticsearch-2.4.3]$ curl -XPUT '192.168.80.10:9200/zhouls10/emp/1' -d '{"name":"zs"}' (给索引zhouls10赋值)
{"_index":"zhouls10","_type":"emp","_id":"1","_version":1,"_shards":{"total":2,"successful":2,"failed":0},"created":true}[hadoop@HadoopMaster elasticsearch-2.4.3]$
[hadoop@HadoopMaster elasticsearch-2.4.3]$
[hadoop@HadoopMaster elasticsearch-2.4.3]$ curl -XGET http://192.168.80.10:9200/zhouls10/_settings?pretty
{
"zhouls10" : {
"settings" : {
"index" : {
"creation_date" : "1488280491485",
"uuid" : "R4dWmru2T9uO1JFOE98r5w",
"number_of_replicas" : "1",
"number_of_shards" : "1",
"version" : {
"created" : "2040399"
}
}
}
}
}
[hadoop@HadoopMaster elasticsearch-2.4.3]$

2、查看定义的模板

curl -XGET 192.168.80.10:9200/_template/template_1

我这里,创建定义模板temp*就省略了。
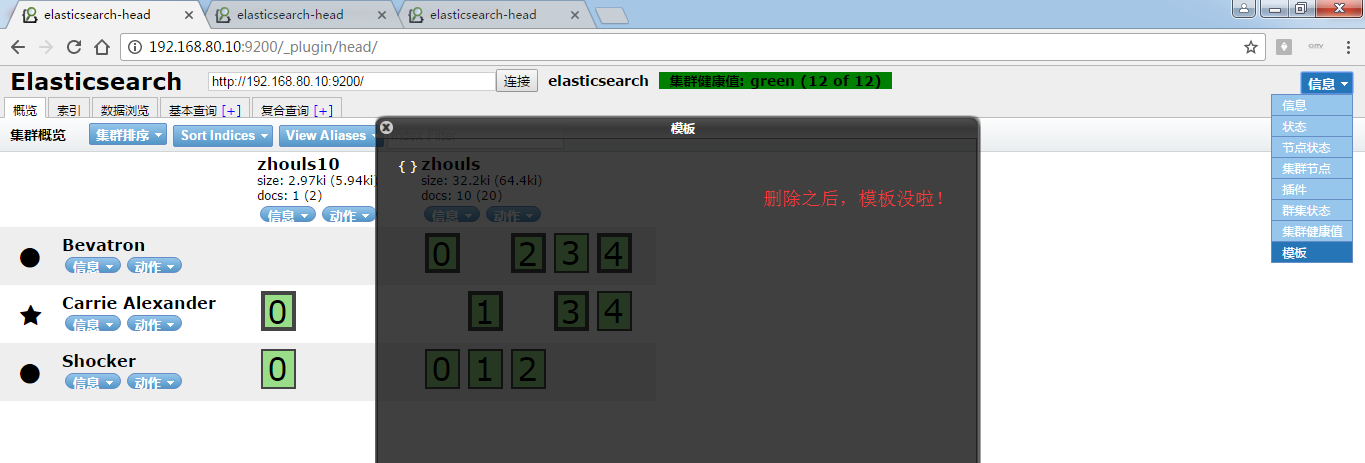
3、删除定义模板

[hadoop@HadoopMaster elasticsearch-2.4.3]$ curl -XDELETE 192.168.80.10:9200/_template/template_1 (删除定义的模板)
{"acknowledged":true}[hadoop@HadoopMaster elasticsearch-2.4.3]$
[hadoop@HadoopMaster elasticsearch-2.4.3]$ curl -XGET http://192.168.80.10:9200/_template/template_1?pretty (查看,可见删除模板成功)
{ }
[hadoop@HadoopMaster elasticsearch-2.4.3]$

[hadoop@HadoopMaster elasticsearch-2.4.3]$ curl -XDELETE 192.168.80.10:9200/_template/temp* (删除定义的模板)
{"acknowledged":true}[hadoop@HadoopMaster elasticsearch-2.4.3]$
[hadoop@HadoopMaster elasticsearch-2.4.3]$ curl -XGET http://192.168.80.10:9200/_template/temp*?pretty (查看下,删除成功)
{ }
[hadoop@HadoopMaster elasticsearch-2.4.3]$
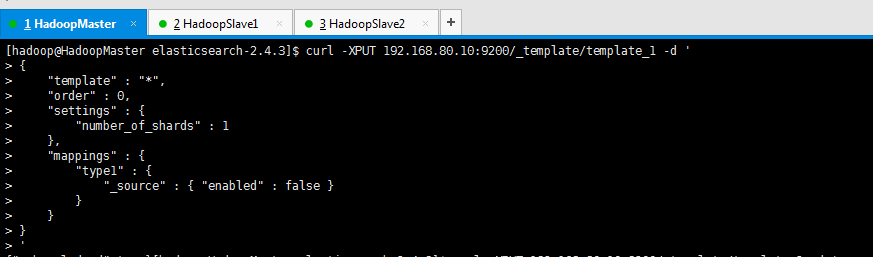
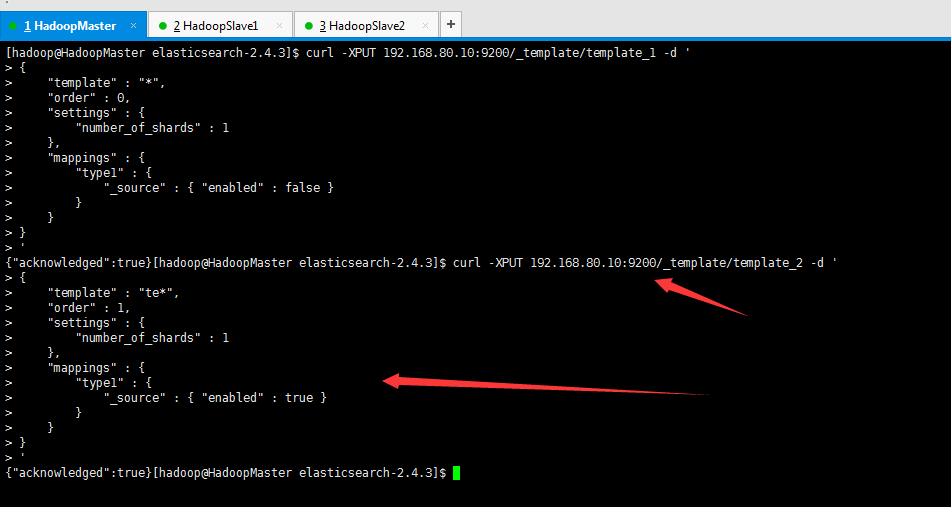
4、创建多个索引模板
当存在多个索引模板时并且某个索引两者都匹配时,settings和mpapings将合成一个配置应用在这个索引上。合并的顺序可由索引模板的order属性来控制。
curl -XPUT 192.168.80.10:9200/_template/template_1 -d '

{

    "template" : "*",

    "order" : 0,

    "settings" : {

        "number_of_shards" : 1

    },

    "mappings" : {

        "type1" : {

            "_source" : { "enabled" : false }

        }

    }

}

'
得到,

然后,输入如下:再创建一个模板
curl -XPUT 192.168.80.10:9200/_template/template_2 -d '

{

    "template" : "te*",

    "order" : 1,

    "settings" : {

        "number_of_shards" : 1

    },

    "mappings" : {

        "type1" : {

            "_source" : { "enabled" : true }

        }

    }

}

'
得到,


[hadoop@HadoopMaster elasticsearch-2.4.3]$ curl -XGET 192.168.80.10:9200/_template/template_1 (查看模板template_1)
{"template_1":{"order":0,"template":"*","settings":{"index":{"number_of_shards":"1"}},"mappings":{"type1":{"_source":{"enabled":false}}},"aliases":{}}}[hadoop@HadoopMaster elasticsearch-2.4.3]$
[hadoop@HadoopMaster elasticsearch-2.4.3]$ curl -XGET 192.168.80.10:9200/_template/template_2 (查看模板template_1)
{"template_2":{"order":1,"template":"te*","settings":{"index":{"number_of_shards":"1"}},"mappings":{"type1":{"_source":{"enabled":true}}},"aliases":{}}}[hadoop@HadoopMaster elasticsearch-2.4.3]$
[hadoop@HadoopMaster elasticsearch-2.4.3]$
上述order为1的配置将覆盖order为0的配置,最终索引的配置source的enabled为true。
注意:order值大的模板内容会覆盖order值小的。
5、模板配置文件:
除了以上方式,索引模板也可以在文件中进行配置。索引模板的配置文件需要在每个
主节点的config目录下,目录结构为:config/templates/template_1.json,temp
late_1.json的样例如下:
 1 {

 2   "template-logstash" : {

 3     "template" : "logstash*",

 4     "settings" : {

 5       "index.number_of_shards" : 5,

 6       "number_of_replicas" : 1,

 7       "index" : {

 8         "store" : {

 9           "compress" : {

10             "stored" : true,

11             "tv": true

12           }

13         }

14       }

15     },

16     "mappings" : {

17       "_default_" : {

18         "properties" : {

19           "dynamic" : "true",

20         },

21       },

22       "loadbalancer" : {

23         "_source" : {

24           "compress" : true,

25         },

26         "_ttl" : {

27           "enabled" : true,

28           "default" : "10d"

29         },

30         "_all" : {

31           "enabled" : false

32         },

33         "properties" : {

34           "@fields" : {

35             "dynamic" : "true",

36             "properties" : {

37               "client" : {

38                 "type" : "string",

39                 "index" : "not_analyzed"

40               },

41               "domain" : {

42                 "type" : "string",

43                 "index" : "not_analyzed"

44               },

45               "oh" : {

46                 "type" : "string",

47                 "index" : "not_analyzed"

48               },

49               "responsetime" : {

50                 "type" : "double",

51               },

52               "size" : {

53                 "type" : "long",

54                 "index" : "not_analyzed"

55               },

56               "status" : {

57                 "type" : "string",

58                 "index" : "not_analyzed"

59               },

60               "upstreamtime" : {

61                 "type" : "double",

62               },

63               "url" : {

64                 "type" : "string",

65                 "index" : "not_analyzed"

66               }

67             }

68           },

69           "@source" : {

70             "type" : "string",

71             "index" : "not_analyzed"

72           },

73           "@timestamp" : {

74             "type" : "date",

75             "format" : "dateOptionalTime"

76           },

77           "@type" : {

78             "type" : "string",

79             "index" : "not_analyzed",

80             "store" : "no"

81           }

82         }

83       }

84     }

85   }

86 }
二、索引别名index alias操作示例
1、增加索引别名

curl -XPOST 'http://192.168.80.10:9200/_aliases' -d '

{

    "actions" : [

        { "add" : { "index" : "zhouls", "alias" : "zhouls_all" } }

    ]

}'
即,zhouls是索引,zhouls_all是索引别名
可以看到,成功啦!
2、可以同时为多个索引映射到一个索引别名
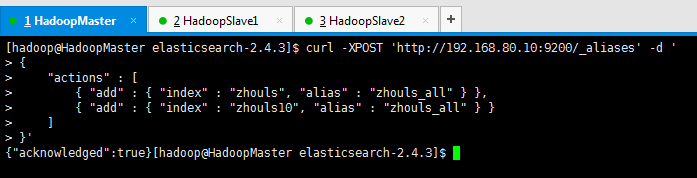
curl -XPOST 'http://192.168.80.10:9200/_aliases' -d '

{

    "actions" : [

        { "add" : { "index" : "zhouls", "alias" : "zhouls_all" } },

        { "add" : { "index" : "zhouls10", "alias" : "zhouls_all" } }

    ]

}'
3、删除索引别名
1、删除索引zhouls映射的索引别名zhouls_all
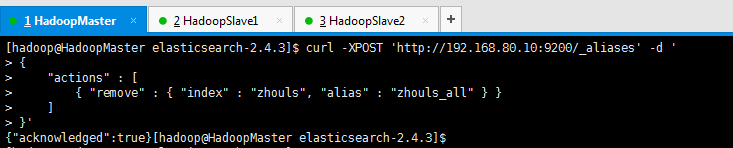
curl -XPOST 'http://192.168.80.10:9200/_aliases' -d '

{

    "actions" : [

        { "remove" : { "index" : "zhouls", "alias" : "zhouls_all" } }

    ]

}'

2、删除索引zhouls10映射的索引别名zhouls_all
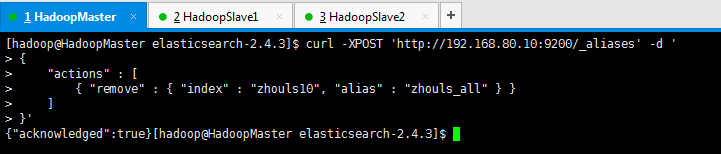
curl -XPOST 'http://192.168.80.10:9200/_aliases' -d '

{

    "actions" : [

        { "remove" : { "index" : "zhouls10", "alias" : "zhouls_all" } }

    ]

}'

Elasticsearch之索引模板index template与索引别名index alias的更多相关文章
- ES 10 - Elasticsearch的索引别名和索引模板
目录 1 索引模板概述 1.1 什么是索引模板 1.2 索引模板中的内容 1.3 索引模板的用途 2 创建索引模板 3 查看索引模板 4 删除索引模板 5 模板的使用建议 5.1 一个index中不能 ...
- Elasticsearch: Index template
Index template定义在创建新index时可以自动应用的settings和mappings. Elasticsearch根据与index名称匹配的index模式将模板应用于新索引.这个对于我 ...
- Elasticsearch7.X 入门学习第八课笔记-----索引模板和动态模板
原文:Elasticsearch7.X 入门学习第八课笔记-----索引模板和动态模板 版权声明:本文为博主原创文章,遵循CC 4.0 BY-SA版权协议,转载请附上原文出处链接和本声明. 本文链接: ...
- 【基础篇】elasticsearch之索引模板Template[转]
一,模板简述:template大致分成setting和mappings两部分:索引可使用预定义的模板进行创建,这个模板称作Index templates.模板设置包括settings和mappings ...
- elasticsearch 5.x 系列之四(索引模板的使用,详细得不要不要的)
1,首先看一下下面这个索引模板 curl -XPUT "master:9200/_template/template_1?pretty" -H 'Content-Type: app ...
- ElasticStack学习(八):ElasticSearch索引模板与聚合分析初探
一.Index Template与Dynamic Template的概念 1.Index Template:它是用来根据提前设定的Mappings和Settings,并按照一定的规则,自动匹配到新创建 ...
- ElasticSearch(六):索引模板
ElasticSearch(六):索引模板 学习课程链接<Elasticsearch核心技术与实战> Index Template Index Template - 帮助你设定Mappin ...
- Elasticsearch索引模板-转载
转载地址:https://dongbo0737.github.io/2017/06/13/elasticsearch-template/#similar_posts Elasticsearch索引模板 ...
- Elasticsearch索引模板和别名
创建模板(模板名和索引名一样都不能有大写) PUT http://222.108.x.x:9200/_template/templateds { "template": " ...
随机推荐
- proxy.go 源码阅读
) for { select { case <-otherSide: complete <- true ...
- too many open files linux服务器 golang java
1. 现象 服务的cpu跑满(golang实现), 并大量报too many open files错误.服务使用systemd来运行,部署在阿里ecs上. 2.分析 从日志来看,cpu的上升主要为到达 ...
- BZOJ_5015_[Snoi2017]礼物_矩阵乘法
BZOJ_5015_[Snoi2017]礼物_矩阵乘法 Description 热情好客的请森林中的朋友们吃饭,他的朋友被编号为 1-N,每个到来的朋友都会带给他一些礼物:.其中,第 一个朋友会带给他 ...
- BZOJ_3132_上帝造题的七分钟_树状数组
BZOJ_3132_上帝造题的七分钟_树状数组 Description “第一分钟,X说,要有矩阵,于是便有了一个里面写满了0的n×m矩阵. 第二分钟,L说,要能修改,于是便有了将左上角为(a,b), ...
- 【游戏开发】Excel表格批量转换成lua的转表工具
一.简介 在上篇博客<[游戏开发]Excel表格批量转换成CSV的小工具> 中,我们介绍了如何将策划提供的Excel表格转换为轻便的CSV文件供开发人员使用.实际在Unity开发中,很多游 ...
- ELK---日志分析系统
ELK就是一套完整的日志分析系统 ELK=Logstash+Elasticsearch+Kibana 统一官网https://www.elastic.co/products ELK模块说明 Logst ...
- Detours HOOK 库 过滤LoadLibraryExW
Detours HOOK 库 Hook 过滤LoadLibraryExW 一丶简介 1.1 Detours库简介 Detours是微软提供的HOOK库.为我们Hook提供了方便.再也不用手撸 HOOK ...
- MongoDB面试题
1.什么是MongoDB MongoDB是一个文档数据库,提供好的性能,领先的非关系型数据库.采用BSON存储文档数据.BSON()是一种类json的一种二进制形式的存储格式,简称Binary JSO ...
- RabbitMQ和Kafka到底怎么选?
前言 开源社区有好多优秀的队列中间件,比如RabbitMQ和Kafka,每个队列都貌似有其特性,在进行工程选择时,往往眼花缭乱,不知所措.对于RabbitMQ和Kafka,到底应该选哪个? Rabbi ...
- C#之Socket的简单使用
Socket是一种通信TCP/IP的通讯接口,也就是HTTP的抽象层,就是Socket在Http之上,Socket也就是发动机.实际上,传输层的TCP是基于网络层的IP协议的,而应用层的HTTP协议又 ...