2017-2018-1 20155310 《信息安全系统设计基础》 实现mypwd
2017-2018-1 20155310 《信息安全系统设计基础》 实现mypwd
作业要求:
1、学习pwd命令
2、研究pwd实现需要的系统调用(man -k; grep),写出伪代码
3、实现mypwd
4、测试mypwd
学习pwd命令
命令简介:
该命令用来显示目前所在的工作目录。指令英文原义:print work directory

执行权限    :All User

指令所在路径:/usr/bin/pwd 或 /bin/pwd
命令语法:
pwd [OPTION]...
命令参数:
| 参数 | 长参数 | 描述 |
|---|---|---|
| -L | --logical(无效) | 当目录为连接路径时,显示连接路径 |
| -P | --physical(无效) | 显示实际物理路径,而非使用连接(link)路径 |
| . | --help | 显示命令在线帮助(该参数无法使用) |
| . | --version | 显示命令版本信息(该参数无法使用) |
使用示例:
1:查看pwd命令的帮助信息
 root@DB-Server init.d]# man pwd

    PWD(1)                           User Commands                          PWD(1)

    NAME

           pwd - print name of current/working directory

    SYNOPSIS

           pwd [OPTION]...

   DESCRIPTION

          Print the full filename of the current working directory.

          -L, --logical

                use PWD from environment, even if it contains symlinks

          -P, --physical

                 avoid all symlinks

          --help display this help and exit

          --version

                 output version information and exit

          NOTE:  your  shell  may  have  its  own version of pwd, which usually supersedes the version described here.  Please refer to your shell鈥檚 documentation for details about the

          options it supports.

   AUTHOR

          Written by Jim Meyering.

   REPORTING BUGS

          Report bugs to <bug-coreutils@gnu.org>.

   COPYRIGHT

          Copyright 漏 2006 Free Software Foundation, Inc.

          This is free software.  You may redistribute copies of it under the terms of the GNU General Public License <http://www.gnu.org/licenses/gpl.html>.  There is NO WARRANTY,  to

          the extent permitted by law.

   SEE ALSO

          The full documentation for pwd is maintained as a Texinfo manual.  If the info and pwd programs are properly installed at your site, the command

                 info pwd

         should give you access to the complete manual.

   pwd 5.97                           May 2011                             PWD(1)

   (END)
2:显示当前目录所在路径 pwd
[root@DB-Server networking]# pwd

    /etc/sysconfig/networking
3:显示当前目录的物理路径 pwd –P
[root@DB-Server init.d]# cd /etc/init.d

    [root@DB-Server init.d]# pwd -P

    /etc/rc.d/init.d
4: 显示当前目录的连接路径:pwd -L
[root@DB-Server networking]# cd /etc/init.d

    [root@DB-Server init.d]# pwd -L

    /etc/init.d

    [root@DB-Server init.d]# pwd

    /etc/init.d
实现mypwd
代码如下:
#include <stdio.h>

#include <stdlib.h>

#include <dirent.h>

#include <sys/types.h>

#include <sys/stat.h>

#include <string.h>

#include <unistd.h>

#define MAX_DIR_DEPTH (256)  //限制最大的目录深度

#define TRUE 1

#define FALSE 0

//根据文件名获取文件的inode-number

ino_t get_ino_byname(char *filename)

{

    struct stat file_stat;

    if(0 != stat(filename, &file_stat)) //stat()通过文件名filename获取文件信息,并保存在buf所指的结构体stat中

    {

        perror("stat");

        exit(-1);

    }

    return file_stat.st_ino;

}

//根据inode-number, 在当前目录中查找对呀的文件名

char *find_name_byino(ino_t ino)

{

    DIR *dp = NULL;

    struct dirent *dptr = NULL;

    char *filename = NULL;

    if(NULL == (dp = opendir("."))) //opendir()打开一个目录,在失败的时候返回一个空的指针,成返回DIR结构体

    {

        fprintf(stderr, "Can not open Current Directory\n");

        exit(-1);

    }

    else

    {

        while(NULL != (dptr = readdir(dp))) //readdir()用来读取目录。返回是dirent结构体指针

        {

            if(dptr->d_ino == ino)

            {

                filename = strdup(dptr->d_name); //strdup()将串拷贝到新建的位置处,返回一个指针,指向为复制字符串分配的空间;如果分配空间失败,则返回NULL值.

                break;

            }

        }

        closedir(dp);

    }

    return filename;

}

int main(int argc, char *argv[])

{

    //记录目名的栈

    char *dir_stack[MAX_DIR_DEPTH];

    unsigned current_depth = 0;

    while(TRUE)

    {

        ino_t current_ino = get_ino_byname("."); //通过特殊的文件名"."获取当期目录的inode-number

        ino_t parent_ino = get_ino_byname(".."); //通过特殊的文件名".."获取当前目录的父目录的inode-number

        if(current_ino == parent_ino)

            break;               //达到根目录,推出循环

        /*两个inode-number不一样*/

        chdir(".."); //更改当前工作目录,变为当前目录的父目录

        dir_stack[current_depth++] = find_name_byino(current_ino); //"文件名"地址存放

        if(current_depth >= MAX_DIR_DEPTH) //路径名太深

        {

            fprintf(stderr, "Directory tree is too deep.\n");

            exit(-1);

        }

    }

    int i = current_depth - 1;

    for(i = current_depth - 1; i >= 0; i--) //打印路径

    {

        fprintf(stdout, "/%s", dir_stack[i]);

    }

    fprintf(stdout, "%s\n", current_depth == 0 ? "/" : "");

    return 0;

}

/*

dirent结构体:

struct dirent

{

    long d_ino; //inode number 索引节点号

    off_t d_off; //offset to this dirent 在目录文件中的偏移

    unsigned short d_reclen;// length of this d_name 文件名长

    unsigned char d_type; //the type of d_name 文件类型

    char d_name [NAME_MAX+1]; //file name (null-terminated) 文件名,最长255字符

};

DIR结构体:

struct __dirstream

{

    void *__fd; // `struct hurd_fd' pointer for descriptor.

    char *__data; // Directory block.

    int __entry_data; // Entry number `__data' corresponds to.

    char *__ptr; // Current pointer into the block.

    int __entry_ptr; // Entry number `__ptr' corresponds to.

    size_t __allocation;// Space allocated for the block.

    size_t __size; // Total valid data in the block.

    __libc_lock_define (, __lock) // Mutex lock for this structure.

};

typedef struct __dirstream DIR;

结构体stat:

struct stat {

    dev_t         st_dev;       //文件的设备编号

    ino_t         st_ino;       //节点

    mode_t        st_mode;      //文件的类型和存取的权限

    nlink_t       st_nlink;     //连到该文件的硬连接数目,刚建立的文件值为1

    uid_t         st_uid;       //用户ID

    gid_t         st_gid;       //组ID

    dev_t         st_rdev;      //(设备类型)若此文件为设备文件,则为其设备编号

    off_t         st_size;      //文件字节数(文件大小)

    unsigned long st_blksize;   //块大小(文件系统的I/O 缓冲区大小)

    unsigned long st_blocks;    //块数

    time_t        st_atime;     //最后一次访问时间

    time_t        st_mtime;     //最后一次修改时间

    time_t        st_ctime;     //最后一次改变时间(指属性)

};  */
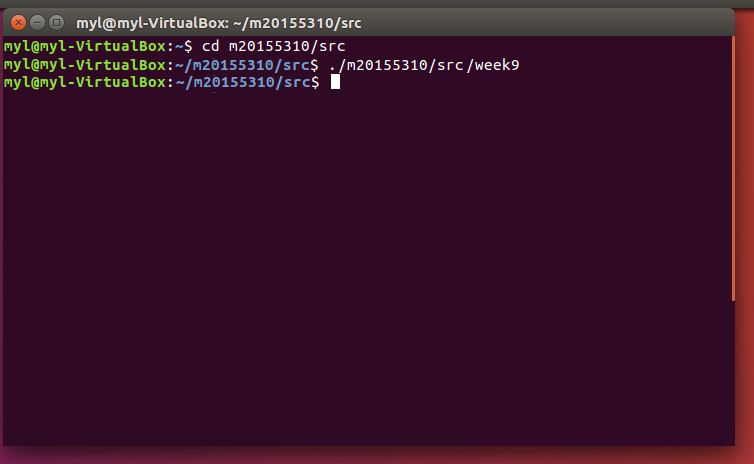
运行截图:

2017-2018-1 20155310 《信息安全系统设计基础》 实现mypwd的更多相关文章
- 20155229 《信息安全系统设计基础》 Mypwd实现
Mypwd 内容 1 学习pwd命令 2 研究pwd实现需要的系统调用(man -k; grep),写出伪代码 3 实现mypwd 4 测试mypwd 学习pwd命令 通过man pwd查看 pwd命 ...
- 20145213《信息安全系统设计基础》实验一 Linux开发环境的配置
北京电子科技学院(BESTI) 实 验 报 告 课程:信息安全系统设计基础 班级:1452 姓名: 黄亚奇 祁玮 学号:20145213 20145222 成绩: 指导教师:娄嘉鹏 实验日期:2016 ...
- 20145215&20145307《信息安全系统设计基础》实验二 固件设计
20145215&20145307<信息安全系统设计基础>实验二 固件设计 实验目的与要求 了解多线程程序设计的基本原理,学习 pthread 库函数的使用. 了解在 linux ...
- 20145215&20145307《信息安全系统设计基础》实验五 网络通信
小组成员:20145215卢肖明.20145307陈俊达 实验报告链接:信息安全系统设计基础--实验五实验报告
- 20145223《信息安全系统设计基础》 GDB调试汇编堆栈过程分析
20145223<信息安全系统设计基础> GDB调试汇编堆栈过程分析 分析的c语言源码 生成汇编代码--命令:gcc -g example.c -o example -m32 进入gdb调 ...
- 20145216 20145330 《信息安全系统设计基础》 实验五 简单嵌入式WEB 服务器实验
20145216 20145330 <信息安全系统设计基础> 实验五 简单嵌入式WEB 服务器实验 实验报告封面 实验步骤 1.阅读理解源码 进入/arm2410cl/exp/basic/ ...
- 20145208《信息安全系统设计基础》实验五 简单嵌入式WEB 服务器实验
20145208<信息安全系统设计基础>实验五 简单嵌入式WEB 服务器实验 20145208<信息安全系统设计基础>实验五 简单嵌入式WEB 服务器实验
- 2016-2017-1 《信息安全系统设计基础》 学生博客及Git@OSC 链接
2016-2017-1 <信息安全系统设计基础> 学生博客及Git@OSC 链接 博客 1452 20145201李子璇 20145202马 超 20145203盖泽双 20145204张 ...
- 20145215&20145307信息安全系统设计基础实验报告
20145215&20145307信息安全系统设计基础实验报告 PART1 一.实验原理 交叉编译,简单地说,就是在一个平台上生成另一个平台上的可执行代码.同一个体系结构可以运行不同的操作系统 ...
随机推荐
- [WinCE] [Win10] Win10 Creator 升级后 Windows Mobile Device Center 不能打开
运行 services.msc 找到 Windows Mobile 2003-based device connectivity服务,右键属性,Log On选项卡选择 Local System acc ...
- 记开发个人图书收藏清单小程序开发(十)DB开发——新增图书信息
昨晚完成了Web端新增图书信息的功能,现在就差DB的具体实现了. 因为我把Book相关的信息拆分的比较多,所以更新有点小麻烦. 首先,我需要创建一个Book Type的Matter: 然后,将图片路径 ...
- 安装Window Server 2008的些配置
上次安装window server2008,由于server2008需要设置很多东西,不然用起来很不爽,就说IE吧,每次随便打开一个网页都要弹出n多窗口出来叫你添加到信任域里面!太烦人了