
ObjectAnimator简单示例
<?xml version="1.0" encoding="utf-8"?>

<LinearLayout xmlns:android="http://schemas.android.com/apk/res/android"

    xmlns:tools="http://schemas.android.com/tools"

    android:layout_width="match_parent"

    android:layout_height="wrap_content"

    android:orientation="horizontal"

    android:layout_gravity="center"

    tools:context="com.loaderman.customviewdemo.MainActivity">

    <TableLayout

        android:visibility="gone"

        android:layout_width="wrap_content"

        android:layout_height="wrap_content">

        <TableRow>

            <Button

                android:id="@+id/start_alpha"

                android:layout_width="wrap_content"

                android:layout_height="wrap_content"

                android:text="alpha"/>

            <Button

                android:id="@+id/start_rotation"

                android:layout_width="wrap_content"

                android:layout_height="wrap_content"

                android:text="rotation"/>

            <Button

                android:id="@+id/start_rotationX"

                android:layout_width="wrap_content"

                android:layout_height="wrap_content"

                android:text="rotationX"/>

        </TableRow>

        <TableRow>

            <Button

                android:id="@+id/start_rotationY"

                android:layout_width="wrap_content"

                android:layout_height="wrap_content"

                android:text="rotationY"/>

            <Button

                android:id="@+id/start_translationX"

                android:layout_width="wrap_content"

                android:layout_height="wrap_content"

                android:text="translationX"/>

            <Button

                android:id="@+id/start_translationY"

                android:layout_width="wrap_content"

                android:layout_height="wrap_content"

                android:text="translationY"/>

        </TableRow>

        <TableRow>

            <Button

                android:id="@+id/start_scaleX"

                android:layout_width="wrap_content"

                android:layout_height="wrap_content"

                android:text="scaleX"/>

            <Button

                android:id="@+id/start_scaleY"

                android:layout_width="wrap_content"

                android:layout_height="wrap_content"

                android:text="scaleY"/>

        </TableRow>

    </TableLayout>

    <TextView

        android:visibility="gone"

        android:id="@+id/tv"

        android:layout_marginLeft="30dp"

        android:layout_width="50dp"

        android:layout_height="20dp"

        android:gravity="center"

        android:text="启舰"

        android:layout_marginTop="100dp"

        android:layout_gravity="center"

        android:background="#000000"

        android:textColor="#ffffff"/>

    <RelativeLayout

        android:layout_width="fill_parent"

        android:layout_height="fill_parent">

        <Button

            android:id="@+id/demobtn"

            android:layout_width="wrap_content"

            android:layout_height="wrap_content"

            android:text="start anim"/>

        <com.loaderman.customviewdemo.CustomTextView

            android:id="@+id/customtv"

            android:layout_toRightOf="@id/demobtn"

            android:layout_marginLeft="30dp"

            android:layout_width="50dp"

            android:layout_height="20dp"

            android:gravity="center"

            android:text="Hello"

            android:background="#000000"

            android:textColor="#ffffff"/>

    </RelativeLayout>

</LinearLayout>
package com.loaderman.customviewdemo;

import android.animation.ObjectAnimator;

import android.os.Bundle;

import android.support.v7.app.AppCompatActivity;

import android.view.View;

import android.widget.TextView;

public class MainActivity extends AppCompatActivity {

    private TextView tv;

    @Override

    protected void onCreate(Bundle savedInstanceState) {

        super.onCreate(savedInstanceState);

        setContentView(R.layout.activity_main);

        final CustomTextView tv2 = (CustomTextView) findViewById(R.id.customtv);

        findViewById(R.id.demobtn).setOnClickListener(new View.OnClickListener() {

            public void onClick(View v) {

                ObjectAnimator animator = ObjectAnimator.ofFloat(tv2, "ScaleSize", 6);

                animator.setDuration(2000);

                animator.start();

            }

        });

        tv = (TextView) findViewById(R.id.tv);

        findViewById(R.id.start_alpha).setOnClickListener(new View.OnClickListener() {

            public void onClick(View v) {

                /**

                 * 实现alpha值变化

                 */

                ObjectAnimator animator = ObjectAnimator.ofFloat(tv, "alpha", 1, 0, 1);

                animator.setDuration(2000);

                animator.start();

            }

        });

        findViewById(R.id.start_rotation).setOnClickListener(new View.OnClickListener() {

            public void onClick(View v) {

                /**

                 * Z轴旋转

                 */

                ObjectAnimator animator = ObjectAnimator.ofFloat(tv, "rotation", 0, 270, 0);

                animator.setDuration(2000);

                animator.start();

            }

        });

        findViewById(R.id.start_rotationX).setOnClickListener(new View.OnClickListener() {

            public void onClick(View v) {

                /**

                 * RotationX旋转

                 */

                ObjectAnimator animator = ObjectAnimator.ofFloat(tv, "rotationX", 0, 270, 0);

                animator.setDuration(2000);

                animator.start();

            }

        });

        findViewById(R.id.start_rotationY).setOnClickListener(new View.OnClickListener() {

            public void onClick(View v) {

                /**

                 * RotationY 旋转

                 */

                ObjectAnimator animator = ObjectAnimator.ofFloat(tv, "rotationY", 0, 180, 0);

                animator.setDuration(2000);

                animator.start();

            }

        });

        findViewById(R.id.start_translationX).setOnClickListener(new View.OnClickListener() {

            public void onClick(View v) {

                /**

                 * translationX动画

                 */

                ObjectAnimator animator = ObjectAnimator.ofFloat(tv, "translationX", 0, 200, -200, 0);

                animator.setDuration(2000);

                animator.start();

            }

        });

        findViewById(R.id.start_translationY).setOnClickListener(new View.OnClickListener() {

            public void onClick(View v) {

                /**

                 * translationY动画

                 */

                ObjectAnimator animator = ObjectAnimator.ofFloat(tv, "translationY", 0, 200, -100, 0);

                animator.setDuration(2000);

                animator.start();

            }

        });

        findViewById(R.id.start_scaleX).setOnClickListener(new View.OnClickListener() {

            public void onClick(View v) {

                /**

                 * scaleX缩放动画

                 */

                ObjectAnimator animator = ObjectAnimator.ofFloat(tv, "scaleX", 0, 3, 1);

                animator.setDuration(2000);

                animator.start();

            }

        });

        findViewById(R.id.start_scaleY).setOnClickListener(new View.OnClickListener() {

            public void onClick(View v) {

                /**

                 * scaleY缩放动画

                 */

                ObjectAnimator animator = ObjectAnimator.ofFloat(tv, "scaleY", 0, 3, 1);

                animator.setDuration(2000);

                animator.start();

            }

        });

    }

}
package com.loaderman.customviewdemo;

import android.content.Context;

import android.util.AttributeSet;

import android.widget.TextView;

public class CustomTextView extends TextView {

    public CustomTextView(Context context) {

        super(context);

    }

    public CustomTextView(Context context, AttributeSet attrs) {

        super(context, attrs);

    }

    public CustomTextView(Context context, AttributeSet attrs, int defStyle) {

        super(context, attrs, defStyle);

    }

    public void setScaleSize(float num){

        setScaleX(num);

    }

    public float getScaleSize(){

        return 0.5f;

    }

}
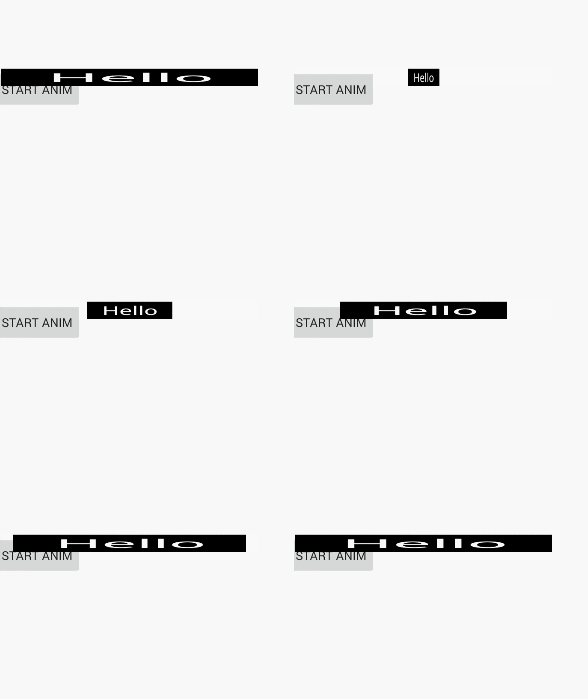
效果:
ObjectAnimator简单示例的更多相关文章
- Linux下的C Socket编程 -- server端的简单示例
Linux下的C Socket编程(三) server端的简单示例 经过前面的client端的学习,我们已经知道了如何创建socket,所以接下来就是去绑定他到具体的一个端口上面去. 绑定socket ...
- C# 构建XML(简单示例)
C# 构建XML的简单示例: var pars = new Dictionary<string, string> { {"url","https://www. ...
- 根据juery CSS点击一个标签弹出一个遮罩层的简单示例
<!DOCTYPE html> <html xmlns="http://www.w3.org/1999/xhtml"> <head> <m ...
- ACEXML解析XML文件——简单示例程序
掌握了ACMXML库解析XML文件的方法后,下面来实现一个比较完整的程序. 定义基本结构 xml文件格式如下 <?xml version="1.0"?> <roo ...
- demo工程的清单文件及activity中api代码简单示例
第一步注册一个账户,并创建一个应用.获取app ID与 app Key. 第二步下载sdk 第三步新建工程,修改清单文件,导入相关的sdk文件及调用相应的api搞定. 3.1 修改清单文件,主要是加入 ...
- spring-servlet.xml简单示例
spring-servlet.xml简单示例 某个项目中的spring-servlet.xml 记下来以后研究用 <!-- springMVC简单配置 --> <?xml versi ...
- SignalR 简单示例
一.什么是 SignalR ASP.NET SignalR is a library for ASP.NET developers that simplifies the process of add ...
- Web API 简单示例
一.RESTful和Web API Representational State Transfer (REST) is a software architecture style consisting ...
- XML引入多scheme文件约束简单示例
XML引入多scheme文件约束简单示例,用company.xsd和department.xsd来约束company.xml: company.xsd <?xml version="1 ...
随机推荐
- C语言二级指针底层实现
C语言中,Pointers to Pointers,即二级指针. 一级指针和二级指针的值都是指向一个内存单元: 一级指针指向的内存单元存放的是源变量的值, 二级指针指向的内存单元存放的是一级指针的地址 ...
- Linux学习之四-Linux发行版及版本比较
Linux发行版及版本比较 三大家族: Fedora是基于RHEL,CentOS,Scientific Linux, 和Oracle Linux的社区版本.相比RHEL,Fedora打包了显著的更多的 ...
- HDU 6187 Destroy Walls (思维,最大生成树)
HDU 6187 Destroy Walls (思维,最大生成树) Destroy Walls *Time Limit: 8000/4000 MS (Java/Others) Memory Limit ...
- webuploader只选择单张图片
webuploader只选择单张图片 一.总结 一句话总结: 在WebUploader.create中配置一下pick即可 pick: { id: '#filePicker', multiple:fa ...
- WPF 反编译后错误处理
1. 首先,手动创建一个WPF工程(WpfApplicationReflectorDemo) 2. 把生成的WpfApplicationReflectorDemo.exe 拖到ILSpy里 3.点击 ...
- tcp文件下载
服务器端 import socket def send_file_2_client(new_client_socket,client_addr): # 接收信息 file_name = new_cli ...
- 使用bootstrap的栅格布局,用row后出现横向滚动条
原因: **row默认有:margin-left:-15px; margin-right:-15px: 解决办法: **row外层需要包裹container或者container-fluid,一句话就 ...
- 为 32 位单片机设计的脚本语言 Berry
Berry是一款一款为32位单片机设计的脚本语言.Berry解释器使用C89标准实现,该语言可以在RAM或ROM很小的设备上运行. 尽管Berry的体积很小,但是它也支持class以及闭包等功能,使得 ...
- mongoose 5.0 链接数据库 代码保存
const mongoose = require('mongoose'); const dbSrc = 'mongodb://localhost/douban-trailer' mongoose.Pr ...
- man与info
Linux系统中在线求助命令:man page 与info page 还有--help . --help没有man的详细,首先我们来看mna 命令.在linux中输入 man + 相关的文件 ,就可以 ...