Centos7.3-mysql5.7复制安装过程
一、环境
192.168.56.102 为主服务器
192.168.56.101 为从服务器
Mysql5.7.20 二进制安装包环境
1、 下载免编译安装包并进行安装
从官网下载 mysql-5.7.20-linux-glibc2.5-x86_64.tar.gz
官网: http://dev.mysql.com/downloads/mysql/
wget https://cdn.mysql.com//Downloads/MySQL-5.7/mysql-5.7.20-linux-glibc2.12-x86_64.tar.gz
[root@mysql-slave ~]# mv mysql-5.7.20-linux-glibc2.12-x86_64 /usr/local/mysql
[root@mysql-slave ~]# cd /usr/local/mysql
[root@mysql-slave mysql]# mkdir –p data/mysql #存放数据目录
[root@mysql-slave mysql]# useradd mysql -s /sbin/nologin
[root@mysql-slave mysql]# chown -R mysql:mysql data/mysql/
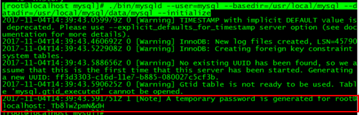
[root@localhost mysql]# ./bin/mysqld --user=mysql --basedir=/usr/local/mysql --datadir=/usr/local/mysql/data/mysql –initialize
# 初始化并安装,会提示产生一个默认密码:root@localhost: Tb8lw2pmN&dH
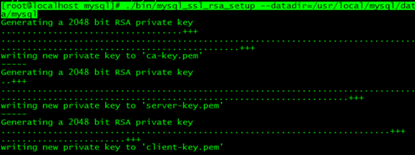
支持加密

# ./bin/mysql_ssl_rsa_setup --datadir=/usr/local/mysql/data/mysql
#/usr/local/mysql/support-files/mysql.server start

启动看看,我这里没有成功,发现配置文件存在问题。

把配置文件复制到/etc/my.cnf

# cp /usr/local/mysql/support-files/my-default.cnf /etc/my.cnf

# vim /etc/my.cnf
[root@localhost bin]# cat /etc/my.cnf  #照如下修改配置文件
[mysqld]
basedir=/usr/local/mysql
datadir=/usr/local/mysql/data/mysql
# Disabling symbolic-links is recommended to prevent assorted security risks
symbolic-links=0
# Settings user and group are ignored when systemd is used.
# If you need to run mysqld under a different user or group,
# customize your systemd unit file for mariadb according to the
# instructions in http://fedoraproject.org/wiki/Systemd
character_set_server=utf8
init_connect='SET NAMES utf8'
[mysqld_safe]
log-error=
pid-file=/var/run/mariadb/mariadb.pid
#
# include all files from the config directory
#
!includedir /etc/my.cnf.d
[client]
default-character-set=utf8
然后设置链接,启动服务
[root@localhost bin]# cp /usr/local/mysql/support-files/mysql.server /etc/init.d/mysqld

[root@localhost bin]# chmod 755 /etc/init.d/mysqld

[root@localhost mysql]# systemctl start mysqld
连接mysql
[root@localhost mysql]# mysql -uroot –p

-bash: mysql: command not found

[root@localhost mysql]# cd bin

[root@localhost bin]# ./mysql

[root@localhost bin]# ./mysql -uroot -p
Enter password:
Welcome to the MySQL monitor. Commands end with ; or \g.
Your MySQL connection id is 4
Server version: 5.7.20
Copyright (c) 2000, 2017, Oracle and/or its affiliates. All rights reserved.
Oracle is a registered trademark of Oracle Corporation and/or its
affiliates. Other names may be trademarks of their respective
owners.
Type 'help;' or '\h' for help. Type '\c' to clear the current input statement.
mysql> show databases;
ERROR 1820 (HY000): You must reset your password using ALTER USER statement before executing this statement.
mysql> alter user 'root'@'localhost' identified by '1';
Query OK, 0 rows affected (0.00 sec)
mysql> flush privileges;
Query OK, 0 rows affected (0.00 sec)
查看日志文件
[root@mysql-m mysql]# cat mysql-m.err
2、 复制配置
2.1 在主服务器上的/etc/my.cnf上开启log-bin:
在[mysqld]下添加

server-id=1

log-bin=/usr/local/mysql/data/mysql/mysql-bin

[root@mysql-m mysql]# systemctl restart mysqld
2.2 建立复制帐户
mysql> grant replication slave on *.* to 'rep'@'192.168.56.%' identified by '1';

Query OK, 0 rows affected, 1 warning (0.01 sec)

mysql> flush privileges;

Query OK, 0 rows affected (0.01 sec)

锁表:

mysql> flush table with read lock;

查看主库状态:

mysql> show master status;

+------------------+----------+--------------+------------------+-------------------+

| File             | Position | Binlog_Do_DB | Binlog_Ignore_DB | Executed_Gtid_Set |

+------------------+----------+--------------+------------------+-------------------+

| mysql-bin.000001 |      599 |              |                  |                   |
新开一个窗口,备份主库
[root@mysql-m ~]# /usr/local/mysql/bin/mysqldump -uroot -p'1' --events -A -B | gzip > /server/backup/mysql_bak.$(data+%F).sql.gz

-bash: data+%F: command not found

mysqldump: [Warning] Using a password on the command line interface can be insecure.

解锁:

mysql> unlock tables;

Query OK, 0 rows affected (0.00 sec)
3、从库配置
[root@mysql-s mysql]# vim /etc/my.cnf  #如果有开启bin-log建议关闭。

server-id=2

重启mysql服务

[root@mysql-s mysql]# systemctl restart mysqld

检查从库log-bin

mysql> show variables like 'log_bin';

+---------------+-------+

| Variable_name | Value |

+---------------+-------+

| log_bin       | OFF   |

+---------------+-------+

1 row in set (0.01 sec)
把备份文件复制到从库并解压

[root@mysql-s ~]# cd /server/backup/

[root@mysql-s backup]# gzip -d mysql_bak.sql.gz

[root@mysql-s backup]# ll

total 764

-rw-r--r-- 1 root root 780324 Nov  5 14:59 mysql_bak.sql

还原备份文件到从库

[root@mysql-s backup]# cd /usr/local/mysql

[root@mysql-s mysql]# bin/mysql -uroot -p'1' < /server/backup/mysql_bak.sql

mysql: [Warning] Using a password on the command line interface can be insecure.
从库上执行:
mysql> CHANGE MASTER TO

    -> MASTER_HOST='192.168.56.104',

    -> MASTER_PORT=3306,

    -> MASTER_USER='rep',

    -> MASTER_PASSWORD='1',

    -> MASTER_LOG_FILE='mysql-bin.000001',

    -> MASTER_LOG_POS=599;

Query OK, 0 rows affected, 2 warnings (0.03 sec)

开启从库

mysql> start slave;

Query OK, 0 rows affected (0.01 sec)

mysql> show slave status\G

*************************** 1. row ***************************

               Slave_IO_State:

                  Master_Host: 192.168.56.104

                  Master_User: rep

                  Master_Port: 3306

                Connect_Retry: 60

              Master_Log_File: mysql-bin.000001

          Read_Master_Log_Pos: 599

               Relay_Log_File: mysql-s-relay-bin.000001

                Relay_Log_Pos: 4

        Relay_Master_Log_File: mysql-bin.000001

             Slave_IO_Running: No

            Slave_SQL_Running: Yes
但出现了错误,如上图红色,查了一下mysql下的日志,报server UUID相同的错误
2017-11-05T07:12:16.236482Z 6 [ERROR] Slave I/O for channel '': Fatal error: The slave I/O thread stops because master and slave have equal MySQL serve
网上查了一下,是由于虚机复制过来的,两套库uuid相同了,
原因分析:
mysql 5.6的复制引入了uuid的概念,各个复制结构中的server_uuid得保证不一样,但是查看到直接copy data文件夹后server_uuid是相同的,show variables like '%server_uuid%';
解决方法:
找到data文件夹下的auto.cnf文件,修改里面的uuid值,保证各个db的uuid不一样,重启db即可
[root@mysql-s mysql]# vim auto.cnf

[auto]

server-uuid=ff3d3303-c16d-11e7-b885-080027c5cf4b

把上面uuid最后原来3b-修改为4b重启数据库后,启动从库,成功!!!

mysql> start slave;

Query OK, 0 rows affected (0.01 sec)
mysql> show slave status\G
*************************** 1. row ***************************
Slave_IO_State: Waiting for master to send event
Master_Host: 192.168.56.104
Master_User: rep
Master_Port: 3306
Connect_Retry: 60
Master_Log_File: mysql-bin.000001
Read_Master_Log_Pos: 599
Relay_Log_File: mysql-s-relay-bin.000004
Relay_Log_Pos: 320
Relay_Master_Log_File: mysql-bin.000001
Slave_IO_Running: Yes
Slave_SQL_Running: Yes
Replicate_Do_DB:
Replicate_Ignore_DB:
Replicate_Do_Table:
Replicate_Ignore_Table:
Replicate_Wild_Do_Table:
Replicate_Wild_Ignore_Table:
Last_Errno: 0
Last_Error:
Skip_Counter: 0
Exec_Master_Log_Pos: 599
Relay_Log_Space: 695
Until_Condition: None
Until_Log_File:
Until_Log_Pos: 0
Master_SSL_Allowed: No
Master_SSL_CA_File:
Master_SSL_CA_Path:
Master_SSL_Cert:
Master_SSL_Cipher:
Master_SSL_Key:
Seconds_Behind_Master: 0
Master_SSL_Verify_Server_Cert: No
Last_IO_Errno: 0
Last_IO_Error:
Last_SQL_Errno: 0
Last_SQL_Error:
Replicate_Ignore_Server_Ids:
Master_Server_Id: 1
Master_UUID: ff3d3303-c16d-11e7-b885-080027c5cf3b
Master_Info_File: /usr/local/mysql/data/mysql/master.info
SQL_Delay: 0
SQL_Remaining_Delay: NULL
Slave_SQL_Running_State: Slave has read all relay log; waiting for more updates
Master_Retry_Count: 86400
Master_Bind:
Last_IO_Error_Timestamp:
Last_SQL_Error_Timestamp:
Master_SSL_Crl:
Master_SSL_Crlpath:
Retrieved_Gtid_Set:
Executed_Gtid_Set:
Auto_Position: 0
Replicate_Rewrite_DB:
Channel_Name:
Master_TLS_Version:
1 row in set (0.00 sec)
测试主从复制:
在主库上创建aaa数据库:
mysql> create database aaa;

Query OK, 1 row affected (0.01 sec)

查看从库:

mysql> show databases;

+--------------------+

| Database           |

+--------------------+

| information_schema |

| aaa                |

| mysql              |

| performance_schema |

| sys                |

+--------------------+

5 rows in set (0.01 sec)
Centos7.3-mysql5.7复制安装过程的更多相关文章
- centos7下mysql5.7的安装与配置
centos7下MySQL5.7的安装与配置 下载 下载地址 根据系统和版本选择红框中的四个RPM包下载即可,然后放到centos7系统中的/opt目录下,等待稍后安装. 安装前的准备 1. 检查系统 ...
- CentOS7下MySQL5.7的安装-RPM方式
Installing MySQL on Linux Using RPM Packages 下载安装包 mysql下载地址:https://dev.mysql.com/downloads/mysql/ ...
- mysql5.5编译安装过程(自己总结)
一,安装过程 //创建mysql安装目录,创建数据存放目录,创建用户和用户组与赋予数据存放目录权限 mkdir -p /usr/local/mysql/ mkdir -p /data/mysql/ g ...
- centos7.2 mysql5.5编译安装
环境 centos7.2 源码包mysql5.5.38 mysql5.5开始,源码配置编译工具configure变成了cmake,所以先要去把cmake装上.并安装make,bison,cmake,g ...
- centos7+mono4+jexus5.6.2安装过程中的遇到的问题
过程参考: http://www.linuxdot.net/ http://www.jexus.org/ http://www.mono-project.com/docs/getting-starte ...
- mysql5.7.12安装过程中遇到的一些问题
在安装mysql-5.7.12-winx64中遇到的问题总结 1.该版本的mysql解压后的文件夹里没有data文件(切记自己添加data,自己添加的文件可能出现的问题是文件里的文件会缺失) 我在使用 ...
- Linux MySql5.6.38安装过程
1.下载mysql安装包mysql-5.6.38-linux-glibc2.12-x86_64.tar.gz 2.用xftp工具将其上传到Linux服务器上的soft文件夹,没有的话先创建 [root ...
- MySQL5.7.20安装过程报错CMake Error at cmake/boost.cmake:81 (MESSAGE):
MySQL在5.7版本及以后,都需要boots 库,所以需要先安装boots 步骤: 1.在/usr/local下创建 名为boots的目录 mkdir -p /usr/local/boots 2.进 ...
- 1、linux下mysql5.5.20安装过程报错汇总
1.Access denied for user 'root'@'localhost' (using password: YES) 这个提示是因为root帐户默认不开放远程访问权限,所以需要修改一下相 ...
随机推荐
- goland设置颜色和字体
- SSH免密登录设置
******配置主机之间的免密ssh登陆 假如 A 要登陆 B 在A上操作: (1)首先生成密钥对 ssh-keygen (提示时,直接回车即可) (2)再将A自己的公钥拷贝并追加到B的授权列 ...
- loj6229 这是一道简单的数学题
https://loj.ac/problem/6229 题解:https://blog.csdn.net/Vectorxj/article/details/79094659 套路推式子,杜教筛,证明复 ...
- 自定义确定框(confirm)
1.先引入 confirm.css @charset "UTF-8"; lq-alert { width: 100%; height: 100%; background: rgba ...
- oracle-PL/SQL2
一 存储过程 存储过程是SQL 语句和可选控制流语句的预编译集合,以一个名称存储并作为一个单元处理.在 ORACLE SERVER上建立存储过程,可以被多个应用程序调用,可以向存储过程传递参数,也可以 ...
- python 变量离散化
- cron服务
相对与at,cron的优点就是能够周期性的执行某个命令,at却只能执行一次,cron的后台进程名字是crond ,cron也是system V的服务,所以我们可以service crond start ...
- Django项目:CRM(客户关系管理系统)--16--08PerfectCRM实现King_admin显示注册表的字段表头
# king_urls.py # ————————02PerfectCRM创建ADMIN页面———————— from django.conf.urls import url from king_ad ...
- Listview的条目item内的点击响应事件
还是这张图 这里的历史列表就是一个ListView,抛开该界面中ScrollView或者RecycleView与该ListView会有冲突,所谓的冲突,说白了就是父控件与子控件两者间的关系冲突,该冲突 ...
- shell 向python传参数,空格引发的问题
昨天用一个shell脚本,调用一个python脚本,并把shell脚本中用 time1=`date "+%Y-%m-%d %H:%M:%S"`生成的时间戳作为参数,传到python ...