Vue 2.0 + Vue Router + Vuex
用 Vue.js 2.x 与相配套的 Vue Router、Vuex 搭建了一个最基本的后台管理系统的骨架。
当然先要安装 node.js(包括了 npm)、vue-cli
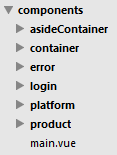
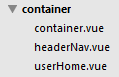
项目结构如图所示:
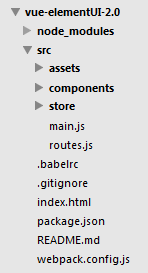
assets 中是静态资源,components 中是组件(以 .vue 为后缀名的文件),store 中是使用了 vuex 的 js 文件。
package.json:
{

  "name": "element-starter",

  "description": "A Vue.js project",

  "author": "caihg",

  "private": false,

  "scripts": {

    "dev": "cross-env NODE_ENV=development webpack-dev-server --inline --hot --open",

    "build": "cross-env NODE_ENV=production webpack --progress --hide-modules"

  },

  "dependencies": {

    "element-ui": "^1.0.0",

    "vue": "^2.1.0",

    "vue-router": "^2.1.1",

    "vue-server-renderer": "^2.1.3",

    "vuex": "^2.0.0",

    "vuex-router-sync": "^3.0.0"

  },

  "devDependencies": {

    "babel-core": "^6.0.0",

    "babel-loader": "^6.0.0",

    "babel-preset-es2015": "^6.13.2",

    "cross-env": "^1.0.6",

    "css-loader": "^0.23.1",

    "file-loader": "^0.8.5",

    "style-loader": "^0.13.1",

    "vue-loader": "^10.0.0",

    "vue-template-compiler": "^2.1.0",

    "webpack": "^2.1.0-beta.25",

    "webpack-dev-server": "^2.1.0-beta.0",

    "webpack-dev-middleware": "^1.6.1"

  }

}
webpack.config.js:
var path = require('path')

var webpack = require('webpack')

module.exports = {

  entry: './src/main.js',

  output: {

    path: path.resolve(__dirname, './dist'),

    publicPath: '/dist/',

    filename: 'build.js'

  },

  module: {

    loaders: [

      {

        test: /\.vue$/,

        loader: 'vue-loader'

      },

      {

        test: /\.js$/,

        loader: 'babel-loader',

        exclude: /node_modules/

      },

      {

        test: /\.css$/,

        loader: 'style-loader!css-loader'

      },

      {

        test: /\.(eot|svg|ttf|woff|woff2)(\?\S*)?$/,

        loader: 'file-loader'

      },

      {

        test: /\.(png|jpe?g|gif|svg)(\?\S*)?$/,

        loader: 'file-loader',

        query: {

          name: '[name].[ext]?[hash]'

        }

      }

    ]

  },

  devServer: {

    historyApiFallback: true,

    noInfo: true

  },

  devtool: '#eval-source-map'

}

if (process.env.NODE_ENV === 'production') {

  module.exports.devtool = '#source-map'

  module.exports.plugins = (module.exports.plugins || []).concat([

    new webpack.DefinePlugin({

      'process.env': {

        NODE_ENV: '"production"'

      }

    }),

    new webpack.optimize.UglifyJsPlugin({

      compress: {

        warnings: false

      }

    })

  ])

}
项目的入口 js 文件 main.js:
import Vue from 'vue'

import VueRouter from 'vue-router'

import ElementUI from 'element-ui'

import 'element-ui/lib/theme-default/index.css'

Vue.use(VueRouter)

Vue.use(ElementUI)

import routes from './routes'

const router = new VueRouter({

  mode: 'history',

  base: __dirname,

  routes: routes

})

import Main from './components/main.vue'

new Vue({

  el: '#app',

  router,

  render: h => h(Main)

})
该文件引用了路由配置文件 routes.js 和主入口的组件 main.vue,其中 main.vue 在 components 目录
routes.js 内容如下:
import Login from './components/login/login.vue'

import Container from './components/container/container.vue'

import UserHome from './components/container/userHome.vue'

import Platform from './components/asideContainer/platform.vue'

import UserList from './components/platform/userList.vue'

import UserCreate from './components/platform/userCreate.vue'

import Product from './components/asideContainer/product.vue'

import ProductList from './components/product/list.vue'

import ProductBrand from './components/product/brand.vue'

import NotFound from './components/error/notFound.vue'

export default [

  {

    path: '/login',

    component: Login

  },

  {

    path: '/',

    redirect: '/login'

  },

  {

    path: '/page',

    component: Container,

    children: [

      {

        path: 'userHome',

        component: UserHome

      },

      {

        path: 'platform',

        redirect: 'platform/userList', // 默认指向用户列表(UserList)

        component: Platform,

        children: [

          {

            path: 'userList',

            component: UserList

          },

          {

            path: 'userCreate',

            component: UserCreate

          }

        ]

      },

      {

        path: 'product',

        redirect: 'product/list', // 默认指向商品列表(ProductList)

        component: Product,

        children: [

          {

            path: 'list',

            component: ProductList

          },

          {

            path: 'brand',

            component: ProductBrand

          }

        ]

      }

    ]

  },

  { // 404页面:必须位于最后,否则其它的路由地址都会使用 NotFound 组件

    path: '*',

    component: NotFound

  }

]
main.vue 的内容如下:
<template>

  <router-view></router-view>

</template>
store.js 在 store 目录,内容如下:
import Vue from 'vue'

import Vuex from 'vuex'

Vue.use(Vuex)

export default new Vuex.Store({

  state: {

    username: ''

  }

})
后台都是登录成功后跳转到主页面
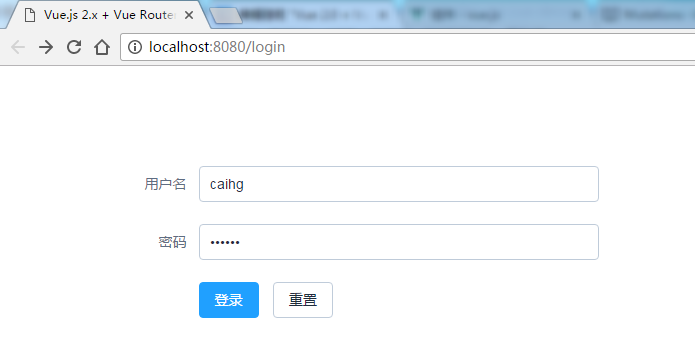
界面的 UI 用的是开源的 element-ui
login.vue 位于 login 目录,内容如下:
<template>

  <div class="box">

    <el-form :model="loginForm" :rules="loginRules" ref="loginForm" label-width="100px" class="form-box">

      <el-form-item label="用户名" prop="username">

        <el-input v-model="loginForm.username" placeholder="请输入用户名" auto-complete="off"></el-input>

      </el-form-item>

      <el-form-item label="密码" prop="password">

        <el-input type="password" v-model="loginForm.password" auto-complete="off"></el-input>

      </el-form-item>

      <el-form-item>

        <el-button type="primary" @click="onLogin">登录</el-button>

        <el-button @click="handleReset">重置</el-button>

      </el-form-item>

    </el-form>

  </div>

</template>

<script>

import store from '../../store/store'

export default {

  data() {

    var validateUsername = (rule, value, callback) => {

      if (value === '') {

        callback(new Error('请输入用户名'));

      } else {

        callback();

      }

    };

    var validatePassword = (rule, value, callback) => {

      if (value === '') {

        callback(new Error('请输入密码'));

      } else {

        callback();

      }

    };

    return {

      loginForm: {

        username: '',

        password: ''

      },

      loginRules: {

        username: [

          { validator: validateUsername, trigger: 'blur' }

        ],

        password: [

          { validator: validatePassword, trigger: 'blur' }

        ]

      }

    };

  },

  methods: {

    onLogin(event) {

      this.$refs.loginForm.validate((valid) => {

        if (valid) {

          store.state.username = this.loginForm.username;

          this.$router.push('page/userHome');

        } else {

          console.log('error submit!!');

          return false;

        }

      });

    },

    handleReset() {

      this.$refs.loginForm.resetFields();

    }

  }

}

</script>

<style>

.form-box {

  width: 500px;

  margin-top: 100px;

  margin-right: auto;

  margin-left: auto;

}

</style>
在登录事件中,将用户名传递给 store 中的 state.username,以便在其它组件中获取:
store.state.username = this.loginForm.username
登录后的界面,默认跳转到主页:
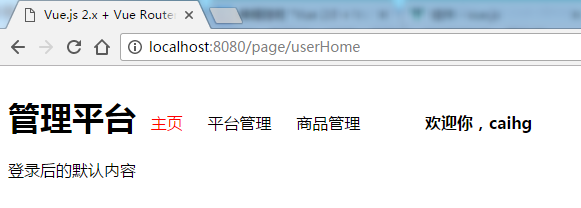
通过 vuex 获取到了登录的用户名称(caihg);当然,如果刷新当前页面,用户名称就没了。
头部在 container 目录,其中有三个组件
container.vue 的内容如下:
<template>

  <div class="container">

    <header-nav></header-nav>

    <router-view></router-view>

  </div>

</template>

<script>

import headerNav from './headerNav.vue'

export default {

  components: {

    headerNav

  }

}

</script>

<style>

header > h1 {

  display: inline-block;

}

header > a {

  margin: 0 10px;

  color: #000;

  text-decoration: none;

}

</style>
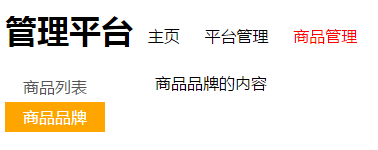
headerNav.vue 中就是头部导航的各种链接:
<template>

  <header>

    <h1>管理平台</h1>

    <router-link to="/page/userHome">主页</router-link>

    <router-link to="/page/platform">平台管理</router-link>

    <router-link to="/page/product">商品管理</router-link>

    <strong>欢迎你,{{ getUsername }}</strong>

  </header>

</template>

<script>

import store from '../../store/store'

export default {

  computed: {

    getUsername () {

      return store.state.username

    }

  }

}

</script>

<style>

header > .router-link-active {

  color: red;

}

header > strong {

  padding-left: 50px;

}

</style>
点击头部的导航,下面的内容相应地切换
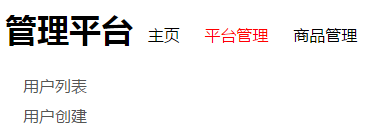
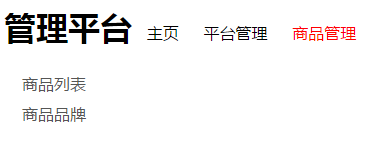
其中左侧部分也是导航,点击也要跟随切换
左侧的导航放在 asideContainer 目录
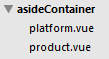
platform.vue 与 product.vue 内容相似;只是前者包括了样式,后者没有(相同的样式写一份就够了,如果多写了,也会重复渲染)
<template>

  <!-- 平台管理 -->

  <div>

    <ul class="aside-nav">

      <li><router-link to="/page/platform/userList">用户列表</router-link></li>

      <li><router-link to="/page/platform/userCreate">用户创建</router-link></li>

    </ul>

    <router-view class="aside-container"></router-view>

  </div>

</template>

<style>

.aside-nav {

  float: left;

  width: 100px;

  margin: 0 50px 0 0;

  padding-left: 0;

}

.aside-nav a {

  display: block;

  padding: 4px 0 5px;

  color: #555;

  text-align: center;

  text-decoration: none;

}

.aside-nav .router-link-active {

  color: #fff;

  background-color: orange;

}

.aside-container {

  float: left;

}

</style>
<template>

  <!-- 商品管理 -->

  <div>

    <ul class="aside-nav">

      <li><router-link to="/page/product/list">商品列表</router-link></li>

      <li><router-link to="/page/product/brand">商品品牌</router-link></li>

    </ul>

    <router-view class="aside-container"></router-view>

  </div>

</template>
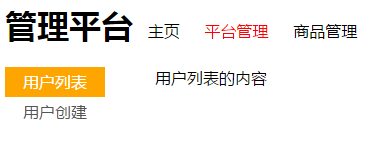
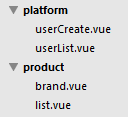
左侧导航对应的内容分别在不同的目录(根据功能划分)
userList.vue 中的内容如下:
<template>

  <div>

    用户列表的内容

  </div>

</template>
至此完成,后台管理系统的大致骨架就是这样了。
项目代码在 github 上
Vue 2.0 + Vue Router + Vuex的更多相关文章
- 已配置好的vue全家桶项目router,vuex,api,axios,vue-ls,async/await,less下载即使用
github 地址: https://github.com/liangfengbo/vue-cli-project 点击进入 vue-cli-project 已构建配置好的vuejs全家桶项目,统一管 ...
- vue 2.0 vue.set的使用方法
这里我定义了一个列表数据,我将通过三个不同的按钮来控制列表数据. 首先在列表中动态新增一条数据: <!DOCTYPE html><html><head lang=&quo ...
- vue 2.0 路由切换以及组件缓存源代码重点难点分析
摘要 关于vue 2.0源代码分析,已经有不少文档分析功能代码段比如watcher,history,vnode等,但没有一个是分析重点难点的,没有一个是分析大命题的,比如执行router.push之后 ...
- vue.js2.0实战(1):搭建开发环境及构建项目
Vue.js学习系列: vue.js2.0实战(1):搭建开发环境及构建项目 https://my.oschina.net/brillantzhao/blog/1541638 vue.js2.0实战( ...
- Vue3: 如何以 Vite 创建,以 Vue Router, Vuex, Ant Design 开始应用
本文代码: https://github.com/ikuokuo/start-vue3 在线演示: https://ikuokuo.github.io/start-vue3/ Vite 创建 Vue ...
- 简单vue项目脚手架(vue+webpack2.0+vuex+vue-router)
github地址 使用技术栈 webpack(^2.6.1) webpack-dev-server(^2.4.5) vue(^2.3.3) vuex(^2.3.1) vue-router(^2.5.3 ...
- vue(2.0)+vue-router(2.0)+vuex(2.0)实战
好久没更新自己的知识库,刚好借双十一的契机,用上了vue(2.0)+vue-router(2.0)+vuex(2.0)来开发公司的双十一电商活动. 项目目录结构: 运行: npm install np ...
- 01-路由跳转 安装less this.$router.replace(path) 解决vue/cli3.0语法报错问题
2==解决vue2.0里面控制台包的一些语法错误. https://www.jianshu.com/p/5e0a1541418b 在build==>webpack.base.conf.j下注释掉 ...
- vue.js2.0 (简易)水果商城 vuex vant-ui
vue.js2.0 (简易)水果商城 vuex vant-ui:https://segmentfault.com/a/1190000015690250 vue2.5全家桶 高仿vivo商城 百分之95 ...
随机推荐
- connect 链接失败: 查找不到 signal
提示错误是: signal_index < 0 ;; ---- 故 connect返回false; 消除 connect 信号 ...
- Java Class类及反射机制
java.lang.Class类 声明: public final class Class<T>extends Object implements Serializable, Generi ...
- Apache shiro 文章推荐
均为系列文章,篇幅略长,适合入门. shiro源码分析 跟我学shiro
- Struts2与Struts1的区别
Struts2是基于WebWork的一个全新框架.不过有了Struts1的基础,学Struts2更方便.Struts2主要改进是取代了Struts1的Servlet和Action.Struts2的核心 ...
- vue学习
2016年12月2日 今天学习Vue.js,对于未知的知识,一脸懵逼.记录学习新知识的路程,为以后学习更多的新知识一个引导.以后学会了之后再回来看看, 回忆一下会与不会的区别在哪.这样以后学习可以更快 ...
- Centos7 修改mysql指定用户的密码
1.登陆mysql或者mariadb(两种任选其一) [root@localhost ~]# mysql -u root [root@localhost ~]# mysql -uroot -p 2.切 ...
- ios原声音频播放AVAudioSession 总结
//音频播放/*英译:record:录音 */ 1 导入头文件#import<AVFoundation/AVFoundation.h>//AVAudioSession是一个单例模式.在IO ...
- Android 应用程序升级到 5.0 需要注意的问题
Android 5.0,代号 Lollipop,源码终于在2014年12月3日放出,国内一大批厂商跟进.最大的改变是默认使用 ART(Android Runtime) ,替换了之前的 Dalvik 虚 ...
- 利用python的双向队列(Deque)数据结构实现回文检测的算法
#!/usr/bin/env python # -*- coding: utf-8 -*- # learn <<Problem Solving with Algorithms and Da ...
- Redis到底该如何利用(二)?
上一篇文章里我简述了使用Keys作为Redis搜索的方式,确实感受到了社区的力量,写文章好处多.首先谢谢各位前辈的指导,我知道了拿Redis作为搜索是个错误的方向.本来这篇文章我觉得确实没必要发了,但 ...