centos7使用kubeadm安装kubernetes集群
参考资料:官方文档
一、虚拟机安装
配置说明: windows下使用vbox,centos17.6 min版,kubernetes的版本是1.14.1,
安装如下三台机器:
192.168.56.15 k15
192.168.56.16 k16
192.168.56.17 k17
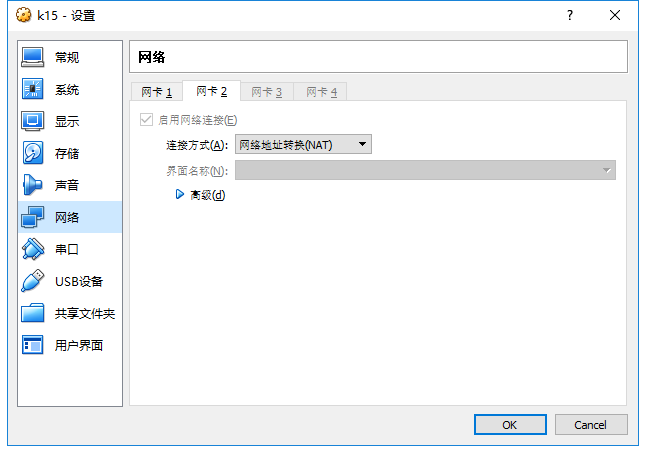
其中k15作为master,k16和k17作为node,虚拟机的安装重点关注网卡设置,设置两个网卡,第一个网卡(ifcfg-enp0s3)Host Only模式,第二个网卡(ifcfg-enp0s8)NAT模式,参见下图

二、虚拟机基本设置
本章节三台机器都执行,这里以k15为例
1.配置hostname
hostnamectl --static set-hostname k15
2. 网卡设置
红色字体部分是需要修改和新增的配置
#网卡1 Local Bridge

vi /etc/sysconfig/network-scripts/ifcfg-enp0s3

TYPE=Ethernet

PROXY_METHOD=none

BROWSER_ONLY=no

BOOTPROTO=static

DEFROUTE=yes

IPV4_FAILURE_FATAL=no

IPV6INIT=yes

IPV6_AUTOCONF=yes

IPV6_DEFROUTE=yes

IPV6_FAILURE_FATAL=no

IPV6_ADDR_GEN_MODE=stable-privacy

NAME=enp0s3

UUID=ede01346-f054-4dbc-94ff-b78b665e9089

DEVICE=enp0s3

ONBOOT=yes

IPADDR=192.168.56.15
#网卡2 NAT

vi /etc/sysconfig/network-scripts/ifcfg-enp0s8

TYPE=Ethernet

PROXY_METHOD=none

BROWSER_ONLY=no

BOOTPROTO=dhcp

DEFROUTE=yes

IPV4_FAILURE_FATAL=no

IPV6INIT=yes

IPV6_AUTOCONF=yes

IPV6_DEFROUTE=yes

IPV6_FAILURE_FATAL=no

IPV6_ADDR_GEN_MODE=stable-privacy

NAME=enp0s8

UUID=9f93f30e-45d0--bdd7-f1cf8720ac2a

DEVICE=enp0s8

ONBOOT=yes
查看网络设置
#网络重启

systemctl restart network

#ping网关

ping 192.168.56.0

#ping外网

ping www.baidu.com
3.设置/etc/hosts
vi /etc/hosts

192.168.56.15 k15

192.168.56.16 k16

192.168.56.17 k17
4.三台机器之间免密登录
ssh-keygen -t rsa  #一路回车

ssh-copy-id root@k16

ssh-copy-id root@k17
5.rpm配置阿里镜像
mv /etc/yum.repos.d/CentOS-Base.repo /etc/yum.repos.d/CentOS-Base.repo.backup

curl -o /etc/yum.repos.d/CentOS-Base.repo http://mirrors.aliyun.com/repo/Centos-7.repo

yum clean all

yum makecache

yum update
三、kubernetes安装需要的基本配置
本章节三台机器都执行,这里以k15为例
1.禁用防火墙
systemctl stop firewalld

systemctl disable firewalld
2.禁用swap
sed -ri 's/.*swap.*/#&/' /etc/fstab
3.禁用selinux
修改/etc/selinux/config 文件
将SELINUX=enforcing改为SELINUX=disabled
4.重启机器
四、安装docker
本章节三台机器都执行,这里以k15为例
安装docker,参见Centos7上安装docker
#查看docker版本

docker version

#启动

systemctl start docker

#设置开机自动启动

systemctl enable docker
五、安装kubeadm
本章节三台机器都执行,这里以k15为例
1.设置国内yum源
官方推荐的源是
cat <<EOF > /etc/yum.repos.d/kubernetes.repo

[kubernetes]

name=Kubernetes

baseurl=https://packages.cloud.google.com/yum/repos/kubernetes-el7-x86_64

enabled=

gpgcheck=

repo_gpgcheck=

gpgkey=https://packages.cloud.google.com/yum/doc/yum-key.gpg https://packages.cloud.google.com/yum/doc/rpm-package-key.gpg

exclude=kube*

EOF
官方提供的谷歌镜像源国内无法访问,这里我们使用阿里云镜像仓库解决这个问题:
cat <<EOF > /etc/yum.repos.d/kubernetes.repo

[kubernetes]

name=Kubernetes

baseurl=http://mirrors.aliyun.com/kubernetes/yum/repos/kubernetes-el7-x86_64

enabled=

gpgcheck=

repo_gpgcheck=

gpgkey=http://mirrors.aliyun.com/kubernetes/yum/doc/yum-key.gpg http://mirrors.aliyun.com/kubernetes/yum/doc/rpm-package-key.gpg

EOF
2.执行安装
yum install -y kubelet kubeadm kubectl --disableexcludes=kubernetes

systemctl enable --now kubelet
3.设置启动bridge模块
Some users on RHEL/CentOS 7 have reported issues with traffic being routed incorrectly due to iptables being bypassed. You should ensure net.bridge.bridge-nf-call-iptables is set to 1 in your sysctl config, e.g.
cat <<EOF > /etc/sysctl.d/k8s.conf

net.bridge.bridge-nf-call-ip6tables =

net.bridge.bridge-nf-call-iptables =

EOF

sysctl --system
设置为开机自动启动
vi /etc/rc.local

modprobe ip_vs

modprobe ip_vs_rr

modprobe ip_vs_wrr

modprobe ip_vs_sh

modprobe nf_conntrack_ipv4

modprobe br_netfilter
查看
lsmod | grep ip_vs
4.设置
六,kubeadm init
1.设置cgoups
cat >/etc/sysconfig/kubelet<<EOF

KUBELET_CGROUP_ARGS="--cgroup-driver=$DOCKER_CGROUPS"

KUBELET_EXTRA_ARGS="--pod-infra-container-image=registry.cn-hangzhou.aliyuncs.com/google_containers/pause-amd64:3.1"

EOF
设置完以后执行
2.从国内镜像下载kubeadm需要的docker镜像
安装kubeadm把相关的组件都安装在docker里,除了kubelet,这些docker镜像路径kubeadm会从google源取,因为不能访问google网站,所以再需要手工先从国内镜像下载
如果不下载镜像错误是这样的kubeadm执行初始化
[root@k8s15 system]# kubeadm init --apiserver-advertise-address 192.168.56.15 --pod-network-cidr=10.244.0.0/

I0502 ::03.001120    version.go:] could not fetch a Kubernetes version from the internet: unable to get URL "https://dl.k8s.io/release/stable-1.txt": Get https://dl.k8s.io/release/stable-1.txt: net/http: request canceled while waiting for connection (Client.Timeout exceeded while awaiting headers)

I0502 ::03.001307    version.go:] falling back to the local client version: v1.14.1

[init] Using Kubernetes version: v1.14.1

[preflight] Running pre-flight checks

        [WARNING Firewalld]: firewalld is active, please ensure ports [ ] are open or your cluster may not function correctly

        [WARNING IsDockerSystemdCheck]: detected "cgroupfs" as the Docker cgroup driver. The recommended driver is "systemd". Please follow the guide at https://kubernetes.io/docs/setup/cri/

error execution phase preflight: [preflight] Some fatal errors occurred:

        [ERROR Swap]: running with swap on is not supported. Please disable swap

[preflight] If you know what you are doing, you can make a check non-fatal with `--ignore-preflight-errors=...`
先查看kubeadm都需要哪些镜像
[root@k8s15 system]# cat kubeadm-config.yaml

cat: kubeadm-config.yaml: No such file or directory

[root@k8s15 system]# kubeadm config images list

I0502 ::38.423762    version.go:] could not fetch a Kubernetes version from the internet: unable to get URL "https://dl.k8s.io/release/stable-1.txt": Get https://dl.k8s.io/release/stable-1.txt: net/http: request canceled while waiting for connection (Client.Timeout exceeded while awaiting headers)

I0502 ::38.423825    version.go:] falling back to the local client version: v1.14.1

k8s.gcr.io/kube-apiserver:v1.14.1

k8s.gcr.io/kube-controller-manager:v1.14.1

k8s.gcr.io/kube-scheduler:v1.14.1

k8s.gcr.io/kube-proxy:v1.14.1

k8s.gcr.io/pause:3.1

k8s.gcr.io/etcd:3.3.

k8s.gcr.io/coredns:1.3.
重新安装还是说docker源有问题,继续参考这篇文章
echo ""

echo "=========================================================="

echo "Pull Kubernetes v1.14.1 Images from aliyuncs.com ......"

echo "=========================================================="

echo ""

MY_REGISTRY=registry.cn-hangzhou.aliyuncs.com/openthings

## 拉取镜像

docker pull ${MY_REGISTRY}/k8s-gcr-io-kube-apiserver:v1.14.1

docker pull ${MY_REGISTRY}/k8s-gcr-io-kube-controller-manager:v1.14.1

docker pull ${MY_REGISTRY}/k8s-gcr-io-kube-scheduler:v1.14.1

docker pull ${MY_REGISTRY}/k8s-gcr-io-kube-proxy:v1.14.1

docker pull ${MY_REGISTRY}/k8s-gcr-io-etcd:3.3.

docker pull ${MY_REGISTRY}/k8s-gcr-io-pause:3.1

docker pull ${MY_REGISTRY}/k8s-gcr-io-coredns:1.3.

## 添加Tag

docker tag ${MY_REGISTRY}/k8s-gcr-io-kube-apiserver:v1.14.1 k8s.gcr.io/kube-apiserver:v1.14.1

docker tag ${MY_REGISTRY}/k8s-gcr-io-kube-scheduler:v1.14.1 k8s.gcr.io/kube-scheduler:v1.14.1

docker tag ${MY_REGISTRY}/k8s-gcr-io-kube-controller-manager:v1.14.1 k8s.gcr.io/kube-controller-manager:v1.14.1

docker tag ${MY_REGISTRY}/k8s-gcr-io-kube-proxy:v1.14.1 k8s.gcr.io/kube-proxy:v1.14.1

docker tag ${MY_REGISTRY}/k8s-gcr-io-etcd:3.3. k8s.gcr.io/etcd:3.3.

docker tag ${MY_REGISTRY}/k8s-gcr-io-pause:3.1 k8s.gcr.io/pause:3.1

docker tag ${MY_REGISTRY}/k8s-gcr-io-coredns:1.3. k8s.gcr.io/coredns:1.3.

echo ""

echo "=========================================================="

echo "Pull Kubernetes v1.14.1 Images FINISHED."

echo "into registry.cn-hangzhou.aliyuncs.com/openthings, "

echo "           by openthings@https://my.oschina.net/u/2306127."

echo "=========================================================="

echo ""
生成上面的脚然后执行,然后可以通过docker images查看下载的镜像
3.执行kubeadm init
[root@k8s15 ~]# kubeadm init --apiserver-advertise-address 192.168.56.15 --pod-network-cidr=10.244.0.0/

I0502 ::55.764075     version.go:] could not fetch a Kubernetes version from the internet: unable to get URL "https://dl.k8s.io/release/stable-1.txt": Get https://dl.k8s.io/release/stable-1.txt: net/http: request canceled while waiting for connection (Client.Timeout exceeded while awaiting headers)

I0502 ::55.764251     version.go:] falling back to the local client version: v1.14.1

[init] Using Kubernetes version: v1.14.1

[preflight] Running pre-flight checks

[preflight] Pulling images required for setting up a Kubernetes cluster

[preflight] This might take a minute or two, depending on the speed of your internet connection

[preflight] You can also perform this action in beforehand using 'kubeadm config images pull'

[kubelet-start] Writing kubelet environment file with flags to file "/var/lib/kubelet/kubeadm-flags.env"

[kubelet-start] Writing kubelet configuration to file "/var/lib/kubelet/config.yaml"

[kubelet-start] Activating the kubelet service

[certs] Using certificateDir folder "/etc/kubernetes/pki"

[certs] Generating "ca" certificate and key

[certs] Generating "apiserver-kubelet-client" certificate and key

[certs] Generating "apiserver" certificate and key

[certs] apiserver serving cert is signed for DNS names [k8s15 kubernetes kubernetes.default kubernetes.default.svc kubernetes.default.svc.cluster.local] and IPs [10.96.0.1 192.168.56.15]

[certs] Generating "front-proxy-ca" certificate and key

[certs] Generating "front-proxy-client" certificate and key

[certs] Generating "etcd/ca" certificate and key

[certs] Generating "etcd/server" certificate and key

[certs] etcd/server serving cert is signed for DNS names [k8s15 localhost] and IPs [192.168.56.15 127.0.0.1 ::]

[certs] Generating "etcd/peer" certificate and key

[certs] etcd/peer serving cert is signed for DNS names [k8s15 localhost] and IPs [192.168.56.15 127.0.0.1 ::]

[certs] Generating "etcd/healthcheck-client" certificate and key

[certs] Generating "apiserver-etcd-client" certificate and key

[certs] Generating "sa" key and public key

[kubeconfig] Using kubeconfig folder "/etc/kubernetes"

[kubeconfig] Writing "admin.conf" kubeconfig file

[kubeconfig] Writing "kubelet.conf" kubeconfig file

[kubeconfig] Writing "controller-manager.conf" kubeconfig file

[kubeconfig] Writing "scheduler.conf" kubeconfig file

[control-plane] Using manifest folder "/etc/kubernetes/manifests"

[control-plane] Creating static Pod manifest for "kube-apiserver"

[control-plane] Creating static Pod manifest for "kube-controller-manager"

[control-plane] Creating static Pod manifest for "kube-scheduler"

[etcd] Creating static Pod manifest for local etcd in "/etc/kubernetes/manifests"

[wait-control-plane] Waiting for the kubelet to boot up the control plane as static Pods from directory "/etc/kubernetes/manifests". This can take up to 4m0s

[apiclient] All control plane components are healthy after 24.006122 seconds

[upload-config] storing the configuration used in ConfigMap "kubeadm-config" in the "kube-system" Namespace

[kubelet] Creating a ConfigMap "kubelet-config-1.14" in namespace kube-system with the configuration for the kubelets in the cluster

[upload-certs] Skipping phase. Please see --experimental-upload-certs

[mark-control-plane] Marking the node k8s15 as control-plane by adding the label "node-role.kubernetes.io/master=''"

[mark-control-plane] Marking the node k8s15 as control-plane by adding the taints [node-role.kubernetes.io/master:NoSchedule]

[bootstrap-token] Using token: xsatmx.ccv54br4fl9jt66r

[bootstrap-token] Configuring bootstrap tokens, cluster-info ConfigMap, RBAC Roles

[bootstrap-token] configured RBAC rules to allow Node Bootstrap tokens to post CSRs in order for nodes to get long term certificate credentials

[bootstrap-token] configured RBAC rules to allow the csrapprover controller automatically approve CSRs from a Node Bootstrap Token

[bootstrap-token] configured RBAC rules to allow certificate rotation for all node client certificates in the cluster

[bootstrap-token] creating the "cluster-info" ConfigMap in the "kube-public" namespace

[addons] Applied essential addon: CoreDNS

[addons] Applied essential addon: kube-proxy

Your Kubernetes control-plane has initialized successfully!

To start using your cluster, you need to run the following as a regular user:

  mkdir -p $HOME/.kube

  sudo cp -i /etc/kubernetes/admin.conf $HOME/.kube/config

  sudo chown $(id -u):$(id -g) $HOME/.kube/config

You should now deploy a pod network to the cluster.

Run "kubectl apply -f [podnetwork].yaml" with one of the options listed at:

  https://kubernetes.io/docs/concepts/cluster-administration/addons/

Then you can join any number of worker nodes by running the following on each as root:

kubeadm join 192.168.56.15: --token xsatmx.ccv54br4fl9jt66r \

    --discovery-token-ca-cert-hash sha256:a82d920063399de8cbd77db1d0c7fecb226fbc3b58932a9524341804b79e597e
mkdir -p $HOME/.kube

cp -i /etc/kubernetes/admin.conf $HOME/.kube/config

chown $(id -u):$(id -g) $HOME/.kube/config

echo export KUBECONFIG=~/.kube/config>> ~/.bashrc

source ~/.bashrc
[root@k8s15 ~]# kubectl apply -f https://raw.githubusercontent.com/coreos/flannel/master/Documentation/kube-flannel.yml

podsecuritypolicy.extensions/psp.flannel.unprivileged created

clusterrole.rbac.authorization.k8s.io/flannel created

clusterrolebinding.rbac.authorization.k8s.io/flannel created

serviceaccount/flannel created

configmap/kube-flannel-cfg created

daemonset.extensions/kube-flannel-ds-amd64 created

daemonset.extensions/kube-flannel-ds-arm64 created

daemonset.extensions/kube-flannel-ds-arm created

daemonset.extensions/kube-flannel-ds-ppc64le created

daemonset.extensions/kube-flannel-ds-s390x created
在k8s16和k8s17上执行
[root@k8s16 yum.repos.d]# kubeadm join 192.168.56.15: --token xsatmx.ccv54br4fl9jt66r \

>     --discovery-token-ca-cert-hash sha256:a82d920063399de8cbd77db1d0c7fecb226fbc3b58932a9524341804b79e597e

[preflight] Running pre-flight checks

        [WARNING IsDockerSystemdCheck]: detected "cgroupfs" as the Docker cgroup driver. The recommended driver is "systemd". Please follow the guide at https://kubernetes.io/docs/setup/cri/

[preflight] Reading configuration from the cluster...

[preflight] FYI: You can look at this config file with 'kubectl -n kube-system get cm kubeadm-config -oyaml'

[kubelet-start] Downloading configuration for the kubelet from the "kubelet-config-1.14" ConfigMap in the kube-system namespace

[kubelet-start] Writing kubelet configuration to file "/var/lib/kubelet/config.yaml"

[kubelet-start] Writing kubelet environment file with flags to file "/var/lib/kubelet/kubeadm-flags.env"

[kubelet-start] Activating the kubelet service

[kubelet-start] Waiting for the kubelet to perform the TLS Bootstrap...

This node has joined the cluster:

* Certificate signing request was sent to apiserver and a response was received.

* The Kubelet was informed of the new secure connection details.

Run 'kubectl get nodes' on the control-plane to see this node join the cluster.
七、kubeadm reset
kubeadm reset
rm -rf /var/lib/etcd
rm -rf ~/.kube
kubeadm init \
--kubernetes-version=v1.14.1 \
--apiserver-advertise-address=192.168.56.15 \
--pod-network-cidr=10.244.0.0/16 \
--ignore-preflight-errors=Swap
mkdir -p $HOME/.kube
cp -i /etc/kubernetes/admin.conf $HOME/.kube/config
chown $(id -u):$(id -g) $HOME/.kube/config
export KUBECONFIG=/etc/kubernetes/admin.conf
kubectl apply -f https://raw.githubusercontent.com/coreos/flannel/master/Documentation/kube-flannel.yml
rm -rf /etc/kubernetes/manifests
rm -rf /etc/kubernetes/kubelet.conf
rm -rf /etc/kubernetes/pki/ca.crt
八、kubectl join 添加k16和k17作为node节点
kubeadm join 192.168.56.15: --token 7h02b5.5yd3vc8aq8ydl6g0 \

    --discovery-token-ca-cert-hash sha256:17ce1395fff815815b7e7173a0df85973108bfa9b43f98ddb97fad8b7ee98cfa
在k15上查看集群的节点
[root@k15 ~]# kubectl get nodes

NAME   STATUS   ROLES    AGE   VERSION

k15    Ready    master   22h   v1.14.1

k16    Ready    <none>   22h   v1.14.1

k17    Ready    <none>   22h   v1.14.1
centos7使用kubeadm安装kubernetes集群的更多相关文章
- Kubernetes(K8s) 安装(使用kubeadm安装Kubernetes集群)
背景: 由于工作发生了一些变动,很长时间没有写博客了. 概述: 这篇文章是为了介绍使用kubeadm安装Kubernetes集群(可以用于生产级别).使用了Centos 7系统. 一.Centos7 ...
- VirtualBox上使用kubeadm安装Kubernetes集群
之前一直使用minikube练习,为了更贴近生产环境,使用VirtualBox搭建Kubernetes集群. 为了不是文章凌乱,把在搭建过程中遇到的问题及解决方法记在了另一篇文章:安装Kubernet ...
- centos7使用kubeadm搭建kubernetes集群
一.本地实验环境准备 服务器虚拟机准备 IP CPU 内存 hostname 192.168.222.129 >=2c >=2G master 192.168.222.130 >=2 ...
- centos7.5下kubeadm安装kubernetes集群安装
文章是按https://blog.csdn.net/Excairun/article/details/88962769,来进行操作并记录相关结果 版本:k8s V14.0,docker-ce 18.0 ...
- Ubuntu上kubeadm安装Kubernetes集群
一 创建VM 3台VM,其中一台为master节点,2台work node: 二 安装相关软件 在所有节点上运行: apt-get update apt-get install apt-transpo ...
- 安装Kubernetes集群时遇到的问题及解决方法
在搭建Kubernetes集群时遇到一些问题,记录在这里. 搭建过程在另一篇文章:VirtualBox上使用kubeadm安装Kubernetes集群 1. 虚拟机安装完CentOS7登录时遇到war ...
- Centos7 使用 kubeadm 安装Kubernetes 1.13.3
目录 目录 什么是Kubeadm? 什么是容器存储接口(CSI)? 什么是CoreDNS? 1.环境准备 1.1.网络配置 1.2.更改 hostname 1.3.配置 SSH 免密码登录登录 1.4 ...
- kubeadm搭建kubernetes集群之二:创建master节点
在上一章kubeadm搭建kubernetes集群之一:构建标准化镜像中我们用VMware安装了一个CentOS7虚拟机,并且打算用这个虚拟机的镜像文件作为后续整个kubernetes的标准化镜像,现 ...
- CentOS 7.5 使用 yum 安装 Kubernetes 集群(二)
一.安装方式介绍 1.yum 安装 目前CentOS官方已经把Kubernetes源放入到自己的默认 extras 仓库里面,使用 yum 安装,好处是简单,坏处也很明显,需要官方更新 yum 源才能 ...
随机推荐
- java8学习之Collectors工厂类源码分析与实战
如上一节[http://www.cnblogs.com/webor2006/p/8360232.html]在结尾处谈到的,彻底理解了Collector收集器之后,有必要对其系统Collectors实现 ...
- mvn高级构建
指定pom文件,打包指定的module,并且自动打包这个模块所依赖的其他模块. mvn clean install -f vmc-business-parent/pom.xml -pl vmc-sch ...
- HDU - 6583 Typewriter (后缀自动机+dp)
题目链接 题意:你要打印一段字符串,往尾部添加一个字符需要花费p元,复制一段字符到尾部需要花费q元,求打印完全部字符的最小花费. 一开始想的贪心,后来发现忘了考虑p<q的情况了,还纳闷怎么不对. ...
- ionic实现下载文件并打开功能(file-transfer和file-opener2插件)
作为一款app,下载文件功能,和打开文件功能,在某些场景下还是十分有必要的.使用cordova-plugin-file-transfer和cordova-plugin-file-opener2这两个插 ...
- Struts2基本原理【转】
阐述struts2的执行流程. Struts 2框架本身大致可以分为3个部分:核心控制器FilterDispatcher.业务控制器Action和用户实现的企业业务逻辑组件. 核心控制器FilterD ...
- LINUX装机问题:无法使用“Ctrl+Alt+[F1~F6]”快捷键切换到终端
用VMware装LINUX虚拟机之后,你会发现在X Window的登陆界面无法使用“Ctrl+Alt+[F1~F6]”快捷键切换到终端,这是因为VMware默认的快捷键也是Ctrl+Alt,所以你只需 ...
- 写在centos7 最小化安装之后
1.最小化安装之后首先解决联网问题(https://lintut.com/how-to-setup-network-after-rhelcentos-7-minimal-installation/) ...
- QT:QSS完全无效的原因
QSS的文件格式不是UTF-8,导致读取到的文件中字符串出现乱码.
- CSS之咖啡菜单网页设计
今天记录学习的设计网站首页的咖啡菜单,综合运用所学习的html,css背景,文本,字体,链接,表格,盒子,选择器,定位,以及css3的阴影,圆角边框,2d变换等内容. ㈠咖啡菜单整体样式 运用html ...
- 二叉排序树(Binary Sort Tree)
1.定义 二叉排序树(Binary Sort Tree)又称二叉查找(搜索)树(Binary Search Tree).其定义为:二叉排序树或者是空树,或者是满足如下性质的二叉树: ① 若它的左子树 ...