Google Maps API v2密钥申请以及实现地图定位导航
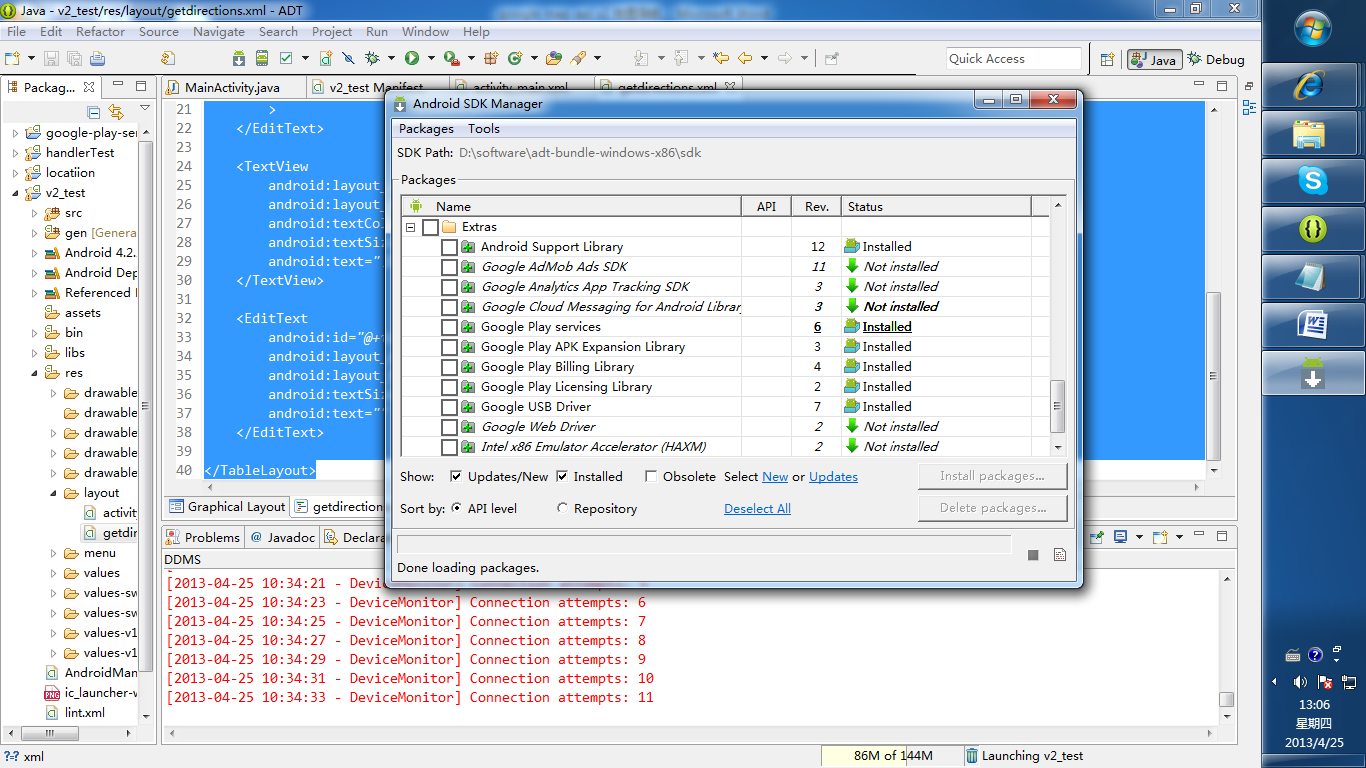
注意新建项目之前需要安装
google play services
然后导入
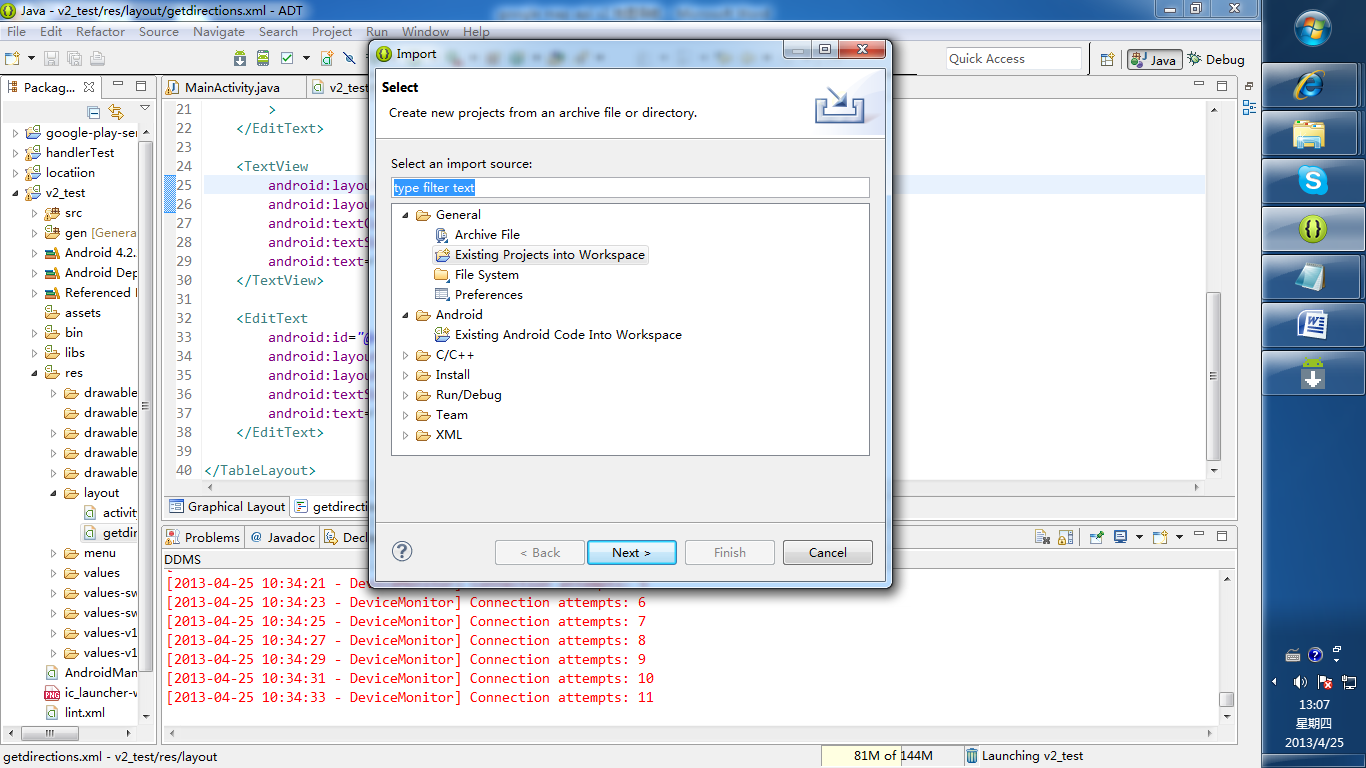
通过上图方法导入sdk包下面的一个包:
\adt-bundle-windows-x86\sdk\extras\google\google_play_services\libproject\google-play-services_lib
 AndroidManifest.xml

 <?xml version="1.0" encoding="utf-8"?>

 <manifest xmlns:android="http://schemas.android.com/apk/res/android"

     package="com.example.v2_test"

     android:versionCode="1"

     android:versionName="1.0" >

     <uses-sdk

         android:minSdkVersion="8"

         android:targetSdkVersion="17" />

     <permission

         android:name="com.example.v2_test.permission.MAPS_RECEIVE"

         android:protectionLevel="signature" />

 <uses-permission android:name="android.permission.INTERNET" />

     <uses-permission android:name="com.example.v2_test.permission.MAPS_RECEIVE" />

     <uses-permission android:name="android.permission.WRITE_EXTERNAL_STORAGE" />

     <uses-permission android:name="com.google.android.providers.gsf.permission.READ_GSERVICES" />

     <uses-permission android:name="android.permission.ACCESS_COARSE_LOCATION" />

     <uses-permission android:name="android.permission.ACCESS_FINE_LOCATION" />

     <uses-permission android:name="android.permission.ACCESS_MOCK_LOCATION"/>

     <uses-feature

         android:glEsVersion="0x00020000"

         android:required="true" />

     <application

         android:allowBackup="true"

         android:icon="@drawable/ic_launcher"

         android:label="@string/app_name"

         android:theme="@style/AppTheme" >

         <activity

             android:name="com.example.v2_test.MainActivity"

             android:label="@string/app_name" >

             <intent-filter>

                 <action android:name="android.intent.action.MAIN" />

                 <category android:name="android.intent.category.LAUNCHER" />

             </intent-filter>

         </activity>

         <meta-data

             android:name="com.google.android.maps.v2.API_KEY"

             android:value="AIzaSyDmrnUUl_zWzgimKKeR5t3ZiinvouSWO8E" />

     </application>

 </manifest>
 布局文件

 <RelativeLayout xmlns:android="http://schemas.android.com/apk/res/android"

     xmlns:map="http://schemas.android.com/apk/res-auto"

      android:layout_width="match_parent"

         android:layout_height="match_parent"

     >

     <fragment

         android:id="@+id/map"

         android:layout_width="match_parent"

         android:layout_height="match_parent"

         class="com.google.android.gms.maps.SupportMapFragment" />

     <ImageButton

          android:id="@+id/local"

          android:background="@null"

          android:layout_width="wrap_content"

         android:layout_height="wrap_content"

         android:layout_marginTop="10dp"

         android:layout_alignParentRight="true"

         android:layout_marginRight="10dp"

         />

 </RelativeLayout>
菜单弹出框布局文件

<?xml version="1.0" encoding="utf-8"?>

<TableLayout xmlns:android="http://schemas.android.com/apk/res/android"

    android:layout_width="fill_parent"

    android:layout_height="fill_parent"

    android:orientation="vertical" >

    <TextView

        android:layout_width="wrap_content"

        android:layout_height="wrap_content"

        android:text="起始位置:"

        android:textColor="@android:color/white"

        android:textSize="18dp">

    </TextView>

    <EditText

        android:id="@+id/start"

        android:layout_width="wrap_content"

        android:layout_height="wrap_content"

        android:textSize="18dp"

        android:text="我的位置"

        >

    </EditText>

    <TextView

        android:layout_width="wrap_content"

        android:layout_height="wrap_content"

        android:textColor="@android:color/white"

        android:textSize="18dp"

        android:text="目的地:" >

    </TextView>

    <EditText

        android:id="@+id/end"

        android:layout_width="wrap_content"

        android:layout_height="wrap_content"

        android:textSize="18dp"

        android:text="" >

    </EditText>

</TableLayout>
以上是核心配置文件与布局文件,下面是Activity中的实现代码,具体的请参考google 的官方demo
package com.example.v2_test;

import java.io.BufferedReader;

import java.io.IOException;

import java.io.InputStream;

import java.io.InputStreamReader;

import java.util.ArrayList;

import java.util.List;

import org.apache.http.HttpEntity;

import org.apache.http.HttpResponse;

import org.apache.http.client.ClientProtocolException;

import org.apache.http.client.HttpClient;

import org.apache.http.client.methods.HttpGet;

import org.apache.http.client.methods.HttpPost;

import org.apache.http.impl.client.DefaultHttpClient;

import org.json.JSONArray;

import org.json.JSONException;

import org.json.JSONObject;

import com.google.android.gms.maps.CameraUpdateFactory;

import com.google.android.gms.maps.GoogleMap;

import com.google.android.gms.maps.SupportMapFragment;

import com.google.android.gms.maps.model.CameraPosition;

import com.google.android.gms.maps.model.LatLng;

import com.google.android.gms.maps.model.Marker;

import com.google.android.gms.maps.model.MarkerOptions;

import com.google.android.gms.maps.model.Polyline;

import com.google.android.gms.maps.model.PolylineOptions;

import android.app.AlertDialog;

import android.app.ProgressDialog;

import android.content.DialogInterface;

import android.content.DialogInterface.OnClickListener;

import android.graphics.Color;

import android.location.Criteria;

import android.location.Location;

import android.location.LocationListener;

import android.location.LocationManager;

import android.os.Bundle;

import android.os.Handler;

import android.os.Message;

import android.support.v4.app.FragmentActivity;

import android.util.Log;

import android.view.LayoutInflater;

import android.view.Menu;

import android.view.MenuItem;

import android.view.View;

import android.widget.EditText;

import android.widget.ImageButton;

public class MainActivity extends FragmentActivity {

    List<LatLng> list;

    Polyline polyline;

    private Location location;

    private CameraPosition cameraPosition;

    private GoogleMap map;

    String start = "";

    String end = "";

    double lat = 0.0;

    double lng = 0.0;

    double endlat = 0.0;

    double endlng = 0.0;

    LocationManager locationManager;

    ImageButton local;

    LocationListener llistener;

    Marker  marker;

    private ProgressDialog progressdialog;

    private Handler mHandler = new Handler() {

        public void handleMessage(Message msg) {

            switch (msg.what) {

            case 1:

                progressdialog.dismiss();

                if(polyline!=null){

                polyline.remove();

                map.clear();

                markMysition();

                }

                map.addMarker(new MarkerOptions().position(

                        new LatLng(endlat, endlng)).title(

                        MainActivity.this.getLocation(endlat, endlng)));

                LatLng last = null;

                for (int i = 0; i < list.size() - 1; i++) {

                    LatLng src = list.get(i);

                    LatLng dest = list.get(i + 1);

                    last = dest;

                    polyline = map.addPolyline(new PolylineOptions()

                            .add(new LatLng(src.latitude, src.longitude),

                                    new LatLng(dest.latitude, dest.longitude))

                            .width(4).color(Color.GREEN));

                }

                break;

            }

        };

    };

    @Override

    protected void onCreate(Bundle savedInstanceState) {

        super.onCreate(savedInstanceState);

        setContentView(R.layout.activity_main);

        local = (ImageButton) findViewById(R.id.local);

        local.setImageResource(R.drawable.ww);

        // 点击按钮视图回到我的位置

        local.setOnClickListener(new android.view.View.OnClickListener() {

            @Override

            public void onClick(View v) {

                MainActivity.this.setCameraPosition();

            }

        });

        map = ((SupportMapFragment) (this.getSupportFragmentManager()

                .findFragmentById(R.id.map))).getMap();

        this.getPointLocation();

        MainActivity.this.setCameraPosition();

    }

    // 标记我的位置

    void markMysition() {

          marker=map.addMarker(new MarkerOptions().position(new LatLng(lat, lng)).title(

                this.getLocation(lat, lng)).snippet("我的位置"));

    }

    // 获取我的位置

    private void getPointLocation() {

        Criteria criteria = new Criteria();

        // ACCURACY_FINE 较高精确度

        criteria.setAccuracy(Criteria.ACCURACY_FINE);

        criteria.setAltitudeRequired(false);

        criteria.setBearingRequired(false);

        criteria.setCostAllowed(true);

        criteria.setPowerRequirement(Criteria.POWER_LOW);

        locationManager = (LocationManager) getSystemService(LOCATION_SERVICE);

        String provider = locationManager.getBestProvider(criteria, true);

        Log.d("provider", provider);

        llistener = new LocationListener() {

            @Override

            public void onLocationChanged(Location location) {

                /*if(marker!=null){

                    marker.remove();

                }

*/                lat = location.getLatitude();

                lng = location.getLongitude();

            //    MainActivity.this.markMysition();

            }

            @Override

            public void onProviderDisabled(String provider) {

                Log.i("onProviderDisabled", "come in");

            }

            @Override

            public void onProviderEnabled(String provider) {

                Log.i("onProviderEnabled", "come in");

            }

            @Override

            public void onStatusChanged(String provider, int status,

                    Bundle extras) {

            }

        };

        location = locationManager

                .getLastKnownLocation(locationManager.GPS_PROVIDER);

        locationManager.requestLocationUpdates(provider, 3000, (float) 10.0,

                llistener);

        updateLocation();

        MainActivity.this.markMysition();

        MainActivity.this.setCameraPosition();

    }

    // 位置更新

    private void updateLocation() {

        if (location != null) {

            lat = location.getLatitude();

            lng = location.getLongitude();

        }

    }

    // 将视图镜头定位在我的位置

    public void setCameraPosition() {

        // 获取视图镜头

        cameraPosition = new CameraPosition.Builder()

                .target(new LatLng(lat, lng)) // Sets the center of the map to

                .zoom(17) // 缩放比例

                .bearing(0) // Sets the orientation of the camera to east

                .tilt(20) // Sets the tilt of the camera to 30 degrees

                .build(); // Creates a CameraPosition from the builder

        map.animateCamera(CameraUpdateFactory.newCameraPosition(cameraPosition));

    }

    // 菜单

    public boolean onCreateOptionsMenu(Menu menu) {

        menu.add(0, Menu.FIRST + 1, 1, "获取路线");

        menu.add(0, Menu.FIRST + 2, 2, "退出");

        return true;

    }

    // 菜单响应

    public boolean onOptionsItemSelected(MenuItem item) {

        switch (item.getItemId()) {

        case Menu.FIRST + 1:

            // 定义输入框界面

            editpoint();

            break;

        case Menu.FIRST + 2:

            locationManager.removeUpdates(llistener);

            this.finish();

        }

        return true;

    }

    // 获取物理位置

    private String getLocation(double lat, double lng) {

        String address = "";

        String resultString = "";

        String urlString = String

                .format("http://maps.google.com/maps/api/geocode/json?latlng="

                        + lat + "," + lng + "&sensor=true&language=zh-CN");

        Log.i("URL", urlString);

        HttpClient client = new DefaultHttpClient();

        HttpGet get = new HttpGet(urlString);

        try {

            HttpResponse response = client.execute(get);

            HttpEntity entity = response.getEntity();

            BufferedReader buffReader = new BufferedReader(

                    new InputStreamReader(entity.getContent()));

            StringBuffer strBuff = new StringBuffer();

            String result = null;

            while ((result = buffReader.readLine()) != null) {

                strBuff.append(result);

            }

            resultString = strBuff.toString();

            // 解析josn数据,获得物理地址

            if (resultString != null && resultString.length() > 0) {

                JSONObject jsonobject = new JSONObject(resultString);

                JSONArray jsonArray = new JSONArray(jsonobject.get("results")

                        .toString());

                resultString = "";

                for (int i = 0; i < jsonArray.length(); i++) {

                    resultString = jsonArray.getJSONObject(i).getString(

                            "formatted_address");

                    address += resultString;

                }

            }

        } catch (Exception e) {

        } finally {

            get.abort();

            client = null;

        }

        return address;

    }

    // 通过输入信息解析json获取路线

    private void getDirection(String start, String endposition) {

        String DresultString = "";

        String Durl = "http://maps.google.com/maps/api/directions/json?origin="

                + lat + "," + lng + "&destination=" + endlat + "," + endlng

                + "&sensor=true&mode=driving";

        HttpClient Dclient = new DefaultHttpClient();

        HttpGet Dget = new HttpGet(Durl);

        HttpResponse response;

        try {

            response = Dclient.execute(Dget);

            HttpEntity Dentity = response.getEntity();

            BufferedReader DbuffReader = new BufferedReader(

                    new InputStreamReader(Dentity.getContent()));

            StringBuffer DstrBuff = new StringBuffer();

            String Dresult = null;

            while ((Dresult = DbuffReader.readLine()) != null) {

                DstrBuff.append(Dresult);

            }

            DresultString = DstrBuff.toString();

        } catch (Exception e) {

        }

        try {

            final JSONObject jsonObject = new JSONObject(DresultString);

            JSONArray routeArray = jsonObject.getJSONArray("routes");

            JSONObject routes = routeArray.getJSONObject(0);

            JSONObject overviewPolylines = routes

                    .getJSONObject("overview_polyline");

            String encodedString = overviewPolylines.getString("points");

            Log.d("test: ", encodedString);

            list = decodePoly(encodedString);

        } catch (JSONException e) {

            e.printStackTrace();

        } catch (ArrayIndexOutOfBoundsException e) {

            System.err.println("Caught ArrayIndexOutOfBoundsException: "

                    + e.getMessage());

        }

    }

    // 填写起始地点以得到路线导航

    private void editpoint() {

        LayoutInflater factory = LayoutInflater.from(MainActivity.this);

        // 获得自定义对话框

        final View view = factory.inflate(R.layout.getdirections, null);

        AlertDialog navigate = new AlertDialog.Builder(MainActivity.this)

                .setIcon(android.R.drawable.ic_menu_edit).setTitle("获取路线")

                .setView(view).setPositiveButton("确定", new OnClickListener() {

                    @Override

                    public void onClick(DialogInterface dialog, int which) {

                        dialog.dismiss();

                        EditText st = (EditText) view.findViewById(R.id.start);

                        EditText en = (EditText) view.findViewById(R.id.end);

                        start = st.getText().toString();

                        end = en.getText().toString();

                        progressdialog = ProgressDialog.show(MainActivity.this,

                                "正在获取路线", "请稍等……", true);

                        new Thread(new Runnable() {

                            @Override

                            public void run() {

                                // TODO Auto-generated method stub

                                getlatlng(end);

                                getDirection("我的位置", end);

                                mHandler.sendEmptyMessage(0);

                                mHandler.sendEmptyMessage(1);

                            }

                        }).start();

                    }

                }).setNegativeButton("取消", null).create();

        navigate.show();

    }

    // 根据地理名称获得起始点和终点的经纬度

    private void getlatlng(String end) {

        StringBuilder stringBuilder = new StringBuilder();

        try {

            HttpPost httppost = new HttpPost(

                    "http://maps.google.com/maps/api/geocode/json?address="

                            + end + "&sensor=false");

            HttpClient client = new DefaultHttpClient();

            HttpResponse response;

            stringBuilder = new StringBuilder();

            response = client.execute(httppost);

            HttpEntity entity = response.getEntity();

            InputStream stream = entity.getContent();

            int b;

            while ((b = stream.read()) != -1) {

                stringBuilder.append((char) b);

            }

        } catch (ClientProtocolException e) {

            // TODO Auto-generated catch block

            e.printStackTrace();

        } catch (IOException e) {

            // TODO Auto-generated catch block

            e.printStackTrace();

        }

        JSONObject jsonObject = new JSONObject();

        try {

            jsonObject = new JSONObject(stringBuilder.toString());

        } catch (JSONException e) {

            // TODO Auto-generated catch block

            e.printStackTrace();

        }

        try {

            endlng = ((JSONArray) jsonObject.get("results")).getJSONObject(0)

                    .getJSONObject("geometry").getJSONObject("location")

                    .getDouble("lng");

            endlat = ((JSONArray) jsonObject.get("results")).getJSONObject(0)

                    .getJSONObject("geometry").getJSONObject("location")

                    .getDouble("lat");

        } catch (Exception e) {

            e.printStackTrace();

        }

    }

    // 解析json文件里面的polyline下的poly得出导航上面路径的点

    private List<LatLng> decodePoly(String encoded) {

        List<LatLng> poly = new ArrayList<LatLng>();

        int index = 0, len = encoded.length();

        int lat = 0, lng = 0;

        while (index < len) {

            int b, shift = 0, result = 0;

            do {

                b = encoded.charAt(index++) - 63;

                result |= (b & 0x1f) << shift;

                shift += 5;

            } while (b >= 0x20);

            int dlat = ((result & 1) != 0 ? ~(result >> 1) : (result >> 1));

            lat += dlat;

            shift = 0;

            result = 0;

            do {

                b = encoded.charAt(index++) - 63;

                result |= (b & 0x1f) << shift;

                shift += 5;

            } while (b >= 0x20);

            int dlng = ((result & 1) != 0 ? ~(result >> 1) : (result >> 1));

            lng += dlng;

            LatLng p = new LatLng((lat / 1E5), lng / 1E5);

            poly.add(p);

        }

        return poly;

    }

}
欢迎访问:http://www.cnblogs.com/wangmars/ 这里有您而精彩
此文来自百度文库.....
Google Maps API v2密钥申请以及实现地图定位导航的更多相关文章
- Google Maps API v2密钥申请
1. 进入到Google APIs Console页面 https://code.google.com/apis/console/ 点击左边导航栏的Seivices进入 在All services 的 ...
- Google Map API V2密钥申请
之前用的都是v1,用的是MapView,好吧,仅仅能认命了.废话不再多说,開始android 的Google Maps Android API v2吧 之前參考了http://www.cnblogs. ...
- Google Maps API v2 Demo Tutorial
申请API KEY https://code.google.com/apis/console/?noredirect 1. 创建项目,名称随意,只是为了区分 2. 开启Google Maps Andr ...
- Google Maps API V2
1. 在AndroidManifest.xml的application节点中,添加Google play service的版本号: <meta-data android:name="c ...
- Google Maps API Web Services
原文:Google Maps API Web Services 摘自:https://developers.google.com/maps/documentation/webservices/ Goo ...
- Google Maps API Key申请办法(最新)
之前的Google Maps Api的API Key很容易申请,只需要按照一个简单的表单提交部署的网站地址即可,自动生成API Key并给出引用的路径. 但是最近在处理另外一个项目的时候发现之前的这种 ...
- google maps api申请的问题
现在已经改由统一的GOOGLE API控制台进行所有GOOGLE API的管理了. 方法是使用Google帐号登入 https://code.google.com/apis/console. 然后在所 ...
- Android中Google地图路径导航,使用mapfragment地图上画出线路(google map api v2)详解
在这篇里我们只聊怎么在android中google map api v2地图上画出路径导航,用mapfragment而不是mapview,至于怎么去申请key,manifest.xml中加入的权限,系 ...
- Google maps API开发(一)(转)
一.加载Google maps API <script type="text/javascript" src="http://ditu.google.com/map ...
随机推荐
- 分布式锁的理解,java自带的锁为什么会失效
前段时间在发送短信的代码块上通过网上找的工具类基于Redis实现了分布式锁的功能 对应的链接https://www.cnblogs.com/c-h-y/p/9391602.html 周末想细细看一下. ...
- CentOS7 安装Python3.6.4
1. 安装依赖环境 # yum -y install zlib-devel bzip2-devel openssl-devel ncurses-devel sqlite-devel readline- ...
- iOS 9应用开发基础教程下册
iOS 9应用开发基础教程下册 介绍: 本教程是国内第一本iOS 9开发应用教程.本教程基于Xcode 7.0,使用Swift 2.0语言讲解如何开发iOS 9的应用App. 学习建议:本教程针对 ...
- 范浩强treap——可持久化
当平衡树需要可持久化的时候,意味着我们需要访问以前的某个时间点的平衡树,就要保持以前的树形态不变,新建一个时间戳,构建一棵新的树. 如果用以前的旋转treap可能就不方便做到(又要打时间戳,又要新建节 ...
- 【推导】【线段树】hdu5929 Basic Data Structure
题意: 维护一个栈,支持以下操作: 从当前栈顶加入一个0或者1: 从当前栈顶弹掉一个数: 将栈顶指针和栈底指针交换: 询问a[top] nand a[top-1] nand ... nand a[bo ...
- 初涉springboot(一)
概述 1.了解springboot的作用 2.构建第一个springboot项目 一.springboot的作用 ① 原先在构建SSM项目的时候,可以感觉到,在一些不是很大的项目,构建配置文件的过程所 ...
- ES查询
(1)简单查询 1)根据id查询 get http://39.98.224.229:9200/company/data_info/AWnNz-AuWR2RitGomoXH 2)根据条件查询 查询所有数 ...
- 温故而知新---Java(一)
学习不仅要学习新的东西,而且还要时不时的回过头捡漏... 本文参考老马说编程系列等文,在此推荐大家关注老马说编程系列文章 正文 基础知识 数据类型主要是为了对数据进行分类,方便理解和操作,在Java中 ...
- TortoiseSVN里锁lock 的使用方法
刚才试验了一下,终于搞明白了TortoiseSVN里锁lock 的使用方法. 简单的说,如果压根没有锁lock,那么每个人都拥有一个本地copy,每个人都能自由地对本地copy编辑edit并提交com ...
- ADC for programmable logic uses one capacitor
Many electronic devices require user input for setting the application properties. Typical input dev ...