
apache的应用(发布目录,黑白名单,虚拟主机,PHP-cgi支持,正向代理,https加密,)
[root@apache1 ~]# yum install httpd -y
[root@apache1 ~]# cd /var/www/html/ 进入默认发布目录
[root@apache1 html]# ls
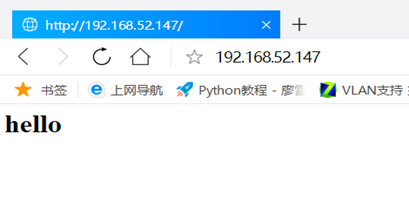
[root@apache1 html]# vim index.html 编辑默认读取的页面
[root@apache1 html]# systemctl start httpd
###################################################
修改默认发布目录
[root@apache1 html]# vim /etc/httpd/conf/httpd.conf 编辑配置文件
#DocumentRoot "/var/www/html" 注释此行(119左右)
DocumentRoot "/var/www/test" 自己写入要更改的发布目录
<Directory "/var/www/test">
Require all granted
</Directory>
<IfModule dir_module> 约在167行左右
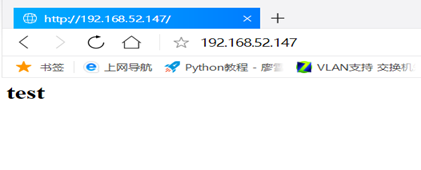
DirectoryIndex test.html index.html 修改默认读取的文件
</IfModule>
[root@apache1 html]# mkdir /var/www/test 创建自己设置的发布目录(有时需注意权限)
[root@apache1 html]# vim /var/www/test/test.html 编辑自己默认读取的文件(ex:test)
[root@apache1 html]# systemctl restart httpd.service 重启服务,读取文件
页面测试:
#######################################################
黑白目录(名单的设置):
[root@apache1 html]# vim /etc/httpd/conf/httpd.conf
DocumentRoot "/var/www/test"
<Directory "/var/www/test"> 修改此模块中的内容
Order Allow,Deny ##黑白名单的读取顺序
Allow from ALL ##白名单Allow,允许所有人访问
Deny from 192.168.52.0/24 ##黑名单Deny,拒绝192.168.52.0这个网段的人访问
</Directory>
[root@apache1 html]# systemctl restart httpd.service
测试:
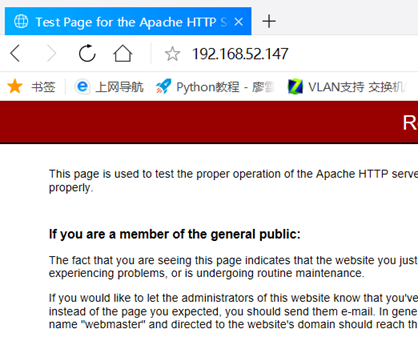
访问失败
此时我们再来修改一下配置文件:
DocumentRoot "/var/www/test"
<Directory "/var/www/test">
Order Deny,Allow ##将黑白名单的读取顺序改变一下先Deny,后Allow
Allow from ALL
Deny from 192.168.52.0/24
</Directory>
[root@apache1 html]# systemctl restart httpd.service ##重新服务,读取文件
再次访问时会发现又可以访问通了。由此可得出一个结论:
在黑白名单中,后读取的规则会覆盖先读取的规则。
##################################################
指定用户访问发布目录:
[root@apache1 html]# cd /etc/httpd/
[root@apache1 httpd]# ls
conf conf.d conf.modules.d logs modules run
[root@apache1 httpd]# htpasswd -cm apacheuser admin 建立用户并生成认证文件
New password:
Re-type new password:
Adding password for user admin
[root@apache1 httpd]# htpasswd -m apacheuser bss
New password:
Re-type new password:
Adding password for user bss
[root@apache1 httpd]# cat apacheuser 查看用户信息
admin:$apr1$U.IY9J0s$SWnZa5LQlH59vFF3gVfsz/
bss:$apr1$cKBxKH39$8maYvvh5aDGV.8/iQRrSA1
编辑配置文件
[root@apache1 httpd]# vim /etc/httpd/conf/httpd.conf
DocumentRoot "/var/www/test"
<Directory "/var/www/test">
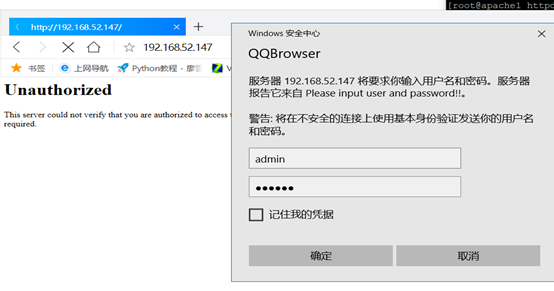
AuthUserFile /etc/httpd/apacheuser 读取的认证文件
AuthName "Please input user and password!!" 访问页面
AuthType basic 基本的认证方式
Require user admin 只允许admin用户访问
</Directory>
[root@apache1 httpd]# systemctl restart httpd.service
访问
[root@apache1 httpd]# vim /etc/httpd/conf/httpd.conf
DocumentRoot "/var/www/test"
<Directory "/var/www/test">
AuthUserFile /etc/httpd/apacheuser
AuthName "Please input user and password!!"
AuthType basic
Require valid-user ##此时允许所有用户登陆
</Directory>
[root@apache1 httpd]# systemctl restart httpd.service
这样所有的用户都可以登陆
############################################
虚拟主机的创建:
[root@apache1 httpd]# cd /etc/httpd/conf.d/
[root@apache1 conf.d]# vim default.conf
<VirtualHost _default_:80>
DocumentRoot /var/www/html
CustomLog "logs/default.log" combined
</VirtualHost>
[root@apache1 conf.d]# cp default.conf new.conf
[root@apache1 conf.d]# vim new.conf
<VirtualHost *:80>
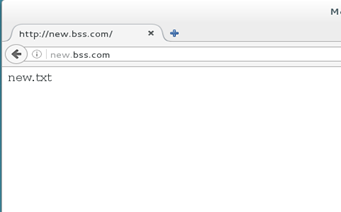
ServerName new.bss.com
DocumentRoot "/var/www/html/new"
CustomLog "logs/new.log" combined
</VirtualHost>
<Directory "/var/www/html/new">
Require all granted
</Directory>
[root@apache1 conf.d]# cp new.conf lol.conf
[root@apache1 conf.d]# vim lol.conf
<VirtualHost *:80>
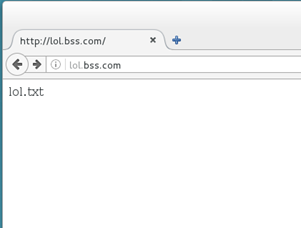
ServerName lol.bss.com
DocumentRoot "/var/www/html/lol"
CustomLog "logs/lol.log" combined
</VirtualHost>
<Directory "/var/www/html/lol">
Require all granted
</Directory>
创建虚拟目录,需要与文件中写的一致
[root@apache1 conf.d]# mkdir /var/www/html/new
[root@apache1 conf.d]# mkdir /var/www/html/lol
编写发布页面
[root@apache1 conf.d]# echo "new.txt" > /var/www/html/new/index.html
[root@apache1 conf.d]# echo "lol.txt" > /var/www/html/lol/index.html
添加本地解析(需要用哪台测,就写在哪台机子上)
[root@apache1 conf.d]# vim /etc/hosts
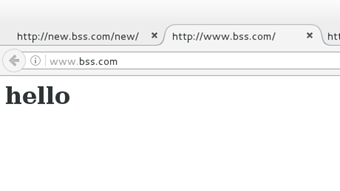
192.168.52.147 lol.bss.com new.bss.com www.bss.com
测试:
###################################################
Apache: php与cgi
Php的支持:
[root@apache1 conf.d]# yum install php -y
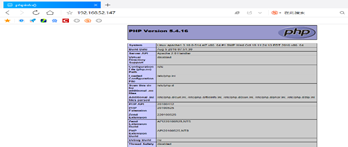
[root@apache1 conf.d]# vim /var/www/html/index.php ##写入php测试页面
<?php
phpinfo();
?>
编辑apache配置文件,在默认访问页面的模块加入php页面
<IfModule dir_module>
DirectoryIndex index.php index.html
</IfModule>
[root@apache1 conf.d]# systemctl restart httpd.service
测试:
Cgi的支持:
[root@apache1 conf.d]# mkdir /var/www/html/cgi
[root@apache1 conf.d]# vim /var/www/html/cgi/index.cgi
#!/usr/bin/perl
print "Content-type: text/html\n\n";
print `date`
[root@apache1 conf.d]# chmod +x /var/www/html/cgi/index.cgi ##给予cgi可执行权限
[root@apache1 conf.d]# /var/www/html/cgi/index.cgi ##执行cgi脚本
Content-type: text/html
Wed Mar 13 21:30:25 CST 2019
但是此时页面访问只会显示脚本文件内容,不会执行。
此时我们编辑apache配置文件,
[root@apache1 conf.d]# vim /etc/httpd/conf/httpd.conf
<Directory /var/www/html/cgi> ##添加此模块
Options +ExecCGI
ADDHandler cgi-script .cgi
</Directory>
[root@apache1 conf.d]# systemctl restart httpd.service
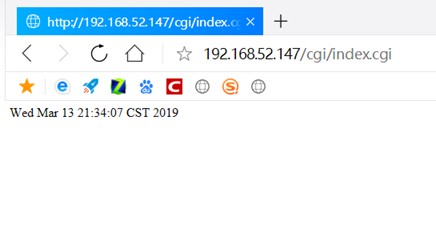
测试:
########################################################
https加密认证
[root@apache1 conf.d]# yum install mod_ssl.x86_64 crypto-utils.x86_64 -y
[root@apache1 ~]# genkey www.bss.com
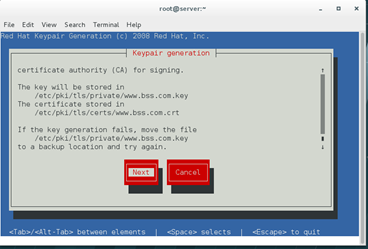
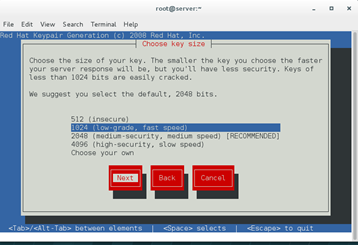
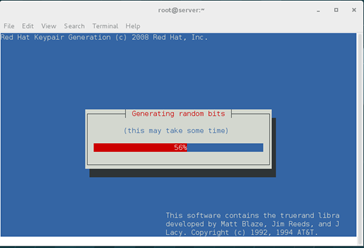
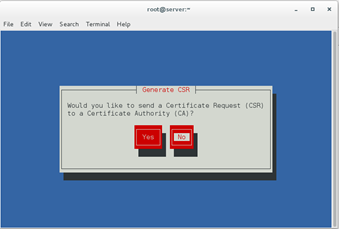
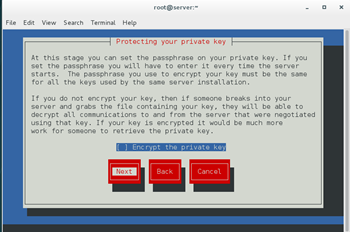
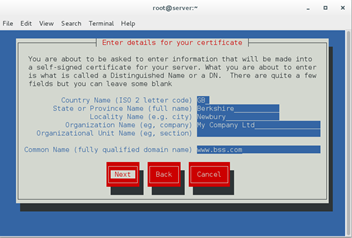
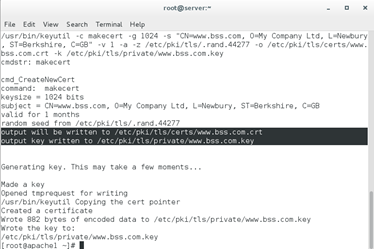
[root@apache1 conf.d]# vim /etc/httpd/conf.d/ssl.conf ##根据图中所示路径修改下面两行
SSLCertificateFile /etc/pki/tls/certs/www.bss.com.crt ##100行
SSLCertificateKeyFile /etc/pki/tls/private/www.bss.com.key ##107行
[root@apache1 conf.d]# systemctl restart httpd ##重启服务
地址转换:
Vim /etc/hosts
192.168.52.147 lls.bss.com
[root@apache1 ~]# vim /etc/httpd/conf.d/bss.conf
<Virtualhost *:443>
ServerName lls.bss.com
DocumentRoot "/var/www/lls"
CustomLog "logs/lls.log" combined
SSLEngine on
SSLCertificateFile /etc/pki/tls/certs/www.bss.com.crt
SSLCertificateKeyFile /etc/pki/tls/private/www.bss.com.key
</Virtualhost>
<Virtualhost *:80>
ServerName lls.bss.com
RewriteEngine on
RewriteRule ^(/.*)$ https://%{HTTP_HOST}$1 [redirect=301]
</Virtualhost>
[root@apache1 ~]# mkdir /var/www/lls
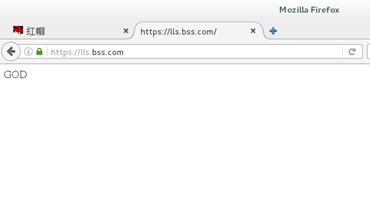
[root@apache1 ~]# echo "GOD" > /var/www/lls/index.html
[root@apache1 ~]# systemctl restart httpd
###############################################
代理服务器:
可上网的机器
[root@apache1 ~]# yum install squid.x86_64 -y
[root@apache1 ~]# vim /etc/squid/squid.conf
http_access allow all ##第56行,允许所有人通过
http_port 3128 ##59行
cache_dir ufs /var/spool/squid 100 16 256 ##62行,
[root@apache1 ~]# systemctl restart squid
在不能上网的机器上:
Edit > Preferences > Advanced > Network > Settings > Manual proxy configuration > HTTP Proxy


apache的应用(发布目录,黑白名单,虚拟主机,PHP-cgi支持,正向代理,https加密,)的更多相关文章
- linux下用Apache一个IP多个域名建虚拟主机
如有两个域名,分别是hello.abc.com和play.abc.com,需把这两个域名都绑定到 IP是219.13.34.32的服务器上 1.首先需在域名供应商管理页面指定域名和IP的对应关系 2. ...
- [javaEE] web应用的目录结构&配置虚拟主机
myWebSite | |-- 静态资源和JSP文件都可以直接放在web应用目录下,浏览器可以直接访问 |-- WEB-INF 浏览器没有办法直接访问 |-- classes 动态web运行时的cla ...
- .net MVC4.0项目发布到阿里云虚拟主机中遇到的问题。
正所谓学以致用,今天本来想做个bootstrap的demo发到服务器上看一下效果,结果服务器搞了半天,最终太晚了没能学到什么东西. 首先写好页面之后我做了一个MVC4.0的网站项目,然后把Bootst ...
- <Apache服务的搭建"三件套"《目录验证》《虚拟主机》《加密证书》>
自己没事会整理一些小知识,复习原来的同时也帮助新手. vvvvvvvvvvvvv开启apache目录验证vvvvvvvvvvvvvv htpasswd -cm uers redhat //redha ...
- Apache配置完虚拟主机后,使用Chrome访问localhost还是默认目录htdocs
Chrome 解析DNS出错,这个错误比较罕见,甚至说有点奇特.今天在使用Apache配置虚拟主机时,出现了一个非常奇怪的现象.我按照配置的步骤配置虚拟主机,如下 配置虚拟主机的步骤如下: 1. 启用 ...
- Apache虚拟主机配置
在一个Apache服务器上可以配置多个虚拟主机,实现一个服务器提供多站点服务,其实就是访问同一个服务器上的不同目录.Apache虚拟主机配置有3中方法:基于IP配置.基于域名配置和基于端口配置,这里介 ...
- 【Apache运维基础(3)】虚拟主机配置说明
建议在主配置文件中增加一句 Include conf/vhosts/*.conf 然后就在vhosts目录下添加虚拟主机配置文件 在配置前打开NameVirtualHost *:80注释,注意此处要与 ...
- 基于Apache在本地配置多个虚拟主机站点
简单的说,打开httpd.conf 在最后加入如下内容: <VirtualHost 127.0.0.2:80> DocumentRoot d:/AppServ/www2 Ser ...
- Nginx 和Apache 中的虚拟主机的概念
在部署环境的时候,有时候会引用到虚拟主机的概念,什么是虚拟主机呢,博主之前一直把虚拟主机的概念没搞清楚,导致在部署的时候,一直动不动就404 ,或者500,或者服务器不通 所以,什么是虚拟主机呢? 虚 ...
随机推荐
- C++ generic tools -- from C++ Standard Library
今晚学了一下C++标准程序库, 来简单回顾和总结一下. 1.pair 结构体 // defined in <utility> , in the std namespace namespac ...
- [GO]从键盘获取回复的客户端
package main import ( "net" "fmt" "os" ) func main() { //连接服务器 conn, e ...
- CodeForces 682C Alyona and the Tree (树上DFS)
题意:给定一棵树,每个叶子有一个权值,每条边也有一个权值,现在让你删最少的结点,使得从任何结点出发到另一个结点的边上权值和都小于两个结点的权值. 析:很明显是DFS,不过要想找出最少的结点可能不太容易 ...
- 编写高质量代码改善C#程序的157个建议——建议70:避免在调用栈较低的位置记录异常
建议70:避免在调用栈较低的位置记录异常 并不是所有的异常都要被记录到日志,一类情况是异常发生的场景需要被记录,还有一类就是未被捕获的异常.未被捕获的异常通常被视为一个Bug,所以,对于它的记录,应该 ...
- HBASE的优化、hadoop通用优化,Linux优化,zookeeper优化,基础优化
HBase 的优化3.1.高可用在 HBase 中 Hmaster 负责监控 RegionServer 的生命周期,均衡 RegionServer 的负载,如果Hmaster 挂掉了,那么整个 HBa ...
- 前端技术俗语js
注:原文是英文,本文是我翻译的.有人把我翻译的内容原文照抄,放到他自己的专栏,搞得有人问我是不是我抄袭了……请支持我的劳动成果,花了两个小时翻译的,谢谢.转载请注明译者为方应杭. 嘿,我最近接到一个 ...
- redis整理の安装
安装 步骤一: 下载 Redis 下载安装包:#wget http://redis.googlecode.com/files/redis-2.8.19.tar.gz: 步骤二:解压:#tar zxvf ...
- Android-Spinner下拉列表
在布局Layout文件中定义Spinner: <?xml version="1.0" encoding="utf-8"?> <LinearLa ...
- AgentJob--修改操作系统时间对Job的影响
场景:有一个数据库作业每10分钟运行一次,在系统管理员修改操作系统时间后,作业长时间未运行. 分析:作业最后一次运行时间是 10:20,按照作业的计划,下一次的运行时间为 10:30,而系统管理员修改 ...
- WebApi与Mvc的区别
ASP.NET Mvc是基于ASP.NET管道设计的框架,但是Mvc应用程序只能在iis中运行,而WebApi框架既可以寄宿在IIs上也可以在Self-Host上进行处理. Mvc和webapi都有相 ...