SpringBoot入门之简单配置
今天下载了《JavaEE开发的颠覆者SpringBoot实战》这本书,发现Spring还有好多遗漏的部分,算是又恶补了一下,今天主要是学习下SpringBoot的配置。
一、基本配置
1.定制Banner
(1).在src/main/resource下新建banner.txt
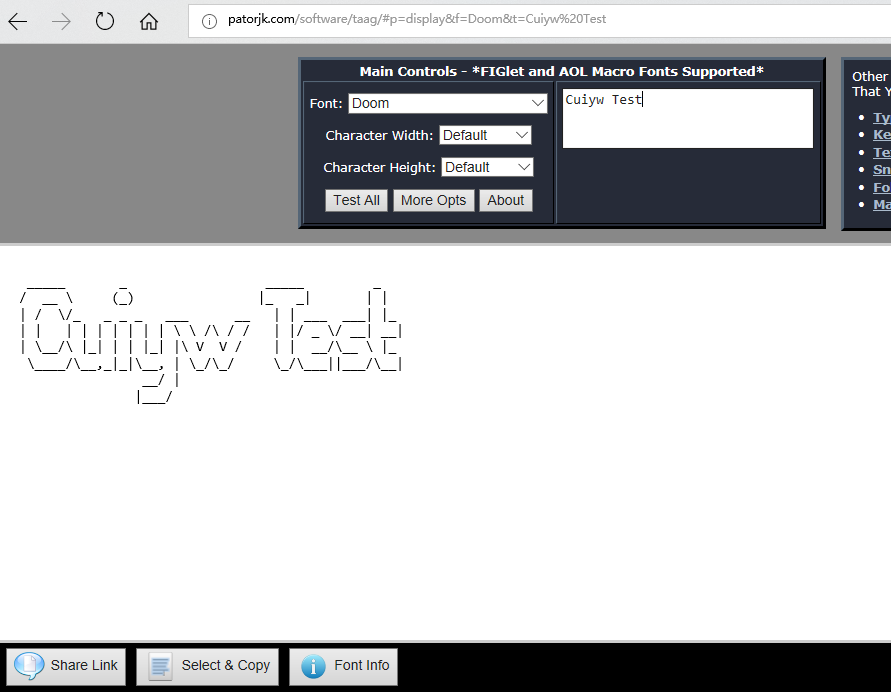
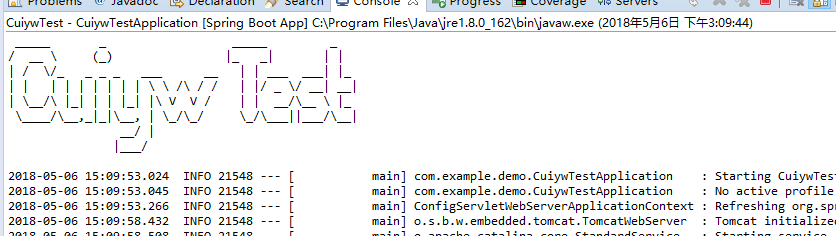
(2).打开http://patorjk.com/software/taag,输入要显示的文字,选择想要的样式,拷贝到banner.txt中,再次启动时就会发现banner已变。
(3)关闭banner
可以修改main,设置设置banner mode为OFF关闭banner。
package com.example.demo;

import org.springframework.boot.Banner;

import org.springframework.boot.SpringApplication;

import org.springframework.boot.autoconfigure.SpringBootApplication;

@SpringBootApplication

public class CuiywTestApplication {

    public static void main(String[] args) {

        //SpringApplication.run(CuiywTestApplication.class, args);

        SpringApplication app=new SpringApplication(CuiywTestApplication.class);

        app.setBannerMode(Banner.Mode.OFF);

        app.run(args);

    }

}
2.springboot配置文件
SpringBoot使用application.properties作为全局的配置文件,对一些默认配置的值进行修改。它不仅支持properties类型的文件还支持yml类型的文件.
server.port=8081

server.servlet.context-path=/cywtest
这里修改了启动的默认端口8080和默认context-path:/。看它启动日志也可以看出来发生了变化.

3.使用xml配置
虽然SpringBoot不提倡使用xml配置,但有时候也还是需要用的,这里我们在src/main/java下创建com.example.cywtest包,在包下创建一个@service HelloService,由于SpringBoot默认扫描的是CuiywTestApplication main方法对应的包以及子包,不会扫到com.example.cywtest包,我们在helloController注入一个该服务,然后启动,发现会报错,找不到该类。
***************************

APPLICATION FAILED TO START

***************************

Description:

Field helloService in com.example.demo.helloController required a bean of type 'com.example.cywtest.HelloService' that could not be found.

Action:

Consider defining a bean of type 'com.example.cywtest.HelloService' in your configuration.
(1).创建application-bean.xml
<?xml version="1.0" encoding="UTF-8"?>

<beans xmlns="http://www.springframework.org/schema/beans"

       xmlns:xsi="http://www.w3.org/2001/XMLSchema-instance"

       xsi:schemaLocation="http://www.springframework.org/schema/beans http://www.springframework.org/schema/beans/spring-beans.xsd">

    <!--

        自定义配置bean

    -->

    <bean id="helloService" class="com.example.cywtest.HelloService">

    </bean>

</beans>
(2).在main方法对应的包下创建配置文件引入bean,以便让SpringBoot能扫描到
package com.example.demo;

import org.springframework.context.annotation.Configuration;

import org.springframework.context.annotation.ImportResource;

@Configuration

@ImportResource(locations = {"application-bean.xml"})

public class ConfigClass {

}
这样再启动就不会报错了。
HelloService:这个类不在CuiywTestApplication对应的包下,SpringBoot默认扫描不到。
package com.example.cywtest;

import org.springframework.stereotype.Service;

@Service

public class HelloService {

      public HelloService(){

            System.out.println("使用XML进行配置的Service");

        }

}
ConfigClass:这里引入了application-bean.xml
package com.example.demo;

import org.springframework.context.annotation.Configuration;

import org.springframework.context.annotation.ImportResource;

@Configuration

@ImportResource(locations = {"application-bean.xml"})

public class ConfigClass {

}
helloController: 这里注入了HelloService.
package com.example.demo;

import org.springframework.beans.factory.annotation.Autowired;

import org.springframework.stereotype.Controller;

import org.springframework.web.bind.annotation.RequestMapping;

import org.springframework.web.bind.annotation.ResponseBody;

import org.springframework.web.bind.annotation.RestController;

import com.example.cywtest.HelloService;

@RestController

//@Controller

//@ResponseBody

@RequestMapping("/sbs")

public class helloController {

    @Autowired

    HelloService helloService;

    @RequestMapping("/hello")

    public String Hello(){

        return "Hello World";

    }

}
这样通过上面的方法引入之后就能让SpringBoot扫描到了,再次启动也不会报错了。

二、外部配置
1.常规属性配置
在SpringBoot中只需在application.properties中定义,使用@Value注入即可。
Test.Name=cuiyw
package com.example.demo;

import org.springframework.beans.factory.annotation.Autowired;

import org.springframework.beans.factory.annotation.Value;

import org.springframework.stereotype.Controller;

import org.springframework.web.bind.annotation.RequestMapping;

import org.springframework.web.bind.annotation.ResponseBody;

import org.springframework.web.bind.annotation.RestController;

import com.example.cywtest.HelloService;

@RestController

//@Controller

//@ResponseBody

@RequestMapping("/sbs")

public class helloController {

    @Autowired

    HelloService helloService;

    @Value("${Test.Name}")

    private String Name;

    @RequestMapping("/hello")

    public String Hello(){

        return "Hello World,"+Name;

    }

}

2.基于properties类型安全的配置
SpringBoot提供了类型安全的配置方式,通过@ConfigurationProperties将Properties属性和一个Bean及其属性关联,从而实现类型安全的配置。
(1).在src/main/resource下建了一个test.properties的属性文件
person.Name=cyw

person.Age=18
(2).在com.example.demo包下创建了PersonSetting的类用来与test属性文件进行关联。
package com.example.demo;

import org.springframework.boot.context.properties.ConfigurationProperties;

import org.springframework.context.annotation.PropertySource;

import org.springframework.stereotype.Component;

@Component

@PropertySource(value = "classpath:/test.properties")

@ConfigurationProperties(prefix="person")

public class PersonSetting {

    private String name;

    private Long age;

    public String getName() {

        return name;

    }

    public void setName(String name) {

        this.name = name;

    }

    public Long getAge() {

        return age;

    }

    public void setAge(Long age) {

        this.age = age;

    }

}
(3).在helloController注入PersonSetting
package com.example.demo;

import org.springframework.beans.factory.annotation.Autowired;

import org.springframework.beans.factory.annotation.Value;

import org.springframework.stereotype.Controller;

import org.springframework.web.bind.annotation.RequestMapping;

import org.springframework.web.bind.annotation.ResponseBody;

import org.springframework.web.bind.annotation.RestController;

import com.example.cywtest.HelloService;

@RestController

//@Controller

//@ResponseBody

@RequestMapping("/sbs")

public class helloController {

    @Autowired

    HelloService helloService;

    @Value("${Test.Name}")

    private String Name;

    @Autowired

    PersonSetting personSetting;

    @RequestMapping("/hello")

    public String Hello(){

        return "Hello World,"+Name+"Person Name:"+personSetting.getName();

    }

}
(4).启动,在浏览器输入http://localhost:8081/cywtest/sbs/hello,可以看到获取到了属性文件中的name值。

三、Profile配置
在开发中可能会部署多个环境,每个环境部署的配置可能不一样.我们可以使用application.properties进行多个环境的配置,通过application-{profile}.properties来控制加载哪个环境的配置,将于环境无关的属性,放置到application.properties文件里面,通过spring.profiles.active=profiles的值,加载不同环境的配置,如果不指定,则默认加载application.properties的配置,不会加载带有profile的配置 。
(1).创建application-dev.properties开发和application-prod.properties生产属性文件,分别指定不同的port和context-path。
server.port=8082

server.servlet.context-path=/devtest
server.port=8083

server.servlet.context-path=/prodtest
(2)在application.properties设置环境 ,这里设置的是dev环境,那启动的端口就是8082.
spring.profiles.active=dev

四、小结
今天算是学了几个简单的配置,其实还有好多配置,比如日志等,这个一篇博客也写不完,在以后的博客中学习。
SpringBoot入门之简单配置的更多相关文章
- springboot 入门二- 读取配置信息一
在上篇入门中简单介绍下springboot启动使用了大量的默认配置,在实际开发过程中,经常需要启动多个服务,那端口如何手动修改呢? 此篇就是简单介绍相关的配置文件信息. Spring Boot允许外部 ...
- 01.springboot入门--启用自动配置注解EnableAutoConfiguration
springboot入门 <parent> <groupId>org.springframework.boot</groupId> <artifactId&g ...
- springboot 入门八-自定义配置信息(编码、拦截器、静态资源等)
若想实际自定义相关配置,只需要继承WebMvcConfigurerAdapter.WebMvcConfigurerAdapter定义些空方法用来重写项目需要用到的WebMvcConfigure实现.具 ...
- SpringBoot入门(简单详细教程)
Spring Boot 简介 简化Spring应用开发的一个框架:整个Spring技术栈的一个大整合:J2EE开发的一站式解决方案: 微服务 martin fowler:微服务:架构风格(服务微化): ...
- SpringBoot入门教程(八)配置logback日志
Logback是由log4j创始人设计的又一个开源日志组件.logback当前分成三个模块:logback-core,logback- classic和logback-access.logback-c ...
- SpringBoot入门之分散配置
springboot默认支持两种格式的配置文件:.properties和.yml.其中.properties是属性文件,也是最常用的一种:.yml是yaml格式的文件,yaml是一种简洁的标记语言.例 ...
- springboot入门之简单demo
项目构建 我们采用maven构建SpringBoot工程,首先创建一个maven工程,对应的pom文件如下: <properties> <java.version>1.8< ...
- springboot 入门三- 读取配置信息二(读取属性文件方式)
在上篇文章中简单介绍自带读取方式.springboot提供多种方式来读取 一.@ConfigurationProperties(value="my") 支持更灵活的绑定及元数据的支 ...
- SpringBoot入门 (三) 日志配置
上一篇博文记录了再springboot项目中读取属性文件中配置的属性,本文学习在springboot项目中记录日志. 日志记录在项目中是很常见的一个功能了,对排查问题有很大帮助,也可以做分类分析及统计 ...
随机推荐
- 使用Hash函数和MAC产生伪随机数
基于Hash函数的PRNG 流程非常类似于对称密码的CTR工作模式 算法的伪码如下 m = ⌈n/outlen⌉ data = V W = the null String for i = 1 to m ...
- OC语言编写:为视图添加丝滑的水波纹
先看一下最终效果图: 首先我们可以把如此丝滑的水波纹拆分一下下: 一条规律的曲线. 曲线匀速向右移动. 曲线下方的位置用颜色填充. 于是先来一条曲线吧. 对于需要产生波动如此规律的曲线,我们首先想到的 ...
- Linux下配置Tomcat
***安装*** 安装JDK chmod a+x jdk-1_5_0_06-linux-i586-rpm.bin ./jdk-1_5_0_06-linux-i586-rpm.bin 敲几次空格就O ...
- pig的grunt中shell命令不稳定,能不用尽量不用
shell命令:mv a b 将文件a改名为b, 可如果b已经存在,比如/test文件下有a和b两个文件,执行mv a b后,b被覆盖的了.也就是/test文件下只有a. 但是mv命令在pig的g ...
- Java实现简易的文件的迁移器
Java作为世界上最受欢迎的一门编程语言,自然是有原因的.比如说我们可以直接的方便的调用其中的函数来实现我们想要的功能. 一个偶然的机会,我浏览API文档时发现了一个名为FileDialog的类,然后 ...
- Android平台 Psensor传感器调试方法
一. 驱动层调试1.在板级dts文件中增加相应的dts代码,如:调试sensor类,在代码中找到已经有的代码在修改,I2C使用那根(一般为I2C3),I2C地址(找datasheet或者FAE),哪个 ...
- [WinForm]dataGridView导出到EXCEL
方法一: SaveFileDialog dlg = new SaveFileDialog(); dlg.Filter = "Execl files (*.xls)|*.xls"; ...
- 分布式进阶(十六)Zookeeper入门基础
Zookeeper入门基础 前言 在Zookeeper中,znode是一个跟Unix文件系统路径相似的节点,可以往这个节点存储或获取数据.如果在创建znode时Flag设置为EPHEMERAL,那么当 ...
- 《java入门第一季》之面向对象面试题
1:方法重写和方法重载的区别?方法重载能改变返回值类型吗? 方法重写: 在子类中,出现和父类中一模一样的方法声明的现象. 方法重载: 同一个类中,出现的方法名相同,参数列表不同的现象. 方法重载能改变 ...
- 《java入门第一季》之java语法部分小案例
到这里举一个小例子把语法部分梳理一下,下一节开始进入java正式基础--面向对象的学习整理. 案例: /* 某个公司采用公用电话传递数据信息,数据是小于8位的整数,为了确保安全, 在传递过程中需要加密 ...