
在Linux下搭建Git服务器步骤
环境:
服务器 CentOS6.6 + git(version 1.7.1)
客户端 Windows10 + git(version 2.8.4.windows.1)
① 安装 Git
Linux 做为服务器端系统,Windows 作为客户端系统,分别安装 Git
服务器端:
|
1
|
#yum install -y git |
安装完后,查看 Git 版本
|
1
2
|
[root@localhost ~]# git --versiongit version 1.7.1 |
客户端:
下载 Git for Windows,地址:https://git-for-windows.github.io/
安装完之后,可以使用 Git Bash 作为命令行客户端。
安装完之后,查看 Git 版本
|
1
2
|
$ git --versiongit version 2.8.4.windows.1 |
② 服务器端创建 git 用户,用来管理 Git 服务,并为 git 用户设置密码
|
1
2
3
4
|
[root@localhost home]# id gitid: git:无此用户[root@localhost home]# useradd git[root@localhost home]# passwd git |
③ 服务器端创建 Git 仓库
设置 /home/data/git/gittest.git 为 Git 仓库
然后把 Git 仓库的 owner 修改为 git
|
1
2
3
4
5
|
[root@localhost home]# mkdir -p data/git/gittest.git[root@localhost home]# git init --bare data/git/gittest.gitInitialized empty Git repository in /home/data/git/gittest.git/[root@localhost home]# cd data/git/[root@localhost git]# chown -R git:git gittest.git/ |
④ 客户端 clone 远程仓库
进入 Git Bash 命令行客户端,创建项目地址(设置在 d:/wamp64/www/gittest_gitbash)并进入:
|
1
2
3
4
5
6
7
8
9
10
11
|
dee@Lenovo-PC MINGW64 /d$ cd wamp64/wwwdee@Lenovo-PC MINGW64 /d/wamp64/www$ mkdir gittest_gitbashdee@Lenovo-PC MINGW64 /d/wamp64/www$ cd gittest_gitbashdee@Lenovo-PC MINGW64 /d/wamp64/www/gittest_gitbash$ |
然后从 Linux Git 服务器上 clone 项目:
|
1
|
$ git clone git@192.168.56.101:/home/data/gittest.git |

当第一次连接到目标 Git 服务器时会得到一个提示:
The authenticity of host '192.168.56.101 (192.168.56.101)' can't be
established.RSA key fingerprint is
SHA256:Ve6WV/SCA059EqoUOzbFoZdfmMh3B259nigfmvdadqQ.Are you sure you want
to continue connecting (yes/no)?
选择 yes:
Warning: Permanently added '192.168.56.101' (RSA) to the list of known hosts.
此时 C:\Users\用户名\.ssh 下会多出一个文件 known_hosts,以后在这台电脑上再次连接目标 Git 服务器时不会再提示上面的语句。

后面提示要输入密码,可以采用 SSH 公钥来进行验证。
⑤ 客户端创建 SSH 公钥和私钥
|
1
|
$ ssh-keygen -t rsa -C |
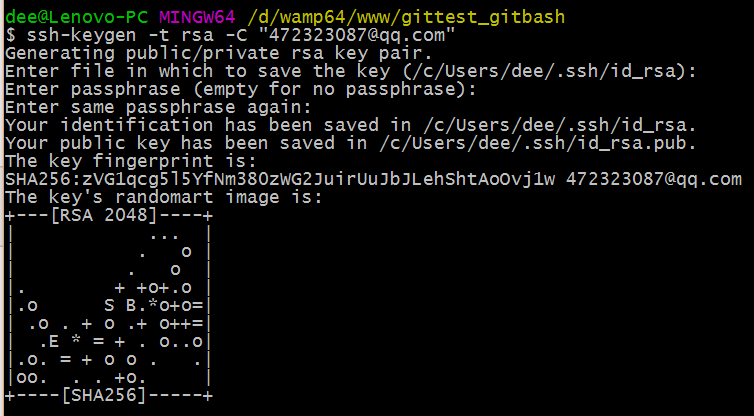
此时 C:\Users\用户名\.ssh 下会多出两个文件 id_rsa 和 id_rsa.pub
id_rsa 是私钥
id_rsa.pub 是公钥
⑥ 服务器端 Git 打开 RSA 认证
进入 /etc/ssh 目录,编辑 sshd_config,打开以下三个配置的注释:
|
1
2
3
|
RSAAuthentication yesPubkeyAuthentication yesAuthorizedKeysFile .ssh/authorized_keys |
保存并重启 sshd 服务:
|
1
|
[root@localhost ssh]# /etc/rc.d/init.d/sshd restart |
由 AuthorizedKeysFile 得知公钥的存放路径是 .ssh/authorized_keys,实际上是
$Home/.ssh/authorized_keys,由于管理 Git 服务的用户是 git,所以实际存放公钥的路径是
/home/git/.ssh/authorized_keys
在 /home/git/ 下创建目录 .ssh
|
1
2
3
4
5
|
[root@localhost git]# pwd/home/git[root@localhost git]# mkdir .ssh[root@localhost git]# ls -a . .. .bash_logout .bash_profile .bashrc .gnome2 .mozilla .ssh |
然后把 .ssh 文件夹的 owner 修改为 git
|
1
2
3
4
5
6
7
8
9
10
11
|
[root@localhost git]# chown -R git:git .ssh[root@localhost git]# ll -a总用量 32drwx------. 5 git git 4096 8月 28 20:04 .drwxr-xr-x. 8 root root 4096 8月 28 19:32 ..-rw-r--r--. 1 git git 18 10月 16 2014 .bash_logout-rw-r--r--. 1 git git 176 10月 16 2014 .bash_profile-rw-r--r--. 1 git git 124 10月 16 2014 .bashrcdrwxr-xr-x. 2 git git 4096 11月 12 2010 .gnome2drwxr-xr-x. 4 git git 4096 5月 8 12:22 .mozilladrwxr-xr-x. 2 git git 4096 8月 28 20:08 .ssh |
⑦ 将客户端公钥导入服务器端 /home/git/.ssh/authorized_keys 文件
回到 Git Bash 下,导入文件:
|
1
|
$ ssh git@192.168.56.101 'cat >> .ssh/authorized_keys' < ~/.ssh/id_rsa.pub |
需要输入服务器端 git 用户的密码

回到服务器端,查看 .ssh 下是否存在 authorized_keys 文件:
|
1
2
3
4
|
[root@localhost git]# cd .ssh[root@localhost .ssh]# ll总用量 4-rw-rw-r--. 1 git git 398 8月 28 20:08 authorized_keys |
可以查看一下是否是客户端生成的公钥。
重要:
修改 .ssh 目录的权限为 700
修改 .ssh/authorized_keys 文件的权限为 600
|
1
2
3
|
[root@localhost git]# chmod 700 .ssh[root@localhost git]# cd .ssh[root@localhost .ssh]# chmod 600 authorized_keys |
⑧ 客户端再次 clone 远程仓库
|
1
|
$ git clone git@192.168.56.101:/home/data/git/gittest.git |

查看客户端项目目录:

项目已经 clone 了。
也可以使用 tortoiseGit 客户端来管理项目:
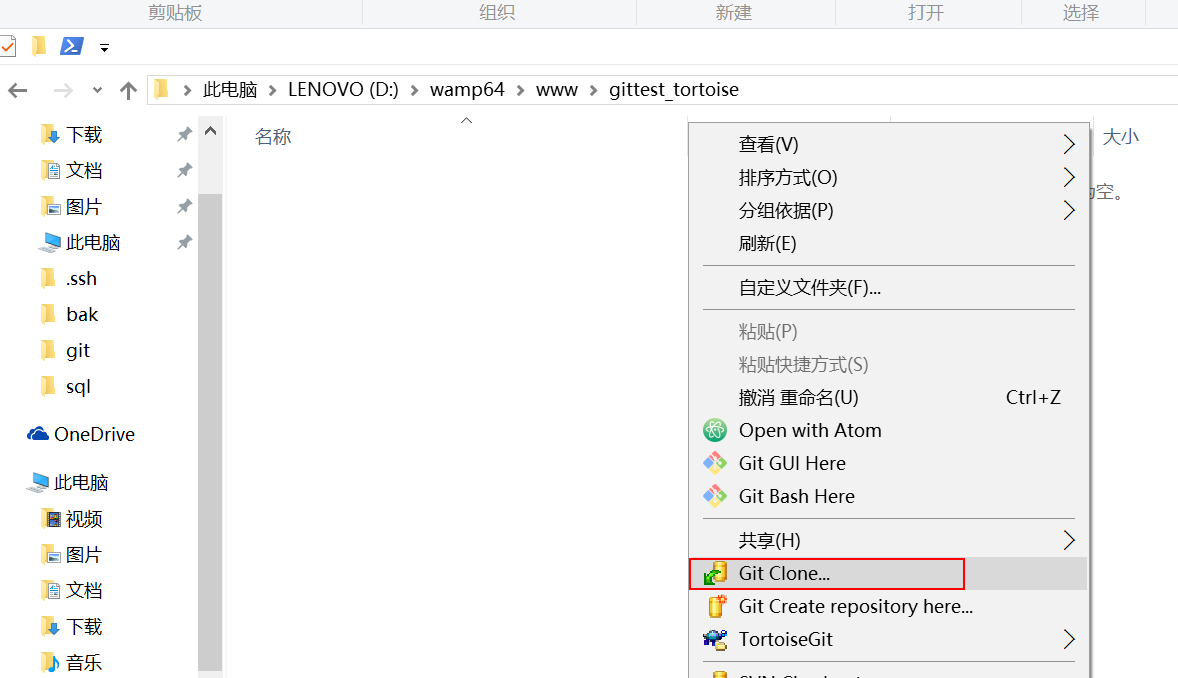
clone
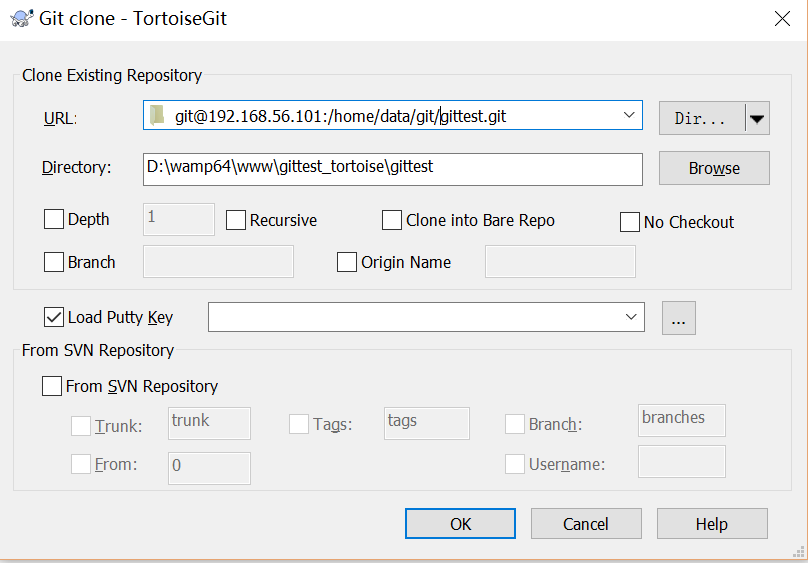
⑨ 禁止 git 用户 ssh 登录服务器
之前在服务器端创建的 git 用户不允许 ssh 登录服务器
编辑 /etc/passwd
找到:
|
1
|
git:x:502:504::/home/git:/bin/bash |
修改为
|
1
|
git:x:502:504::/home/git:/bin/git-shell |
此时 git 用户可以正常通过 ssh 使用 git,但无法通过 ssh 登录系统。
以上就是本文的全部内容,希望对大家的学习有所帮助,也希望大家多多支持脚本之家。
在Linux下搭建Git服务器步骤的更多相关文章
- 【转】在Linux下搭建Git服务器
在 Linux 下搭建 Git 服务器 环境: 服务器 CentOS6.6 + git(version 1.7.1)客户端 Windows10 + git(version 2.8.4.windows. ...
- 在Linux下搭建Git服务器的方法是什么样?
第一步 安装git:可以通过命令的方式快速安装,不同的linux的安装方法可能不一样,我的是采用的yum方法.ubuntu可以用apt-get命令.sudo yum install git 第二步 添 ...
- Linux 下搭建Git 服务器详细步骤
参考: https://www.cnblogs.com/dee0912/p/5815267.html#_label0 https://blog.csdn.net/carfge/article/deta ...
- 在 Linux 下搭建 Git 服务器
环境: 服务器 CentOS6.6 + git(version 1.7.1)客户端 Windows10 + git(version 2.8.4.windows.1) ① 安装 Git Linux 做为 ...
- 在 Linux 下搭建 Git 服务器(yum安装)
服务端(linux): 1. 安装git [root@localhost ~]# yum -y install git 2. 增加一个git账户 为了管理的方便,在linux下面增添一个 " ...
- Linux下搭建Git服务器
1.安装Git 见 Jenkins持续集成环境部署 第四节 2.创建Git用户和用户组 groupadd git useradd git -g git 3.创建证书切换到git用户创建证书 su gi ...
- kali linux 下搭建git服务器
参考:http://www.cnblogs.com/dee0912/p/5815267.html https://www.liaoxuefeng.com/wiki/001373951630592960 ...
- 在Linux下搭建git服务器
http://www.cnblogs.com/dee0912/p/5815267.html 步骤很详细,很受用
- Windows操作系统下搭建Git服务器和客户端。
本文将介绍如何在Windows操作系统下搭建Git服务器和客户端.服务器端采用的是Bonobo Git Server,一款用ASP.NET MVC开发的Git源代码管理工具,界面简洁,基于Web方式配 ...
随机推荐
- Ubuntu 16.04将ISO镜像写入U盘
sudo fdisk -l 查看U盘的路径,如/dev/sdc为U盘的位置,注意位置!注意这个不是挂载的位置. 然后准备好ISO文件,如放在/home/jim/abc.iso 然后输入 sudo dd ...
- PHP的一些陷阱
1,空Array为False $a = array() if($a == false) { echo "This will be printed ! ! !" ; } 持续更新中
- nginx $document_uri 参数使用
$document_uri 表示访问的url 现在我的需求是,访问 www.abc.com 请求到 www.abc.com/abc/在nginx配置文件中加入 if ($document_uri ...
- Geek改变世界
在10月24号的GeekPwn到来前,主办方 — 来自Keen Team的创始人大牛蛙希望我能为GeekPwn写点东西.作为GeekPwn的顾问,我也非常乐意为这次首秀做一点事情. 正如之前提到过的, ...
- 【Hadoop】Hadoop mr wordcount基础
1.基本概念 2.Mapper package com.ares.hadoop.mr.wordcount; import java.io.IOException; import java.util.S ...
- 解压缩报错tar: Error is not recoverable: exiting now
[root@Gris-11140 FMIS2600bak]# tar -zxvf /home/oradata/FMIS2600DMP.tar.gzgzip: stdin: not in gzip fo ...
- 转: java语法与ide级入门介绍 from: IBM dev
点评: 讲的比较初级,但是有教你使用ide (Eclipse) frrom:http://www.ibm.com/developerworks/java/tutorials/j-introtojava ...
- 使用JMeter录制手机App脚本
Apache JMeter是100%的Java桌面应用程序,用于对软件做压力测试.它最初被设计用于Web应用测试,但后来扩展到其他测试领域.现如今这款软件越来越受到测试人员的青睐,相比于LoadRun ...
- 如何安装Android SDK Emulator
1 下载并安装JDK,可以到官方网站寻找自己的对应版本下载 http://www.oracle.com/technetwork/java/javase/downloads/jdk-7u1-downlo ...
- Laravel之Eloquent ORM访问器调整器及属性转换
一.查询构建器的get方法 查询构建器的get方法返回了一个集合 $users = App\User::where('active', 1)->get(); foreach ($users as ...