
6、SpringBoot+Mybatis整合------参数传递
开发工具:STS
代码下载链接:https://github.com/theIndoorTrain/SpringBoot_Mybatis/tree/7892801d804d2060774f3720f82e776ff318e3ba
前言:
在调用mybatis的查询条件时,之前,遇到需要验证多个参数的查询时,往往需要把所有参数都绑定到一个实体中去,然后调用获取。
现在,我们来详细描述mybatis传递参数的细节。
一、单个参数:
1.定义mapper接口:
 package com.xm.mapper;

 import java.util.List;

 import com.xm.pojo.Student;

 public interface StudentMapper {

     /**

      * 根据name查询

      * @param name

      * @return

      */

     public Student getByName(String name);

 }
StudentMapper.java
2.实现mapper映射:
 <?xml version="1.0" encoding="UTF-8" ?>

 <!DOCTYPE mapper PUBLIC "-//mybatis.org//DTD Mapper 3.0//EN" "http://mybatis.org/dtd/mybatis-3-mapper.dtd" >

 <mapper namespace="com.xm.mapper.StudentMapper">

     <!-- 根据name查询 -->

     <select id="getByName" resultType="student">

     select * from student where name=#{name}

     </select>

 </mapper>
StudentMapper.xml
3.定义测试用例:
 package com.xm;

 import org.junit.Test;

 import org.junit.runner.RunWith;

 import org.springframework.beans.factory.annotation.Autowired;

 import org.springframework.boot.test.context.SpringBootTest;

 import org.springframework.test.context.junit4.SpringRunner;

 import com.xm.mapper.StudentMapper;

 import com.xm.pojo.Student;

 @RunWith(SpringRunner.class)

 @SpringBootTest

 public class StudentTest {

     @Autowired

     private StudentMapper studentMapper;

     @Test

     public void selectStudent() {

         Student student = studentMapper.getByName("郭小明");

         System.out.println(student);

     }

 }
StudentTest.java
4.测试结果:
(1)数据库查询结果:
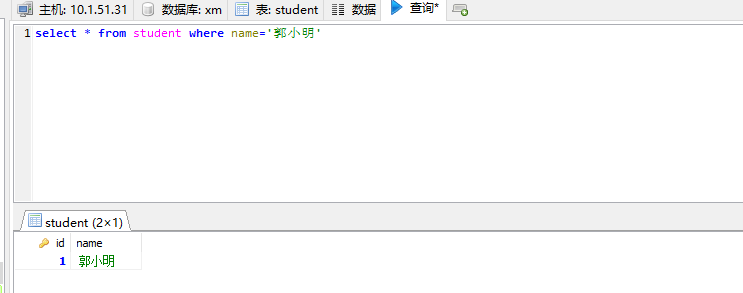
(2)测试结果输出:

注意在mapper映射中,单个参数类型,也可以不写 parameterType="",参数名可以随意写,比如#{names}
实现mapper映射:
 <?xml version="1.0" encoding="UTF-8" ?>

 <!DOCTYPE mapper PUBLIC "-//mybatis.org//DTD Mapper 3.0//EN" "http://mybatis.org/dtd/mybatis-3-mapper.dtd" >

 <mapper namespace="com.xm.mapper.StudentMapper">

     <!-- 根据name查询 -->

     <select id="getByName" resultType="student">

     <!-- select * from student where name=#{name} -->

     select * from student where name=#{names}

     </select>

 </mapper>
StudentMapper.xml
二、多个参数
1.根据参数名查询
(1)定义mapper接口:
 package com.xm.mapper;

 import java.util.List;

 import com.xm.pojo.Student;

 public interface StudentMapper {

     /**

      * 根据用户名和id同时查询

      * @param id

      * @param name

      * @return

      */

     public Student getStudentByIdAndName(Integer id,String name);

 }
StudentMapper.java
(2)实现mapper映射:
 <?xml version="1.0" encoding="UTF-8" ?>

 <!DOCTYPE mapper PUBLIC "-//mybatis.org//DTD Mapper 3.0//EN" "http://mybatis.org/dtd/mybatis-3-mapper.dtd" >

 <mapper namespace="com.xm.mapper.StudentMapper">

     <!-- 根据用户名和id同时查询 -->

     <select id="getStudentByIdAndName" resultType="student">

     select * from student where name=#{name} and id=#{id}

     </select>

 </mapper>
StudentMapper.xml
(3)定义测试用例:
 package com.xm;

 import org.junit.Test;

 import org.junit.runner.RunWith;

 import org.springframework.beans.factory.annotation.Autowired;

 import org.springframework.boot.test.context.SpringBootTest;

 import org.springframework.test.context.junit4.SpringRunner;

 import com.xm.mapper.StudentMapper;

 import com.xm.pojo.Student;

 @RunWith(SpringRunner.class)

 @SpringBootTest

 public class StudentTest {

     @Autowired

     private StudentMapper studentMapper;

     @Test

     public void selectStudent() {

         /*Student student = studentMapper.getByName("郭小明");*/

         Student student = studentMapper.getStudentByIdAndName(1, "郭小明");

         System.out.println(student);

     }

 }
StudentTest.java
(4)测试结果:

说明:这种简单的根据参数名传参是失败的
2.根据参数key值获取,获取规则为param1,param2,param3.........:
(1)实现mapper映射:
 <?xml version="1.0" encoding="UTF-8" ?>

 <!DOCTYPE mapper PUBLIC "-//mybatis.org//DTD Mapper 3.0//EN" "http://mybatis.org/dtd/mybatis-3-mapper.dtd" >

 <mapper namespace="com.xm.mapper.StudentMapper">

     <!-- 根据用户名和id同时查询 -->

     <select id="getStudentByIdAndName" resultType="student">

     <!-- select * from student where name=#{name} and id=#{id}  -->

     select * from student where name=#{param2} and id=#{param1}

     </select>

 </mapper>
StudentMapper.xml
(2)测试结果:
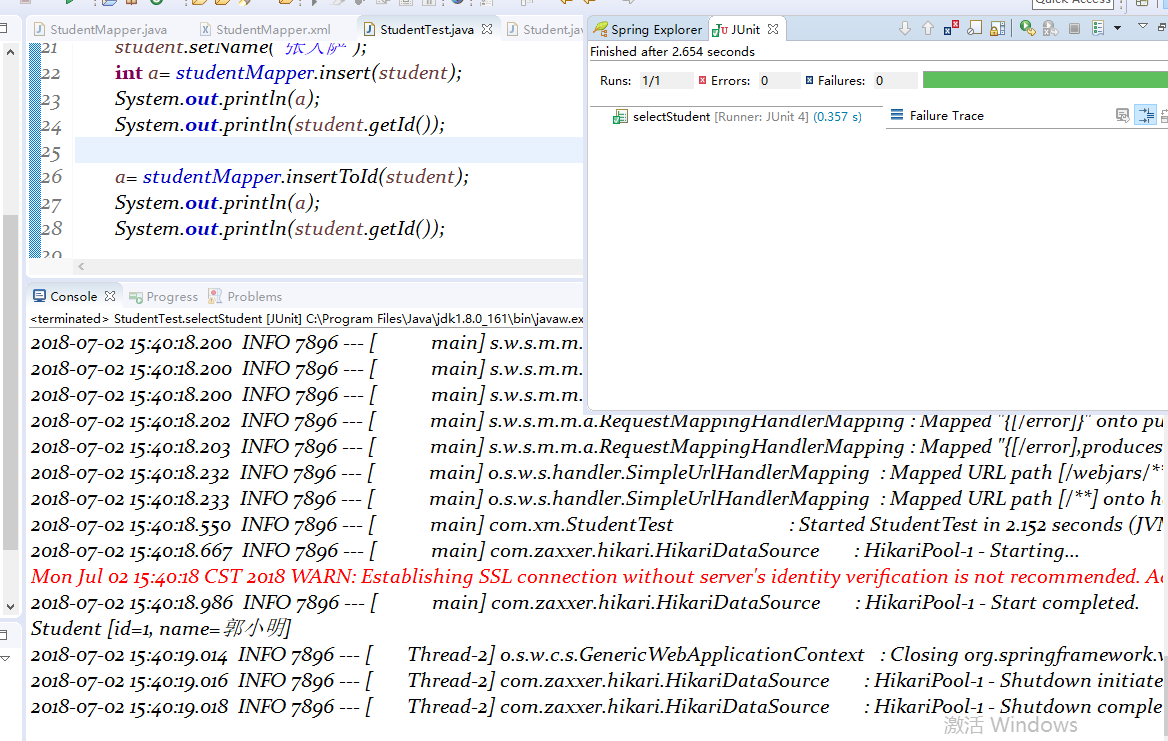
说明:针对这种情况,如果参数较多的情况下,获取准确的参数名更好一些
3.绑定参数名
(1)定义mapper接口:
 package com.xm.mapper;

 import java.util.List;

 import org.apache.ibatis.annotations.Param;

 import com.xm.pojo.Student;

 public interface StudentMapper {

     /**

      * 根据用户名和id同时查询

      * @param id

      * @param name

      * @return

      */

     public Student getStudentByIdAndName(@Param("id")Integer id,@Param("name")String name);

 }
StudentMapper.java
(2)实现mapper映射:
 <?xml version="1.0" encoding="UTF-8" ?>

 <!DOCTYPE mapper PUBLIC "-//mybatis.org//DTD Mapper 3.0//EN" "http://mybatis.org/dtd/mybatis-3-mapper.dtd" >

 <mapper namespace="com.xm.mapper.StudentMapper">

     <!-- 根据用户名和id同时查询 -->

     <select id="getStudentByIdAndName" resultType="student">

     select * from student where name=#{name} and id=#{id}

     <!-- select * from student where name=#{param2} and id=#{param1}  -->

     </select>

 </mapper>
StudentMapper.xml
(3)测试结果:

说明:针对参数较多,且参数都属于同一个pojo类的时候,可以把参数先封装入实体,再获取
4.封装实体参数:
(1)定义mapper接口:
 package com.xm.mapper;

 import java.util.List;

 import org.apache.ibatis.annotations.Param;

 import com.xm.pojo.Student;

 public interface StudentMapper {

     /**

      * 根据用户名和id同时查询

      * @param id

      * @param name

      * @return

      */

     public Student getStudentByIdAndName(Student student);

 }
StudentMapper.java
(2)定义测试用例:
 package com.xm;

 import org.junit.Test;

 import org.junit.runner.RunWith;

 import org.springframework.beans.factory.annotation.Autowired;

 import org.springframework.boot.test.context.SpringBootTest;

 import org.springframework.test.context.junit4.SpringRunner;

 import com.xm.mapper.StudentMapper;

 import com.xm.pojo.Student;

 @RunWith(SpringRunner.class)

 @SpringBootTest

 public class StudentTest {

     @Autowired

     private StudentMapper studentMapper;

     @Test

     public void selectStudent() {

         /*Student student = studentMapper.getByName("郭小明");*/

         /*Student student = studentMapper.getStudentByIdAndName(1, "郭小明");*/

         Student student = new Student();

         student.setName("郭小明");

         student.setId(1);

         Student student2 = studentMapper.getStudentByIdAndName(student);

         System.out.println(student2);

     }

 }
StudentMapper.java
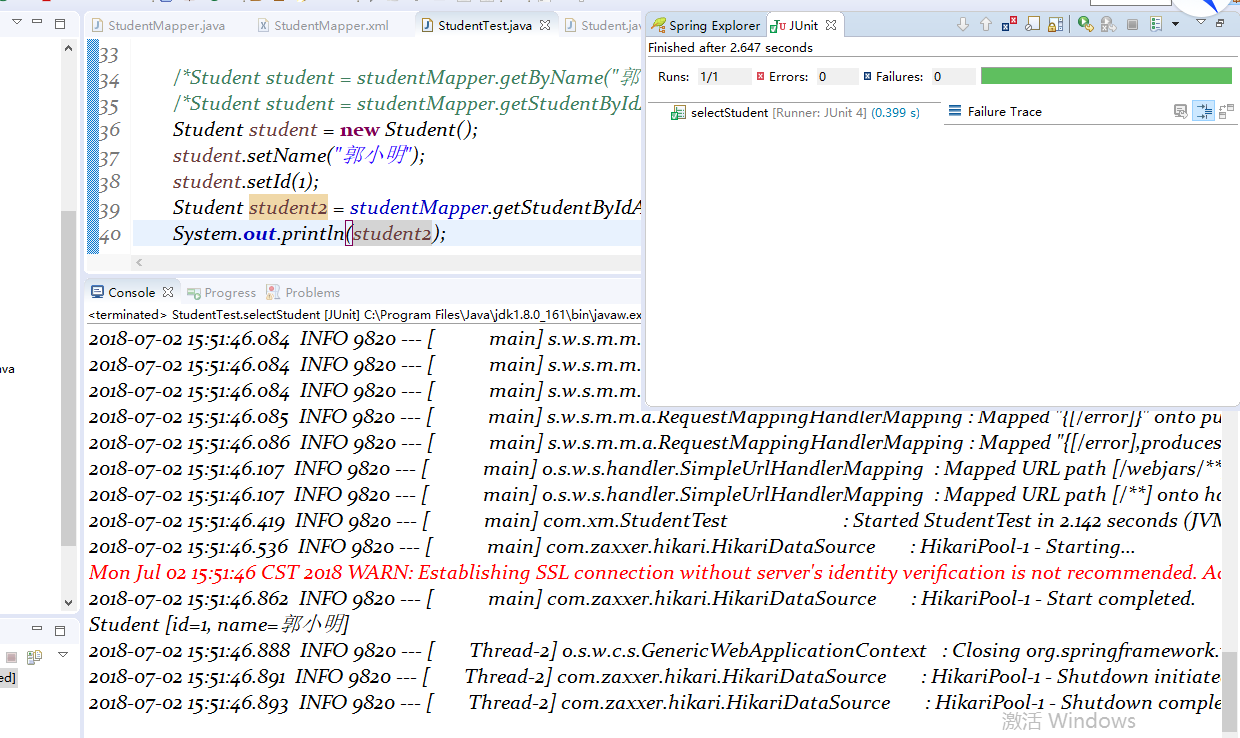
(3)测试结果:
2018-07-02
6、SpringBoot+Mybatis整合------参数传递的更多相关文章
- SpringBoot Mybatis整合(注解版),SpringBoot集成Mybatis(注解版)
SpringBoot Mybatis整合(注解版),SpringBoot集成Mybatis(注解版) ================================ ©Copyright 蕃薯耀 2 ...
- SpringBoot+Mybatis整合入门(一)
SpringBoot+Mybatis 四步整合 第一步 添加依赖 springBoot+Mybatis相关依赖 <!--springBoot相关--> <parent> < ...
- springboot/Mybatis整合
正题 本项目使用的环境: 开发工具:Intellij IDEA 2017.1.3 springboot: 1.5.6 jdk:1.8.0_161 maven:3.3.9 额外功能 PageHelper ...
- SpringBoot+Mybatis整合实例
前言 大家都知道springboot有几大特点:能创建独立的Spring应用程序:能嵌入Tomcat,无需部署WAR文件:简化Maven配置:自动配置Spring等等.这里整合mybatis,创建一个 ...
- 2、SpringBoot+Mybatis整合------一对一
开发工具:STS 代码下载链接:https://github.com/theIndoorTrain/SpringBoot_Mybatis01/tree/93398da60c647573645917b2 ...
- springboot+mybatis整合(单元测试,异常处理,日志管理,AOP)
我用的事IDEA,jdk版本是1.7.新建项目的时候这个地方的选择需要注意一下,springboot版本是1.5的,否则不支持1.7的jdk pom.xml <dependency> &l ...
- 9、SpringBoot+Mybatis整合------动态sql
开发工具:STS 前言: mybatis框架中最具特色的便是sql语句中的自定义,而动态sql的使用又使整个框架更加灵活. 动态sql中的语法: where标签 if标签 trim标签 set标签 s ...
- 1、SpringBoot+Mybatis整合------简单CRUD的实现
编译工具:STS 代码下载链接:https://github.com/theIndoorTrain/SpringBoot_Mybatis01/commit/b757cd9bfa4e2de551b2e9 ...
- springboot mybatis 整合
新建项目在上一篇. 第二步:创建表和相应的实体类 实体类:user.java package com.qtt.im.entity; import java.io.Serializable; publi ...
随机推荐
- js 页面按钮提交后 创建显示loading div 操作完成后 再隐藏或删除 进度div
预期效果: 1.点击Save按钮,创建及显示loading div框 2.Save操作完成后,再删除loading 及弹出提示结果 <html> <head> </hea ...
- Oracle SQL Tuning Advisor 测试
如果面对一个需要优化的SQL语句,没有很好的想法,可以先试试Oracle的SQL Tuning Advisor. SQL> select * from v$version; BANNER --- ...
- pat1066. Root of AVL Tree (25)
1066. Root of AVL Tree (25) 时间限制 100 ms 内存限制 65536 kB 代码长度限制 16000 B 判题程序 Standard 作者 CHEN, Yue An A ...
- POJ 3522 ——Slim Span——————【最小生成树、最大边与最小边最小】
Slim Span Time Limit: 5000MS Memory Limit: 65536K Total Submissions: 7102 Accepted: 3761 Descrip ...
- 关于EasyUI datagrid 表头居中 数据列内容居右 或者居左
cell.css("text-align",(col.halign||col.align||"")); 这里有个属性挺眼熟 : col.align 前面还有一个 ...
- dll托管于非托管
托管的DLL组件可以在VS 直接添加引用,在使用using dll的文件命名空间就可以使用 非托管的DLL组件,只能通过using system.Runtime.InteropServices:引入 ...
- jQuery中的节点操作(二)
html代码如下 <p title="武汉长乐教育PHP系列教程" name="hello" class="blue"> < ...
- (开发)ESLint - 代码规范
参考文档:http://eslint.cn/ ESLint 是在 ECMAScript/JavaScript 代码中识别和报告模式匹配的工具,它的目标是保证代码的一致性和避免错误.在许多方面,它和 J ...
- While, DoWhile in WorkFlow.
On 03/03/2010, in 4.0, WF, by bcakiroglu While Activity In a While activity, the activity in the Bod ...
- Eclipse常用设置和快捷键
1.提示键配置一般默认情况下,Eclipse ,MyEclipse 的代码提示功能是比Microsoft Visual Studio的差很多的,主要是Eclipse ,MyEclipse本身有很多选项 ...