使用kube-bench检测Kubernetes集群安全
一.系统环境
本文主要基于Kubernetes1.22.2和Linux操作系统Ubuntu 18.04。
| 服务器版本 | docker软件版本 | Kubernetes(k8s)集群版本 | kube-bench版本 | CPU架构 |
|---|---|---|---|---|
| Ubuntu 18.04.5 LTS | Docker version 20.10.14 | v1.22.2 | 0.6.7 | x86_64 |
Kubernetes集群架构:k8scludes1作为master节点,k8scludes2,k8scludes3作为worker节点。
| 服务器 | 操作系统版本 | CPU架构 | 进程 | 功能描述 |
|---|---|---|---|---|
| k8scludes1/192.168.110.128 | Ubuntu 18.04.5 LTS | x86_64 | docker,kube-apiserver,etcd,kube-scheduler,kube-controller-manager,kubelet,kube-proxy,coredns,calico | k8s master节点 |
| k8scludes2/192.168.110.129 | Ubuntu 18.04.5 LTS | x86_64 | docker,kubelet,kube-proxy,calico | k8s worker节点 |
| k8scludes3/192.168.110.130 | Ubuntu 18.04.5 LTS | x86_64 | docker,kubelet,kube-proxy,calico | k8s worker节点 |
二.前言
在当今云原生应用的开发中,Kubernetes已经成为标准,然而,随着其使用的普及,也带来了安全问题的挑战。本文将向你介绍如何使用kube-bench工具来评估和增强你的Kubernetes集群的安全性。
使用kube-bench检测Kubernete集群安全的前提是已经有一套可以正常运行的Kubernetes集群,关于Kubernetes(k8s)集群的安装部署,可以查看博客《Ubuntu 安装部署Kubernetes(k8s)集群》https://www.cnblogs.com/renshengdezheli/p/17632858.html。
三.CIS (Center for Internet Security)简介
CIS(Center for Internet Security)是一家致力于网络安全的非营利组织。它提供一系列针对各种操作系统和应用程序的基线安全标准,这些标准被广泛认可,是防止网络攻击的有效手段。
CIS基准是由美国计算机互联网安全中心(Center for Internet Security,简称CIS)制定的一系列全球公认的最佳实践标准,用于保护系统和数据免受威胁。这些基准包括了各种技术平台和系统的配置指南,例如操作系统、网络设备、移动设备、服务器应用等。
CIS基准提供了详细的步骤来保护特定系统,每个步骤都有清晰的说明和建议。此外,它还提供了用于评估系统是否符合CIS基准的自动化工具。遵循CIS基准能帮助组织降低安全风险并增强合规性。
在Kubernetes环境中,CIS Kubernetes基准就是一套针对Kubernetes的安全配置最佳实践。例如,CIS Kubernetes基准会涵盖如何配置kubelet,如何限制API服务器上的权限等内容。
CIS官网为:https://www.cisecurity.org/,CIS的Kubernetes Benchmark文件下载方法如下:
进入CIS(Center for Internet Security)官网。
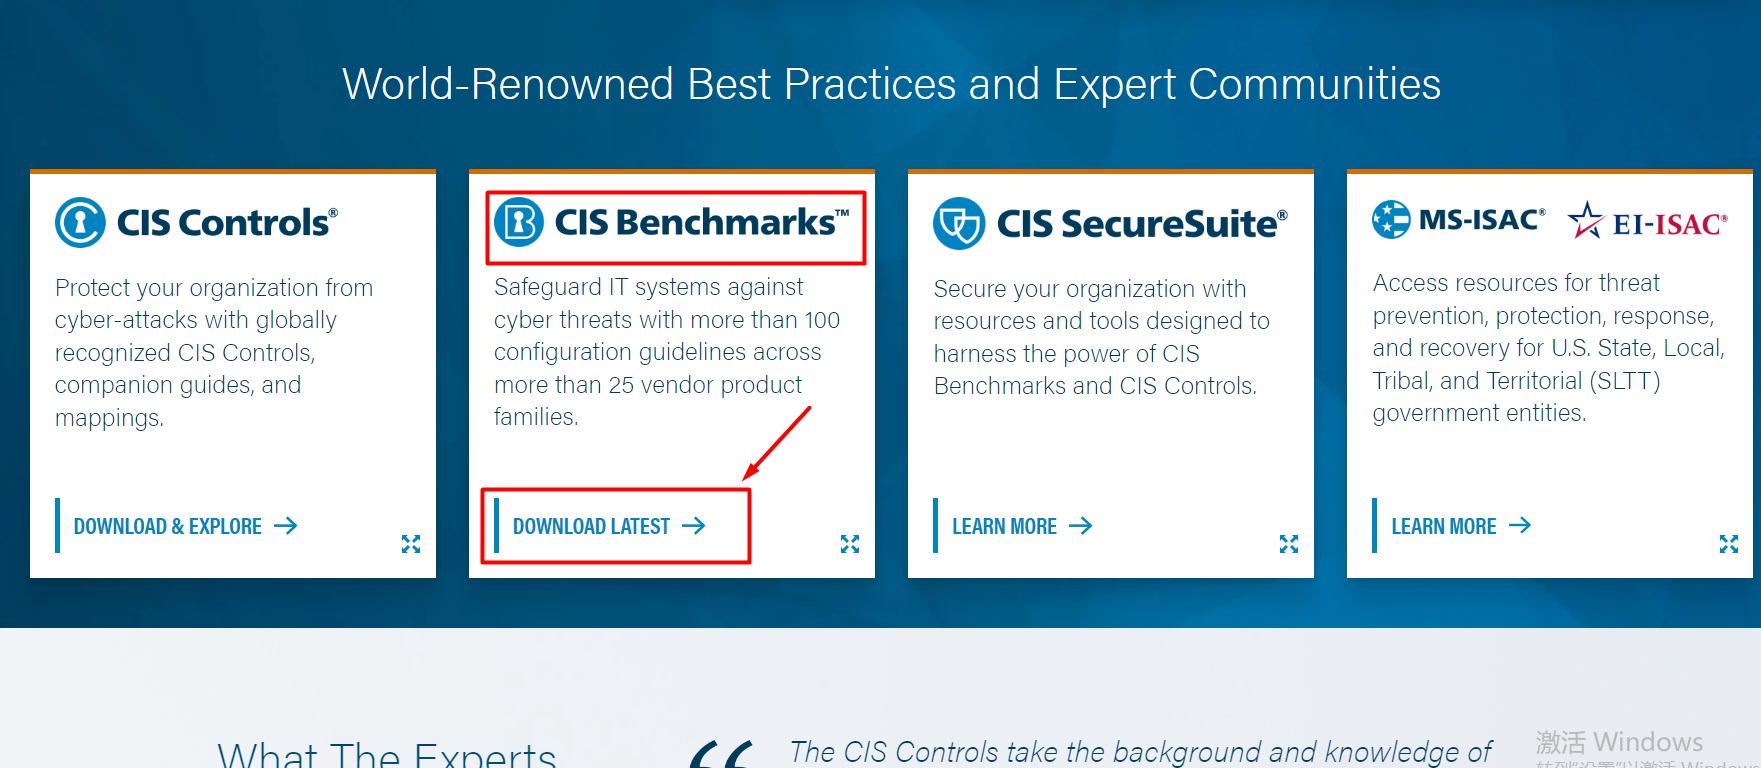
找到CIS Benchmarks,点击DOWNLOAD LATEST。
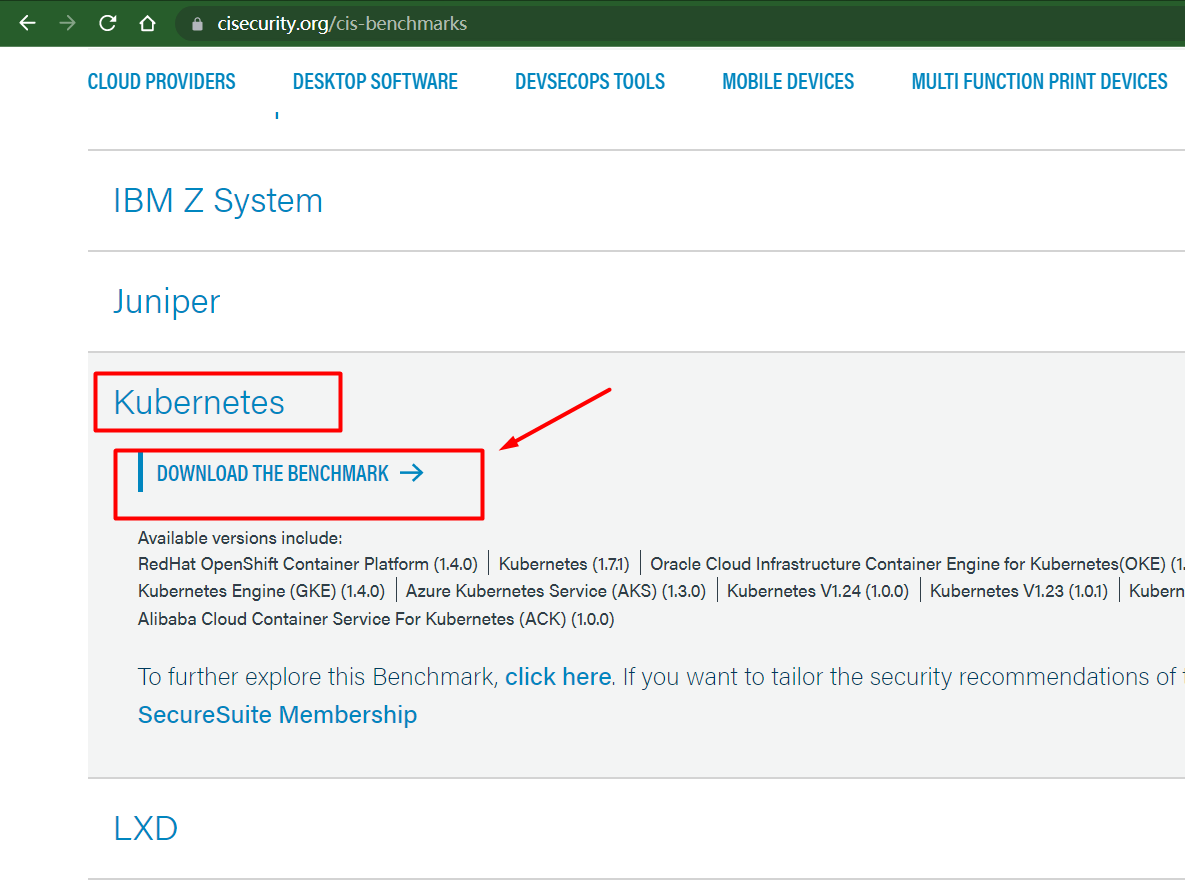
我们需要的是kubernetes的benchmarks,找到Kubernetes,点击DOWNLOAD THE BENCHMARK。
填写信息,就可以免费下载kubernetes的Benchmark PDF文件了。
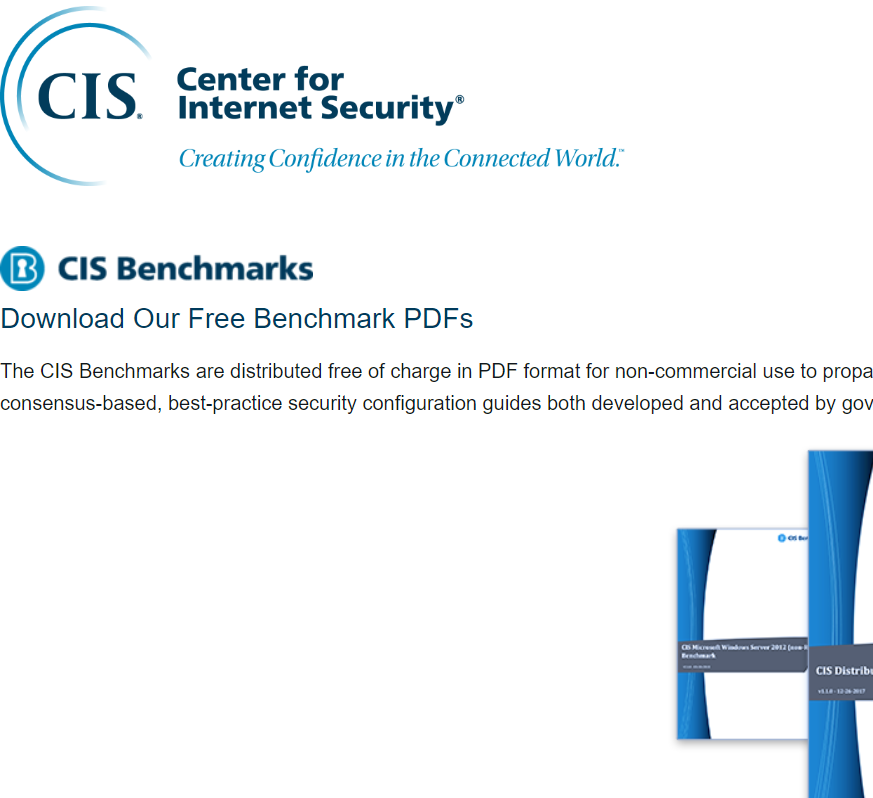
下载之后得到的文件为:CIS_Kubernetes_Benchmark_v1.6.0.pdf。
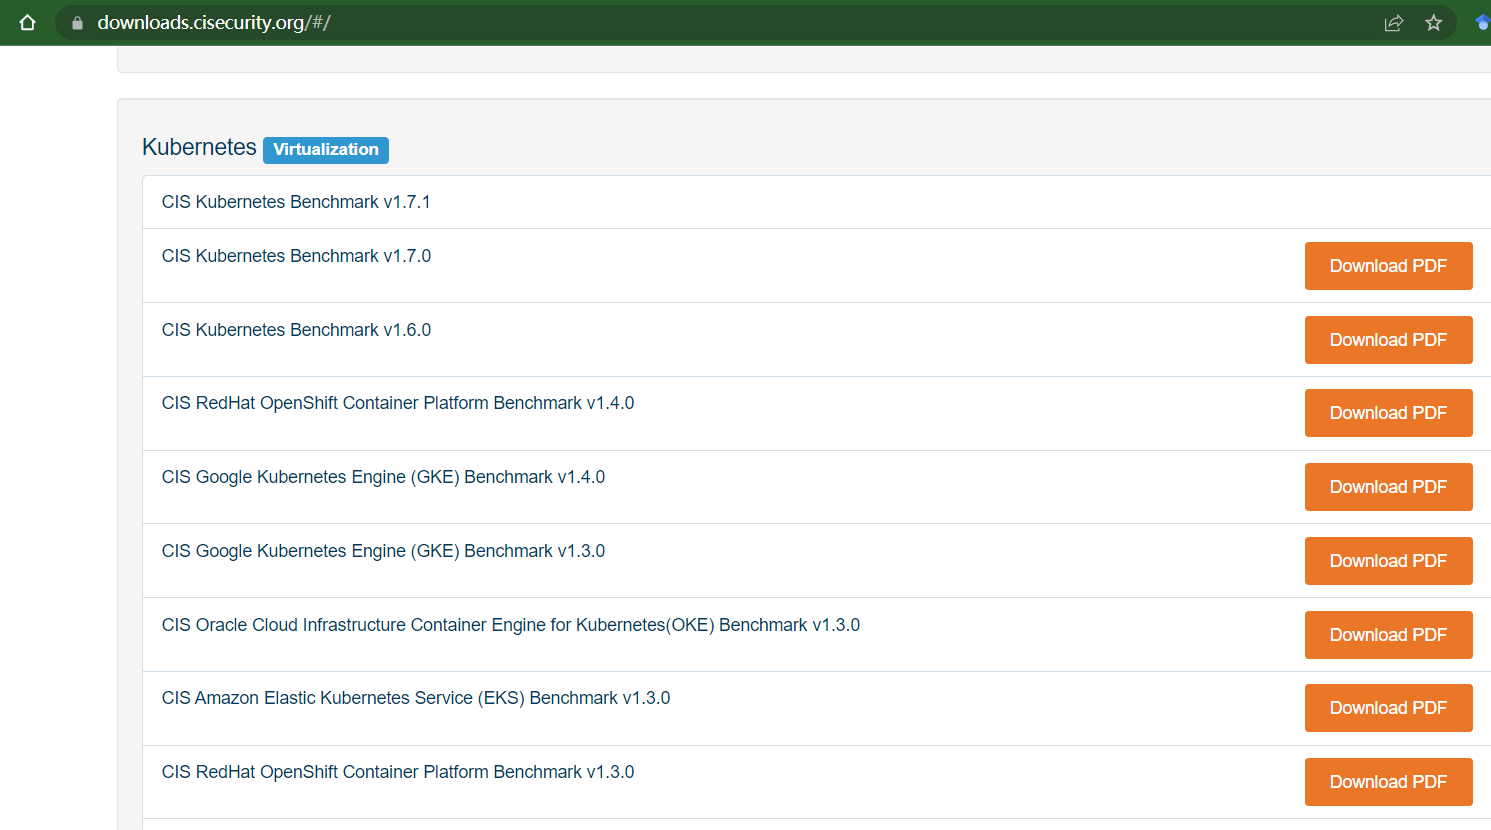
或者直接去https://downloads.cisecurity.org/#/下载,找到kubernetes,选择合适的版本下载即可。
四.什么是Kube-Bench?
Kube-Bench是一个开源的Go语言工具,用于自动化检查Kubernetes集群是否符合CIS Kubernetes基准。这些基准包括一系列关于Kubernetes配置和部署安全性的建议和最佳实践。
Kube-Bench执行了一系列针对Kubernetes组件(如kube-apiserver、etcd、kube-scheduler、kube-controller-manager等)的测试,来检查它们是否按照CIS基准的推荐进行了配置。测试结果会被分类为PASS、FAIL或WARN,以清晰明了地显示哪些地方需要改进。
Kube-Bench是在运行时检查Kubernetes环境的工具,它并不会修改系统。你可以定期运行kube-bench来审计你的Kubernetes环境,确保其保持在最佳的安全状态。
kube-bench在GitHub的网址为:https://github.com/aquasecurity/kube-bench/ 。
可在 https://github.com/aquasecurity/kube-bench/tags 下载kube-bench工具。
选择版本,点击Downloads。
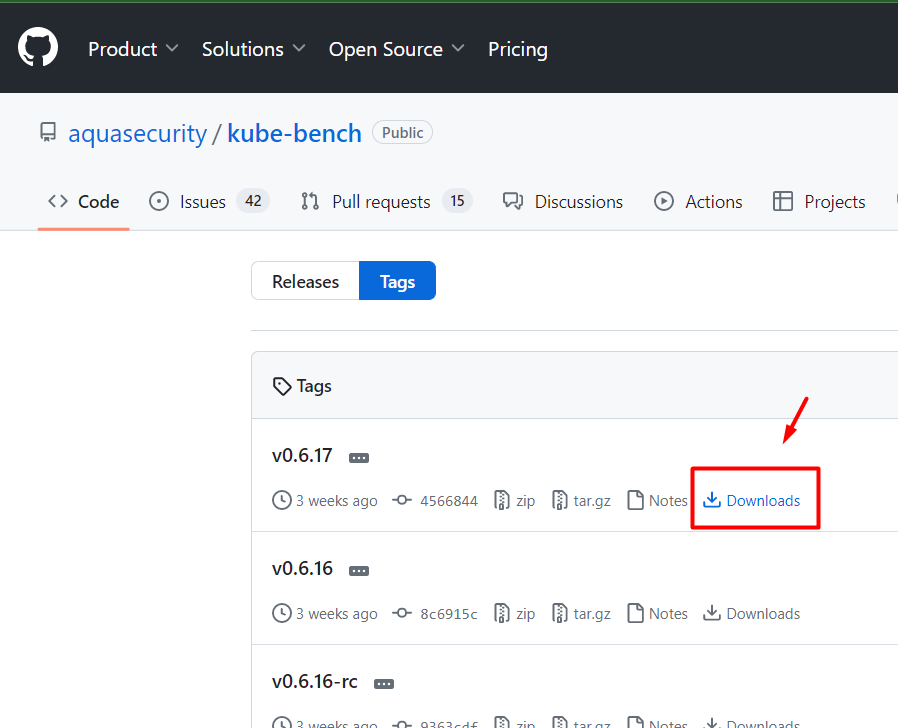
下载kube-bench_0.6.17_linux_amd64.tar.gz。

五.使用kube-bench检测不安全的设置
5.1 手动设置不安全的参数
按照CIS_Kubernetes_Benchmark文件设置kubernetes集群安全有点麻烦,我们使用工具kube-bench检测kubernetes集群安全。
创建备份目录。
root@k8scludes1:~# mkdir /bak
把/etc/kubernetes/manifests/下的文件备份,后面要修改配置文件,如果修改错误之后可以复原。
root@k8scludes1:~# cd /etc/kubernetes/manifests/

root@k8scludes1:/etc/kubernetes/manifests# ls

etcd.yaml  kube-apiserver.yaml  kube-controller-manager.yaml  kube-scheduler.yaml

#cp -a: 递归复制,复制的数据会保留原有数据的时间戳等信息(具体:时间戳+所有权+复制连结文件属性而非档案本身)

#cp -r: 递归复制,复制的数据会使用新的时间戳等信息

root@k8scludes1:/etc/kubernetes/manifests# cp -a * /bak/
现在文件就备份好了。
root@k8scludes1:/etc/kubernetes/manifests# ls /bak/

etcd.yaml  kube-apiserver.yaml  kube-controller-manager.yaml  kube-scheduler.yaml
我们把etcd.yaml文件里的client-cert-auth=true改为client-cert-auth=false。
root@k8scludes1:/etc/kubernetes/manifests# pwd

/etc/kubernetes/manifests

root@k8scludes1:/etc/kubernetes/manifests# ls

etcd.yaml  kube-apiserver.yaml  kube-controller-manager.yaml  kube-scheduler.yaml

root@k8scludes1:/etc/kubernetes/manifests# vim etcd.yaml

root@k8scludes1:/etc/kubernetes/manifests# grep client-cert-auth etcd.yaml

    - --client-cert-auth=false

    - --peer-client-cert-auth=true
我们把authorization-mode授权模式改为AlwaysAllow。
root@k8scludes1:/etc/kubernetes/manifests# vim kube-apiserver.yaml

root@k8scludes1:/etc/kubernetes/manifests# grep authorization-mode kube-apiserver.yaml

      # - --authorization-mode=Node,RBAC

    - --authorization-mode=AlwaysAllow
重启kubelet使配置生效。
root@k8scludes1:/etc/kubernetes/manifests# systemctl restart kubelet

root@k8scludes1:/etc/kubernetes/manifests# systemctl status kubelet

● kubelet.service - kubelet: The Kubernetes Node Agent

   Loaded: loaded (/lib/systemd/system/kubelet.service; enabled; vendor preset: enabled)

  Drop-In: /etc/systemd/system/kubelet.service.d

           └─10-kubeadm.conf

   Active: active (running) since Sun 2022-04-17 16:14:24 CST; 9s ago

     Docs: https://kubernetes.io/docs/home/

 Main PID: 49107 (kubelet)

    Tasks: 16 (limit: 3295)

   CGroup: /system.slice/kubelet.service
5.2 安装kube-bench
kube-bench我们已经下载好了,没有下载的可以去这个网站下载:https://github.com/aquasecurity/kube-bench/tags 。
root@k8scludes1:~# ls

kube-bench_0.6.7_linux_amd64.tar.gz
解压kube-bench_0.6.7_linux_amd64.tar.gz之后得到cfg和kube-bench。
root@k8scludes1:~# tar xf kube-bench_0.6.7_linux_amd64.tar.gz

root@k8scludes1:~# ls

cfg  kube-bench  kube-bench_0.6.7_linux_amd64.tar.gz
进入 cfg目录,cfg/config.yaml包含了master包含哪些组件,配置文件放在哪里,需要去哪里读取配置文件等等,如果k8s的某些配置文件自定义放到了某个目录,修改config.yaml里的相应目录就行。
root@k8scludes1:~# ls cfg/

ack-1.0  aks-1.0  cis-1.20  cis-1.5  cis-1.6  config.yaml  eks-1.0.1  gke-1.0  gke-1.2.0  rh-0.7  rh-1.0

root@k8scludes1:~# cd cfg/cis-1.6/

#etcd.yaml文件记录了需要检测etcd的信息

root@k8scludes1:~/cfg/cis-1.6# ls

config.yaml  controlplane.yaml  etcd.yaml  master.yaml  node.yaml  policies.yaml
5.3 kube-bench检测etcd组件
kube-bench V0.31版本执行方法为:./kube-bench ,./kube-bench master(检测master设置) ,./kube-bench node(检测worker设置),但是新版本kube-bench不能这样执行。
root@k8scludes1:~/cfg# cd

root@k8scludes1:~# ./kube-bench node

Error: unknown command "node" for "./kube-bench"

Run './kube-bench --help' for usage.

unknown command "node" for "./kube-bench"
执行新版本kube-bench需要指定配置目录,检测语法为:./kube-bench --config-dir 配置目录 --config 配置文件 run --targets=需要检测的组件。
root@k8scludes1:~# pwd

/root

root@k8scludes1:~# ls

cfg  kube-bench  kube-bench_0.6.7_linux_amd64.tar.gz

#--targets=检测的组件就是cfg/cis-1.6/目录下的那些组件

root@k8scludes1:~# ls cfg/cis-1.6/

config.yaml  controlplane.yaml  etcd.yaml  master.yaml  node.yaml  policies.yaml
我们现在使用kube-bench开始检测etcd组件,可以看到etcd组件有6个PASS,1个FAIL。
root@k8scludes1:~# pwd

/root

root@k8scludes1:~# ls

cfg  kube-bench  kube-bench_0.6.7_linux_amd64.tar.gz

root@k8scludes1:~# ./kube-bench --config-dir `pwd`/cfg --config `pwd`/cfg/config.yaml run --targets=etcd

Warning: Kubernetes version was not auto-detected because kubectl could not connect to the Kubernetes server. This may be because the kubeconfig information is missing or has credentials that do not match the server. Assuming default version 1.18

Warning: Kubernetes version was not auto-detected because kubectl could not connect to the Kubernetes server. This may be because the kubeconfig information is missing or has credentials that do not match the server. Assuming default version 1.18

[INFO] 2 Etcd Node Configuration

[INFO] 2 Etcd Node Configuration Files

[PASS] 2.1 Ensure that the --cert-file and --key-file arguments are set as appropriate (Automated)

[FAIL] 2.2 Ensure that the --client-cert-auth argument is set to true (Automated)

[PASS] 2.3 Ensure that the --auto-tls argument is not set to true (Automated)

[PASS] 2.4 Ensure that the --peer-cert-file and --peer-key-file arguments are set as appropriate (Automated)

[PASS] 2.5 Ensure that the --peer-client-cert-auth argument is set to true (Automated)

[PASS] 2.6 Ensure that the --peer-auto-tls argument is not set to true (Automated)

[PASS] 2.7 Ensure that a unique Certificate Authority is used for etcd (Manual)

== Remediations etcd ==

2.2 Edit the etcd pod specification file /etc/kubernetes/manifests/etcd.yaml on the master

node and set the below parameter.

--client-cert-auth="true"

== Summary etcd ==

6 checks PASS

1 checks FAIL

0 checks WARN

0 checks INFO

== Summary total ==

6 checks PASS

1 checks FAIL

0 checks WARN

0 checks INFO
根据kube-bench的报错信息:“[FAIL] 2.2 Ensure that the --client-cert-auth argument is set to true (Automated)”,表明--client-cert-auth参数应该设置为true。
Remediations etcd告诉我们解决的办法,按照提示修改/etc/kubernetes/manifests/etcd.yaml的--client-cert-auth参数。
root@k8scludes1:~# vim /etc/kubernetes/manifests/etcd.yaml

root@k8scludes1:~# grep client-cert-auth /etc/kubernetes/manifests/etcd.yaml

    - --client-cert-auth=true

    - --peer-client-cert-auth=true
重启kubelet让参数生效。
root@k8scludes1:~# systemctl restart kubelet

root@k8scludes1:~# kubectl get node

NAME         STATUS   ROLES                  AGE   VERSION

k8scludes1   Ready    control-plane,master   26h   v1.22.2

k8scludes2   Ready    <none>                 23h   v1.22.2

k8scludes3   Ready    <none>                 23h   v1.22.2
使用kube-bench重新检测etcd组件,现在etcd组件就全是PASS状态了,etcd没有安全隐患了。
root@k8scludes1:~# ./kube-bench --config-dir `pwd`/cfg --config `pwd`/cfg/config.yaml run --targets=etcd

[INFO] 2 Etcd Node Configuration

[INFO] 2 Etcd Node Configuration Files

[PASS] 2.1 Ensure that the --cert-file and --key-file arguments are set as appropriate (Automated)

[PASS] 2.2 Ensure that the --client-cert-auth argument is set to true (Automated)

[PASS] 2.3 Ensure that the --auto-tls argument is not set to true (Automated)

[PASS] 2.4 Ensure that the --peer-cert-file and --peer-key-file arguments are set as appropriate (Automated)

[PASS] 2.5 Ensure that the --peer-client-cert-auth argument is set to true (Automated)

[PASS] 2.6 Ensure that the --peer-auto-tls argument is not set to true (Automated)

[PASS] 2.7 Ensure that a unique Certificate Authority is used for etcd (Manual)

== Summary etcd ==

7 checks PASS

0 checks FAIL

0 checks WARN

0 checks INFO

== Summary total ==

7 checks PASS

0 checks FAIL

0 checks WARN

0 checks INFO
5.4 kube-bench检测master节点
现在检测master节点,master节点参数很多,输出信息太多了,我把PASS的信息删除了。
可以看到master节点有39个PASS,14个FAIL,11个WARN。
root@k8scludes1:~# ./kube-bench --config-dir `pwd`/cfg --config `pwd`/cfg/config.yaml run --targets=master

[INFO] 1 Master Node Security Configuration

[INFO] 1.1 Master Node Configuration Files

[PASS] 1.1.1 Ensure that the API server pod specification file permissions are set to 644 or more restrictive (Automated)

......

......

[INFO] 1.2 API Server

[WARN] 1.2.1 Ensure that the --anonymous-auth argument is set to false (Manual)

[PASS] 1.2.2 Ensure that the --token-auth-file parameter is not set (Automated)

......

[FAIL] 1.2.5 Ensure that the --kubelet-certificate-authority argument is set as appropriate (Automated)

[FAIL] 1.2.6 Ensure that the --authorization-mode argument is not set to AlwaysAllow (Automated)

[FAIL] 1.2.7 Ensure that the --authorization-mode argument includes Node (Automated)

[FAIL] 1.2.8 Ensure that the --authorization-mode argument includes RBAC (Automated)

......

[PASS] 1.2.19 Ensure that the --secure-port argument is not set to 0 (Automated)

[FAIL] 1.2.20 Ensure that the --profiling argument is set to false (Automated)

[FAIL] 1.2.21 Ensure that the --audit-log-path argument is set (Automated)

[FAIL] 1.2.22 Ensure that the --audit-log-maxage argument is set to 30 or as appropriate (Automated)

[FAIL] 1.2.23 Ensure that the --audit-log-maxbackup argument is set to 10 or as appropriate (Automated)

[FAIL] 1.2.24 Ensure that the --audit-log-maxsize argument is set to 100 or as appropriate (Automated)

[WARN] 1.2.25 Ensure that the --request-timeout argument is set as appropriate (Manual)

[PASS] 1.2.26 Ensure that the --service-account-lookup argument is set to true (Automated)

[PASS] 1.2.27 Ensure that the --service-account-key-file argument is set as appropriate (Automated)

......

[FAIL] 1.4.1 Ensure that the --profiling argument is set to false (Automated)

[PASS] 1.4.2 Ensure that the --bind-address argument is set to 127.0.0.1 (Automated)

== Remediations master ==

1.1.9 Run the below command (based on the file location on your system) on the master node.

For example,

chmod 644 <path/to/cni/files>

......

1.2.6 Edit the API server pod specification file /etc/kubernetes/manifests/kube-apiserver.yaml

on the master node and set the --authorization-mode parameter to values other than AlwaysAllow.

One such example could be as below.

--authorization-mode=RBAC

1.2.7 Edit the API server pod specification file /etc/kubernetes/manifests/kube-apiserver.yaml

on the master node and set the --authorization-mode parameter to a value that includes Node.

--authorization-mode=Node,RBAC

......

1.2.20 Edit the API server pod specification file /etc/kubernetes/manifests/kube-apiserver.yaml

on the master node and set the below parameter.

--profiling=false

1.2.21 Edit the API server pod specification file /etc/kubernetes/manifests/kube-apiserver.yaml

on the master node and set the --audit-log-path parameter to a suitable path and

file where you would like audit logs to be written, for example:

--audit-log-path=/var/log/apiserver/audit.log

......

1.4.1 Edit the Scheduler pod specification file /etc/kubernetes/manifests/kube-scheduler.yaml file

on the master node and set the below parameter.

--profiling=false

== Summary master ==

39 checks PASS

14 checks FAIL

11 checks WARN

0 checks INFO

== Summary total ==

39 checks PASS

14 checks FAIL

11 checks WARN

0 checks INFO
查看1.2.6的报错信息:“1.2.6 Ensure that the --authorization-mode argument is not set to AlwaysAllow (Automated)“,表示-authorization-mode不应该设置为AlwaysAllow,应该设置为--authorization-mode=Node,RBAC,按照提示修改。
root@k8scludes1:~# vim /etc/kubernetes/manifests/kube-apiserver.yaml

root@k8scludes1:~# grep authorization-mode /etc/kubernetes/manifests/kube-apiserver.yaml

    - --authorization-mode=Node,RBAC
1.2.20的报错信息为:“[FAIL] 1.2.20 Ensure that the --profiling argument is set to false (Automated) “,表示--profiling参数应该设置为false。
根据提示信息:”1.2.20 Edit the API server pod specification file /etc/kubernetes/manifests/kube-apiserver.yaml
on the master node and set the below parameter. --profiling=false“。修改参数。
root@k8scludes1:~# vim /etc/kubernetes/manifests/kube-apiserver.yaml

root@k8scludes1:~# grep profiling /etc/kubernetes/manifests/kube-apiserver.yaml

    - --profiling=false
重启kubelet使配置生效。
root@k8scludes1:~# systemctl restart kubelet

root@k8scludes1:~# kubectl get node

NAME         STATUS   ROLES                  AGE   VERSION

k8scludes1   Ready    control-plane,master   36h   v1.22.2

k8scludes2   Ready    <none>                 33h   v1.22.2

k8scludes3   Ready    <none>                 33h   v1.22.2
使用kube-bench重新检测master节点,现在pass变多了,FAIL变少了。
root@k8scludes1:~# ./kube-bench --config-dir `pwd`/cfg --config `pwd`/cfg/config.yaml run --targets=master

[INFO] 1 Master Node Security Configuration

[INFO] 1.1 Master Node Configuration Files

[PASS] 1.1.1 Ensure that the API server pod specification file permissions are set to 644 or more restrictive (Automated)

[PASS] 1.1.2 Ensure that the API server pod specification file ownership is set to root:root (Automated)

[PASS] 1.1.3 Ensure that the controller manager pod specification file permissions are set to 644 or more restrictive (Automated)

[PASS] 1.1.4 Ensure that the controller manager pod specification file ownership is set to root:root (Automated)

......

[PASS] 1.2.6 Ensure that the --authorization-mode argument is not set to AlwaysAllow (Automated)

[PASS] 1.2.7 Ensure that the --authorization-mode argument includes Node (Automated)

[PASS] 1.2.8 Ensure that the --authorization-mode argument includes RBAC (Automated)

[WARN] 1.2.9 Ensure that the admission control plugin EventRateLimit is set (Manual)

[PASS] 1.2.10 Ensure that the admission control plugin AlwaysAdmit is not set (Automated)

[WARN] 1.2.11 Ensure that the admission control plugin AlwaysPullImages is set (Manual)

[WARN] 1.2.12 Ensure that the admission control plugin SecurityContextDeny is set if PodSecurityPolicy is not used (Manual)

[PASS] 1.2.13 Ensure that the admission control plugin ServiceAccount is set (Automated)

[PASS] 1.2.14 Ensure that the admission control plugin NamespaceLifecycle is set (Automated)

[FAIL] 1.2.15 Ensure that the admission control plugin PodSecurityPolicy is set (Automated)

[PASS] 1.2.16 Ensure that the admission control plugin NodeRestriction is set (Automated)

[PASS] 1.2.17 Ensure that the --insecure-bind-address argument is not set (Automated)

[FAIL] 1.2.18 Ensure that the --insecure-port argument is set to 0 (Automated)

[PASS] 1.2.19 Ensure that the --secure-port argument is not set to 0 (Automated)

[PASS] 1.2.20 Ensure that the --profiling argument is set to false (Automated)

......

== Remediations master ==

......

== Summary master ==

43 checks PASS

10 checks FAIL

11 checks WARN

0 checks INFO

== Summary total ==

43 checks PASS

10 checks FAIL

11 checks WARN

0 checks INFO
5.5 kube-bench检测worker节点
把kube-bench安装包拷贝到kubernetes集群的worker节点。
root@k8scludes1:~# scp kube-bench_0.6.7_linux_amd64.tar.gz k8scludes2:~/
解压。
root@k8scludes2:~# ls

kube-bench_0.6.7_linux_amd64.tar.gz

root@k8scludes2:~# tar xf kube-bench_0.6.7_linux_amd64.tar.gz

root@k8scludes2:~# ls

cfg  kube-bench  kube-bench_0.6.7_linux_amd64.tar.gz
使用kube-bench检测kubernetes集群的worker节点,可以看到19个PASS,1个FAIL,3个WARN。
root@k8scludes2:~# ./kube-bench --config-dir `pwd`/cfg --config `pwd`/cfg/config.yaml run --targets=node

Warning: Kubernetes version was not auto-detected because kubectl could not connect to the Kubernetes server. This may be because the kubeconfig information is missing or has credentials that do not match the server. Assuming default version 1.18

Warning: Kubernetes version was not auto-detected because kubectl could not connect to the Kubernetes server. This may be because the kubeconfig information is missing or has credentials that do not match the server. Assuming default version 1.18

[INFO] 4 Worker Node Security Configuration

[INFO] 4.1 Worker Node Configuration Files

......

[PASS] 4.2.5 Ensure that the --streaming-connection-idle-timeout argument is not set to 0 (Manual)

[FAIL] 4.2.6 Ensure that the --protect-kernel-defaults argument is set to true (Automated)

[PASS] 4.2.7 Ensure that the --make-iptables-util-chains argument is set to true (Automated)

[PASS] 4.2.8 Ensure that the --hostname-override argument is not set (Manual)

[WARN] 4.2.9 Ensure that the --event-qps argument is set to 0 or a level which ensures appropriate event capture (Manual)

[WARN] 4.2.10 Ensure that the --tls-cert-file and --tls-private-key-file arguments are set as appropriate (Manual)

[PASS] 4.2.11 Ensure that the --rotate-certificates argument is not set to false (Manual)

[PASS] 4.2.12 Verify that the RotateKubeletServerCertificate argument is set to true (Manual)

[WARN] 4.2.13 Ensure that the Kubelet only makes use of Strong Cryptographic Ciphers (Manual)

== Remediations node ==

4.2.6 If using a Kubelet config file, edit the file to set protectKernelDefaults: true.

If using command line arguments, edit the kubelet service file

/etc/systemd/system/kubelet.service.d/10-kubeadm.conf on each worker node and

set the below parameter in KUBELET_SYSTEM_PODS_ARGS variable.

--protect-kernel-defaults=true

Based on your system, restart the kubelet service. For example:

systemctl daemon-reload

systemctl restart kubelet.service

4.2.9 If using a Kubelet config file, edit the file to set eventRecordQPS: to an appropriate level.

If using command line arguments, edit the kubelet service file

/etc/systemd/system/kubelet.service.d/10-kubeadm.conf on each worker node and

set the below parameter in KUBELET_SYSTEM_PODS_ARGS variable.

Based on your system, restart the kubelet service. For example:

systemctl daemon-reload

systemctl restart kubelet.service

4.2.10 If using a Kubelet config file, edit the file to set tlsCertFile to the location

of the certificate file to use to identify this Kubelet, and tlsPrivateKeyFile

to the location of the corresponding private key file.

If using command line arguments, edit the kubelet service file

/etc/systemd/system/kubelet.service.d/10-kubeadm.conf on each worker node and

set the below parameters in KUBELET_CERTIFICATE_ARGS variable.

--tls-cert-file=<path/to/tls-certificate-file>

--tls-private-key-file=<path/to/tls-key-file>

Based on your system, restart the kubelet service. For example:

systemctl daemon-reload

systemctl restart kubelet.service

4.2.13 If using a Kubelet config file, edit the file to set TLSCipherSuites: to

TLS_ECDHE_ECDSA_WITH_AES_128_GCM_SHA256,TLS_ECDHE_RSA_WITH_AES_128_GCM_SHA256,TLS_ECDHE_ECDSA_WITH_CHACHA20_POLY1305,TLS_ECDHE_RSA_WITH_AES_256_GCM_SHA384,TLS_ECDHE_RSA_WITH_CHACHA20_POLY1305,TLS_ECDHE_ECDSA_WITH_AES_256_GCM_SHA384,TLS_RSA_WITH_AES_256_GCM_SHA384,TLS_RSA_WITH_AES_128_GCM_SHA256

or to a subset of these values.

If using executable arguments, edit the kubelet service file

/etc/systemd/system/kubelet.service.d/10-kubeadm.conf on each worker node and

set the --tls-cipher-suites parameter as follows, or to a subset of these values.

--tls-cipher-suites=TLS_ECDHE_ECDSA_WITH_AES_128_GCM_SHA256,TLS_ECDHE_RSA_WITH_AES_128_GCM_SHA256,TLS_ECDHE_ECDSA_WITH_CHACHA20_POLY1305,TLS_ECDHE_RSA_WITH_AES_256_GCM_SHA384,TLS_ECDHE_RSA_WITH_CHACHA20_POLY1305,TLS_ECDHE_ECDSA_WITH_AES_256_GCM_SHA384,TLS_RSA_WITH_AES_256_GCM_SHA384,TLS_RSA_WITH_AES_128_GCM_SHA256

Based on your system, restart the kubelet service. For example:

systemctl daemon-reload

systemctl restart kubelet.service

== Summary node ==

19 checks PASS

1 checks FAIL

3 checks WARN

0 checks INFO

== Summary total ==

19 checks PASS

1 checks FAIL

3 checks WARN

0 checks INFO
可以看到4.2.6的FAIL报错信息为:“[FAIL] 4.2.6 Ensure that the --protect-kernel-defaults argument is set to true (Automated)”。Remediations node已经告诉我们修改方法。
查看kubelet的配置参数,--config=/var/lib/kubelet/config.yaml。
root@k8scludes2:~# ps -ef | grep kubelet | grep -v grep

root       1010      1  2 09:58 ?        00:01:44 /usr/bin/kubelet --bootstrap-kubeconfig=/etc/kubernetes/bootstrap-kubelet.conf --kubeconfig=/etc/kubernetes/kubelet.conf --config=/var/lib/kubelet/config.yaml --network-plugin=cni --pod-infra-container-image=registry.aliyuncs.com/google_containers/pause:3.5
查看kubelet的启动脚本。
root@k8scludes2:~# systemctl status kubelet

● kubelet.service - kubelet: The Kubernetes Node Agent

   Loaded: loaded (/lib/systemd/system/kubelet.service; enabled; vendor preset: enabled)

  Drop-In: /etc/systemd/system/kubelet.service.d

           └─10-kubeadm.conf

   Active: active (running) since Mon 2022-04-18 09:58:12 CST; 1h 28min ago

     Docs: https://kubernetes.io/docs/home/

 Main PID: 1010 (kubelet)

    Tasks: 16 (limit: 3295)

   CGroup: /system.slice/kubelet.service

           └─1010 /usr/bin/kubelet --bootstrap-kubeconfig=/etc/kubernetes/bootstrap-kubelet.conf --kubeconfig=/etc/kubernetes/kubelet.conf --config=/var/lib/kubelet/config.yaml --network-plugin=cni --pod-infra-
修改/etc/systemd/system/kubelet.service.d/10-kubeadm.conf,根据kube-bench的提示,添加环境变量Environment="KUBELET_SYSTEM_PODS_ARGS=--protect-kernel-defaults=true",并且要在ExecStart里引用变量$KUBELET_SYSTEM_PODS_ARGS。
root@k8scludes2:~# vim /etc/systemd/system/kubelet.service.d/10-kubeadm.conf

root@k8scludes2:~# cat /etc/systemd/system/kubelet.service.d/10-kubeadm.conf

# Note: This dropin only works with kubeadm and kubelet v1.11+

[Service]

Environment="KUBELET_KUBECONFIG_ARGS=--bootstrap-kubeconfig=/etc/kubernetes/bootstrap-kubelet.conf --kubeconfig=/etc/kubernetes/kubelet.conf"

Environment="KUBELET_CONFIG_ARGS=--config=/var/lib/kubelet/config.yaml"

Environment="KUBELET_SYSTEM_PODS_ARGS=--protect-kernel-defaults=true"

# This is a file that "kubeadm init" and "kubeadm join" generates at runtime, populating the KUBELET_KUBEADM_ARGS variable dynamically

EnvironmentFile=-/var/lib/kubelet/kubeadm-flags.env

# This is a file that the user can use for overrides of the kubelet args as a last resort. Preferably, the user should use

# the .NodeRegistration.KubeletExtraArgs object in the configuration files instead. KUBELET_EXTRA_ARGS should be sourced from this file.

EnvironmentFile=-/etc/default/kubelet

ExecStart=

ExecStart=/usr/bin/kubelet $KUBELET_KUBECONFIG_ARGS $KUBELET_CONFIG_ARGS $KUBELET_KUBEADM_ARGS $KUBELET_EXTRA_ARGS $KUBELET_SYSTEM_PODS_ARGS
重新加载配置文件。
root@k8scludes2:~# systemctl daemon-reload ; systemctl restart kubelet
现在就可以看到--protect-kernel-defaults=true参数了。
root@k8scludes2:~# ps -ef | grep kubelet | grep -v grep

root      73612      1  4 11:34 ?        00:00:01 /usr/bin/kubelet --bootstrap-kubeconfig=/etc/kubernetes/bootstrap-kubelet.conf --kubeconfig=/etc/kubernetes/kubelet.conf --config=/var/lib/kubelet/config.yaml --network-plugin=cni --pod-infra-container-image=registry.aliyuncs.com/google_containers/pause:3.5 --protect-kernel-defaults=true
再次使用kube-bench检测kubernetes集群的worker节点,现在就没有FAIL了。
root@k8scludes2:~# ./kube-bench --config-dir `pwd`/cfg --config `pwd`/cfg/config.yaml run --targets=node

Warning: Kubernetes version was not auto-detected because kubectl could not connect to the Kubernetes server. This may be because the kubeconfig information is missing or has credentials that do not match the server. Assuming default version 1.18

Warning: Kubernetes version was not auto-detected because kubectl could not connect to the Kubernetes server. This may be because the kubeconfig information is missing or has credentials that do not match the server. Assuming default version 1.18

[INFO] 4 Worker Node Security Configuration

[INFO] 4.1 Worker Node Configuration Files

[PASS] 4.1.1 Ensure that the kubelet service file permissions are set to 644 or more restrictive (Automated)

......

[WARN] 4.2.9 Ensure that the --event-qps argument is set to 0 or a level which ensures appropriate event capture (Manual)

[WARN] 4.2.10 Ensure that the --tls-cert-file and --tls-private-key-file arguments are set as appropriate (Manual)

[PASS] 4.2.11 Ensure that the --rotate-certificates argument is not set to false (Manual)

[PASS] 4.2.12 Verify that the RotateKubeletServerCertificate argument is set to true (Manual)

[WARN] 4.2.13 Ensure that the Kubelet only makes use of Strong Cryptographic Ciphers (Manual)

== Remediations node ==

4.2.9 If using a Kubelet config file, edit the file to set eventRecordQPS: to an appropriate level.

If using command line arguments, edit the kubelet service file

/etc/systemd/system/kubelet.service.d/10-kubeadm.conf on each worker node and

set the below parameter in KUBELET_SYSTEM_PODS_ARGS variable.

Based on your system, restart the kubelet service. For example:

systemctl daemon-reload

systemctl restart kubelet.service

......

== Summary node ==

20 checks PASS

0 checks FAIL

3 checks WARN

0 checks INFO

== Summary total ==

20 checks PASS

0 checks FAIL

3 checks WARN

0 checks INFO
注意:--protect-kernel-defaults=true该参数的作用就是保护内核参数不被随意修改,现在protect-kernel-defaults不设置为true了,因为我们后面要修改内核参数,不然修改内核参数之后pod无法正常运行。
root@k8scludes2:~# vim /etc/systemd/system/kubelet.service.d/10-kubeadm.conf

root@k8scludes2:~# cat /etc/systemd/system/kubelet.service.d/10-kubeadm.conf

# Note: This dropin only works with kubeadm and kubelet v1.11+

[Service]

Environment="KUBELET_KUBECONFIG_ARGS=--bootstrap-kubeconfig=/etc/kubernetes/bootstrap-kubelet.conf --kubeconfig=/etc/kubernetes/kubelet.conf"

Environment="KUBELET_CONFIG_ARGS=--config=/var/lib/kubelet/config.yaml"

#Environment="KUBELET_SYSTEM_PODS_ARGS=--protect-kernel-defaults=true"

# This is a file that "kubeadm init" and "kubeadm join" generates at runtime, populating the KUBELET_KUBEADM_ARGS variable dynamically

EnvironmentFile=-/var/lib/kubelet/kubeadm-flags.env

# This is a file that the user can use for overrides of the kubelet args as a last resort. Preferably, the user should use

# the .NodeRegistration.KubeletExtraArgs object in the configuration files instead. KUBELET_EXTRA_ARGS should be sourced from this file.

EnvironmentFile=-/etc/default/kubelet

ExecStart=

ExecStart=/usr/bin/kubelet $KUBELET_KUBECONFIG_ARGS $KUBELET_CONFIG_ARGS $KUBELET_KUBEADM_ARGS $KUBELET_EXTRA_ARGS
重新加载配置文件。
root@k8scludes2:~# systemctl daemon-reload ; systemctl restart kubelet
现在--protect-kernel-defaults参数就消失了。
root@k8scludes2:~# ps -ef | grep kubelet | grep -v grep

root      79852      1 10 11:42 ?        00:00:00 /usr/bin/kubelet --bootstrap-kubeconfig=/etc/kubernetes/bootstrap-kubelet.conf --kubeconfig=/etc/kubernetes/kubelet.conf --config=/var/lib/kubelet/config.yaml --network-plugin=cni --pod-infra-container-image=registry.aliyuncs.com/google_containers/pause:3.5
六.总结
kube-bench是一款强大的工具,它可以帮助我们发现哪些Kubernetes配置没有遵循CIS的最佳实践,从而改正这些问题,增强我们的Kubernetes集群的安全性。虽然kube-bench不能捕获所有可能的安全问题,但它至少可以帮助我们消除最常见的一些安全漏洞。
七.附加信息
请注意,kube-bench只是一个检查工具,它不能自动修复发现的问题。它提供的是关于哪些配置可能需要您的注意的信息。对于任何可能的配置更改,都需要由具备相应知识的管理员审慎决定并手动实施。
使用kube-bench检测Kubernetes集群安全的更多相关文章
- kubernetes集群部署
鉴于Docker如此火爆,Google推出kubernetes管理docker集群,不少人估计会进行尝试.kubernetes得到了很多大公司的支持,kubernetes集群部署工具也集成了gce,c ...
- 二进制安装部署kubernetes集群---超详细教程
本文收录在容器技术学习系列文章总目录 前言:本篇博客是博主踩过无数坑,反复查阅资料,一步步搭建完成后整理的个人心得,分享给大家~~~ 本文所需的安装包,都上传在我的网盘中,需要的可以打赏博主一杯咖啡钱 ...
- 高可用Kubernetes集群-11. 部署kube-dns
参考文档: Github介绍:https://github.com/kubernetes/dns Github yaml文件:https://github.com/kubernetes/kuberne ...
- 手动搭建高可用的kubernetes 集群
之前按照和我一步步部署 kubernetes 集群的步骤一步一步的成功的使用二进制的方式安装了kubernetes集群,在该文档的基础上重新部署了最新的v1.8.2版本,实现了kube-apiserv ...
- Docker学习-Kubernetes - 集群部署
Docker学习 Docker学习-VMware Workstation 本地多台虚拟机互通,主机网络互通搭建 Docker学习-Docker搭建Consul集群 Docker学习-简单的私有Dock ...
- Kubernetes集群安装(自己搭过,已搭好)
k8s安装目录 1. 组件版本 && 集群环境 组件版本 etcd 集群 && k8s master 机器 && k8s node 机器 集群环境变量 ...
- 二进制文件方式安装kubernetes集群
所有操作全部用root使用者进行,高可用一般建议大于等于3台的奇数,我们使用3台master来做高可用 练习环境说明: 参考GitHub master: kube-apiserver,kube-con ...
- Kubernetes 集群和应用监控方案的设计与实践
目录 Kubernetes 监控 监控对象 Prometheus 指标 实践 节点监控 部署 Prometheus 部署 Kube State Metrics 部署 Grafana 应用如何接入 Pr ...
- Kubernetes 集群日志 和 EFK 架构日志方案
目录 第一部分:Kubernetes 日志 Kubernetes Logging 是如何工作的 Kubernetes Pod 日志存储位置 Kubelet Logs Kubernetes 容器日志格式 ...
- 快速安装与配置kubernetes集群搭
Kubernetes是什么? 首先,它是一个全新的基于容器技术的分布式架构领先方案.这个方案尽然很新,但它是谷歌十几年以来大规模应用容器技术的经验积累和升华的一个重要成果.确切地说,kubernete ...
随机推荐
- 2022-03-24:你被请来给一个要举办高尔夫比赛的树林砍树,树林由一个 m x n 的矩阵表示, 在这个矩阵中: 0 表示障碍,无法触碰 1 表示地面,可以行走 比 1 大的数 表示有树的单元格,
2022-03-24:你被请来给一个要举办高尔夫比赛的树林砍树,树林由一个 m x n 的矩阵表示, 在这个矩阵中: 0 表示障碍,无法触碰 1 表示地面,可以行走 比 1 大的数 表示有树的单元格, ...
- 2021-08-31:去除重复字母。给你一个字符串 s ,请你去除字符串中重复的字母,使得每个字母只出现一次。需保证 返回结果的字典序最小(要求不能打乱其他字符的相对位置)。力扣316。
2021-08-31:去除重复字母.给你一个字符串 s ,请你去除字符串中重复的字母,使得每个字母只出现一次.需保证 返回结果的字典序最小(要求不能打乱其他字符的相对位置).力扣316. 福大大 答案 ...
- 代码随想录算法训练营Day21 二叉树
代码随想录算法训练营 代码随想录算法训练营Day21 二叉树| 530.二叉搜索树的最小绝对差 501.二叉搜索树中的众数 236. 二叉树的最近公共祖先 530.二叉搜索树的最小绝对差 题目链接:5 ...
- LeetCode刷题,代码随想录算法训练营Day3| 链表理论基础 203.移除链表元素 707.设计链表 206.反转链表
链表理论基础 链表是通过指针串联在一起的线性结构,每个节点由一个数据域和一个指针域构成. 链表的类型 单链表 双链表 有两个指针域,一个指向下一个节点,一个指向上一个节点,既可以向前查询也可以向后查询 ...
- GPT虚拟直播Demo系列(二)|无人直播间实现虚拟人回复粉丝
摘要 虚拟人和数字人是人工智能技术在现实生活中的具体应用,它们可以为人们的生活和工作带来便利和创新.在直播间场景里,虚拟人和数字人可用于直播主播.智能客服.营销推广等.接入GPT的虚拟人像是加了超强b ...
- 带你体验AI系列之云原生最佳实践--免费体验GPT-4教程
前言 [GPT-4]是OpenAI最新推出的大型语言模型,它支持图像和文本输入,以文本形式输出.它比GPT-3.5更大.更强.更猛.最重要的是据与研究表明,他在某些场景下,可以通过图灵测试.但是, ...
- MySQL读取的记录和我想象的不一致
摘要:并发的事务在运行过程中会出现一些可能引发一致性问题的现象,本篇将详细分析一下. 本文分享自华为云社区<MySQL读取的记录和我想象的不一致--事物隔离级别和MVCC>,作者:砖业洋_ ...
- C++ 学习笔记 (一)
C++标准化组织 https://isocpp.org/std/status http://open-std.org/JTC1/SC22/WG21/ why C++王者归来? https://cool ...
- docker-compose多服务器部署kafka集群
Kafka 是一个开源的分布式事件流平台,依赖Zookeeper或者KRaft,本文基于Zookeeper. 服务器IP配置 本文使用三个服务器来做集群搭建,IP如下: nodeName IP nod ...
- 【Java技术专题】「攻破技术盲区」带你攻破你很可能存在的Java技术盲点之动态性技术原理指南(反射技术专题)
@ 目录 带你攻破你很可能存在的Java技术盲点之动态性技术原理指南 编程语言的类型 静态类型语言 动态类型语言 技术核心方向 反射API 反射案例介绍 反射功能操作 获取构造器 长度可变的参数 - ...