Spring04-SpringEL&Spring JDBC数据访问
一. SpringEL入门
Spring动态语言(简称SpEL) 是一个支持运行时查询和操作对象图的强大的动态语言,语法类似于EL表达式,具有诸如显示方法和基本字符串模板函数等特性.
1. 准备工作
需要导入jar包
spring-expression.jar
maven项目pom文件添加:
 <dependency>

     <groupId>org.springframework</groupId>

     <artifactId>spring-expression</artifactId>

     <version>4.3.10.RELEASE</version>

 </dependency>
测试:
 /**

   * 在SpEL中,使用表达式非常简单,只需创建一个SpelExpressionParser实例即可,也就是首先创建一个SpEL   *表达式解析器,然后调用ExpressionParser#parseExpression()方法对表达式进行解析,其中单引号表示

   *String类型.

   */

 public class SpelHello {

      public static  void main(String [] args){

         //TODO 测试SPRINGEL表达式

          ExpressionParser parser = new SpelExpressionParser();

          Expression exp = parser.parseExpression("'hello'+'world'");

          String value = (String) exp.getValue();

          System.out.println(value);  //helloworld

      }

 }
注意: SpEL被设计成一个可独立运行的模块,可以脱离Spring容器直接运行,因此只需引入SpEL的模块spring-expression即可,无须引入Spring的其他框架,接下来,在代码中就可以使用SpEL提供表达式解析类.
二.SpringEL核心接口
SpringEL的核心接口和核心类全部位于 org.springframework.expression包及其子包,以及spel.support中.
1. 核心接口介绍
ExpressionParser: 解析表达式字符串,表达式字符串是一个用单引号标注或者用转义的双引号标注的字符串.
Expression: 接口用来计算表达式字符串值
SpringEL支持一系列功能特性,比如方法调用,属性调用及构造器调用.
例如:
   @Test

   public  void test1(){

      //TODO 测试SPRINGEL表达式解析函数

      ExpressionParser parser = new SpelExpressionParser();

      Expression exp = parser.parseExpression("'hello'+'world'.concat('!!!')");

      String value = (String) exp.getValue();

      System.out.println(value);  //输出结果helloworld!!!

   }
2. EvaluationContext接口
EvaluationContext接口提供了属性,方法,字段解析器及类型转化器.默认实现类StandardEvaluationContext的内部使用反射机制来操作对象.为了提高性能,在其内部会对已获取的Method,Field和Constructor实例进行缓存.
示例:
 @Test

 public  void test2(){

     //TODO 测试 EvaluationContext

     User user = new User();

     user.setUserName("张三");

     user.setCredits(100);

     ExpressionParser parser = new SpelExpressionParser();

     /**

       *  创建一个 StandardEvaluationContext实例,指定一个跟对象作为求值目标对象,这样在求值表达式中就可以引用根

       *  对象属性.在求值内部可以使用反射机制从注册对象中获取相应的属性.

       */

     EvaluationContext context = new StandardEvaluationContext(user);

     String userName = (String) parser.parseExpression("userName").getValue(context);

     System.out.println(userName);

  }
示例:
操作类Simple:
 public class Simple {

     public List<Boolean> booleansList = new ArrayList<Boolean>();

 }
测试:
 @Test

  public  void test3(){

       //TODO 测试 EvaluationContext

       //

       Simple simple = new Simple();

       simple.booleansList.add(true); //给Simple对象 属性的集合中添加一个值

       //

       StandardEvaluationContext simpleContext = new StandardEvaluationContext(simple);

       ExpressionParser parser = new SpelExpressionParser();

       //

       Expression expression = parser.parseExpression("booleansList[0]");

       //

       expression.setValue(simpleContext,"false");

          //

       Boolean bl = simple.booleansList.get(0);

       System.out.println("bl---->"+bl);  //输出结果: b1 - false

   }
创建测试类对象,给予booleansList集合设置值
创建StandardEvaluationContext的内部使用反射机制创建Simple操作对象.
创建SpEL表达式
给SpEL表达式设置操作上下文对象. 以及设置对应的值
获取修改后的结果!
三. SpEL基础表达式
1. 文本字符解析器
文本表达式支持字符串,日期,数字(正数,实数及十六进制数),布尔类型及null,其中字符串需使用单引号或者反斜杠+双引号包含起来,如" 'String类型' " , " "String类型" ",单引号字符可使用 " ' " 表示.
test:
 @Test

 public  void  test4(){

      //TODO SpEL基本类型解析

      ExpressionParser parser = new SpelExpressionParser();

      //1.解析字符串

      String hellworld =(String) parser.parseExpression("\"hello world\"").getValue();

      //2.解析双精度浮点

      double doubleNumber = (Double) parser.parseExpression("3.1415926").getValue();

      //3.解析整数

      int maxValue = (Integer) parser.parseExpression("0xFFFFFF").getValue();

      //4.解析boolean类型

      boolean value = (Boolean) parser.parseExpression("true").getValue();

      //5.解析空值

      Object nullValue = parser.parseExpression("null").getValue();   System.out.println(hellworld+doubleNumber+maxValue+value+nullValue);

 }
2. 对象属性解析
在SpringEL中,可使用类似 "xxx.yyy.zzz" 的对象属性路径轻松的访问对象属性值.
创建Place类:
 public class Place {

     private String city;

     public Place(String city) {

         this.city = city;

     }

     public String getCity() {

         return city;

     }

     public void setCity(String city) {

         this.city = city;

     }

 }
创建User类:
 public class User {

     private String userName;

     private Integer credits;

     private Place place;

     public Place getPlace() {

         return place;

     }

     public void setPlace(Place place) {

         this.place = place;

     }

     public String getUserName() {

         return userName;

     }

     public void setUserName(String userName) {

         this.userName = userName;

     }

     public Integer getCredits() {

         return credits;

     }

     public void setCredits(Integer credits) {

         this.credits = credits;

     }

 }
测试:
 @Test

  public  void test5(){

      //TODO 获取对象属性值

         User user = new User();

         user.setCredits(100);

         user.setUserName("王老五");

         user.setPlace(new Place("葫芦岛"));

         //构建SpEL解析上下文

         ExpressionParser parser = new SpelExpressionParser();

         EvaluationContext context = new StandardEvaluationContext(user);

         //基本属性值获取

         String username = (String)parser.parseExpression("userName").getValue(context);

         System.out.println("username = " + username);

         //支持运算

         int credits = (Integer)parser.parseExpression("credits+10").getValue(context);

         System.out.println("credits = " + credits);

         //获取嵌套对象属性值

         String  city = (String)parser.parseExpression("place.city").getValue(context);

         System.out.println("city = " + city);

     }
3. 数组,集合类型解析
在SpEL中,支持数组,集合类型解析.数组支持标准Java语言创建方法,如"new int []{1,2,3}".List支持大括号括起来的内容,数据项之间用逗号隔开,如 "{1,2,3,4,5}", "{{'a','b'},{'c','d'}}".目前SpEL还不支持多维数组初始化,如 "new int[2][3]{{1,2,3},{4,5,6}} ". Map采用如下表达式: {userName:'tom',credits:100}
 @Test

     public  void  test6(){

      //TODO 测试数组集合解析

         ExpressionParser parser = new SpelExpressionParser();

         EvaluationContext context = new StandardEvaluationContext(user);

         //数组获取

         int [] array1 = (int[]) parser.parseExpression("new int[]{1,2,3}").getValue();

         System.out.println(Arrays.toString(array1));

         //集合获取

         List list = (List) parser.parseExpression("{1,2,3,4}").getValue();

         List tList = (List) parser.parseExpression("{{123,456},{789,111}}").getValue();

         System.out.println(list+"\n"+tList);

         //Map数据操作

         Map map= (Map) parser.parseExpression("{username:'tom',age:11}").getValue();

         List mList = (List) parser.parseExpression("{{username:\"aaa\"},{username:'zhanfsan'}}").getValue();

         System.out.println("mList = " + mList+" \n "+map);

     }

    //输出结果

    [1, 2, 3]

    [1, 2, 3, 4]

    [[123, 456], [789, 111]]

    mList = [{username=aaa}, {username=zhanfsan}]

    {username=tom, age=11}
4. 方法解析
在SpEL中,方法调用支持Java可访问的方法,包括对象方法,静态方法,支持可变方法参数;还可以使用String类型的所有可访问的方法,如String#substring()
修改User类:
 public class User {

     private String userName;

     private Integer credits;

     private Place place;

     public String [] arr;

     /**

      * 添加三个方法 使用spel调用

      * 共有方法

      * 静态方法

      * 私有方法

      */

     public  Boolean  method1(String value){

         return  value.equalsIgnoreCase("admin") ;

     }

     public  static  Boolean method2(String value){

         return  value.equalsIgnoreCase("admin");

     }

     private  Boolean method3(String value){

         return  value.equalsIgnoreCase("admin")

     }

      //setter getter

 }
测试:
 @Test

  public  void test7(){

      //TODO 测试SPEL调用方法

        User user = new User();

        EvaluationContext context = new StandardEvaluationContext(user);

        ExpressionParser parser = new SpelExpressionParser();

        //调用String方法

         String sbString = parser.parseExpression("'Spring'.substring(2)").getValue(String.class);

         System.out.println("sbString = " + sbString);

         Integer index = parser.parseExpression("'Spring'.indexOf('p')").getValue(Integer.class);

         System.out.println("index = " + index);

         //调用实例方法

         //共有方法

         boolean  method1 = (Boolean) parser.parseExpression("method1('123')").getValue(context);

         System.out.println(method1);

         //静态方法

         boolean  method2 = (Boolean) parser.parseExpression("method2('admin')").getValue(context);

         System.out.println(method2);

         /** 结果集

          sbString = ring

          index = 1

          false

          true

          */

         //私有方法

         boolean method3 = (Boolean) parser.parseExpression("method3('aaa')").getValue(context);

         System.out.println("method3 = " + method3);

         //此处报错

     }
5. 操作符解析
SpEL提供了丰富的操作符解析,支持关系操作付符,逻辑操作符号,算术运算操作符等...
关系操作符:
  @Test

  public  void test8(){

         //测试运算符

         ExpressionParser parser = new SpelExpressionParser();

         Boolean value = parser.parseExpression("2==2").getValue(Boolean.class);

         System.out.println("value = " + value);

         Integer sum = parser.parseExpression("2+2").getValue(Integer.class);

         System.out.println("sum = " + sum);

         /**

           * 输出结果: value = true  sum = 4

           */

  }
6. 赋值操作
 User user = new User();

 EvaluationContext context = new StandardEvaluationContext(user);

 //setValue方法赋值

 ExpressionParser parser = new SpelExpressionParser();

 parset.parsetEcpression("userName").setValue(context,"userName");
 //表达式直接赋值

 User user = new User();

 EvaluationContext context = new StandardEvaluationContext(user);

 //setValue方法赋值

 ExpressionParser parser = new SpelExpressionParser();

 parset.parsetEcpression("userName='userName对应的值'").setValue(context);
四. 在Spring中使用SpEL
1. 基于XML配置
<bean id="xx" name="xx" class="xx.xx.xx" p:age="#{T(java.lang.Math).random()*100 }"/>
通过SpEL提供的T类型操作符,直接调java.lang.Math的静态方法来生成一个随机数.
2. 引用其他bean属性
 <bean id="b1" name="xx" class="com.itqf.spring.bean.User"></bean>

 <!-- id b2 引用 b1 -->

 <bean id="b2" name="xxx" class="xx.xx.xx">

     <property name="userName" value="#{b1.userName }"></property>

 </bean>
五. Spring JDBC 数据访问
Spring JDBC是Spring所提供的持久层技术,它的主要目标是降低使用JDBC API的门槛,以一种更直接,更简介,更简单的方式使用JDBC API, 在Spring JDBC里,仅需做那些与业务相关的DML操作,而将资源获取,Statment创建,资源释放以及异常处理等繁杂而乏味的工作交给Spring JDBC.
虽然ORM的框架已经成熟丰富,但是JDBC的灵活,直接的特性,依然让他拥有自己的用武之地,如在完全依赖查询模型动态产生查询语句的综合查询系统中,Hibernaye,MyBatis,JPA等框架都无法使用,这里JDBC是唯一的选择.
1. JdbcTemplate入门
1.1 创建项目
引入jar包
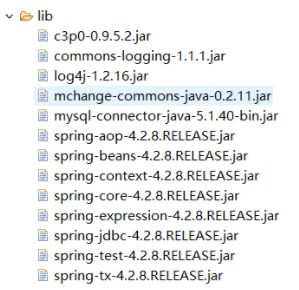
pom.xml:
 <dependencies>

     <dependency>

         <groupId>junit</groupId>

         <artifactId>junit</artifactId>

         <version>3.8.1</version>

         <scope>test</scope>

     </dependency>

     <dependency>

         <groupId>aopalliance</groupId>

         <artifactId>aopalliance</artifactId>

         <version>1.0</version>

     </dependency>

     <!-- https://mvnrepository.com/artifact/org.aspectj/aspectjweaver -->

     <dependency>

         <groupId>org.aspectj</groupId>

         <artifactId>aspectjweaver</artifactId>

         <version>1.8.10</version>

     </dependency>

     <!-- https://mvnrepository.com/artifact/org.springframework/spring-aspects -->

     <dependency>

         <groupId>org.springframework</groupId>

         <artifactId>spring-aspects</artifactId>

         <version>4.3.7.RELEASE</version>

     </dependency>

       <dependency>

       <groupId>org.springframework</groupId>

       <artifactId>spring-aop</artifactId>

       <version>4.3.10.RELEASE</version>

   </dependency>

   <dependency>

       <groupId>org.springframework</groupId>

       <artifactId>spring-context-support</artifactId>

       <version>4.3.11.RELEASE</version>

   </dependency>

   <dependency>

       <groupId>org.springframework</groupId>

       <artifactId>spring-context</artifactId>

       <version>4.3.10.RELEASE</version>

   </dependency>

   <dependency>

       <groupId>org.springframework</groupId>

       <artifactId>spring-core</artifactId>

       <version>4.3.10.RELEASE</version>

   </dependency>

   <dependency>

       <groupId>org.springframework</groupId>

       <artifactId>spring-beans</artifactId>

       <version>4.3.10.RELEASE</version>

   </dependency>

   <dependency>

       <groupId>org.springframework</groupId>

       <artifactId>spring-expression</artifactId>

       <version>4.3.10.RELEASE</version>

   </dependency>

   <!-- https://mvnrepository.com/artifact/org.springframework/spring-jdbc -->

   <dependency>

       <groupId>org.springframework</groupId>

       <artifactId>spring-jdbc</artifactId>

       <version>4.3.9.RELEASE</version>

   </dependency>

   <!-- https://mvnrepository.com/artifact/mysql/mysql-connector-java -->

   <dependency>

       <groupId>mysql</groupId>

       <artifactId>mysql-connector-java</artifactId>

       <version>5.1.38</version>

   </dependency>

   <dependency>

       <groupId>commons-logging</groupId>

       <artifactId>commons-logging</artifactId>

       <version>1.1.2</version>

   </dependency>

   <dependency>

       <groupId>log4j</groupId>

       <artifactId>log4j</artifactId>

       <version>1.2.14</version>

   </dependency>

   <dependency>

       <groupId>mysql</groupId>

       <artifactId>mysql-connector-java</artifactId>

       <version>5.1.38</version>

   </dependency>

   <!-- https://mvnrepository.com/artifact/commons-dbcp/commons-dbcp -->

   <dependency>

       <groupId>commons-dbcp</groupId>

       <artifactId>commons-dbcp</artifactId>

       <version>1.4</version>

   </dependency>

   <!-- https://mvnrepository.com/artifact/org.springframework/spring-test -->

   <dependency>

       <groupId>org.springframework</groupId>

       <artifactId>spring-test</artifactId>

       <version>4.3.10.RELEASE</version>

       <scope>test</scope>

   </dependency>

   <!-- https://mvnrepository.com/artifact/com.mchange/mchange-commons-java -->

   <dependency>

       <groupId>com.mchange</groupId>

       <artifactId>mchange-commons-java</artifactId>

       <version>0.2.11</version>

   </dependency>

   <!-- https://mvnrepository.com/artifact/org.springframework.boot/spring-boot -->

   <dependency>

       <groupId>org.springframework.boot</groupId>

       <artifactId>spring-boot</artifactId>

       <version>1.5.7.RELEASE</version>

   </dependency>

   <!-- https://mvnrepository.com/artifact/com.mchange/c3p0 -->

   <dependency>

       <groupId>com.mchange</groupId>

       <artifactId>c3p0</artifactId>

       <version>0.9.5.2</version>

   </dependency>

     <dependency>

       <groupId>org.springframework</groupId>

       <artifactId>spring-tx</artifactId>

       <version>4.3.9.RELEASE</version>

   </dependency>
导入日志:log4j.properties
1.2 创建数据库
数据库名: springjdbc
创建角色表:
 CREATE TABLE `role` (

   `rid` INT(10) UNSIGNED NOT NULL AUTO_INCREMENT COMMENT '角色id',

   `rname` VARCHAR(20) NOT NULL COMMENT '角色名',

   `alias` VARCHAR(20) NOT NULL COMMENT '角色别名',

   PRIMARY KEY (`rid`)

 )

 INSERT INTO role (rid,rname,alias)

     VALUES(1,'admin','系统管理员'),(2,'dispatcher','调度员');
1.3 测试代码
  @Test

  public  void test1() throws Exception {

         //TODO 测试jdbcTemplate简单使用

         //1.创建c3p0链接池

         ComboPooledDataSource dataSource  = new ComboPooledDataSource();

         dataSource.setDriverClass("com.mysql.jdbc.Driver");        dataSource.setJdbcUrl("jdbc:mysql://localhost:3306/springjdbc");

         dataSource.setUser("root");

         dataSource.setPassword("111");

         //创建jdbcTemplate对象

         JdbcTemplate jdbcTemplate = new JdbcTemplate(dataSource);

         //创建sql语句

         String sql = "insert into role (rid , rname ,alias) value (? , ?,?);";

         jdbcTemplate.update(sql,"3","visitor","游客");

  }
2. Spring管理JdbcTemplate
1. 创建Role.java
 public class Role {

     private Integer cid;

     private String  rname;

     private String  alias;

     //setter getter

 }
2. RoleDao.java
 public interface RoleDao {

      //增

      void save(Role role);

      //删除

      void delete(Integer id);

      //改

      void update(Role role);

      //查

      Role getById(Integer id);

      //查

      int getTotalCount();

      //查

      List<Role> getAll();

 }
3. 创建RoleDaoImpl.java
创建数据源(连接池),JdbcTemplate,RoleDao交给Spring容器管理(IOC)
注意: 可以自己在RoleDaoImpl中添加 JdbcTemplate变量,如果不自动装载记得添加变量的set方法,
标准的操作,我们可以让RoleDaoImpl 继承 JdbcDaoSupport, 因为(org.springframework.jdbc.core.support.JdbcDaoSupport)类提供了JdbcTemplate对象以及对应的获取和设置方法.不用自己在实现类中添加JdbcTemplate变量
 JdbcTemplate  // Spring操作数据模板类(工具类)

 JdbcTemplate.update(sql,ArgsObj....);   //DML

 JdbcTemplate.execute(sql)    //DDL DCL

 //DQL 查询单个

 jdbcTemplate.queryForObject(String var1, RowMapper<T> var2, Object... var3);

 RowWapper<T> 将结果封装的处理器; 得到Result解析成实体类对象即可!

 //查询所有

 jdbcTemplate.query(String var1, RowMapper<T> var2, Object... var3);
RoleDaoImple代码:
 public class RoleDaoImpl extends JdbcDaoSupport implements RoleDao {

     public void save(Role role) {

     //TODO 插入数据

        String sql = "INSERT INTO role (rname,alias) value (?,?) ;";

        getJdbcTemplate().update(sql,role.getRname(),role.getAlias());

     }

     public void delete(Integer id) {

      //TODO 根据id删除

         String sql = "delete from role where rid = ? ;";

         getJdbcTemplate().update(sql,id);

     }

     public void update(Role role) {

       //TODO 修改role信息

         String  sql="update role set rname = ? , alias = ? where rid = ? ;" ;

         getJdbcTemplate().update(sql,role.getRname(),role.getAlias(),role.getRid());

     }

     public Role getById(Integer id) {

         String sql = "select * from  role where rid = ? ;";

         //直接查询

        // Role role = getJdbcTemplate().queryForObject(sql, new Object[]{id}, Role.class);

         Role role = (Role) getJdbcTemplate().queryForObject(sql, new Object[]{id}, new RowMapper<Object>() {

             public Object mapRow(ResultSet resultSet, int index) throws SQLException {

                 //将一行数据解析成一个java对象

                 return  mapRowHandler(resultSet);

             }

         });

         return role;

     }

     public int getTotalCount() {

         String sql = "select count(*) from role ;";

         Integer count = getJdbcTemplate().queryForObject(sql,Integer.class);

         return count;

     }

     //查询所有

     public List<Role> getAll() {

         String  sql = "select * from role";

         List<Role> list =  getJdbcTemplate().query(sql, new RowMapper<Role>() {

             public Role mapRow(ResultSet resultSet, int i) throws SQLException {

                 return mapRowHandler(resultSet);

             }

         });

         return list;

     }

     private Role mapRowHandler(ResultSet resultSet) throws  SQLException{

            Role role = new Role();

            role.setRid(resultSet.getInt("rid"));

            role.setRname(resultSet.getString("rname"));

            role.setAlias(resultSet.getString("alias"));

            return  role;

     }

 }
4. 创建数据库配置文件
文件名:db.properties
位置: src下/ maven项目 resources文件夹下
 jdbc.jdbcUrl=jdbc:mysql://localhost:3306/springjdbc

 jdbc.driverClass=com.mysql.jdbc.Driver

 jdbc.user=root

 jdbc.password=xxx
5.编写IOC配置
文件名:applicationContext.xml
位置:src下 / maven项目 resources文件夹下
 <?xml version="1.0" encoding="UTF-8"?>

 <beans xmlns="http://www.springframework.org/schema/beans"

        xmlns:xsi="http://www.w3.org/2001/XMLSchema-instance"

        xmlns:context="http://www.springframework.org/schema/context"

        xmlns:p="http://www.springframework.org/schema/p"

        xsi:schemaLocation="

         http://www.springframework.org/schema/beans http://www.springframework.org/schema/beans/spring-beans.xsd

         http://www.springframework.org/schema/context http://www.springframework.org/schema/context/spring-context.xsd"> <!-- bean definitions here -->

        <context:component-scan base-package="com.itqf.spring"></context:component-scan>

        <context:property-placeholder  location="db.properties"></context:property-placeholder>

         <bean name="dataSource" class="com.mchange.v2.c3p0.ComboPooledDataSource" p:jdbcUrl="${jdbc.jdbcUrl}"

               p:driverClass="${jdbc.driverClass}"

               p:user="root"

               p:password="xxxx"

         />

         <!-- bean jdbcTemplate -->

         <bean name="jdbcTemplate" class="org.springframework.jdbc.core.JdbcTemplate">

             <property name="dataSource" ref="dataSource"/>

         </bean>

         <bean name="roleDao" class="spring.dao.impl.RoleDaoImpl">

             <property name="jdbcTemplate" ref="jdbcTemplate"/>

         </bean>

 </beans>
测试:
  @Test

     public  void test2(){

      //TODO 测试使用配置文件

         ApplicationContext context =new  ClassPathXmlApplicationContext("applicationContext.xml");

         RoleDao dao = context.getBean("roleDao", RoleDaoImpl.class);

         Role byId = dao.getById(2);

         System.out.println(byId);

         List<Role> all = dao.getAll();

         System.out.println("all = " + all);

     }
Spring04-SpringEL&Spring JDBC数据访问的更多相关文章
- Spring JDBC 数据访问
Spring JDBC是Spring所提供的持久层技术,它的主要目标是降低使用JDBC API的门槛,以一种更直接,更简介,更简单的方式使用JDBC API, 在Spring JDBC里,仅需做那些与 ...
- jdbc数据访问技术
jdbc数据访问技术 1.JDBC如何做事务处理? Con.setAutoCommit(false) Con.commit(); Con.rollback(); 2.写出几个在Jdbc中常用的接口 p ...
- Spring 梳理-数据访问-DB
针对接口编程 DAO是指数据访问对象(data access object),它提供了数据读取和写入到数据库中的一种方式.Spring认为,它应该以接口的方式发布功能,而应用程序的其他部分需要通过接口 ...
- SpringBoot系列之JDBC数据访问
SpringBoot系列之JDBC数据访问 New->Project or Module->Spring Initializer 选择JDBC和mysql驱动,为了方便测试web等等也可以 ...
- 06.深入浅出 Spring Boot - 数据访问之Druid
代码下载:https://github.com/Jackson0714/study-spring-boot.git 一.Druid是什么? 1.Druid是数据库连接池,功能.性能.扩展性方面都算不错 ...
- 07.深入浅出 Spring Boot - 数据访问之Mybatis(附代码下载)
MyBatis 在Spring Boot应用非常广,非常强大的一个半自动的ORM框架. 代码下载:https://github.com/Jackson0714/study-spring-boot.gi ...
- Spring ( 五 )Spring之数据访问与事务管理
个人博客网:https://wushaopei.github.io/ (你想要这里多有) 一.Spring之数据访问 1.Spring数据访问工程环境搭建 jdbc.properties配置 ...
- Spring Boot数据访问之动态数据源切换之使用注解式AOP优化
在Spring Boot数据访问之多数据源配置及数据源动态切换 - 池塘里洗澡的鸭子 - 博客园 (cnblogs.com)中详述了如何配置多数据源及多数据源之间的动态切换.但是需要读数据库的地方,就 ...
- Spring Boot数据访问之多数据源配置及数据源动态切换
如果一个数据库数据量过大,考虑到分库分表和读写分离需要动态的切换到相应的数据库进行相关操作,这样就会有多个数据源.对于一个数据源的配置在Spring Boot数据访问之数据源自动配置 - 池塘里洗澡的 ...
随机推荐
- 第一次在新西兰组织技术社区活动:Monkeyfest2018
从3月份登陆到现在,转眼间已经8个月了.在6个月的时候我就想写篇文总结下近期的一些状况,一直拖到现在.因为近期一直在筹备我第一次社区活动——Monkeyfest 2018,占用了比较多的时间.这是一个 ...
- .Net Core2.0下使用Dapper遇到的问题
今天成功把.Net Framework下使用Dapper进行封装的ORM成功迁移到.Net Core 2.0上,在迁移的过程中也遇到一些很有意思的问题,值得和大家分享一下.下面我会还原迁移的每一个过程 ...
- [2017BUAA软工助教]常见问题Q&A
软工常见问题Q&A 目录: 1. 转会相关 1.1 转会流程是什么样子的? 1.2 团队中多人要求转会怎么办?(如何解散团队) 1.3 为什么有人想要转会? 1.4 软件工程课为什么有这一环节 ...
- Svn基本操作
日常开发中使用到的Svn基本操作 svn https://tortoisesvn.net/ https://www.visualsvn.com/server/download/ 1. 检 ...
- Notepad++快捷使用
用Notepad++写代码,要是有一些重复的代码想copy一下有木有简单的方法呢,确实还是有的不过也不算太好用.主要是应用键盘上的 Home 键 和 End 键.鼠标光标停留在一行的某处,按 Home ...
- laravel 项目表单中有csrf_token,但一直报错419错误 解决redis连接错误:MISCONF Redis is configured to save RDB snapshots, but it is currently not able to persi
laravel 项目表单中有csrf_token,但一直报错419错误,因为项目中使用到Redis缓存,在强制关闭Redis后出现的问题,查询laravel.log文件查找相关问题 安装redis后在 ...
- Navicat 远程连接Docker容器中的mysql 报错:1251 - Client does not support authentication protocol 解决办法。
出现这个问题 首先进入 1.docker exec -it mysql02 bash //mysql02是mysql容器的别名 2.mysql -uroot -p 3.输入密码 4.进入my ...
- tensorflow实现基于LSTM的文本分类方法
tensorflow实现基于LSTM的文本分类方法 作者:u010223750 引言 学习一段时间的tensor flow之后,想找个项目试试手,然后想起了之前在看Theano教程中的一个文本分类的实 ...
- SpringMVC配置三大组件
1.组件扫描器 使用组件扫描器省去在spring容器配置每个Controller类的繁琐. 使用<context:component-scan>自动扫描标记@Controller的控制器类 ...
- Django进阶知识
drf学习之Django进阶点 一.Django migrations原理 1.makemigrattions: 相当于在每个app下的migrations文件夹下生成一个py脚本文件用于创建表或则修 ...