
Ubuntu16.04+Opencv3.3的安装教程
需要准备的基本材料(请先看完整个安装过程再进行下面的操作):
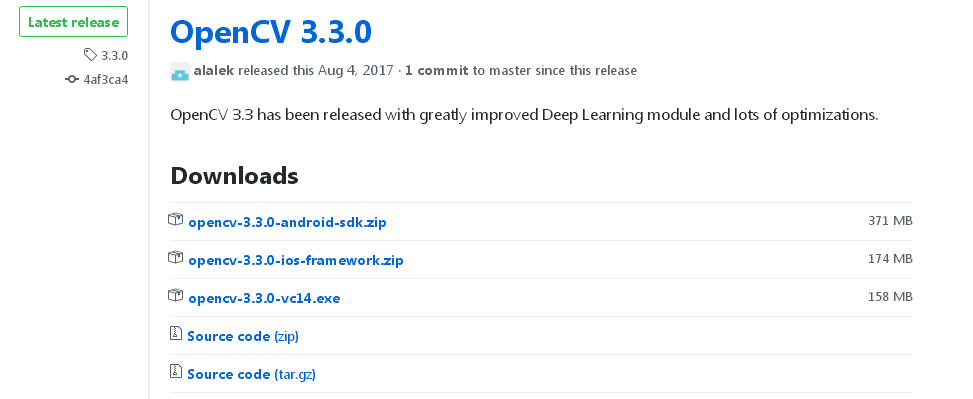
一、到Opecv-Release的Github项目上下载最新的Opencv版本,注意---基于python2.7,可选用 OpenCV2.3/2.4 以及 OpenCV3.X,我们选取版本3.3:
下载地址:https://github.com/opencv/opencv/releases/tag/3.3.0
二、安装GUN GCC编译器,对于Ubuntu16.04版本的Linux操作系统这款编译器是自带的
三、安装Cmake跨平台编译工具(CMake 可以编译源代码、制作程序库、产生适配器(wrapper)、还可以用任意的顺序建构执行档)安装的方法:sudo apt-get install cmake
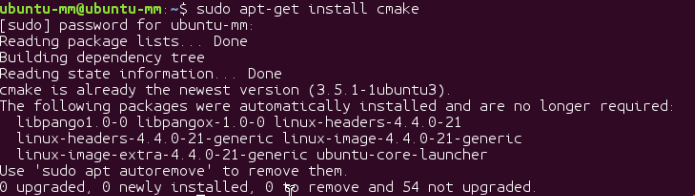 我已经安装好了,就提示无需更新,无需安装
四、安装python2.7,在ubuntu中一般来说是自带python2.7的,如果没有安装,请参看博客中其他的教程
五、安装numpy,在安装好python之后建议您安装pip,安装完pip之后就可以使用pip来安装各种各样的库了,pip install numpy
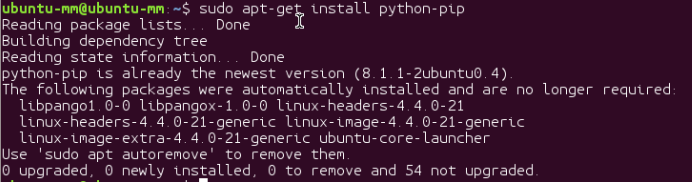 我已经安装好了,就提示无需更新,无需安装
六、安装pkg-config指令(注意,这里的安装很重要,例如libgtk2.0-dev软件包涉及到了opencv中的imshow等窗口调用能否使用的问题):
sudo apt-get install pkg-config libgtk2.0-dev pkg-config libavcodec-dev libavformat-dev libswscale-dev libjpeg-dev libpng-dev libtiff-dev libjasper-dev libdc1394-22-dev
开始安装Opencv For Python:
1、找到下载的Opencv3.3的目录:

2、执行下面的指令(在执行指令的过程之前,我们可以切换到su超级权限下进行操作,也可以不切换到su权限下,切换到那个用户,以后就只能在那个用户下调用对应的cv2的图像处理库):
tar -xzvf opencv-3.3.0.tar.gz

cd opencv-3.3.0/

cd ..

mkdir my_build_dir

cd my_build_dir

cmake ../opencv-3.3.0 -DWITH_GTK_2_X=ON -DCMAKE_INSTALL_PREFIX=/usr/local

make    # make -j4表示开4个线程来进行编译

make install
解压之后的opencv-3.3.0的目录:

Cmake的过程和结果如下:


建立的my_build_dir经过 cmake ../opencv-3.3.0 -DWITH_GTK_2_X=ON -DCMAKE_INSTALL_PREFIX=/usr/local之后的结果
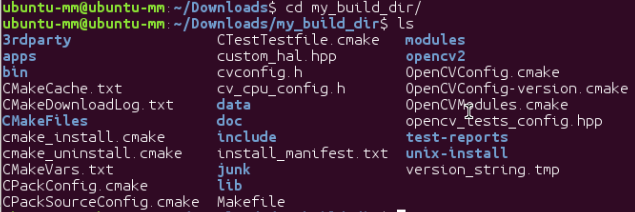
在my_build_dir中执行make和make install即可
编写代码:

运行结果:

安装过程之中碰到的问题:
"FATAL: In-source builds are not allowed.
You should create separate directory for build files."
意思就是说不要在源代码内部直接编译程序,以免污染源代码,所以在opencv-2.4.13目录之外建立文件夹my_build_dir,然后在这个目录里面执行cmake。
详细问题参照下面的链接:
https://stackoverflow.com/questions/45518317/in-source-builds-are-not-allowed-in-cmake
Ubuntu下卸载重装Opencv的教程参考:
http://www.cnblogs.com/txg198955/p/5990295.html
注:安装之后可能遇到的问题
Question-1:

简单的意思就是调用了window相关的程序,但是没有安装GTK相关的包,函数function不能实现,需要安装libgtk2.0-dev 和 pkg-config。
如果没有使用到opencv的显示接口的话,基本的opencv的函数是能够使用的,在通过numpy的相关的数学运算包转化一下数据格式就可以使用matlibplot等包显示输出图像了。
如果想解决上述的问题,就一定记得安装libgtk2.0-dev和pkg-config之后在cmake ---》make ---》 make install.Opencv就行了。
Question-2:
我们发现在安装libgtk2.0-dev的软件包的时候,很难安装成功,全是提示说安装包和其他的依赖的安装包存在版本不兼容的问题,如下图所示:
# apt-get install libgtk2.0-dev

Reading package lists... Done

Building dependency tree

Reading state information... Done

Some packages could not be installed. This may mean that you have

requested an impossible situation or if you are using the unstable

distribution that some required packages have not yet been created

or been moved out of Incoming.

The following information may help to resolve the situation:

The following packages have unmet dependencies:

  libgtk2.0-dev: Depends: libgtk2.0-0 (= 2.20.0-0ubuntu4) but 2.20.1-0ubuntu2.1 is to be installed

                 Depends: libglib2.0-dev (>= 2.21.3) but it is not going to be installed

                 Depends: libpango1.0-dev (>= 1.20) but it is not going to be installed

                 Depends: libatk1.0-dev (>= 1.13.0) but it is not going to be installed

                 Depends: libcairo2-dev (>= 1.6.4-6.1) but it is not going to be installed

                 Depends: libx11-dev (>= 2:1.0.0-6) but it is not going to be installed

                 Depends: libxext-dev (>= 1:1.0.1-2) but it is not going to be installed

                 Depends: libxinerama-dev (>= 1:1.0.1-4.1) but it is not going to be installed

                 Depends: libxi-dev (>= 1:1.0.1-4) but it is not going to be installed

                 Depends: libxrandr-dev (>= 1:1.2.99) but it is not going to be installed

                 Depends: libxcursor-dev but it is not going to be installed

                 Depends: libxfixes-dev (>= 1:3.0.0-3) but it is not going to be installed

                 Depends: libxcomposite-dev (>= 1:0.2.0-3) but it is not going to be installed

                 Depends: libxdamage-dev (>= 1:1.0.1-3) but it is not going to be installed

E: Broken packages
将较新的库降级为满足依赖关系的库,按照提示逐步操作即可。
这里我们就需要使用如下的指令来完成安装:
sudo aptitude install libgtk2.0-dev
运行后会出现一大堆消息,给出第一个解决方案一般是保留这些库文件,让选择y/n/q?,这里选择“n”;然后会继续找解决方案,有时会超时找不到,点击y继续找,直到给出得解决方案是“降级”这些库文件,选择“y”,然后等待结束就完了。
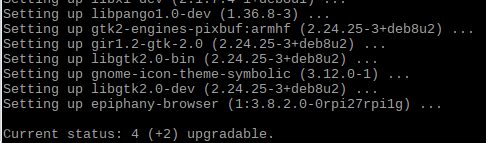 这里我们看到提示:Setting up libgtk2.0-dev(2.24.25-3+deb8u2) ...
完成后可以再输入“sudo apt-get install libgtk2.0-dev”进行测试,出现已经安装对应得库文件,说明安装成功了。(此方法同样适用于安装opencv时其他不能正常安装的预备库文件)
 Finished!
Ubuntu16.04+Opencv3.3的安装教程的更多相关文章
- Ubuntu16.04 + cuda8.0 + GTX1080安装教程
1. 安装Ubuntu16.04 不考虑双系统,直接安装 Ubuntu16.04,从 ubuntu官方 下载64位版本: ubuntu-16.04-desktop-amd64.iso . 在MAC下制 ...
- ubuntu16.04+Opencv3.4.0安装(slam版)
本文记录ubuntu下安装opencv过程,步骤来自 opencv官网可以对照官网步骤:https://docs.opencv.org/3.4.0/d7/d9f/tutorial_linux_inst ...
- 阿里云ECS服务器环境搭建——ubuntu16.04图形界面的安装
阿里云ECS服务器环境搭建——ubuntu16.04图形界面的安装 最近琢磨着想在服务器上搭建一个hexo博客,于是就在阿里云上买了一个云服务器ECS,远程接入后默认给的是一个命令窗口,没有图形界面, ...
- Ubuntu16.04 LTS下apt安装WireShark
Ubuntu16.04 LTS下apt安装WireShark 安装与配置 首先通过apt安装WireShark: $ sudo apt install wireshark 会同时安装许多的依赖包,其中 ...
- 路由器安装ubuntu-16.04.1-server-amd64出现“无法安装busybox-initramfs”错误。向目标系统中安装busybox-initramfs软件包时出现一个错误。请检查/var/log/syslog或查看第四虚拟控制台以获得详细
公司的路由器要ubuntu服务器进行路由网络功能的管理,在安装的时候出现下面的错误提示: 安装ubuntu-16.04.1-server-amd64出现“无法安装busybox-initramfs”错 ...
- ubuntu16.04下sublime text3安装和配置
ubuntu16.04下sublime text3安装和配置 2018年04月20日 10:31:08 zhengqijun_ 阅读数:1482 1.安装方法 1)使用ppa安装 sudo add-a ...
- Ubuntu16.04上用源代码安装ICE
ubuntu16.04上用源代码安装ICE
- Ubuntu16.04下,erlang安装和rabbitmq安装步骤
文章来源: Ubuntu16.04下,erlang安装和rabbitmq安装步骤 准备工作,先下载erlang和rabbitmq的安装包,注意他们的版本,版本不对可能会导致rabbitmq无法启动,这 ...
- Ubuntu16.04+OpenCV3.2.0+Opencv_Contrib3.2.0安装
为了学习slam,在ubuntu16.04系统上安装opencv3.2.0以及对应的opencv_contrib3.2.0 安装过程 下载 Github上下载有的时候比较慢,我这里分享了OpenCV3 ...
随机推荐
- winform无需安装pdf阅读器打开pdf文件
控件来源:http://www.o2sol.com/pdfview4net/download.htm (使用版本:2016年8月31号更新版) 备份链接: https://pan.baidu.com/ ...
- Confluence 6 在你的 LDAP 目录中优化用户和用户组数量
连接 LDAP 服务器能为你的用户管理提供灵活高效的解决方案.为了达到优化的性能,后台同步程序将会从 LDAP 上查找和下载数据同步到你本地的 Confluence 服务器数据库上同时还会定时的更新数 ...
- Vue.extend和Vue.component的联系与差异
extend 是构造一个组件的语法器. 你给它参数 他给你一个组件 然后这个组件 你可以作用到Vue.component 这个全局注册方法里, 也可以在任意vue模板里使用apple组件 var ap ...
- LeetCode(105):从前序与中序遍历序列构造二叉树
Medium! 题目描述: 根据一棵树的前序遍历与中序遍历构造二叉树. 注意:你可以假设树中没有重复的元素. 例如,给出 前序遍历 preorder = [3,9,20,15,7] 中序遍历 inor ...
- 【Vue】组件watch props属性值
转载: https://www.cnblogs.com/mqxs/p/8972368.html #HTML <div id="example"> <p> & ...
- Linux文件系统及文件类型
Linux文件系统: 根文件系统(rootfs) root filesystem LSB, FHS: (FileSystem... /etc, /usr, /var, /root.... /bo ...
- shell设置连接服务器永不超时
1.打开/etc/ssh/sshd_config vim /etc/ssh/sshd_config 2.设置如下内容: MaxAuthTries 60 MaxSessions 3 ClientAl ...
- AI-restful接口写法
AI-restful接口写法 restful接口规范 http协议请求方式:GET POST DELETE PUT PATCH OPTION HEAD 设计接口时必须使用这种格式的数据 GET 查看数 ...
- I: Carryon的字符串排序(字典树/map映射)
2297: Carryon的字符串 Time Limit: C/C++ 1 s Java/Python 3 s Memory Limit: 128 MB Accepted ...
- 用SQL语句查询zabbix的监控数据
参考地址:http://blog.51cto.com/sfzhang88/1558254 -- 获取主机id -- 10084 select hostid from hosts where host= ...