SpringBoot配置双数据源
SpringBoot配置双数据源
一、搭建springboot项目
二、添加依赖
<dependencies>

    <!--web服务-->

    <dependency>

        <groupId>org.springframework.boot</groupId>

        <artifactId>spring-boot-starter-web</artifactId>

    </dependency>

    <!--测试-->

    <dependency>

        <groupId>org.springframework.boot</groupId>

        <artifactId>spring-boot-starter-test</artifactId>

        <scope>test</scope>

    </dependency>

    <!--mybatis驱动-->

    <dependency>

        <groupId>org.mybatis.spring.boot</groupId>

        <artifactId>mybatis-spring-boot-starter</artifactId>

        <version>1.3.1</version>

    </dependency>

    <!--mysql驱动-->

    <dependency>

        <groupId>mysql</groupId>

        <artifactId>mysql-connector-java</artifactId>

        <scope>runtime</scope>

    </dependency>

    <!--druid连接池-->

    <dependency>

        <groupId>com.alibaba</groupId>

        <artifactId>druid-spring-boot-starter</artifactId>

        <version>1.1.24</version>

    </dependency>

    <!--lombok插件-->

    <dependency>

        <groupId>org.projectlombok</groupId>

        <artifactId>lombok</artifactId>

        <optional>true</optional>

    </dependency>

  	<!--数据实体类转化-->

    <dependency>

        <groupId>org.mapstruct</groupId>

        <artifactId>mapstruct-jdk8</artifactId>

        <version>1.2.0.Final</version>

    </dependency>

    <dependency>

        <groupId>org.mapstruct</groupId>

        <artifactId>mapstruct-processor</artifactId>

        <version>1.2.0.Final</version>

    </dependency>

		<!--aop依赖,事务所需要-->

    <dependency>

        <groupId>org.springframework.boot</groupId>

        <artifactId>spring-boot-starter-aop</artifactId>

    </dependency>

</dependencies>
三、配置数据源
spring:

  datasource:

    master:

      driver-class-name: com.mysql.jdbc.Driver

      username: root

      password: root

      url: jdbc:mysql://localhost:3306/sys_user?serverTimezone=UTC&autoReconnect=true&useUnicode=true&characterEncoding=utf8&useSSL=false&allowMultiQueries=true

      type: com.alibaba.druid.pool.DruidDataSource

    second:

      driver-class-name: com.mysql.jdbc.Driver

      username: root

      password: root

      url: jdbc:mysql://localhost:3306/t_sys_user?serverTimezone=UTC&autoReconnect=true&useUnicode=true&characterEncoding=utf8&useSSL=false&allowMultiQueries=true

      type: com.alibaba.druid.pool.DruidDataSource

#mybatis:

  #config‐location: classpath:mybatis/mybatis‐config.xml  #指定全局配置文件的位置

  #mapper‐locations: classpath:mapper/*.xml

logging:

  path: ./data_migration

  level:

    root: INFO

    com.cxqy.data: DEBUG
四、编写数据源配置类
1、主数据源配置类 MasterDataSourceConfig
Configuration

@MapperScan(basePackages = MasterDataSourceConfig.PACKAGE, sqlSessionFactoryRef = "masterSqlSessionFactory")

public class MasterDataSourceConfig {

    // 精确到 master 目录,以便跟其他数据源隔离

    static final String PACKAGE = "com.cxqy.data.dao.master";

    static final String MAPPER_LOCATION = "classpath:mapper/master/*.xml";

    @Value("${spring.datasource.master.url}")

    private String url;

    @Value("${spring.datasource.master.username}")

    private String user;

    @Value("${spring.datasource.master.password}")

    private String password;

    @Value("${spring.datasource.master.driver-class-name}")

    private String driverClass;

    @Bean(name = "masterDataSource")

    @Primary

    public DataSource masterDataSource() {

        DruidDataSource dataSource = new DruidDataSource();

        dataSource.setDriverClassName(driverClass);

        dataSource.setUrl(url);

        dataSource.setUsername(user);

        dataSource.setPassword(password);

        return dataSource;

    }

    @Bean(name = "masterTransactionManager")

    @Primary

    public DataSourceTransactionManager masterTransactionManager() {

        return new DataSourceTransactionManager(masterDataSource());

    }

    @Bean(name = "masterSqlSessionFactory")

    @Primary

    public SqlSessionFactory masterSqlSessionFactory(@Qualifier("masterDataSource") DataSource masterDataSource)

            throws Exception {

        final SqlSessionFactoryBean sessionFactory = new SqlSessionFactoryBean();

        sessionFactory.setDataSource(masterDataSource);

        sessionFactory.setMapperLocations(new PathMatchingResourcePatternResolver()

                .getResources(MasterDataSourceConfig.MAPPER_LOCATION));

        return sessionFactory.getObject();

    }

}
2、副数据源配置类 SecondDataSourceConfig
@Configuration

@MapperScan(basePackages = SecondDataSourceConfig.PACKAGE, sqlSessionFactoryRef = "secondSqlSessionFactory")

public class SecondDataSourceConfig {

    // 精确到 cluster 目录,以便跟其他数据源隔离

    static final String PACKAGE = "com.cxqy.data.dao.second";

    static final String MAPPER_LOCATION = "classpath:mapper/second/*.xml";

    @Value("${spring.datasource.second.url}")

    private String url;

    @Value("${spring.datasource.second.username}")

    private String user;

    @Value("${spring.datasource.second.password}")

    private String password;

    @Value("${spring.datasource.second.driver-class-name}")

    private String driverClass;

    @Bean(name = "secondDataSource")

    public DataSource clusterDataSource() {

        DruidDataSource dataSource = new DruidDataSource();

        dataSource.setDriverClassName(driverClass);

        dataSource.setUrl(url);

        dataSource.setUsername(user);

        dataSource.setPassword(password);

        return dataSource;

    }

    @Bean(name = "secondTransactionManager")

    public DataSourceTransactionManager clusterTransactionManager() {

        return new DataSourceTransactionManager(clusterDataSource());

    }

    @Bean(name = "secondSqlSessionFactory")

    public SqlSessionFactory clusterSqlSessionFactory(@Qualifier("secondDataSource") DataSource clusterDataSource)

            throws Exception {

        final SqlSessionFactoryBean sessionFactory = new SqlSessionFactoryBean();

        sessionFactory.setDataSource(clusterDataSource);

        sessionFactory.setMapperLocations(new PathMatchingResourcePatternResolver()

                .getResources(SecondDataSourceConfig.MAPPER_LOCATION));

        return sessionFactory.getObject();

    }

}
此时可以连接两个数据源进行业务编写。
注意避坑
在双数据源的情况下,事务可能会失效,这时候需要指定那一个数据库的操作需要进行事务,指定数据库事务名在配置类中。
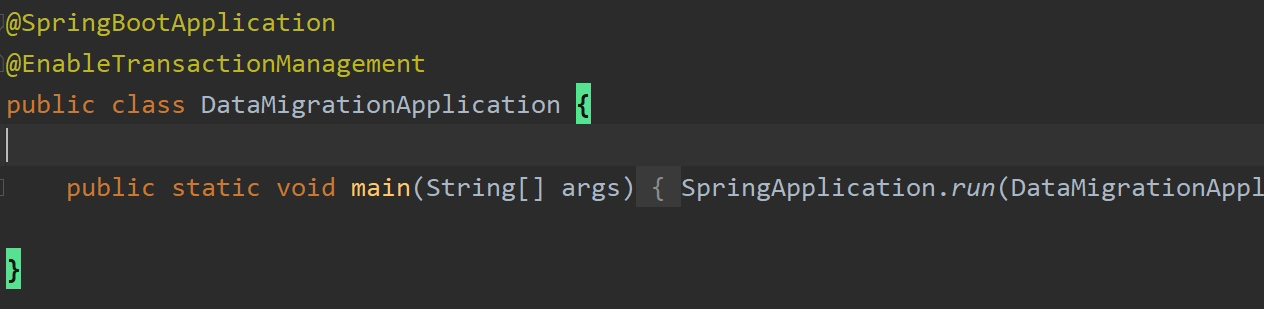
1、在启动类BootdoApplication上添加@EnableTransactionManagement 注解
2、在service层添加@Transactional注解
@Transactional(readOnly = true,rollbackFor = Exception.class,transactionManager = "secondTransactionManager",isolation = Isolation.READ_UNCOMMITTED,propagation = Propagation.REQUIRED)

3、查看置顶数据库事务名,在数据源配置类中查看

SpringBoot配置双数据源的更多相关文章
- springboot配置双数据源 MySQL和SqlServer
1. pom文件的驱动jar包加上去, compile 'com.microsoft.sqlserver:mssql-jdbc:6.2.2.jre8' 2. application.yml sprin ...
- spring项目配置双数据源读写分离
我们最早做新项目的时候一直想做数据库的读写分离与主从同步,由于一些原因一直没有去做这个事情,这次我们需要配置双数据源的起因是因为我们做了一个新项目用了另一个数据库,需要把这个数据库的数据显示到原来的后 ...
- springboot配置Druid数据源
springboot配置druid数据源 Author:SimpleWu springboot整合篇 前言 对于数据访问层,无论是Sql还是NoSql,SpringBoot默认采用整合SpringDa ...
- SpringBoot配置多数据源时遇到的问题
SpringBoot配置多数据源 参考代码:Spring Boot 1.5.8.RELEASE同时配置Oracle和MySQL 原作者用的是1.5.8版本的SpringBoot,在升级到2.0.*之后 ...
- springboot 配置多数据源
1.首先在创建应用对象时引入autoConfig package com; import org.springframework.boot.SpringApplication; import org. ...
- spring+mybatis 配置双数据源
配置好后,发现网上已经做好的了, 不过,跟我的稍有不同, 我这里再拿出来现个丑: properties 文件自不必说,关键是这里的xml: <?xml version="1.0&quo ...
- springboot配置双视图解析器
因项目要求,需要同时支持html和jsp页面,所以在springboot的基础上配置双视图解析器. 重点在于,抛开原来的resources目录结构层,这层只放application.propertie ...
- springboot 配置多数据源 good
1.首先在创建应用对象时引入autoConfig package com; import org.springframework.boot.SpringApplication; import org. ...
- spring boot 配置双数据源mysql、sqlServer
背景:原来一直都是使用mysql数据库,在application.properties 中配置数据库信息 spring.datasource.url=jdbc:mysql://xxxx/test sp ...
- springboot配置多数据源mybatis配置失效问题
mybatis配置 #开启驼峰映射 mybatis.configuration.map-underscore-to-camel-case=true #开启打印sql mybatis.configura ...
随机推荐
- JAVA-GUI创作学校管理系统
1.对于学校的管理系统,我们先做一个简单的一个需求分析,我们需要做学生信息管理,教师信息管理,课程的信息管理.我们要根据自己的需求进行数据库的编写. 简单的添加了几个 2.然后我们通过eclipse+ ...
- 数据每三位增加一个逗号(即千分符) js
使用 toLocaleString() 另一种使用场景
- jssip3.9.1的demo,webphone网页电话
用的目前最新的3.9.1版本,全版本在这里: https://jssip.net/download/releases/ https://github.com/versatica/JsSIP 代码: & ...
- git基础代码获取
1.新建文件夹 2.使用命令git init 初始化 3.见你与远程厂库的连接,git remote add origin 远程仓库地址 4.将远程仓库代码拉去到本地,git fetch origin ...
- (性能测试笔记)逻辑IO和物理IO的区别
IO性能对于一个系统的影响是至关重要的. 一个系统经过多项优化以后,瓶颈往往落在数据库:而数据库经过多种优化以后,瓶颈最终会落到IO.而IO性能的发展,明显落后于CPU的发展.Memchached也好 ...
- iOS开发-应用评分引导
导入头文件#import <StoreKit/StoreKit.h>+ (void)yoStoreReview{ if (@available(iOS 10.3, *)) { if ([S ...
- 从个人角度谈为什么要使用git多分支?
今天烦死了,公司的项目没有使用多分支管理,造成给某客户的打包的代码竟然需要截取gitlab节点重新打包. 在我上家公司开发Android项目的时候,使用了非常鲜明的多分支管理,当时作为项目运维,对gi ...
- 微信小程序的this在success函数中使用
在绝大多数情况下,函数的调用方式决定了this的值.this不能在执行期间被赋值,并且在每次函数被调用时this的值也可能会不同. 在微信小程序中 我就遇到的一些问题 requestName: fun ...
- Spring框架1--IoC
Spring框架之IoC Spring的后处理器 待补充~ BeanFactoryPostProcessor BeanPostProcessor Bean的生命周期 具体可见图解:点击这里 补充: A ...
- ES5 绑定 this 的方法
this的动态切换,固然为 JavaScript 创造了巨大的灵活性,但也使得编程变得困难和模糊.有时,需要把this固定下来,避免出现意想不到的情况.JavaScript 提供了call.apply ...