Spring框架学习02——Spring IOC 详解
1、Spring IOC的基本概念
IOC(Inverse of Control)反转控制的概念,就是将原本在程序中手动创建对象的控制权,交由Spring框架管理。当某个Java对象(调用者)需要调用另一个Java对象(被调用者)时,在传统编程模式下,调用者通常会采用“new 被调用者”的代码方式来创建对象。这种方式会增加调用者与被调用者之间的耦合性,不利于后期代码的升级与维护。
当Spring框架出现后,对象的实例不再由调用者来创建,而是由Spring容器来创建。Spring容器会负责控制程序之间的关系,而不是由调用者的程序代码直接控制。这样,控制权由调用者转移到Spring容器,控制权发生了反转,这就是Spring的控制反转。
2、Spring IOC容器
实现控制反转的是Spring IOC容器,Spring IOC容器的设计主要是基于Bean Factory和ApplicationContext两个接口。
2.1、BeanFactory接口
BeanFactory由org.springframework.beans.factory.BeanFactory接口定义,它提供了完整的IOC服务支持,是一个管理Bean的工厂,主要负责初始化各种Bean。
BeanFactory接口最常用的实现类是org.springframework.beans.factory.xml.XMLBeanFactory,该类会根据XML配置文件中的定义来装配Bean。
BeanFactory实例创建代码如下:
@Test

public void demo(){

    FileSystemResource file = new FileSystemResource("C:\\demo\\applicationContext.xml");

    BeanFactory beanFactory = new XmlBeanFactory(file);

    TestDao testDao = (TestDao) beanFactory.getBean("testDao");

    testDao.sayHello();

}
由于使用BeanFactory实例加载Spring配置文件在实际开发中并不多见,所以对于该接口仅了解即可。
2.2、ApplicationContext接口
ApplicationContext是BeanFactory的子接口,也称为应用上下文,由org.springframework.context.ApplicationContext接口定义。ApplicationContext接口除了包含BeanFactory的所有功能以外,还添加了对国际化、资源访问、事件传播等内容的支持。
创建ApplicationContext接口实例通常有以下3中方法:
- 通过ClassPathXmlApplicationContext创建
- 通过FileSystemXmlApplicationContext创建
- 通过Web服务器实例化ApplicationContext容器
下面对这3种方法的代码做演示:
(1)ClassPathXmlApplicationContext
使用ClassPathXmlApplicationContext将从类路径目录(src根目录)中寻找指定的XML配置文件,代码示例:
@Test

public void demo(){

    //初始化Spring容器ApplicationContext,加载配置文件

    ApplicationContext application = new ClassPathXmlApplicationContext("applicationContext.xml");

    //通过容器获取testDao实例

    TestDao testDao = (TestDao) application.getBean("testDao");

    testDao.sayHello();

}
(2)FileSystemXmlApplicationContext
使用FileSystemXmlApplicationContext将从指定文件的绝对路径中寻找XML配置文件,找到并装载完成ApplicationContext的实例化工作,代码示例:
@Test

public void demo(){

    ApplicationContext application = new FileSystemXmlApplicationContext("C:\\demo\\applicationContext.xml");

    TestDao testDao = (TestDao) application.getBean("testDao");

    testDao.sayHello();

}
(3)使用Web服务器实例化
通过Web服务器实例化ApplicationContext容器,一般使用org.springframework.web.context.ContextLoaderListener的实现方式,需要添加Spring-web依赖,pom.xml配置如下:
<dependency>

   <groupId>org.springframework</groupId>

   <artifactId>spring-web</artifactId>

   <version>5.0.2.RELEASE</version>

 </dependency>
在web.xml中配置代码如下:
<context-param>

  <!--加载src目录下的applicationContext.xml文件-->

  <param-name>contextConfigLocation</param-name>

  <param-value>classpath:applicationContext.xml</param-value>

</context-param>

<!--指定以ContextLoaderListener方式启动Spring容器-->

<listener>

  <listener-class>org.springframework.web.context.ContextLoaderListener</listener-class>

</listener>
通过web.xml配置,web容器会自动加载context-param中的配置文件初始化ApplicationContext实例,然后就可以在web应用中通过WebApplicationContextUtils.getWebApplicationContext方法获取ApplicationContext的引用,Servlet中的代码如下:
protected void doGet(HttpServletRequest req, HttpServletResponse resp) throws javax.servlet.ServletException, IOException {

    ApplicationContext application = WebApplicationContextUtils.getWebApplicationContext(request.getServletContext());

    TestDao testDao = (TestDao) application.getBean("testDao");

    testDao.sayHello();

}
3、依赖注入(基于XML方式)
DI (Dependency Injection)依赖注入的概念,在Spring中实现IOC容器的方法是依赖注入,依赖注入的作用是在使用Spring框架创建对象时动态地将其所依赖的对象(属性值)注入Bean组件中。
Spring框架的依赖注入通常有以下几种实现方式:
- 使用构造方法注入
- 使用属性的setter方法注入
- 使用使用P名称空间注入
- 使用SpEL注入
3.1、使用构造方法注入
创建User类
package test;

public class User {

    private String name;

    private int age;

    public User(String name,int age){

        this.name = name;

        this.age = age;

    }

    @Override

    public String toString() {

        return "User{" +

                "name='" + name + '\'' +

                ", age=" + age +

                '}';

    }

}
在applicationContext.xml文件中配置user实例
<?xml version="1.0" encoding="UTF-8"?>

<beans xmlns="http://www.springframework.org/schema/beans"

       xmlns:xsi="http://www.w3.org/2001/XMLSchema-instance"

       xsi:schemaLocation="http://www.springframework.org/schema/beans http://www.springframework.org/schema/beans/spring-beans.xsd">

    <!--使用构造方法注入-->

    <bean id="user" class="test.User">

        <constructor-arg name="name" value="张三"></constructor-arg>

        <constructor-arg name="age" value="20"></constructor-arg>

    </bean>

</beans>
在测试方法中代码
@Test

public void demo(){

    //初始化Spring容器ApplicationContext,加载配置文件

    ApplicationContext application = new ClassPathXmlApplicationContext("applicationContext.xml");

    //通过容器获取实例

    User user = (User) application.getBean("user");

    System.out.println(user);

}
运行结果

3.2、使用属性的setter方法注入
创建Course课程类
package entity;

public class Course {

    private String cname;

    public String getCname() {

        return cname;

    }

    public void setCname(String cname) {

        this.cname = cname;

    }

    @Override

    public String toString() {

        return "Course{" +

                "cname='" + cname + '\'' +

                '}';

    }

}
创建Student学生类
package entity;

public class Student {

    private String name;

    private int age;

    private Course course;

    @Override

    public String toString() {

        return "Student{" +

                "name='" + name + '\'' +

                ", age=" + age +

                ", course=" + course +

                '}';

    }

    //getter和setter方法

}
配置applicationContext.xml文件
<?xml version="1.0" encoding="UTF-8"?>

<beans xmlns="http://www.springframework.org/schema/beans"

       xmlns:xsi="http://www.w3.org/2001/XMLSchema-instance"

       xsi:schemaLocation="http://www.springframework.org/schema/beans http://www.springframework.org/schema/beans/spring-beans.xsd">

    <!--使用set方法注入-->

    <bean id="course" class="entity.Course">

        <property name="cname" value="大学语文"></property>

    </bean>

    <bean id="student" class="entity.Student">

        <property name="name" value="张三"></property>

        <property name="age" value="20"></property>

        <property name="course" ref="course"></property>

    </bean>

</beans>
测试方法
@Test

public void demo(){

    //初始化Spring容器ApplicationContext,加载配置文件

    ApplicationContext application = new ClassPathXmlApplicationContext("applicationContext.xml");

    //通过容器获取实例

    Student student = (Student) application.getBean("student");

    System.out.println(student);

}
运行结果
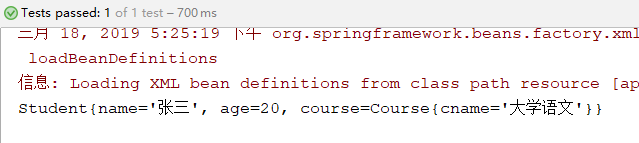
3.3、使用P名称空间注入
创建Course课程类
package entity;

public class Course {

    private String cname;

    public String getCname() {

        return cname;

    }

    public void setCname(String cname) {

        this.cname = cname;

    }

    @Override

    public String toString() {

        return "Course{" +

                "cname='" + cname + '\'' +

                '}';

    }

}
创建Student学生类
package entity;

public class Student {

    private String name;

    private int age;

    private Course course;

    @Override

    public String toString() {

        return "Student{" +

                "name='" + name + '\'' +

                ", age=" + age +

                ", course=" + course +

                '}';

    }

    //getter和setter方法

}
配置applicationContext.xml文件,要在约束里面加入p名称空间的约束
<?xml version="1.0" encoding="UTF-8"?>

<beans xmlns="http://www.springframework.org/schema/beans"

       xmlns:p="http://www.springframework.org/schema/p"

       xmlns:xsi="http://www.w3.org/2001/XMLSchema-instance"

       xsi:schemaLocation="http://www.springframework.org/schema/beans http://www.springframework.org/schema/beans/spring-beans.xsd">

    <!--使用p名称空间注入-->

    <bean id="course" class="entity.Course" p:cname="英语"></bean>

    <bean id="student" class="entity.Student" p:name="张三" p:age="20" p:course-ref="course"></bean>

</beans>
测试方法
@Test

public void demo(){

    //初始化Spring容器ApplicationContext,加载配置文件

    ApplicationContext application = new ClassPathXmlApplicationContext("applicationContext.xml");

    //通过容器获取实例

    Student student = (Student) application.getBean("student");

    System.out.println(student);

}
运行结果
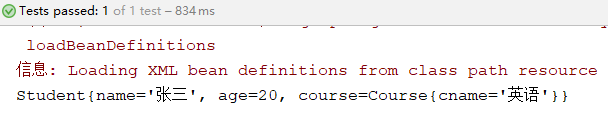
3.4、使用SpEL注入
我们可以使用SpEL(Spring expression language)Spring表达式语言,对依赖注入进行简化。
语法:#{表达式},例如 <bean id="" value="#{表达式}">
#{'hello'}:使用字符串
#{beanId}:使用另一个bean
#{beanId.content.toUpperCase()}:使用指定名属性,并使用方法
#{T(java.lang.Math).PI}:使用静态字段或方法
创建Course课程类
package entity;

public class Course {

    private String cname;

    public String getCname() {

        return cname;

    }

    public void setCname(String cname) {

        this.cname = cname;

    }

    @Override

    public String toString() {

        return "Course{" +

                "cname='" + cname + '\'' +

                '}';

    }

}
创建Student学生类
package entity;

public class Student {

    private String name;

    private int age;

    private Course course;

    @Override

    public String toString() {

        return "Student{" +

                "name='" + name + '\'' +

                ", age=" + age +

                ", course=" + course +

                '}';

    }

    //getter和setter方法

}
配置applicationContext.xml文件
<?xml version="1.0" encoding="UTF-8"?>

<beans xmlns="http://www.springframework.org/schema/beans"

       xmlns:xsi="http://www.w3.org/2001/XMLSchema-instance"

       xsi:schemaLocation="http://www.springframework.org/schema/beans http://www.springframework.org/schema/beans/spring-beans.xsd">

    <!--使用SpEL方式注入-->

    <bean id="course" class="entity.Course">

        <property name="cname" value="#{'高数'}"></property>

    </bean>

    <bean id="student" class="entity.Student">

        <property name="name" value="#{'小明'}"></property>

        <property name="age" value="#{10}"></property>

        <property name="course" value="#{course}"></property>

    </bean>

</beans>
测试方法
@Test

public void demo(){

    //初始化Spring容器ApplicationContext,加载配置文件

    ApplicationContext application = new ClassPathXmlApplicationContext("applicationContext.xml");

    //通过容器获取实例

    Student student = (Student) application.getBean("student");

    System.out.println(student);

}
运行结果

在使用SpEL时,配置中也可以调用方法,示例代码如下:
创建获取年龄的类
package entity;

public class GetAge {

    public int createAge(){

        return 20;

    }

}
配置applicationContext.xml
<!--使用SpEL方式注入-->

<bean id="course" class="entity.Course">

    <property name="cname" value="#{'高数'}"></property>

</bean>

<bean id="getAge" class="entity.GetAge"></bean>

<bean id="student" class="entity.Student">

    <property name="name" value="#{'小明'}"></property>

    <property name="age" value="#{getAge.createAge()}"></property>

    <property name="course" value="#{course}"></property>

</bean>
执行测试方法,运行结果如下:

Spring框架学习02——Spring IOC 详解的更多相关文章
- Spring框架学习03——Spring Bean 的详解
1.Bean 的配置 Spring可以看做一个大型工厂,用于生产和管理Spring容器中的Bean,Spring框架支持XML和Properties两种格式的配置文件,在实际开发中常用XML格式的配置 ...
- 码农小汪-spring框架学习之2-spring IoC and Beans 控制反转 依赖注入 ApplicationContext BeanFactory
spring Ioc依赖注入控制反转 事实上这个东西很好理解的,并非那么的复杂. 当某个Java对象,须要调用还有一个Java对象的时候(被依赖的对象)的方法时.曾经我们的做法是怎么做呢?主动的去创建 ...
- Spring 框架学习(1)--Spring、Spring MVC扫盲
纸上得来终觉浅,绝知此事要躬行 文章大纲 什么是spring 传统Java web应用架构 更强的Java Web应用架构--MVC框架 Spring--粘合式框架 spring的内涵 spring核 ...
- spring框架的定时任务cronExpression表达式详解
附:cronExpression表达式解释: 0 0 12 * * ?---------------在每天中午12:00触发 0 15 10 ? * *---------------每天上午10:15 ...
- Spring batch学习 持久化表结构详解(2)
#接上一篇 这一篇讲一下持久化需要表 batch_job_execution, batch_job_execution_context, batch_job_execution_params, bat ...
- Spring框架系列(6) - Spring IOC实现原理详解之IOC体系结构设计
在对IoC有了初步的认知后,我们开始对IOC的实现原理进行深入理解.本文将帮助你站在设计者的角度去看IOC最顶层的结构设计.@pdai Spring框架系列(6) - Spring IOC实现原理详解 ...
- Spring框架系列(7) - Spring IOC实现原理详解之IOC初始化流程
上文,我们看了IOC设计要点和设计结构:紧接着这篇,我们可以看下源码的实现了:Spring如何实现将资源配置(以xml配置为例)通过加载,解析,生成BeanDefination并注册到IoC容器中的. ...
- Spring框架系列(8) - Spring IOC实现原理详解之Bean实例化(生命周期,循环依赖等)
上文,我们看了IOC设计要点和设计结构:以及Spring如何实现将资源配置(以xml配置为例)通过加载,解析,生成BeanDefination并注册到IoC容器中的:容器中存放的是Bean的定义即Be ...
- Spring框架系列(9) - Spring AOP实现原理详解之AOP切面的实现
前文,我们分析了Spring IOC的初始化过程和Bean的生命周期等,而Spring AOP也是基于IOC的Bean加载来实现的.本文主要介绍Spring AOP原理解析的切面实现过程(将切面类的所 ...
随机推荐
- ubuntu 上下左右键变成ABCD
1.在ubuntu终端环境出现: 这表示你正在insert mode.... 按esc,回到command mode,上下左右就回复到正常的方向键功能了 2.可能写的程序是在insert mode(r ...
- centos7入门
yum install net-tools 设置IP和掩码 ifconfig eth0 1.1.1.20 netmask 255.255.255.0 设置网关 route add default gw ...
- kafka系列九、kafka事务原理、事务API和使用场景
一.事务场景 最简单的需求是producer发的多条消息组成一个事务这些消息需要对consumer同时可见或者同时不可见 . producer可能会给多个topic,多个partition发消息,这些 ...
- kafka系列七、kafka核心配置
一.producer核心配置 1.acks :发送应答(默认值:1) 生产者在考虑完成请求之前要求leader收到的确认的数量.这控制了发送的记录的持久性.允许以下设置: acks=0:设置为0,则生 ...
- appium运行报错java.net.SocketException: socket write error
这个错我调了 快两天一点头绪没有,脚本正常跑没问题,但是就是控制台输出信息报错,没法定位问题在哪.报错如图: 虽然这个报错不影响测试结果,但是本人有强迫症,一定要查出究竟: 我的尝试: 1.那天试验, ...
- 手机端的1px边框如何实现
(1).把边框设置为absolute,使用after,定义宽度为1px(mixin.styl) (2).通过@media,判断不同的dpi,来改变相应的Y轴宽度(base.styl),定义公共clas ...
- LeetCode(33):搜索旋转排序数组
Medium! 题目描述: 假设按照升序排序的数组在预先未知的某个点上进行了旋转. ( 例如,数组 [0,1,2,4,5,6,7] 可能变为 [4,5,6,7,0,1,2] ). 搜索一个给定的目标值 ...
- github 推送代码
一.所有更新一起推送 .git init //初始化本地仓库 . git add . //添加全部文件 .git commit -m 'add all the file' //提交修改 .git st ...
- Lavarel - 模块间复用代码
代码复用在项目中早晚会遇到,这不在用 Laravel 给博客增加 Feed 订阅功能 就到了需要将生成网页 description 的函数提取出来,在文章显示与 Feed 生成的两个 Controll ...
- php数组去重(一维数组)
<?php $arr = ['1', '1', 'PHP', 'PHP', 2, 3]; print_r($arr); echo "<br>"; print_r( ...