
『TensorFlow』SSD源码学习_其四:数据介绍及TFR文件生成
Fork版本项目地址:SSD
一、数据格式介绍
数据文件夹命名为VOC2012,内部有5个子文件夹,如下,

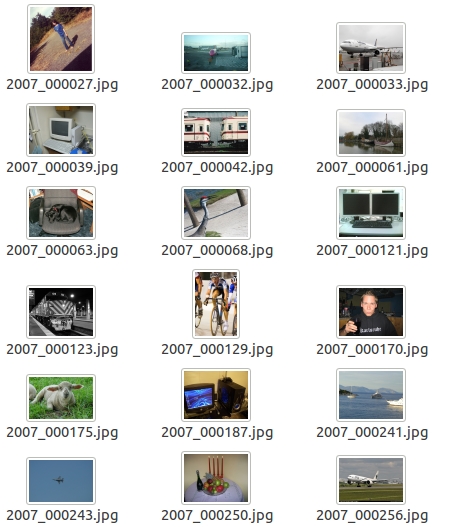
我们的检测任务中使用JPEGImages文件夹和Annotations文件夹。
JPEGImages文件夹中包含了PASCAL VOC所提供的所有的图片信息,包括了训练图片和测试图片。
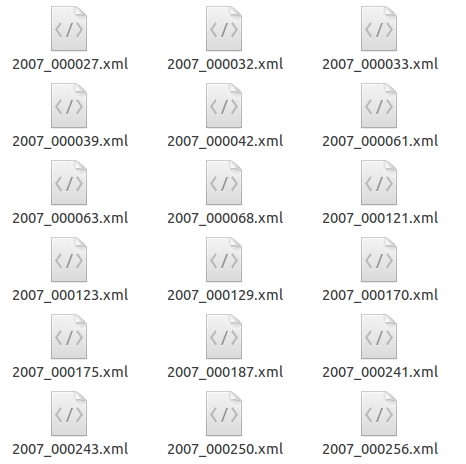
<annotation>

	<folder>VOC2012</folder>

	<filename>2007_000392.jpg</filename>             //文件名

	<source>                                         //图像来源(不重要)

		<database>The VOC2007 Database</database>

		<annotation>PASCAL VOC2007</annotation>

		<image>flickr</image>

	</source>

	<size>					                   //图像尺寸(长宽以及通道数)

		<width>500</width>

		<height>332</height>

		<depth>3</depth>

	</size>

	<segmented>1</segmented>		              //是否用于分割(在图像物体识别中01无所谓)

	<object>                                       //检测目标

		<name>horse</name>                        //物体类别

		<pose>Right</pose>                        //拍摄角度

		<truncated>0</truncated>                  //是否被截断(0表示完整)

		<difficult>0</difficult>                  //目标是否难以识别(0表示容易识别)

		<bndbox>                                  //bounding-box(包含左上角和右下角xy坐标)

			<xmin>100</xmin>

			<ymin>96</ymin>

			<xmax>355</xmax>

			<ymax>324</ymax>

		</bndbox>

	</object>

	<object>                                      //多检测目标

		<name>person</name>

		<pose>Unspecified</pose>

		<truncated>0</truncated>

		<difficult>0</difficult>

		<bndbox>

			<xmin>198</xmin>

			<ymin>58</ymin>

			<xmax>286</xmax>

			<ymax>197</ymax>

		</bndbox>

	</object>

</annotation>
二、TFR数据生成流程
为了加快数据的读取,框架将数据及标签预先读取并写入tfrecord中,这一部分独立于网络或者说训练结构之外,我们单独介绍这一部分。
启动命令如下,注意需要提前建好OUTPUT_DIR文件夹否则会报错(运行命令时去掉注释),
DATASET_DIR=./VOC2012/

OUTPUT_DIR=./tfrecords

python tf_convert_data.py \

    --dataset_name=pascalvoc \  # 数据集名称,实际作者就实现了这一个数据集的预处理方法

    --dataset_dir=${DATASET_DIR} \

    --output_name=voc_2012_train  # tfr文件名,为了兼容后面的程序,命名格式较为固定

    --output_dir=${OUTPUT_DIR}
脚本tf_convert_data.py
这个脚本主要用于和命令行交互,核心功能就一句调用命令:
# './VOC2012/' './tfrecords' 'voc2012_tfr'

pascalvoc_to_tfrecords.run(FLAGS.dataset_dir, FLAGS.output_dir, FLAGS.output_name)
脚本datasets.pascalvoc_to_tfrecords.py
run函数是tfr书写的核心函数,在这个函数中,我们确定具体的每一个tfr文件名,循环的读取图片和标签数据名称,按照指定的容量取书写到每一个tfr文件。
def run(dataset_dir, output_dir, name='voc_train', shuffling=False):

    """Runs the conversion operation.

    Args:

      dataset_dir: The dataset directory where the dataset is stored.

      output_dir: Output directory.

    """

    if not tf.gfile.Exists(dataset_dir):

        tf.gfile.MakeDirs(dataset_dir)

    # Dataset filenames, and shuffling.

    # './VOC2012/' 'Annotations/'

    path = os.path.join(dataset_dir, DIRECTORY_ANNOTATIONS)

    filenames = sorted(os.listdir(path))  # 无路径文件名

    if shuffling:

        random.seed(RANDOM_SEED)

        random.shuffle(filenames)

    # Process dataset files.

    i = 0

    fidx = 0

    while i < len(filenames):  # 循环文件名

        # Open new TFRecord file.

        tf_filename = _get_output_filename(output_dir, name, fidx)  # 获取输出文件名

        with tf.python_io.TFRecordWriter(tf_filename) as tfrecord_writer:

            j = 0

            while i < len(filenames) and j < SAMPLES_PER_FILES:  # 一个文件200张图

                sys.stdout.write('\r>> Converting image %d/%d' % (i+1, len(filenames)))

                sys.stdout.flush()  # 这两句的输出不会生成多行报告,而是在同一行不断更新数字

                filename = filenames[i]

                img_name = filename[:-4]  # 图片名称,去掉字符'.jpg'

                _add_to_tfrecord(dataset_dir, img_name, tfrecord_writer)  # 获取数据并书写

                i += 1

                j += 1

            fidx += 1

    # Finally, write the labels file:

    # labels_to_class_names = dict(zip(range(len(_CLASS_NAMES)), _CLASS_NAMES))

    # dataset_utils.write_label_file(labels_to_class_names, dataset_dir)

    print('\nFinished converting the Pascal VOC dataset!')
这其中,确定具体的每一个tfr文件名函数_get_output_filename很简单,而由文件名读取数据并书写进tfr函数也就分为读文件和写文件两步骤,都很直观,
def _add_to_tfrecord(dataset_dir, name, tfrecord_writer):

    """Loads data from image and annotations files and add them to a TFRecord.

    Args:

      dataset_dir: Dataset directory;

      name: Image name to add to the TFRecord;

      tfrecord_writer: The TFRecord writer to use for writing.

    """

    image_data, shape, bboxes, labels, labels_text, difficult, truncated = \

        _process_image(dataset_dir, name)  # 由文件名读取数据

    example = _convert_to_example(image_data, labels, labels_text,

                                  bboxes, shape, difficult, truncated)  # 书写tfr

    tfrecord_writer.write(example.SerializeToString())

def _get_output_filename(output_dir, name, idx):

    return '%s/%s_%03d.tfrecord' % (output_dir, name, idx)
下面是读取图片、标签数据以及书写example的两个函数,实际工作中就是这样每次读取一个图片文件及其对应的标注文件并处理,
def _process_image(directory, name):

    """

    将图片数据存储为bytes,

    :param directory: voc文件夹

    :param name: 图片名

    :return: 需要写入tfr的数据

    """

    # Read the image file.

    # DIRECTORY_IMAGES = 'JPEGImages/'

    filename = directory + DIRECTORY_IMAGES + name + '.jpg'

    image_data = tf.gfile.FastGFile(filename, 'rb').read()  # 源码中'rb'错写成'r'

    # Read the XML annotation file.

    filename = os.path.join(directory, DIRECTORY_ANNOTATIONS, name + '.xml')

    tree = ET.parse(filename)

    root = tree.getroot()

    # Image shape.

    size = root.find('size')

    shape = [int(size.find('height').text),

             int(size.find('width').text),

             int(size.find('depth').text)]

    # Find annotations.

    bboxes = []

    labels = []

    labels_text = []

    difficult = []

    truncated = []

    for obj in root.findall('object'):

        label = obj.find('name').text

        labels.append(int(VOC_LABELS[label][0]))

        labels_text.append(label.encode('ascii'))

        if obj.find('difficult'):

            difficult.append(int(obj.find('difficult').text))

        else:

            difficult.append(0)

        if obj.find('truncated'):

            truncated.append(int(obj.find('truncated').text))

        else:

            truncated.append(0)

        bbox = obj.find('bndbox')

        bboxes.append((float(bbox.find('ymin').text) / shape[0],

                       float(bbox.find('xmin').text) / shape[1],

                       float(bbox.find('ymax').text) / shape[0],

                       float(bbox.find('xmax').text) / shape[1]

                       ))

    return image_data, shape, bboxes, labels, labels_text, difficult, truncated

def _convert_to_example(image_data, labels, labels_text, bboxes, shape,

                        difficult, truncated):

    """Build an Example proto for an image example.

    Args:

      image_data: string, JPEG encoding of RGB image;

      labels: list of integers, identifier for the ground truth;

      labels_text: list of strings, human-readable labels;

      bboxes: list of bounding boxes; each box is a list of integers;

          specifying [xmin, ymin, xmax, ymax]. All boxes are assumed to belong

          to the same label as the image label.

      shape: 3 integers, image shapes in pixels.

    Returns:

      Example proto

    """

    xmin = []

    ymin = []

    xmax = []

    ymax = []

    for b in bboxes:

        assert len(b) == 4

        # pylint: disable=expression-not-assigned

        [l.append(point) for l, point in zip([ymin, xmin, ymax, xmax], b)]

        # pylint: enable=expression-not-assigned

    image_format = b'JPEG'

    example = tf.train.Example(features=tf.train.Features(feature={

            'image/height': int64_feature(shape[0]),

            'image/width': int64_feature(shape[1]),

            'image/channels': int64_feature(shape[2]),

            'image/shape': int64_feature(shape),

            'image/object/bbox/xmin': float_feature(xmin),

            'image/object/bbox/xmax': float_feature(xmax),

            'image/object/bbox/ymin': float_feature(ymin),

            'image/object/bbox/ymax': float_feature(ymax),

            'image/object/bbox/label': int64_feature(labels),

            'image/object/bbox/label_text': bytes_feature(labels_text),

            'image/object/bbox/difficult': int64_feature(difficult),

            'image/object/bbox/truncated': int64_feature(truncated),

            'image/format': bytes_feature(image_format),  # 图像编码格式

            'image/encoded': bytes_feature(image_data)}))  # 二进制图像数据

    return example
至此,数据预处理tfr文件生成步骤就完成了。
附录、Example feature生成函数
具体的example feature生成函数比较简单,为了完整性,下面给出来,位于程序脚本datasets.dataset_utils.py中:
def int64_feature(value):

    """Wrapper for inserting int64 features into Example proto.

    """

    if not isinstance(value, list):

        value = [value]

    return tf.train.Feature(int64_list=tf.train.Int64List(value=value))

def float_feature(value):

    """Wrapper for inserting float features into Example proto.

    """

    if not isinstance(value, list):

        value = [value]

    return tf.train.Feature(float_list=tf.train.FloatList(value=value))

def bytes_feature(value):

    """Wrapper for inserting bytes features into Example proto.

    """

    if not isinstance(value, list):

        value = [value]

    return tf.train.Feature(bytes_list=tf.train.BytesList(value=value))
标签数字序号对应表
VOC_LABELS = {

    'none': (0, 'Background'),

    'aeroplane': (1, 'Vehicle'),

    'bicycle': (2, 'Vehicle'),

    'bird': (3, 'Animal'),

    'boat': (4, 'Vehicle'),

    'bottle': (5, 'Indoor'),

    'bus': (6, 'Vehicle'),

    'car': (7, 'Vehicle'),

    'cat': (8, 'Animal'),

    'chair': (9, 'Indoor'),

    'cow': (10, 'Animal'),

    'diningtable': (11, 'Indoor'),

    'dog': (12, 'Animal'),

    'horse': (13, 'Animal'),

    'motorbike': (14, 'Vehicle'),

    'person': (15, 'Person'),

    'pottedplant': (16, 'Indoor'),

    'sheep': (17, 'Animal'),

    'sofa': (18, 'Indoor'),

    'train': (19, 'Vehicle'),

    'tvmonitor': (20, 'Indoor'),

}
『TensorFlow』SSD源码学习_其四:数据介绍及TFR文件生成的更多相关文章
- 『TensorFlow』SSD源码学习_其一:论文及开源项目文档介绍
一.论文介绍 读论文系列:Object Detection ECCV2016 SSD 一句话概括:SSD就是关于类别的多尺度RPN网络 基本思路: 基础网络后接多层feature map 多层feat ...
- 『TensorFlow』SSD源码学习_其五:TFR数据读取&数据预处理
Fork版本项目地址:SSD 一.TFR数据读取 创建slim.dataset.Dataset对象 在train_ssd_network.py获取数据操作如下,首先需要slim.dataset.Dat ...
- 『TensorFlow』SSD源码学习_其二:基于VGG的SSD网络前向架构
Fork版本项目地址:SSD 参考自集智专栏 一.SSD基础 在分类器基础之上想要识别物体,实质就是 用分类器扫描整张图像,定位特征位置 .这里的关键就是用什么算法扫描,比如可以将图片分成若干网格,用 ...
- 『TensorFlow』SSD源码学习_其七:损失函数
Fork版本项目地址:SSD 一.损失函数介绍 SSD损失函数分为两个部分:对应搜索框的位置loss(loc)和类别置信度loss(conf).(搜索框指网络生成的网格) 详细的说明如下: i指代搜索 ...
- 『TensorFlow』SSD源码学习_其八:网络训练
Fork版本项目地址:SSD 作者使用了分布式训练的写法,这使得训练部分代码异常臃肿,我给出了部分注释.我对于多机分布式并不很熟,而且不是重点,所以不过多介绍,简单的给出一点训练中作者的优化手段,包含 ...
- 『TensorFlow』SSD源码学习_其六:标签整理
Fork版本项目地址:SSD 一.输入标签生成 在数据预处理之后,图片.类别.真实框格式较为原始,不能够直接作为损失函数的输入标签(ssd向前网络只需要图像就行,这里的处理主要需要满足loss的计算) ...
- 『TensorFlow』SSD源码学习_其三:锚框生成
Fork版本项目地址:SSD 上一节中我们定义了vgg_300的网络结构,实际使用中还需要匹配SSD另一关键组件:被选取特征层的搜索网格.在项目中,vgg_300网络和网格生成都被统一进一个class ...
- nginx源码学习_源码结构
nginx的优秀除了体现在程序结构以及代码风格上,nginx的源码组织也同样简洁明了,目录结构层次结构清晰,值得我们去学习.nginx的源码目录与nginx的模块化以及功能的划分是紧密结合,这也使得我 ...
- 『TensorFlow』读书笔记_TFRecord学习
一.程序介绍 1.包导入 # Author : Hellcat # Time : 17-12-29 import os import numpy as np np.set_printoptions(t ...
随机推荐
- windows下使用LibreOffice的体验
我在家里一般是使用Ubuntu,学校这个网络需要e信拨号,还是只能用Windows主用,以前我在Ubuntu一直使用的是LibreOffice,这次看见学校电脑很乱了就重装了系统,MSOffice真的 ...
- Oracle联合多个子查询(inner join)
select aaa.*,bbb.xh from (select xn,xq,kcdm,kcmc,xf,xkkh,kcxz from jxrwbview where xn='2017-2018' gr ...
- P4091 [HEOI2016/TJOI2016]求和
留待警戒 FFT的时候长度要写的和函数里一样啊XD 瞎扯 这是个第二类斯特林数的理性愉悦颓柿子题目 颓柿子真的是让我hi到不行啦(才没有) 前置芝士 一个公式 \[ \sum_{i=0}^n t^i ...
- 题解——P1108低价购买(DP)
第一问是最长下降子序列,n很小,n^2可过,注意最长下降子序列的枚举顺序即可 ;i<=n;i++)//不要写错 ;j<i;j++)//不要打成<= ) b[i]=b[j]+; 第二问 ...
- 论文笔记:Person Re-identification with Deep Similarity-Guided Graph Neural Network
Person Re-identification with Deep Similarity-Guided Graph Neural Network 2018-07-27 17:41:45 Paper: ...
- Unsupervised Image-to-Image Translation Networks --- Reading Writing
Unsupervised Image-to-Image Translation Networks --- Reading Writing 2017.03.03 Motivations: most ex ...
- 3D场景鼠标点选择物体
对于以下几种选择: (1)点云: (2)线框: (3)网格: 针对以上准备三个函数: (1)获取点和线段最短距离函数: (2)获取线段和线段最短距离函数: (3)获取三角面片和线段最短距离函数: 算法 ...
- Vue学习一:{{}}html模板使用方法
本文为博主原创,未经允许不得转载: 之前自学了vue,在项目中应用了vue,由于是第一次使用,感觉非常强大,使用也非常方便,趁有时间,总结一下vue学习过程中 各个指令的使用方法,只要掌握了vue的指 ...
- 如何让浏览器不解析html?
原问题: 在页面中,除了xmp,textarea以及js转义外,还有什么办法可以让html标签在不被浏览器解析而正常显示呢? 答: 要符合“内部的html标签不被解析”,我们根据HTML5的标准,分元 ...
- 【NOIP 2015】Day2 T3 运输计划
Problem Background 公元 \(2044\) 年,人类进入了宇宙纪元. Description 公元\(2044\) 年,人类进入了宇宙纪元. $L $国有 \(n\) 个星球,还有 ...