安卓Service完全解析(中)
摘要: 版权声明:本文出自汪磊的博客,转载请务必注明出处。
在上一篇中我们学习了Android Service相关的许多基础但是重要的内容,基本涵盖大部分平日里的开发工作。今天我们继续学习一下稍微高级一点的用法,即:远程Service用法,使用远程Service可以实现安卓跨进程通信的功能。下面我们就开始学习一下吧。
什么是远程Service?
所谓的远程Service就是与调用者不在同一进程的Service即可叫做远程Service。那是不是也有近程Service?其实不叫近程Service,专业叫法叫做本地Service,就是调用者与Service在同一进程。
调用远程Service的桥梁-AIDL接口定义语言
由于远程服务与调用者不在同一进程,我们不能再像调用本地服务一样的方式去调用远程服务,
那么如何才能让Activity与一个远程Service建立关联呢?这就要使用AIDL来进行跨进程通信了(IPC)。
AIDL(Android Interface Definition Language)是Android接口定义语言的意思,它可以用于让某个Service与多个应用程序组件之间进行跨进程通信,从而可以实现多个应用程序共享同一个Service的功能。(本篇着重讲解与远程服务通信的过程,不涉及AIDL接口定义语言的细节讲解)
废话少说,下面我们通过一个简单的Demo来讲解一下与远程Service通信的过程。
首先我们新建一个远程服务Demo的工程,新建RemoteService.aidl文件,代码如下:
 package com.wl.remoteservice;

 interface RemoteService{

     int call(int a,int b);

 }
我们点击完保存之后,在gen目录下会生成一个与之对应的java文件,如下:
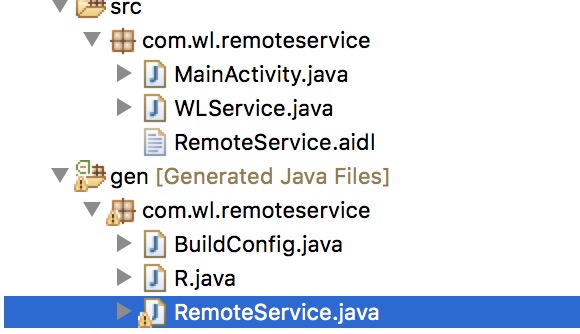
关于文件中内容我们暂时不细究,会在下篇的时候在研究一下。
然后编写Service类,新建WLService继承Service,如下:
 public class WLService extends Service {

     private static final String TAG = "HEART";

     @Override

     public IBinder onBind(Intent intent) {

         Log.i(TAG, "onBind");

         return new MyBinder();

     }

     private int methodInRemoteService(int a,int b){

         return a+b;

     }

     private class MyBinder extends RemoteService.Stub{

         @Override

         public int call(int a,int b) {

             return methodInRemoteService(a,b);

         }

     }

     @Override

     public void onCreate() {

         Log.i(TAG, "onCreate");

         super.onCreate();

     }

     @Override

     public boolean onUnbind(Intent intent) {

         Log.i(TAG, "onUnbind");

         return super.onUnbind(intent);

     }

     @Override

     public void onDestroy() {

         Log.i(TAG, "onDestroy");

         super.onDestroy();

     }

 }
这里我们定义了一个内部类MyBinder继承自RemoteService.Stub,那这个stub是什么玩意呢?点进去看一下,如下
public static abstract class Stub extends android.os.Binder implements com.wl.remoteservice.RemoteService
看定义我们就明白了,原来MyBinder就是Binder子类并且实现了RemoteService接口,所以在onBind的时候返回其实例也就容易理解了。
接下来,在清单文件注册Service。这里我们需要在另一个应用程序启动WLService,但是在另一个应用程序中去绑定Service的时候并没有WLService这个类,这时就必须使用到隐式Intent了。现在修改AndroidManifest.xml中的代码,给WLService加上一个action,如下所示:
         <service android:name="com.wl.remoteservice.WLService">

             <intent-filter >

                 <action android:name="com.wanglei.remoteservice"/>

             </intent-filter>

         </service>
然后我们新建一个项目用以调用上面项目中的远程服务,新项目就叫做:调用远程服务。
首先需要将RemoteService.aidl拷贝过来,记住需要连同原包路径一同拷贝过来,如下:

接下来,修改布局文件:
 <LinearLayout xmlns:android="http://schemas.android.com/apk/res/android"

     xmlns:tools="http://schemas.android.com/tools"

     android:layout_width="match_parent"

     android:layout_height="match_parent"

     android:orientation="vertical"

     tools:context=".MainActivity" >

     <Button

         android:layout_width="fill_parent"

         android:layout_height="wrap_content"

         android:onClick="bind"

         android:text="绑定服务" />

     <Button

         android:layout_width="fill_parent"

         android:layout_height="wrap_content"

         android:onClick="unbind"

         android:text="解除绑定服务" />

     <Button

         android:layout_width="fill_parent"

         android:layout_height="wrap_content"

         android:onClick="click"

         android:text="调用远程服务方法" />

 </LinearLayout>
然后编写MainActivity中代码,如下:
 public class MainActivity extends Activity {

     private static final String TAG = "HEART";

     private RemoteService mRemoteService;

     private MyConn conn;

     @Override

     protected void onCreate(Bundle savedInstanceState) {

         super.onCreate(savedInstanceState);

         setContentView(R.layout.activity_main);

     }

     public void bind(View view){

         Intent intent = new Intent();

         intent.setAction("com.wanglei.remoteservice");

         conn = new MyConn();

         bindService(intent, conn, BIND_AUTO_CREATE);//异步的操作

     }

     public void unbind(View view){

         unbindService(conn);

     }

     public void click(View view){

         if(null != mRemoteService){

             try {

                 int result = mRemoteService.call(10,20);

                 Log.i(TAG, "result = "+result);

             } catch (RemoteException e) {

                 e.printStackTrace();

             }

         }

     }

     private class MyConn implements ServiceConnection{

         @Override

         public void onServiceConnected(ComponentName name, IBinder service) {

             mRemoteService = RemoteService.Stub.asInterface(service);

         }

         @Override

         public void onServiceDisconnected(ComponentName name) {

         }

     }

 }
会发现和上篇讲的bind服务差别不大,这里我们需要在另一程序里面绑定服务所以需要用隐式意图开启。
这里我们需要注意一下,在安卓5.0出来以后,服务意图必须用显式调用,调用bind服务的时候会报如下警告

我们找一下源码,看看哪里报的这个警告,终于在 sdk/sources/android-21/android/app/ContextImpl.Java目录下找到报警告的代码:
     private void validateServiceIntent(Intent service) {

         if (service.getComponent() == null && service.getPackage() == null) {

             if (getApplicationInfo().targetSdkVersion >= Build.VERSION_CODES.LOLLIPOP) {

                 IllegalArgumentException ex = new IllegalArgumentException(

                         "Service Intent must be explicit: " + service);

                 throw ex;

             } else {

                 Log.w(TAG, "Implicit intents with startService are not safe: " + service

                         + " " + Debug.getCallers(2, 3));

             }

         }

     }
好了找到报错的原因了,那怎么解决呢?观察源码发现最外层if判断的时候有个service.getPackage() == null,我们只需要使其不为null不就可以了,这也是谷歌推荐的解决方法
我们将绑定服务的方法改为如下:
 public void bind(View view){

         Intent intent = new Intent();

         intent.setAction("com.wanglei.remoteservice");

         intent.setPackage("com.wl.remoteservice");//设置为Service所在包名

         conn = new MyConn();

         bindService(intent, conn, BIND_AUTO_CREATE);//异步的操作

 }
这样修改就好了,当然还有另外一种解决方法,将隐式意图变为显示意图,方法如下:
 public static Intent getExplicitIntent(Context context, Intent implicitIntent) {

         // Retrieve all services that can match the given intent

         PackageManager pm = context.getPackageManager();

         List<ResolveInfo> resolveInfo = pm.queryIntentServices(implicitIntent, 0);

         // Make sure only one match was found

         if (resolveInfo == null || resolveInfo.size() != 1) {

             return null;

         }

         // Get component info and create ComponentName

         ResolveInfo serviceInfo = resolveInfo.get(0);

         String packageName = serviceInfo.serviceInfo.packageName;

         String className = serviceInfo.serviceInfo.name;

         ComponentName component = new ComponentName(packageName, className);

         // Create a new intent. Use the old one for extras and such reuse

         Intent explicitIntent = new Intent(implicitIntent);

         // Set the component to be explicit

         explicitIntent.setComponent(component);

         return explicitIntent;

     }
好了,通过以上两种方式就可以解决了,到此我们两个项目都已经编写完毕,先运行远程服务demo项目,在运行调用远程服务项目,点击绑定远程服务按钮,然后点击调用远程服务按钮,打印如下:

到此为止,我们成功调用了远程服务中的方法,跨进程通信成功实现,不过有些刚接触的同学可能还有些混乱,怎么觉得那么混乱,比平时用的组建多那么多步骤,那我们总结一下调用远程服务的步骤:
1.编写aidl文件
2.创建远程服务类,在服务的内部创建一个内部类提供一个方法,可以间接调用服务的方法
3.实现服务的onbind方法,返回服务内部类实例
4.拷贝aidl文件到另一工程联同包名
5.在activity 绑定服务。bindService();
6.在服务成功绑定的时候 会执行一个方法 onServiceConnected 传递过来一个 IBinder对象进行类型转换
7.调用远程服务里面的方法。
好了,到这里关于服务的所有最重要的部分都已经讲解完了,通过(上)(中)两篇相信你对服务有了一个全面的认识。
安卓Service完全解析(中)的更多相关文章
- 安卓Service完全解析(上)
版权声明:本文出自汪磊的博客,转载请务必注明出处. 关于安卓Service相信很多安卓开发者都听说过,作为安卓四大组件之一,即使不经常用也应该听说过,但并不是每一个人都掌握的特别详细,全面.那么今天我 ...
- Android Service完全解析,关于服务你所需知道的一切(下)
转载请注册出处:http://blog.csdn.net/guolin_blog/article/details/9797169 在上一篇文章中,我们学习了Android Service相关的许多重要 ...
- Android Service完全解析,关于服务你所需知道的一切(上)
转载请注明出处:http://blog.csdn.net/guolin_blog/article/details/11952435 相信大多数朋友对Service这个名词都不会陌生,没错,一个老练的A ...
- 【转】Android Service完全解析,关于服务你所需知道的一切(下) ---- 不错
原文网址:http://blog.csdn.net/guolin_blog/article/details/9797169 转载请注册出处:http://blog.csdn.net/guolin_bl ...
- WebGIS实现在线要素编辑之ArcGIS Server 发布Feature Service 过程解析
WebGIS实现在线要素编辑之ArcGIS Server 发布Feature Service 过程解析 FeatureService也称要素服务,其最大的好处就是支持在线要素编辑,并将编辑同步更新到后 ...
- [转]Android Service完全解析,关于服务你所需知道的一切
目录(?)[+] Android Service完全解析,关于服务你所需知道的一切(上) 分类: Android疑难解析2013-10-31 08:10 6451人阅读 评论(39) 收藏 举报 ...
- (转) Android Service完全解析,关于服务你所需知道的一切(上)
相信大多数朋友对Service这个名词都不会陌生,没错,一个老练的Android程序员如果连Service都没听说过的话,那确实也太逊了.Service作为Android四大组件之一,在每一个应用程序 ...
- Android Service完全解析,关于服务你所需知道的一切(下) (转载)
转自:http://blog.csdn.net/guolin_blog/article/details/9797169 转载请注册出处:http://blog.csdn.net/guolin_blog ...
- Android Service完全解析,关于服务你所需知道的一切(上) (转载)
转自:http://blog.csdn.net/guolin_blog/article/details/11952435 转载请注明出处:http://blog.csdn.net/guolin_blo ...
随机推荐
- 解决发http get请求的时候不成功,出现android.os.NetworkOnMainThreadException的异常
问题描述:在接游戏sdk的时候,由于游戏要求购买的时候是在主线程里面进行的,但是发http请求是不能在主线程里面发,否则就会出现android.os.NetworkOnMainThreadExcept ...
- JAVA基础——面向对象三大特性:封装、继承、多态
JAVA面向对象三大特性详解 一.封装 1.概念: 将类的某些信息隐藏在类内部,不允许外部程序直接访问,而是通过该类提供的方法来实现对隐藏信息的操作和访问. 2.好处: 只能通过规定的方法访问数据. ...
- mysql数据库左联的使用(一张数据库表关联到另外一张数据库表)
左联的数据库表,然后显示的在页面显示的jsp里面改一下代理种类ID的name,这样在页面上显示的不是id了,而是变成你修改了以后相对于的name了
- ASP.NET Core 开源论坛项目 NETCoreBBS
ASP.NET Core 轻量化开源论坛项目,ASP.NET Core Light forum NETCoreBBS 采用 ASP.NET Core + EF Core Sqlite + Bootst ...
- MongoDB安全及身份认证
前面的话 本文将详细介绍MongoDB安全相关的内容 概述 MongoDB安全主要包括以下4个方面 1.物理隔离 系统不论设计的多么完善,在实施过程中,总会存在一些漏洞.如果能够把不安全的使用方与Mo ...
- Android之ListView优化
关于ListView几个方面的优化: ListView的大小设定固定值; 复用convertView, 使用ViewHolder提高在容器中查找组件的效率; 使用分页加载; 快速滚动时, item不显 ...
- 对称加密详解,以及JAVA简单实现
(原) 常用的加密有3种 1.正向加密,如MD5,加密后密文固定,目前还没办法破解,但是可以能过数据库撞库有一定概率找到,不过现在一般用这种方式加密都会加上盐值. 2.对称加密,通过一个固定的对称密钥 ...
- 流畅python学习笔记:第十一章:抽象基类
__getitem__实现可迭代对象.要将一个对象变成一个可迭代的对象,通常都要实现__iter__.但是如果没有__iter__的话,实现了__getitem__也可以实现迭代.我们还是用第一章扑克 ...
- xdu_1009: Josephus环的复仇(线段树)
题目链接 题意不难理解,解法具体看代码及注释吧.. #include<bits/stdc++.h> using namespace std; typedef long long LL; ; ...
- 一个简单、易用的Python命令行(terminal)进度条库
eprogress 是一个简单.易用的基于Python3的命令行(terminal)进度条库,可以自由选择使用单行显示.多行显示进度条或转圈加载方式,也可以混合使用. 示例 单行进度条 多行进度条 圆 ...