CS:APP3e 深入理解计算机系统_3e ShellLab(tsh)实验
**详细的题目要求和资源可以到 http://csapp.cs.cmu.edu/3e/labs.html 或者 http://www.cs.cmu.edu/~./213/schedule.html 获取。**
前期准备
- Signal (IPC)
- signal(2) - Linux manual page - man7.org
- fork(2) - Linux manual page - man7.org
- wait(2) - Linux manual page - man7.org
- sigprocmask(2) - Linux manual page - man7.org
- access(2) - Linux manual page - man7.org
- sigemptyset(3): POSIX signal set operations
- How to Use C's Volatile Keyword - Barr Group
- Atomic Types
注意事项
- tsh的提示符为“tsh> ”
- 用户的输入分为第一个的
name和后面的参数,之间以一个或多个空格隔开。如果name是一个tsh内置的命令,那么tsh应该马上处理这个命令然后等待下一个输入。否则,tsh应该假设name是一个路径上的可执行文件,并在一个子进程中运行这个文件(这也称为一个工作、job) - tsh不需要支持管道和重定向
- 如果用户输入
ctrl-c(ctrl-z),那么SIGINT(SIGTSTP)信号应该被送给每一个在前台进程组中的进程,如果没有进程,那么这两个信号应该不起作用。 - 如果一个命令以“&”结尾,那么tsh应该将它们放在后台运行,否则就放在前台运行(并等待它的结束)
- 每一个工作(job)都有一个正整数PID或者job ID(JID)。JID通过"%"前缀标识符表示,例如,“%5”表示JID为5的工作,而“5”代笔PID为5的进程。
- tsh应该有如下内置命令:
quit: 退出当前shell

jobs: 列出所有后台运行的工作

bg <job>: 这个命令将会向<job>代表的工作发送SIGCONT信号并放在后台运行,<job>可以是一个PID也可以是一个JID。

fg <job>: 这个命令会向<job>代表的工作发送SIGCONT信号并放在前台运行,<job>可以是一个PID也可以是一个JID。
- tsh应该回收(reap)所有僵尸孩子,如果一个工作是因为收到了一个它没有捕获的(没有按照信号处理函数)而终止的,那么tsh应该输出这个工作的PID和这个信号的相关描述。
提示
- 利用测试文件逐步构建tsh,例如先从trace01.txt开始。
setpgid中的WUNTRACED and WNOHANG选项有用(参看前期准备)- 当解析命令并产生子进程的时候(
fork)的时候,必须先调用sigprocmaskblockSIGCHLD信号,调用addjob将刚刚创建的工作加入到工作列表里,然后unblock该信号(课件里有讲这个竞争产生的问题)。另外,由于子进程会继承block的特性,所以子进程要记得unblock。 - 一些具有终端环境的进程会尝试从父进程读写数据,例如/bin/sh,还有一些程序例如
morelessviemacs会对终端做一些“奇怪的设置”。本次实验用/bin/ls/bin/echo这样的文字模式的程序测试即可。 - 当我们在真正的shell(例如bash)中执行tsh时,tsh本身也是被放在前台进程组中的,它的子进程也会在前台进程组中,例如下图所示:
               +----------+

               |   Bash   |

               +----+-----+

                    |

+-----------------------------------------+

|                   v                     |

|              +----+-----+   foreground  |

|              |   tsh    |   group       |

|              +----+-----+               |

|                   |                     |

|         +--------------------+          |

|         |         |          |          |

|         v         v          v          |

|       /bin/ls    /bin/sleep  xxxxx      |

|                                         |

|                                         |

+-----------------------------------------+
所以当我们在终端输入ctrl-c (ctrl-z)的时候,SIGINT (SIGTSTP)信号应该被送给每一个在前台进程组中的所有进程,包括我们在tsh中认为是后台进程的程序。一个决绝的方法就是在fork之后execve之前,子进程应该调用setpgid(0, 0)使得它进入一个新的进程组(其pgid等于该进程的pid)。tsh接收到SIGINT SIGTSTP信号后应该将它们发送给tsh眼中正确的“前台进程组”(包括其中的所有进程)。
思路及其实现
我首先将书上(8.5.5节)说的6个关于信号处理函数安全性的要求列出(详细的解释请参考书),在编程的时候要注意:
- 尽量保持信号处理函数的简单性,例如只改变一个flag
- 在信号处理函数内部只调用
async-signal-safe的函数(man 7 signal里面有完全的列出) - 在进入和退出信号处理函数的时候保存和还原
errno变量(参考:Thread-local storage ) - 当试图访问全局结构变量的时候暂时block所有的信号,然后还原
- 全局变量的声明为
volatile - 将flag(标志)声明为
sig_atomic_t
下面我就实验要求完成的7个函数说几个注意的地方,代码中的注释也解释了一些:
/* Here are the functions that you will implement */

void eval(char *cmdline);

int builtin_cmd(char **argv, char *cmdline);

void do_bgfg(char **argv, char *cmdline);

void waitfg(pid_t pid);

void sigchld_handler(int sig);

void sigtstp_handler(int sig);

void sigint_handler(int sig);
1.void eval(char *cmdline)
在调用parseline解析输出后,我们首先判断这是一个内置命令(shell实现)还是一个程序(本地文件)。如果是内置命令,进入builtin_cmd(argv, cmdline) ,否则创建子进程并在job列表里完成添加。这里要注意在fork前用access判断是否存在这个文件,不然fork以后无法回收,另外要注意一个线程并行竞争(race)的问题:fork以后会在job列表里添加job,信号处理函数sigchld_handler回收进程后会在job列表中删除,如果信号来的比较早,那么就可能会发生先删除后添加的情况。这样这个job永远不会在列表中消失了(内存泄露),所以我们要先blockSIGCHLD ,添加以后再还原。
更新:fork子进程后发生错误退出子进程应该使用_exit而非exit (unix_error里面也是用的exit ) 参考:What is the difference between using _exit() & exit() in a conventional Linux fork-exec?
/*

 * eval - Evaluate the command line that the user has just typed in

 *

 * If the user has requested a built-in command (quit, jobs, bg or fg)

 * then execute it immediately. Otherwise, fork a child process and

 * run the job in the context of the child. If the job is running in

 * the foreground, wait for it to terminate and then return.  Note:

 * each child process must have a unique process group ID so that our

 * background children don't receive SIGINT (SIGTSTP) from the kernel

 * when we type ctrl-c (ctrl-z) at the keyboard.

 */

void eval(char *cmdline)

{

    char *argv[MAXARGS];

    int bg_flag;

    bg_flag = parseline(cmdline, argv); /* true if the user has requested a BG job, false if the user has requested a FG job. */

    if (builtin_cmd(argv, cmdline)) /* built-in command */

    {

        return;

    }

    else /* program (file) */

    {

        if (access(argv[0], F_OK)) /* do not fork and addset! */

        {

        	fprintf(stderr, "%s: Command not found\n", argv[0]);

        	return;

        }

		pid_t pid;

        sigset_t mask, prev;

        sigemptyset(&mask);

        sigaddset(&mask, SIGCHLD);

        sigprocmask(SIG_BLOCK, &mask, &prev); /* block SIG_CHLD */

        if ((pid=fork()) == 0) /* child */

        {

            sigprocmask(SIG_SETMASK, &prev, NULL); /* unblock SIG_CHLD */

            if (!setpgid(0, 0))

            {

                if (execve(argv[0], argv, environ))

                {

                    fprintf(stderr, "%s: Failed to execve\n", argv[0]);

                    _exit(1);

                }

                /* context changed */

            }

            else

            {

                fprintf(stderr, "Failed to invoke setpgid(0, 0)\n");

                _exit(1);

            }

        }

        else if (pid > 0)/* tsh */

        {

            if (!bg_flag) /* exec foreground */

            {

                fg_pid = pid;

                fg_pid_reap = 0;

                addjob(jobs, pid, FG, cmdline);

                sigprocmask(SIG_SETMASK, &prev, NULL); /* unblock SIG_CHLD */

                waitfg(pid);

            }

            else /* exec background */

            {

                addjob(jobs, pid, BG, cmdline);

                sigprocmask(SIG_SETMASK, &prev, NULL); /* unblock SIG_CHLD */

                printf("[%d] (%d) %s", maxjid(jobs), pid, cmdline);

            }

            return;

        }

        else

        {

            unix_error("Failed to fork child");

        }

    }

    return;

}
2.int builtin_cmd(char **argv, char *cmdline)
这个函数分情况判断是哪一个内置命令,要注意如果用户仅仅按下回车键,那么在解析后argv的第一个变量将是一个空指针。如果用这个空指针去调用strcmp函数会引发segment fault。
/*

 * builtin_cmd - If the user has typed a built-in command then execute

 *    it immediately.

 */

int builtin_cmd(char **argv, char *cmdline)

{

    char *first_arg = argv[0];

    if (first_arg == NULL) /* if input nothing('\n') in function main, then the

                              first_arg here will be NULL, which will cause SEG fault when invoke strcmp(read) */

    {

        return 1;

    }

    if (!strcmp(first_arg, "quit"))

    {

        exit(0);

    }

    else if (!strcmp(first_arg, "jobs"))

    {

        listjobs(jobs);

        return 1;

    }

    else if (!strcmp(first_arg, "bg") || !strcmp(first_arg, "fg"))

    {

        do_bgfg(argv, cmdline);

        return 1;

    }

    return 0;

}
3.void do_bgfg(char **argv, char *cmdline)
这个函数单独处理了bg和fg这两个内置命令。要注意fg有两个对应的情况:1.后台程序是stopped的状态,这时我们需要设置相关变量,然后发送继续的信号。2.如果这个进程本身就在运行,我们就只需要改变job的状态,设置相关变量,然后进入waitfg等待这个新的前台进程执行完毕。
写这个也出现了一个让我debug 几个小时的兼容性问题:
在man 7 signal中,SIGCHLD描述如下:
SIGCHLD 20,17,18 Ign Child stopped or terminated
也就是说,子进程终止或者停止的时候会向父进程发送这个信号,然后父进程进入sigchld_handler信号处理函数进行回收或者提示。但是在我的机器上却发现在子进程从stopped变到running(收到SIGCONT )的时候也会向父进程发送这个信号。这样就会出现一个问题:我们要使后台一个stopped的进程重新运行,但是它会向父进程(shell)发送一个SIGCHLD ,这样父进程就会进入信号处理函数sigchld_handler试图回收它(不是stop),而它有没有结束,所以信号处理函数会一直等待它执行完毕,在shell中显示的情况就是卡住了。
经过长时间调试确认后发现在POSIX某个标准中SIGCHLD信号的定义如下:
SIGCHLD
The SIGCHLD signal is sent to a process when a child process terminates, is interrupted, or resumes after being interrupted. One common usage of the signal is to instruct the operating system to clean up the resources used by a child process after its termination without an explicit call to the
waitsystem call.
or resumes after being interrupted. ,看到这句的时候我就要吐血了。。。
为了进一步证实我的想法,我在FreeBSD11.1上面查了一下手册:
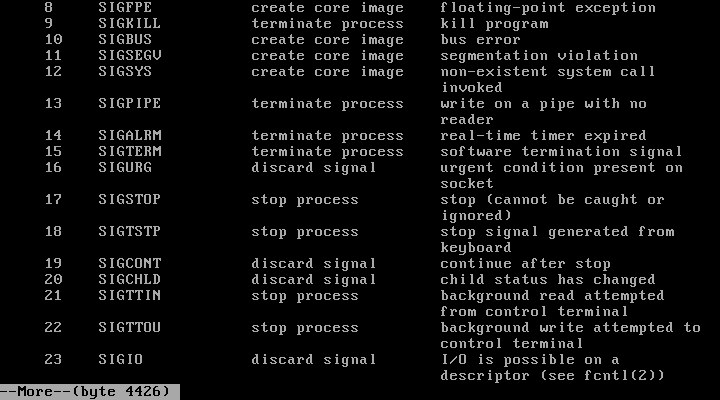
他说的是“changed”,看来我的机器是按照POSIX的某个标准实现的。
我的解决方案是设置一个pid_t的全局变量stopped_resume_child记录我们要fg的stopped进程,在进入信号处理函数后首先检查这个变量是否大于零,如果是就直接退出不做处理。(这里其实有一个和其他进程竞争的问题,时间有限就不去做更改了)
/*

 * do_bgfg - Execute the builtin bg and fg commands

 */

void do_bgfg(char **argv, char *cmdline)

{

    char *first_arg = argv[0];

    if (!strcmp(first_arg, "bg"))

    {

        if (argv[1] == NULL)

        {

            fprintf(stderr, "bg command requires PID or %%jobid argument\n");

            return;

        }

        if (argv[1][0] == '%') /* JID */

        {

            int jid = atoi(argv[1] + 1);

            if (jid)

            {

            	struct job_t *job_tmp = getjobjid(jobs, jid);

                if (job_tmp != NULL)

                {

                	job_tmp->state = BG;

                	printf("[%d] (%d) %s", jid, job_tmp->pid, job_tmp->cmdline);

                	stopped_resume_child = job_tmp->pid;

                    killpg(job_tmp->pid, SIGCONT);

                    return;

                }

                else

                {

                    fprintf(stderr, "%%%s: No such job\n", argv[1] + 1);

                }

            }

            else

            {

                fprintf(stderr, "%%%s: No such job\n", argv[1] + 1);

            }

        }

        else /* PID */

        {

            pid_t pid = atoi(argv[1]);

            if(pid)

            {

            	struct job_t *job_tmp = getjobpid(jobs, pid);

                if (job_tmp != NULL)

                {

                	job_tmp->state = BG;

                	printf("[%d] (%d) %s", job_tmp->jid, pid, job_tmp->cmdline);

                	stopped_resume_child = job_tmp->pid;

                    killpg(pid, SIGCONT);

                    return;

                }

                else

                {

                    fprintf(stderr, "(%s): No such process\n", argv[1]);

                }

            }

            else

            {

                fprintf(stderr, "bg: argument must be a PID or %%jobid\n");

            }

        }

    }

    else

    {

    	/* there are two case when using fg:

    	1. the job stopped

    	2. the job is running

    	*/

    	if (argv[1] == NULL)

        {

            fprintf(stderr, "fg command requires PID or %%jobid argument\n");

            return;

        }

        if (argv[1][0] == '%') /* JID */

        {

            int jid = atoi(argv[1] + 1);

            if (jid)

            {

            	struct job_t *job_tmp = getjobjid(jobs, jid);

                if (job_tmp != NULL)

                {

                	int state = job_tmp->state;

                	fg_pid = job_tmp->pid; /* this is the new foreground process */

                	fg_pid_reap = 0;

                	job_tmp->state = FG;

                	if (state == ST)

                	{

                		stopped_resume_child = job_tmp->pid; /* set the global var in case of wait in SIGCHLD handler */

                    	killpg(job_tmp->pid, SIGCONT);

                	}

                    waitfg(job_tmp->pid); /* wait until the foreground terminate/stop */

                    return;

                }

                else

                {

                    fprintf(stderr, "%%%s: No such job\n", argv[1] + 1);

                }

            }

            else

            {

                fprintf(stderr, "%%%s: No such job\n", argv[1] + 1);

            }

        }

        else /* PID */

        {

            pid_t pid = atoi(argv[1]);

            if(pid)

            {

            	struct job_t *job_tmp = getjobpid(jobs, pid);

                if (job_tmp != NULL)

                {

                	int state = job_tmp->state;

                	fg_pid = job_tmp->pid; /* this is the new foreground process */

                	fg_pid_reap = 0;

                	job_tmp->state = FG;

                	if (state == ST)

                	{

                		stopped_resume_child = job_tmp->pid; /* set the global var in case of wait in SIGCHLD handler */

                    	killpg(pid, SIGCONT);

                	}

                    waitfg(job_tmp->pid); /* wait until the foreground terminate/stop */

                    return;

                }

                else

                {

                    fprintf(stderr, "(%s): No such process\n", argv[1]);

                }

            }

            else

            {

                fprintf(stderr, "fg: argument must be a PID or %%jobid\n");

            }

        }

    }

    return;

}
4.void waitfg(pid_t pid)
我之前声明了一个volatile sig_atomic_t的全局变量fg_pid_reap ,只要信号处理函数回收了前台进程,它就会将fg_pid_reap 置1,这样我们的waitfg函数就会退出,接着读取用户的下一个输入。使用busysleep会有一些延迟,实验报告上要求这么实现我也没办法; )
/*

 * waitfg - Block until process pid is no longer the foreground process

 */

void waitfg(pid_t pid)

{

    while (!fg_pid_reap)

    {

        sleep(1);

    }

    fg_pid_reap = 0;

    return;

}
5.void sigchld_handler(int sig)
注意保存errno 。
注意到这里不能使用while来回收进程,因为我们的后台还可能有正在运行的进程,这样做的话会使得waitpid一直等待这个进程结束。当然使用if只回收一次也可能会导致信号累加的问题,例如多个后台程序同时结束,实验报告上要求这么实现我也没办法 ; )
注意如果程序是被stop的话SIGTSTP ctrl-z ,我们不用回收、删除job列表中的节点。
/*

 * sigchld_handler - The kernel sends a SIGCHLD to the shell whenever

 *     a child job terminates (becomes a zombie), or stops because it

 *     received a SIGSTOP or SIGTSTP signal. The handler reaps all

 *     available zombie children, but doesn't wait for any other

 *     currently running children to terminate.

 */

void sigchld_handler(int sig) /* When a child process stops or terminates, SIGCHLD is sent to the parent process. */

{

	int olderrno = errno;

	if (stopped_resume_child)

	{

		stopped_resume_child = 0;

		return;

	}

    int status;

    pid_t pid;

    if ((pid = waitpid(-1, &status, WUNTRACED)) > 0) /* don't use while! */

    {

        if (pid == fg_pid)

        {

            fg_pid_reap = 1;

        }

        if (WIFEXITED(status)) /* returns true if the child terminated normally */

        {

            deletejob(jobs, pid);

        }

        else if (WIFSIGNALED(status)) /* returns true if the child process was terminated by a signal. */

                                      /* since job start from zero, we add it one */

        {

            printf("Job [%d] (%d) terminated by signal %d\n", pid2jid(pid), pid, WTERMSIG(status));

            deletejob(jobs, pid);

        }

        else /* SIGTSTP */

        {

            /* don't delete job */

            struct job_t *p = getjobpid(jobs, pid);

            p->state = ST; /* Stopped */

            printf("Job [%d] (%d) stopped by signal 20\n", pid2jid(pid), pid);

        }

    }

    errno = olderrno;

    return;

}
6.void sigtstp_handler(int sig)
注意是群发,即killpg,不能只发一个。
/*

 * sigint_handler - The kernel sends a SIGINT to the shell whenver the

 *    user types ctrl-c at the keyboard.  Catch it and send it along

 *    to the foreground job.

 */

void sigint_handler(int sig)

{

	int olderrno = errno;

    pid_t pgid = fgpid(jobs);

    if (pgid)

    {

        killpg(pgid, SIGINT);

    }

    errno = olderrno;

    return;

}
7.void sigint_handler(int sig)
不解释。
/*

 * sigtstp_handler - The kernel sends a SIGTSTP to the shell whenever

 *     the user types ctrl-z at the keyboard. Catch it and suspend the

 *     foreground job by sending it a SIGTSTP.

 */

void sigtstp_handler(int sig)

{

	int olderrno = errno;

    pid_t pgid = fgpid(jobs);

    if (pgid)

    {

        killpg(pgid, SIGTSTP);

    }

    errno = olderrno;

    return;

}
运行结果
为了方便检查结果,我写了一个bash脚本,用来比较我的tsh和实验给的正确参考程序tshref的输出结果(测试用例为trace01.txt~trace16.txt):
frank@under:~/tmp/shlab-handout$ cat test.sh

#! /bin/bash

for file in $(ls trace*)

do

	./sdriver.pl -t $file -s ./tshref > tshref_$file

	./sdriver.pl -t $file -s ./tsh > tsh_$file

done

for file in $(ls trace*)

do

	diff tsh_$file tshref_$file > diff_$file

done

for file in $(ls diff_trace*)

do

	echo $file " :"

	cat $file

	echo -e "-------------------------------------\n"
全部打印出来太长,这里列出最后几个:
frank@under:~/tmp/shlab-handout$ ./test.sh

#.............................

#.............................

#.............................

diff_trace13.txt  :

5c5

< tsh> Job [1] (6173) stopped by signal 20

---

> tsh> Job [1] (6162) stopped by signal 20

7c7

< tsh> [1] (6173) Stopped ./mysplit 4

---

> tsh> [1] (6162) Stopped ./mysplit 4

20,24c20,24

<  6170 pts/5    S+     0:00 /usr/bin/perl ./sdriver.pl -t trace13.txt -s ./tsh

<  6171 pts/5    S+     0:00 ./tsh

<  6173 pts/5    T      0:00 ./mysplit 4

<  6174 pts/5    T      0:00 ./mysplit 4

<  6177 pts/5    R      0:00 /bin/ps a

---

>  6159 pts/5    S+     0:00 /usr/bin/perl ./sdriver.pl -t trace13.txt -s ./tshref

>  6160 pts/5    S+     0:00 ./tshref

>  6162 pts/5    T      0:00 ./mysplit 4

>  6163 pts/5    T      0:00 ./mysplit 4

>  6166 pts/5    R      0:00 /bin/ps a

41c41

<  1303 tty7     Ssl+  21:49 /usr/lib/xorg/Xorg -core :0 -seat seat0 -auth /var/run/lightdm/root/:0 -nolisten tcp vt7 -novtswitch

---

>  1303 tty7     Ssl+  21:48 /usr/lib/xorg/Xorg -core :0 -seat seat0 -auth /var/run/lightdm/root/:0 -nolisten tcp vt7 -novtswitch

51,53c51,53

<  6170 pts/5    S+     0:00 /usr/bin/perl ./sdriver.pl -t trace13.txt -s ./tsh

<  6171 pts/5    S+     0:00 ./tsh

<  6182 pts/5    R      0:00 /bin/ps a

---

>  6159 pts/5    S+     0:00 /usr/bin/perl ./sdriver.pl -t trace13.txt -s ./tshref

>  6160 pts/5    S+     0:00 ./tshref

>  6169 pts/5    R      0:00 /bin/ps a

-------------------------------------

diff_trace14.txt  :

7c7

< tsh> [1] (6207) ./myspin 4 &

---

> tsh> [1] (6188) ./myspin 4 &

23c23

< tsh> Job [1] (6207) stopped by signal 20

---

> tsh> Job [1] (6188) stopped by signal 20

27c27

< tsh> [1] (6207) ./myspin 4 &

---

> tsh> [1] (6188) ./myspin 4 &

29c29

< tsh> [1] (6207) Running ./myspin 4 &

---

> tsh> [1] (6188) Running ./myspin 4 &

-------------------------------------

diff_trace15.txt  :

7c7

< tsh> Job [1] (6241) terminated by signal 2

---

> tsh> Job [1] (6224) terminated by signal 2

9c9

< tsh> [1] (6244) ./myspin 3 &

---

> tsh> [1] (6226) ./myspin 3 &
可以发现除了PID不同以外其余都相同,说明tsh实现正确。
[完整项目代码](https://files.cnblogs.com/files/liqiuhao/tsh.7z)
感悟
这次实验给我最大的教训就是不要完全相信文档,自己去实现和求证也很重要。另外,并行产生的竞争问题也有了一些了解。
另外,有意思的是,我在做实验之前看到实验指导里说:
– In waitfg, use a busy loop around the sleep function.
– In sigchld handler, use exactly one call to waitpid.
当时我还想说用sleep 和在waitpid里面只用一个回收是不是不安全或者太傻了,结果我上github一看不仅都是这样,而且他们的代码非常不安全(上面提到的六个安全注意点完全不遵守,各种调用也没有检查返回值和异常),于是觉得自己写的肯定比他们好多了
结果。。。如果注意这些安全问题会有很多麻烦,时间也有限,我就把几个容易实现的实现了,还有两个“访问全局结构变量前block”和“在信号处理函数中仅使用async-signal-safe没有实现。
最后,改编一下Mutt E-Mail Client作者的一句话总结一下这次实验:
All code about this ShellLab on github sucks. This one just sucks less
详细的题目要求和资源可以到 http://csapp.cs.cmu.edu/3e/labs.html 或者 http://www.cs.cmu.edu/~./213/schedule.html 获取. ... bomb.c /*************************************************************************** * Dr. Evil's Ins ... 详细的题目要求和资源可以到 http://csapp.cs.cmu.edu/3e/labs.html 或者 http://www.cs.cmu.edu/~./213/schedule.html 获取. ... 详细的题目要求和资源可以到 http://csapp.cs.cmu.edu/3e/labs.html 或者 http://www.cs.cmu.edu/~./213/schedule.html 获取. ... queue.h: /* * Code for basic C skills diagnostic. * Developed for courses 15-213/18-213/15-513 by R. ... 由于http://csapp.cs.cmu.edu/并未完全开放实验,很多附加实验做不了,一些环境也没办法搭建,更没有标准答案.做了这个实验的朋友可以和我对对答案:) 实验内容和要求可在http:// ... 详细的题目要求和资源可以到 http://csapp.cs.cmu.edu/3e/labs.html 或者 http://www.cs.cmu.edu/~./213/schedule.html 获取. ... 8.9 关于并行的定义我之前写过一篇文章,参考: 并发与并行的区别 The differences between Concurrency and Parallel +---------------- ... 4.52以后的题目中的代码大多是书上的,如需使用请联系 randy.bryant@cs.cmu.edu 更新:关于编译Y86-64中遇到的问题,可以参考一下CS:APP3e 深入理解计算机系统_3e ... 1. Out,params,ref之前先记录平时用的最多的按值传递参数的情况,当然默认情况下参数传入函数的默认行为也是按值传递的. 1: //默认情况下参数会按照值传递 2: static int a ... import java.awt.*; import javax.swing.*; import javax.swing.JFrame; import java.awt.event.WindowList ... 我也是初学者,写博客只是想把自己的整个思路整理一下,有不对或者不好的地方,请大家多多指正. 1.MyBatis简介 MyBatis 是一款优秀的持久层框架,它支持定制化 SQL.存储过程以及高级映射. ... 安全配置报错分析 服务端配置 <system.serviceModel> <bindings> <wsHttpBinding> <binding name = ... configparser模块与 subprcess 利用configparser模块配置一个类似于 windows.ini格式的文件可以包含一个或多个节(section),每个节可以有多个参数(键=值 ... # 在Vue 项目中引入Bootstrap 有时在vue项目中会根据需求引入Bootstrap,而Bootstrap又是依赖于jQuery的,在使用npm按照时,可能会出现一系列的错误 1.安装jQu ... // console.log("2-"+$(window).height()); //浏览器当前窗口可视区域高度 // console.log("3-"+$(d ... 最近在做一个基于vue 的多页面项目 , 页面n++多,编译时发生node内存溢出问题,继而百度之,得到解答,故记录之. '如图' 只需在 package.json 里面 加上 --max ... 关于音视频通话过程中最小化成悬浮框这个功能的实现,网络上类似的文章很多,但是好像还没看到解释的较为清晰的,这里因为项目需要实现了这样的一个功能,今天我把它记录下来,一方面为了以后用到便于自己查阅,一方 ... 一.最近做阿里云oss文件上传开发,一点收获分享给大家,帮助大家绕过一些坑.关于阿里云oss服务的介绍,我这里不做赘述了,可以查看阿里云OSS开发api文档. 在这里我主要介绍下,文件上传流程比较复杂 ...CS:APP3e 深入理解计算机系统_3e ShellLab(tsh)实验的更多相关文章
随机推荐