
使用angular4和asp.net core 2 web api做个练习项目(三)
第一部分: http://www.cnblogs.com/cgzl/p/7755801.html
第二部分: http://www.cnblogs.com/cgzl/p/7763397.html
后台代码: https://github.com/solenovex/asp.net-core-2.0-web-api-boilerplate
前台代码: https://github.com/solenovex/angular-4-client-panel-app
下面将开发登陆和授权的部分, 这里要用到identity server 4.
在VS解决方案中设置多个项目同时启动:
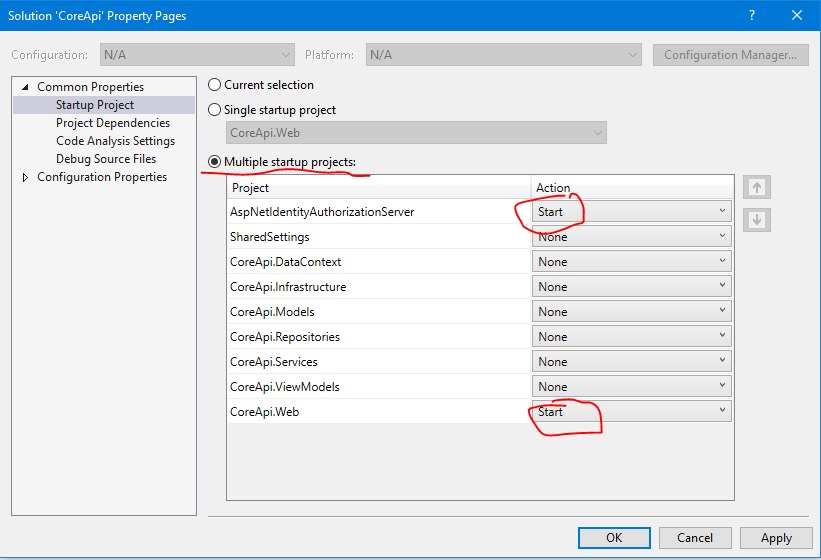
AspNetIdentityAuthorizationServer就是authorization server. 它的地址是 http://localhost:5000
CoreApi.Web作为api, 都已经配置好了.它的地址是 http://localhost:5001
Login 登陆
由于我们使用的是Identity Server 4的登录页面, 所以angular项目里面无需登录页面, 把login相关的文件删除...........
登陆需要使用到oidc-client.js所以通过npm安装:
npm install --save oidc-client
Auth Service
需要登陆服务 auth.service:
ng g s services/auth
打开auth.services.ts:
import { Injectable, OnInit, EventEmitter } from '@angular/core';

import { Observable } from 'rxjs/Observable';

import { User, UserManager, Log } from 'oidc-client';

import 'rxjs/add/observable/fromPromise';

const config: any = {

  authority: 'http://localhost:5000',

  client_id: 'corejs',

  redirect_uri: 'http://localhost:4200/login-callback',

  response_type: 'id_token token',

  scope: 'openid profile coreapi',

  post_logout_redirect_uri: 'http://localhost:4200/index.html',

};

Log.logger = console;

Log.level = Log.DEBUG;

@Injectable()

export class AuthService implements OnInit {

  private manager: UserManager = new UserManager(config);

  public loginStatusChanged: EventEmitter<User>;

  constructor() {

    this.loginStatusChanged = new EventEmitter();

  }

  ngOnInit() {

  }

  login() {

    this.manager.signinRedirect();

  }

  loginCallBack() {

    return Observable.create(observer => {

      Observable.fromPromise(this.manager.signinRedirectCallback())

        .subscribe(() => {

          this.tryGetUser().subscribe((user: User) => {

            this.loginStatusChanged.emit(user);

            observer.next(user);

            observer.complete();

          }, e => {

            observer.error(e);

          });

        });

    });

  }

  checkUser() {

    this.tryGetUser().subscribe((user: User) => {

      this.loginStatusChanged.emit(user);

    }, e => {

      this.loginStatusChanged.emit(null);

    });

  }

  private tryGetUser() {

    return Observable.fromPromise(this.manager.getUser());

  }

  logout() {

    this.manager.signoutRedirect();

  }

}
config是针对identity server 4服务器的配置, authorization server的地址是 http://localhost:5000, 登陆成功后跳转后来的地址是: http://localhost:4200/login-callback
其中的UserManager就是oidc-client里面的东西, 它负责处理登录登出和获取当前登录用户等操作.
这里login()方法被调用后会直接跳转到 authorization server的登录页面.
登录成功后会跳转到一个callback页面, 里面需要调用一个callback方法, 这就是loginCallback()方法.
loginStatusChanged是一个EventEmitter, 任何订阅了这个事件的component, 都会在登录用户变化时(登录/退出)触发component里面自定义的事件.
logout()是退出, 调用方法后也会跳转到authorization server的页面.
最后别忘了在app.module里面注册:
  providers: [

    ClientService,

    AuthService

  ],
登陆成功后跳转回掉页面
建立一个跳转回掉的component和路由:
ng g c components/loginCallback
修改app.module的路由:
const appRoutes: Routes = [

  { path: '', component: DashboardComponent },

  { path: 'login-callback', component: LoginCallbackComponent },

  { path: 'register', component: RegisterComponent },

  { path: 'add-client', component: AddClientComponent },

  { path: 'client/:id', component: ClientDetailsComponent },

  { path: 'edit-client/:id', component: EditClientComponent }

];
打开login-callback.component.ts:
import { Component, OnInit } from '@angular/core';

import { AuthService } from '../../services/auth.service';

import { Router } from '@angular/router';

import { User } from 'oidc-client';

@Component({

  selector: 'app-login-callback',

  templateUrl: './login-callback.component.html',

  styleUrls: ['./login-callback.component.css']

})

export class LoginCallbackComponent implements OnInit {

  constructor(

    private authService: AuthService,

    private router: Router

  ) { }

  ngOnInit() {

    this.authService.loginCallBack().subscribe(

      (user: User) => {

        console.log('login callback user:', user);

        if (user) {

          this.router.navigate(['/']);

        }

      }

    );

  }

}
这里主要是调用oidc的回掉函数. 然后跳转到主页.
html:
<p>

  登录成功!

</p>
这个html, 基本是看不见的.
修改Navbar
navbar.component.html:
<nav class="navbar navbar-expand-md navbar-light bg-light">

  <div class="container">

    <a class="navbar-brand" href="#">Client Panel</a>

    <button class="navbar-toggler" type="button" data-toggle="collapse" data-target="#navbarsExampleDefault" aria-controls="navbarsExampleDefault"

      aria-expanded="false" aria-label="Toggle navigation">

      <span class="navbar-toggler-icon"></span>

    </button>

    <div class="collapse navbar-collapse" id="navbarsExampleDefault">

      <ul class="navbar-nav mr-auto">

        <li *ngIf="isLoggedIn" class="nav-item">

          <a class="nav-link" href="#" routerLink="/">Dashboard </a>

        </li>

      </ul>

      <ul class="navbar-nav ml-auto">

        <li *ngIf="!isLoggedIn" class="nav-item">

          <a class="nav-link" href="#" routerLink="/register">Register </a>

        </li>

        <li *ngIf="!isLoggedIn" class="nav-item">

          <a class="nav-link" href="#" (click)="login()">Login </a>

        </li>

        <li *ngIf="isLoggedIn" class="nav-item">

          <a class="nav-link" href="#" (click)="logout()">Logout </a>

        </li>

      </ul>

    </div>

  </div>

</nav>

<br>
主要是检查是否有用户登陆了, 有的话不显示注册和登陆链接, 并且显示退出链接按钮. 没有的话, 则显示注册和登录.
navbar.component.ts:
import { Component, OnInit } from '@angular/core';

import { Router } from '@angular/router';

import { AuthService } from '../../services/auth.service';

import 'rxjs/add/operator/map';

import { User } from 'oidc-client';

import { FlashMessagesService } from 'angular2-flash-messages';

@Component({

  selector: 'app-navbar',

  templateUrl: './navbar.component.html',

  styleUrls: ['./navbar.component.css']

})

export class NavbarComponent implements OnInit {

  public isLoggedIn: boolean;

  public loggedInUser: User;

  constructor(

    private authService: AuthService,

    private router: Router,

    private flashMessagesService: FlashMessagesService

  ) { }

  ngOnInit() {

    this.authService.loginStatusChanged.subscribe((user: User) => {

      this.loggedInUser = user;

      this.isLoggedIn = !!user;

      if (user) {

        this.flashMessagesService.show('登陆成功', { cssClass: 'alert alert-success', timeout: 4000 });

      }

    });

    this.authService.checkUser();

  }

  login() {

    this.authService.login();

  }

  logout() {

    this.authService.logout();

  }

}
在ngOnInit里面订阅authservice的那个登录状态变化的事件. 以便切换导航栏的按钮显示情况.
angular的部分先到这, 然后要
修改一个identity server的配置:
在VS2017打开AspNetIdentityAuthorizationServer这个项目的Config.cs文件, 看GetClients()那部分, 里面有一个Client是js client, 我们就用这个....
// JavaScript Client

                new Client

                {

                    ClientId = CoreApiSettings.Client.ClientId,

                    ClientName = CoreApiSettings.Client.ClientName,

                    AllowedGrantTypes = GrantTypes.Implicit,

                    AllowAccessTokensViaBrowser = true,

                    RedirectUris =           { CoreApiSettings.Client.RedirectUris },

                    PostLogoutRedirectUris = { CoreApiSettings.Client.PostLogoutRedirectUris },

                    AllowedCorsOrigins =     { CoreApiSettings.Client.AllowedCorsOrigins },

                    AllowedScopes =

                    {

                        IdentityServerConstants.StandardScopes.OpenId,

                        IdentityServerConstants.StandardScopes.Profile,

                        CoreApiSettings.CoreApiResource.Name

                    }

                }
打开CoreApiSettings, 它在SharedSettings这个项目里面:
namespace SharedSettings.Settings

{

    public class CoreApiSettings

    {

        #region CoreApi

        public static string AuthorizationServerBase = "http://localhost:5000";

        public static string CorsPolicyName = "default";

        public static string CorsOrigin = "http://localhost:4200";

        public static (string Name, string DisplayName) CoreApiResource = ("coreapi", "Core APIs");

        public static (string ClientId, string ClientName, string RedirectUris, string PostLogoutRedirectUris, string AllowedCorsOrigins) Client =

            ("corejs", "Core Javascript Client", "http://localhost:4200/login-callback", "http://localhost:4200/index.html", "http://localhost:4200");

        #endregion

    }

}
把相应的地址改成和angular auth.service里面config一样的地址才能工作.
这里面使用了C# 7的命名Tuple, 非常好用.
差不多可以了, 运行VS. 同时运行angular项目:
1. 首次浏览:

2. 点击登陆:
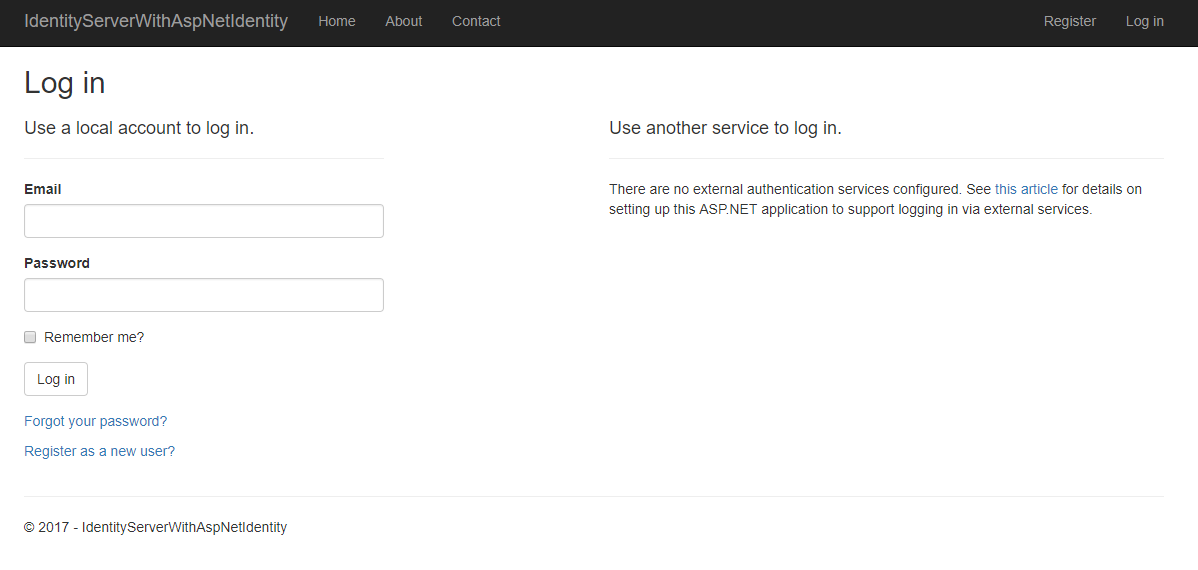
点击登陆就跳转到authorization server的登录页面了, 你在这里需要注册一个用户.....
然后输入用户名密码登陆.
3.同意授权
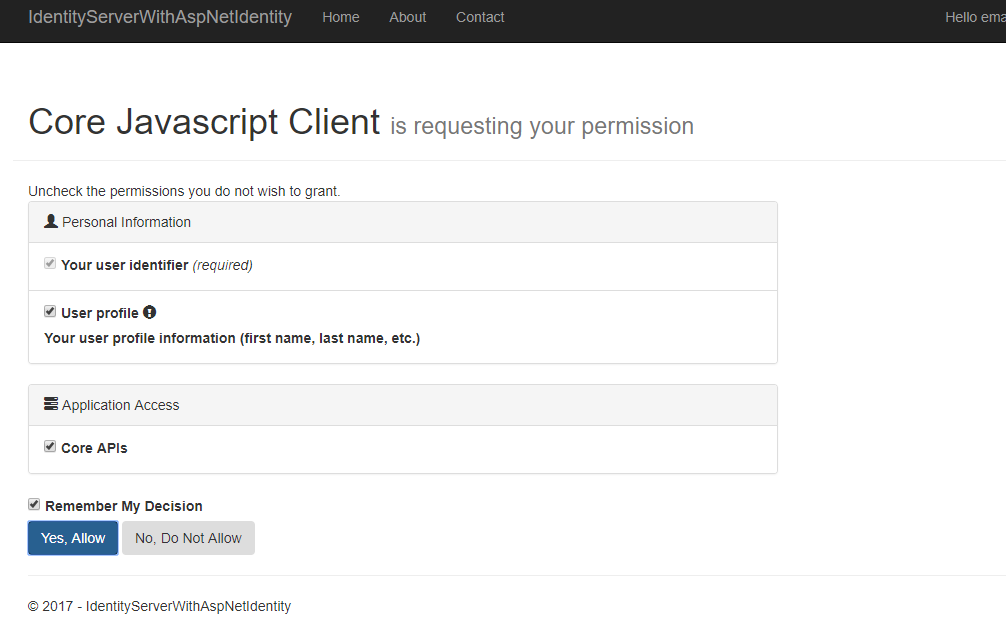
点击yes 同意授权.
4.跳转回angular页面:
首先跳转回的是angular的login-callback路由, 然后瞬间回到了主页:
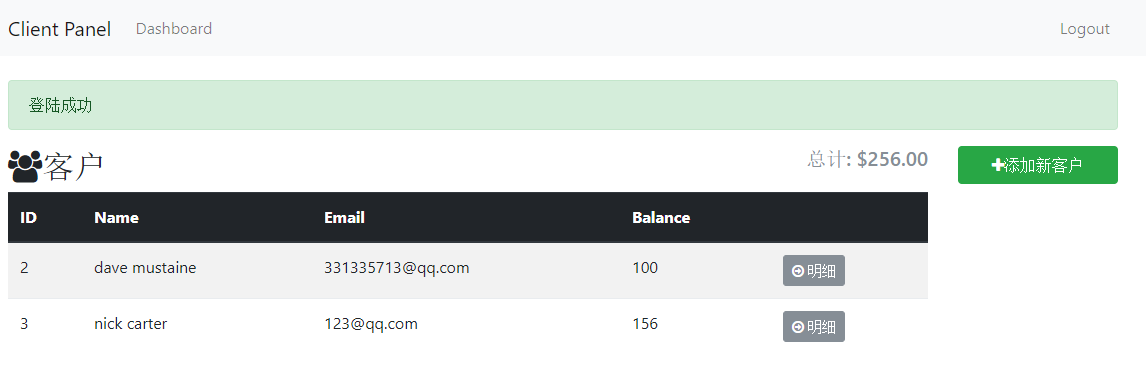
5. 刷新, 还是可以取得到登录的用户.
但是如果再打开一个浏览器实例就无法取得到登陆用户了, oidc应该是把登陆信息存到了session storage里面.
打开浏览器F12--Application:
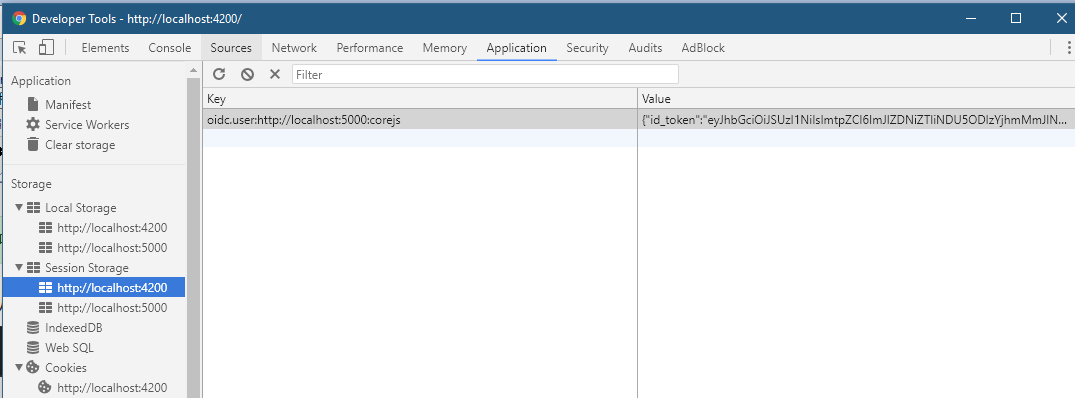
可以看到在session storage里面确实有东西, 而 localstorage里面却没有.
今天比较忙, 先写到这... 估计还得写一篇....
使用angular4和asp.net core 2 web api做个练习项目(三)的更多相关文章
- 使用angular4和asp.net core 2 web api做个练习项目(一)
这是一篇学习笔记. angular 5 正式版都快出了, 不过主要是性能升级. 我认为angular 4还是很适合企业的, 就像.net一样. 我用的是windows 10 安装工具: git for ...
- 使用angular4和asp.net core 2 web api做个练习项目(四)
第一部分: http://www.cnblogs.com/cgzl/p/7755801.html 第二部分: http://www.cnblogs.com/cgzl/p/7763397.html 第三 ...
- 使用angular4和asp.net core 2 web api做个练习项目(二), 这部分都是angular
上一篇: http://www.cnblogs.com/cgzl/p/7755801.html 完成client.service.ts: import { Injectable } from '@an ...
- angular4和asp.net core 2 web api
angular4和asp.net core 2 web api 这是一篇学习笔记. angular 5 正式版都快出了, 不过主要是性能升级. 我认为angular 4还是很适合企业的, 就像.net ...
- 温故知新,使用ASP.NET Core创建Web API,永远第一次
ASP.NET Core简介 ASP.NET Core是一个跨平台的高性能开源框架,用于生成启用云且连接Internet的新式应用. 使用ASP.NET Core,您可以: 生成Web应用和服务.物联 ...
- 基于ASP.NET Core 创建 Web API
使用 Visual Studio 创建项目. 文件->新建->项目,选择创建 ASP.NET Core Web 应用程序. 基于 ASP.NET Core 2.0 ,选择API,身份验证选 ...
- ASP.NET Core Restful Web API 相关资源索引
GraphQL 使用ASP.NET Core开发GraphQL服务器 -- 预备知识(上) 使用ASP.NET Core开发GraphQL服务器 -- 预备知识(下) [视频] 使用ASP.NET C ...
- 使用 ASP.NET Core 创建 Web API及链接sqlserver数据库
创建 Web API https://docs.microsoft.com/zh-cn/aspnet/core/tutorials/first-web-api?view=aspnetcore-3.0& ...
- ASP.NET Core 中基于 API Key 对私有 Web API 进行保护
这两天遇到一个应用场景,需要对内网调用的部分 web api 进行安全保护,只允许请求头账户包含指定 key 的客户端进行调用.在网上找到一篇英文博文 ASP.NET Core - Protect y ...
随机推荐
- Linux 虚拟机安装后的配置和一些命令符笔记
一.安装后的配置 1.设在终端的字体为等宽字体 比如:DejaVu Sans Mono 2.将当前的普通用户加入到sudo用户组adduser en sudochmod +w /etc/sudoers ...
- 【SQL】- 基础知识梳理(三) - SQL连接查询
一.引言 有时为了得到一张报表的完整数据,需要从两个或更多的表中获取结果,这时就用到了"连接查询". 二.连接查询 连接查询的定义: 数据库中的表通过键将彼此联系起来,从而获取这些 ...
- django的admin或者应用中使用KindEditor富文本编辑器
由于django后台管理没有富文本编辑器,看着好丑,展示出来的页面不美观,无法做到所见即所得的编辑方式,所以我们需要引入第三方富文本编辑器. 之前找了好多文档已经博客才把这个功能做出来,有些博客虽然写 ...
- angularjs之ui-bootstrap的Datepicker Popup实现双日期选择控件
最开始使用ui-bootstrap的Datepicker Popup日期选择插件实现双日期选择时间范围时,在网上搜了一些通过JS去实现的方法,不过后来发现可以不必通过JS去处理,只需要使用其自身的属性 ...
- 使用jvisualvm远程监控Java程序
使用Java自带的jvisualvm调试Java程序,可以查看CPU.内存.线程等信息,还可以进行Dump,无疑是一个利器 由于客户端是Windows.服务端是Linux,并且是最小安装的Linux, ...
- Javascript写的一个可拖拽排序的列表
自己常试写了一个可拖拽进行自定义排序的列表,可能写的不太好,欢迎提供意见. 我的思路是将列表中的所有项都放进一个包裹层,将该包裹层设为相对定位,每当点击一个项时,将该项脱离文档并克隆一份重新添加到文档 ...
- 征服 Redis
大约一年多前,公司同事开始使用Redis,不清楚是配置,还是版本的问题,当时的Redis经常在使用一段时间后,连接爆满且不释放.印象中,Redis 2.4.8以下的版本由于设计上的主从库同步问题,就会 ...
- 【JAVA零基础入门系列】Day3 Java基本数据类型
前两篇已经将开发环境搭建完成,如果你已经按之前的教程按部就班的完成了部署,那么世界上最优秀的编程语言之一和世界上最优秀的IDE之一已经出现在你的电脑上(此处应有掌声),如果你还没入门,或者正在台阶上踱 ...
- Tomcat 设置自启动时遇到的错误问题与解决方案
首先,今天在做tomcat开机自启动时,原本很简单的一个问题,但却浪费了很长时间: 首先系统环境采用的是Window10,设置Tomcat自启动过程当中需要注意的是:JDK的版本和Tomcat的位数必 ...
- mysql error 1290 hy000:The MySQL server is running with the --skip-grant-tables option so it cannot execute this statemen' 解决方案
如果在执行授权命令的时候报错 mysql> grant all privileges on *.* to root@"; ERROR (HY000): The MySQL server ...