c#用EPPLUS操作excel
参考:
http://www.cnblogs.com/rumeng/p/3785748.html
http://www.cnblogs.com/libla/p/5824296.html#3818995
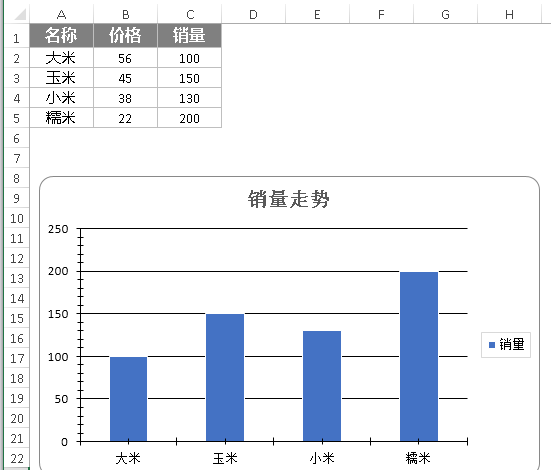
结果:
首先新建一个winform程序,然后加一个button,
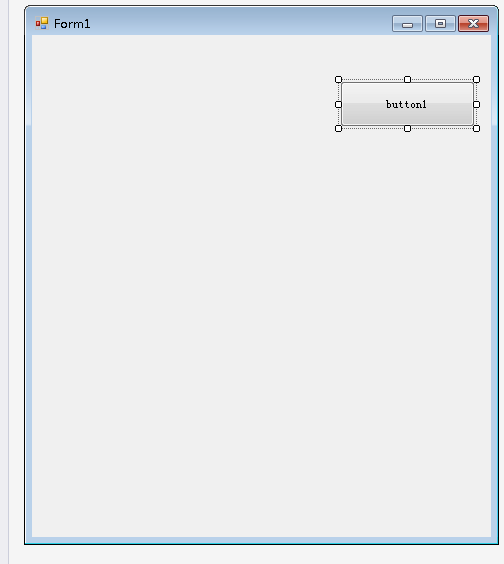
之后双击button1,进入代码区域,输入下面的代码:
 using OfficeOpenXml;

 using OfficeOpenXml.Drawing;

 using OfficeOpenXml.Drawing.Chart;

 using OfficeOpenXml.Style;

 using System;

 using System.Collections.Generic;

 using System.ComponentModel;

 using System.Data;

 using System.Drawing;

 using System.IO;

 using System.Linq;

 using System.Text;

 using System.Threading.Tasks;

 using System.Windows.Forms;

 namespace WindowsFormsApplication1epplus

 {

     public partial class Form1 : Form

     {

         public Form1()

         {

             InitializeComponent();

         }

         private void button1_Click(object sender, EventArgs e)

         {

             using (ExcelPackage package = new ExcelPackage(new FileStream(@"E:\test.xlsx", FileMode.Open)))

             {

                 for (int i = ; i <= package.Workbook.Worksheets.Count; ++i)//循环sheet

                 {

                     ExcelWorksheet sheet = package.Workbook.Worksheets[i];

                     for (int j = sheet.Dimension.Start.Column, k = sheet.Dimension.End.Column; j <= k; j++)

                     {

                         for (int m = sheet.Dimension.Start.Row, n = sheet.Dimension.End.Row; m <= n; m++)

                         {

                             string str = GetValue(sheet, m, j);

                             if (str != null)

                             {

                                 // do something

                             }

                         }

                     }

                 }

             }

             FileInfo newFile = new FileInfo(@"E:\test.xlsx");

             if (newFile.Exists)

             {

                 newFile.Delete();

                 newFile = new FileInfo(@"E:\test.xlsx");

             }

             using (ExcelPackage package = new ExcelPackage(newFile))

             {

                 ExcelWorksheet worksheet = package.Workbook.Worksheets.Add("test");

                 worksheet.Cells.Style.WrapText = true;

                 worksheet.View.ShowGridLines = false;//去掉sheet的网格线

                 worksheet.Cells[, ].Value = "名称";

                 worksheet.Cells[, ].Value = "价格";

                 worksheet.Cells[, ].Value = "销量";

                 worksheet.Cells[, ].Value = "大米";

                 worksheet.Cells[, ].Value = ;

                 worksheet.Cells[, ].Value = ;

                 worksheet.Cells[, ].Value = "玉米";

                 worksheet.Cells[, ].Value = ;

                 worksheet.Cells[, ].Value = ;

                 worksheet.Cells[, ].Value = "小米";

                 worksheet.Cells[, ].Value = ;

                 worksheet.Cells[, ].Value = ;

                 worksheet.Cells[, ].Value = "糯米";

                 worksheet.Cells[, ].Value = ;

                 worksheet.Cells[, ].Value = ;

                 using (ExcelRange range = worksheet.Cells[, , , ])

                 {

                     range.Style.HorizontalAlignment = ExcelHorizontalAlignment.Center;

                     range.Style.VerticalAlignment = ExcelVerticalAlignment.Center;

                 }

                 using (ExcelRange range = worksheet.Cells[, , , ])

                 {

                     range.Style.Font.Bold = true;

                     range.Style.Font.Color.SetColor(Color.White);

                     range.Style.Font.Name = "微软雅黑";

                     range.Style.Font.Size = ;

                     range.Style.Fill.PatternType = ExcelFillStyle.Solid;

                     range.Style.Fill.BackgroundColor.SetColor(Color.FromArgb(, , ));

                 }

                 worksheet.Cells[, ].Style.Border.BorderAround(ExcelBorderStyle.Thin, Color.FromArgb(, , ));

                 worksheet.Cells[, ].Style.Border.BorderAround(ExcelBorderStyle.Thin, Color.FromArgb(, , ));

                 worksheet.Cells[, ].Style.Border.BorderAround(ExcelBorderStyle.Thin, Color.FromArgb(, , ));

                 worksheet.Cells[, ].Style.Border.BorderAround(ExcelBorderStyle.Thin, Color.FromArgb(, , ));

                 worksheet.Cells[, ].Style.Border.BorderAround(ExcelBorderStyle.Thin, Color.FromArgb(, , ));

                 worksheet.Cells[, ].Style.Border.BorderAround(ExcelBorderStyle.Thin, Color.FromArgb(, , ));

                 worksheet.Cells[, ].Style.Border.BorderAround(ExcelBorderStyle.Thin, Color.FromArgb(, , ));

                 worksheet.Cells[, ].Style.Border.BorderAround(ExcelBorderStyle.Thin, Color.FromArgb(, , ));

                 worksheet.Cells[, ].Style.Border.BorderAround(ExcelBorderStyle.Thin, Color.FromArgb(, , ));

                 worksheet.Cells[, ].Style.Border.BorderAround(ExcelBorderStyle.Thin, Color.FromArgb(, , ));

                 worksheet.Cells[, ].Style.Border.BorderAround(ExcelBorderStyle.Thin, Color.FromArgb(, , ));

                 worksheet.Cells[, ].Style.Border.BorderAround(ExcelBorderStyle.Thin, Color.FromArgb(, , ));

                 worksheet.Cells[, ].Style.Border.BorderAround(ExcelBorderStyle.Thin, Color.FromArgb(, , ));

                 worksheet.Cells[, ].Style.Border.BorderAround(ExcelBorderStyle.Thin, Color.FromArgb(, , ));

                 worksheet.Cells[, ].Style.Border.BorderAround(ExcelBorderStyle.Thin, Color.FromArgb(, , ));

                 ExcelChart chart = worksheet.Drawings.AddChart("chart", eChartType.ColumnClustered);

                 ExcelChartSerie serie = chart.Series.Add(worksheet.Cells[, , , ], worksheet.Cells[, , , ]);

                 serie.HeaderAddress = worksheet.Cells[, ];

                 chart.SetPosition(, );

                 chart.SetSize(, );

                 chart.Title.Text = "销量走势";

                 chart.Title.Font.Color = Color.FromArgb(, , );

                 chart.Title.Font.Size = ;

                 chart.Title.Font.Bold = true;

                 chart.Style = eChartStyle.Style15;

                 chart.Legend.Border.LineStyle = eLineStyle.Solid;

                 chart.Legend.Border.Fill.Color = Color.FromArgb(, , );

                 package.Save();

             }

         }

     }

 }
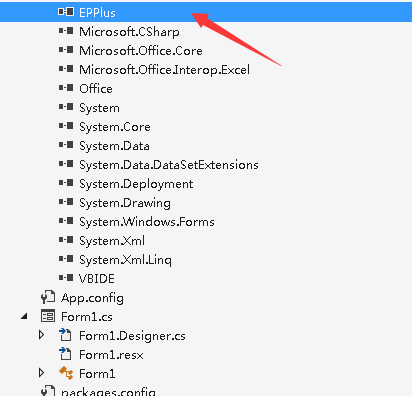
会提示错误, 注意要引用EPPlus,安装好效果如下:
方法是:
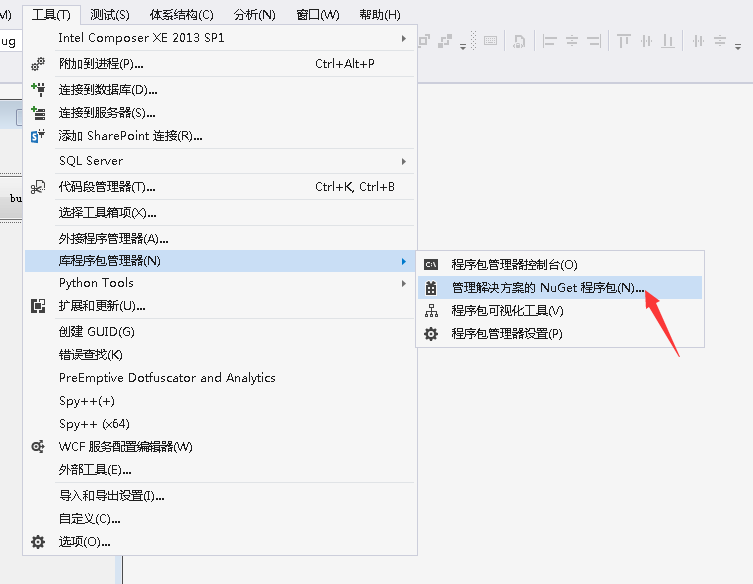
输入epplus,搜索,安装即可。
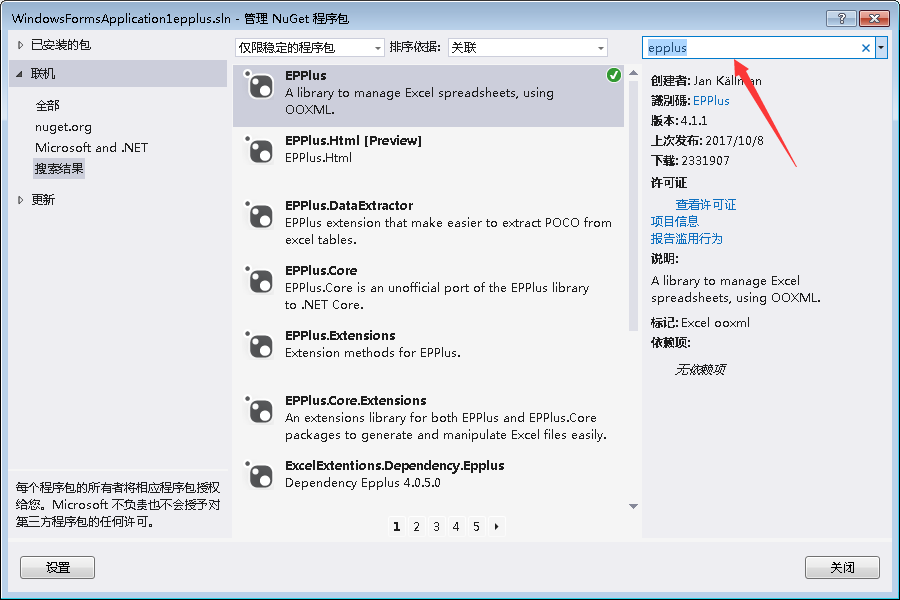
注意路径在E盘,没有E盘的肯定会出错。
c#用EPPLUS操作excel的更多相关文章
- 使用EPPLUS操作EXcel
使用EPPLUS操作EXcel 时间 2014-11-06 19:28:01 姜糖水 原文 http://www.cnphp6.com/archives/58648 主题 Excel 1 下载Ep ...
- C#使用第三方组件Epplus操作Excel表
Epplus操作Excel基础详解 1.什么是Epplus Epplus是一个使用Open Office XML文件格式,能读写Excel2007/2010文件的开源组件,在导出Excel的时候不需要 ...
- ASP.NET Core使用EPPlus操作Excel
1.前言 本篇文章通过ASP.NET Core的EPPlus包去操作Excel(导入导出),其使用原理与NPOI类似,导出Excel的时候不需要电脑上安装office,非常好用 2.使用 新建一个AS ...
- 使用LinqToExcel和EPPlus操作excel
1.使用LinqToExcel LinqToExcel是一个.net framework平台下开源项目,它主要实现了LINQ的语法查询Excel电子表格.类型之前的LINQToXXX如果你是LINQ语 ...
- [Solution] NPOI操作Excel
NPOI 是 POI 项目的 .NET 版本.POI是一个开源的Java读写Excel.WORD等微软OLE2组件文档的项目.使用 NPOI 你就可以在没有安装 Office 或者相应环境的机器上对 ...
- .net 操作excel
.net 操作excel的常用组件:EPPlus,NPOI 1.NPOI,即POI的.NET版本(POI是一套用Java写成的库,能够帮助开发者在没有安装微软Office的情况下读写Office文件, ...
- 【代码沉淀】 - EPPlus - 操作xlsx表格文件
EPPlus - Create advanced Excel spreadsheets on the server.web: http://epplus.codeplex.com/nuget: Ins ...
- C# 操作 Excel(.xls和.xlsx)文件
C#创建Excel(.xls和.xlsx)文件的三种方法 .NET 使用NPOI导入导出标准Excel C# 使用NPOI 实现Excel的简单导入导出 NET使用NPOI组件将数据导出Excel-通 ...
- [Asp.net] C# 操作Excel的几种方式 优缺点比较
在项目中我们常常需要将数据库中的数据导出成Excel文件 有一次工作中我的目的就是读取Excel到内存中,整理成指定格式 整理后再导出到Excel. 因为我要处理的每个Excel表格文件很大.一个表格 ...
随机推荐
- 论equals与==不同的重要性
首先借鉴一下CSDN前辈的总结: 在编程中,通常比较两个字符串是否相同的表达式是“==” ,但在 Java 中不能这么写.在 Java 中,如果要比较 a 字符串是否等于 b 字符串,需要这么写: i ...
- Java基本语法之动手动脑
1.枚举类型 运行EnumTest.java 运行结果:false,false,true,SMALL,MEDIUM,LARGE 结论:枚举类型是引用类型,枚举不属于原始数据类型,它的每个具体值都引用一 ...
- linux命令学习之:rm
rm命令可以删除一个目录中的一个或多个文件或目录,也可以将某个目录及其下属的所有文件及其子目录均删除掉.对于链接文件,只是删除整个链接文件,而原有文件保持不变. 注意:使用rm命令要格外小心.因为一旦 ...
- 设置Tomcat的JAVA_OPTS参数
修改$TOMCAT_HOME/bin/catalina.bat 添加set JAVA_OPTS= ... rem ----- Execute The Requested Command ------- ...
- webpack.base.conf.js
var path = require('path')var utils = require('./utils')var config = require('../config')var vueLoad ...
- 用js实现回车登录而不用点击登录按钮
在你的登录jsp里面,添加一个js <script> function on_return(){ //on_return这是方法名 if(window.event.keyCode == 1 ...
- 时间处理:计算下一天日期,如输入"2004/12/31"(注释2014年12月31日),则输出"2005/1/1".
/* ============================================================================ Name : Exercise.c Au ...
- 解决织梦替换ueditor编辑器后栏目与单页无法保存内容
织梦的默认编辑器是ckeditor,没有插入代码的功能,不够强大,就换成了百度的UEditor编辑器. 使用织梦DedeCMS百度整合UEditor编辑器时,碰到了栏目内容或者单页无法保存的问题,这个 ...
- PAT 1004 成绩排名 (20)(代码)
1004 成绩排名 (20)(20 分) 读入n名学生的姓名.学号.成绩,分别输出成绩最高和成绩最低学生的姓名和学号. 输入格式:每个测试输入包含1个测试用例,格式为\ 第1行:正整数n 第2行:第1 ...
- hdu 1495 (搜索) 非常可乐
http://acm.hdu.edu.cn/showproblem.php?pid=1495 搜索模拟出每此倒得情况就好,详情见代码\ (好困啊!!!!1) #include<cstdio> ...