CentOS 6.x 默认源中带了mysql-server,可以使用yum安装。
1、执行安装命令:yum install mysql-server
2、初始化数据库,使用命令
1
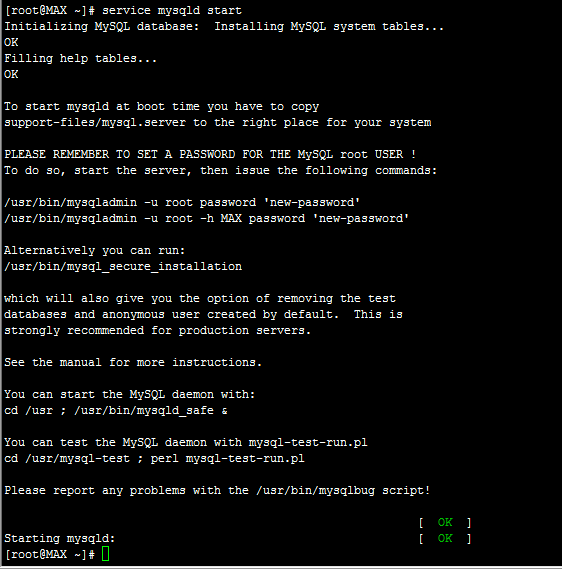
# service mysqld start 启动MSQL
service mysqld stop //关闭Mysql
2设置密码,为root用户,mysql设置密码
方法1: 用SET PASSWORD命令
mysql -u root
mysql> SET PASSWORD FOR 'root'@'localhost' = PASSWORD('newpass');
方法2 。
/usr/bin/mysqladmin -u root password 'new-password'
/usr/bin/mysqladmin -u root -h MAX password 'new-password'
如果root已经设置过密码,采用如下方法
mysqladmin -u root password oldpass "newpass"
方法3: 用UPDATE直接编辑user表
mysql -u root
mysql> use mysql;
mysql> UPDATE user SET Password = PASSWORD('newpass') WHERE user = 'root';
mysql> FLUSH PRIVILEGES;
在丢失root密码的时候,可以这样
mysqld_safe --skip-grant-tables&
mysql -u root mysql
mysql> UPDATE user SET password=PASSWORD("new password") WHERE user='root';
mysql> FLUSH PRIVILEGES;
3 Alternatively you can run:
/usr/bin/mysql_secure_installation
即执行MySQL安全配置向导mysql_secure_installation
安装完mysql-server 会提示可以运行mysql_secure_installation。运行mysql_secure_installation会执行几个设置:
a)为root用户设置密码
b)删除匿名账号
c)取消root用户远程登录
d)删除test库和对test库的访问权限
e)刷新授权表使修改生效
执行之后systemctl restart mysqld命令可以正常执行了 Centos7 下的重启命令。
You can start the MySQL daemon with:
cd /usr ; /usr/bin/mysqld_safe &
You can test the MySQL daemon with mysql-test-run.pl
cd /usr/mysql-test ; perl mysql-test-run.pl
Please report any problems with the /usr/bin/mysqlbug script!
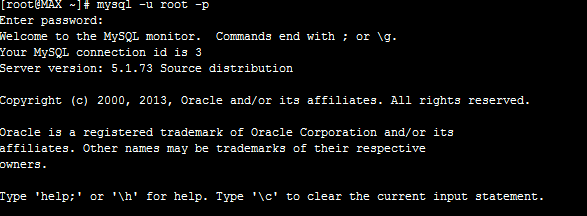
登录安装的数据库库执行 mysql -u root -p
输入设置好的密码,登录成功
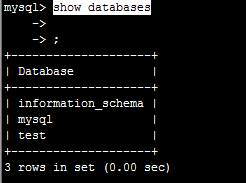
mysql/ show databases; // 每条SQL命令,分号结尾。执行
查看已有的数据库
create database confluence character set utf8 collate utf8_bin; #创建数据库并设置其字符
grant all privileges on confluence.* to '123456'@'localhost' identified by '123456'; #创建授权用户及其密码
flush privileges; #更新权限表
CentOS 6.x 默认源中带了mysql-server,可以使用yum安装。的更多相关文章
- Centos 升级MySQL版本或者Yum安装Mysql5.6
Centos 升级MySQL版本或者Yum安装Mysql5.6 1.从MySQL Yum仓库下载最新的rpm文件:http://dev.mysql.com/downloads/repo/yum/Cen ...
- anacoda 安装默认源中没有的包
pip install -i https://pypi.tuna.tsinghua.edu.cn/simple 1 安装失败 conda install pygame 2 搜索 anaconda se ...
- MySQL Server 5.5安装中遇到的问题及解决方法
之前开始用师兄用过的电脑工作,各种不适应,开始重新搭建自己习惯的环境,重装MySQL就是其中一项,然后重装过程中遇到了问题,具体情况总结如下: 1.以前也重新安装过MySQL,但是完全没有用过就直接卸 ...
- CentOS 6.5 x64下查找依赖包,或用YUM安装
查看某个命令YUM上的安装源 1)当某个命令不存时进行查询所依赖的包,如:pstree [root@localhost ~]# yum provides pstree 已加载插件:fastestmir ...
- CentOS 7中如何安装mysql server
以前一直用RHEL 6.3和6.4,系统盘里自带了mysql server,配置好yum源后,直接yum install mysql-server就可安装mysql服务器端了,最近用CentOS 7. ...
- Homebrew学习(六)之替换及重置homebrew、Homebred Core、Homebrew cask默认源
替换及重置homebrew默认源 中科大源 替换官方源: // 替换brew.git: cd "$(brew --repo)" git remote set-url origin ...
- centos 添加rpmfusion源,yum 安装 ffmpeg
rpmfusion提供了,在Fedora和 centos 源之外的其他yum 源 例如ffmpeg 在 centos 基础源和epel-release 里面都没有, 但是可以在rpmfusion中找到 ...
- ubuntu - 14.04,必须会的技能-安装PPA源中的程序,更大范围使用deb格式安装文件!!
在使用ubuntu时候,管理各种软件最方便的方式肯定是使用软件中心了,这个管理工具类似windows的 程序管理了,使用它有两个好处: 1,无需处理包依赖,linux里面程序存在各种依赖关系,这在以往 ...
- CentOS 5.5 Nginx+JDK+MySQL+Tomcat(jsp)成功安装案例
在CentOS 5.5中安装Nginx+jdk+mysql+tomcat是非常容易的.只需yum安装环境包和nginx.解压安装jdk和tomcat.配置profile文件.server.xml和ng ...
随机推荐
- sqlserver创建表
--创建学员信息数据表 use StudentManageDB go if exists(select * from sysobjects where name='Students') drop ta ...
- javascript-table出现滚动条表格自动对齐
<!DOCTYPE html> <html lang="en"> <head> <meta charset="UTF-8&quo ...
- Python多进程vs多线程
多任务的两种方式:多进程和多线程. 如果用多进程实现Master-Worker,主进程就是Master,其他进程就是Worker. 如果用多线程实现Master-Worker,主线程就是Master, ...
- DB通用类:Sqlite通用类库
Sqlite通用类库 using System; using System.Collections; using System.Collections.Generic; using System.IO ...
- 微信小程序--swiper组件
<view class='swiper-container'> <swiper indicator-dots="true" autoplay=" ver ...
- 新的开始 接触ASP.NET Core跨平台的框架
今天我刚学习了使用Visual Studio 2015新建了.NET Core项目写了一个小的CSHTML代码.按我的话说就是,把C#和HTML合起来使用了,写了一个简单的关于学生的“增” “删” “ ...
- [SQL Server]无法创建 SSIS 运行时对象,请验证 DTS.dll 是否可用及是否已注册
很大可能是SQL Server Management Studio(SSMS)版本与当前操作系统不兼容造成的,与数据库本身没有关系,这种情况基本无解,不过可以使用其他机器连本机数据库导入导出数据. 今 ...
- CF533A Berland Miners
线段树维护贪心 /* */ #include<cstdio> #include<algorithm> #include<cstring> #include<i ...
- Linux netstat命令查看并发连接数
netstat -n | awk '/^tcp/ {++S[$NF]} END {for(a in S) print a, S[a]}' 解释: 返回结果示例: LAST_ACK 5 (正在等待处理的 ...
- @ResponseBody返回中文乱码
1.在方法上修改编码 这种方式,需要对每个方法都进行配置. 2.修改springmvc的配置文件 同时注意,把这个配置写在扫描包的上面.