
在Ubuntu上安装 nginx, MySQL, PHP (LEMP),phpmyadmin和WordPress
0)更新 Apt-Get
终端命令:sudo apt-get update
1) 安装php
sudo apt-get install php5
2)安装MySql
终端命令: sudo apt-get install mysql-server php5-mysql
3)安装Nginx
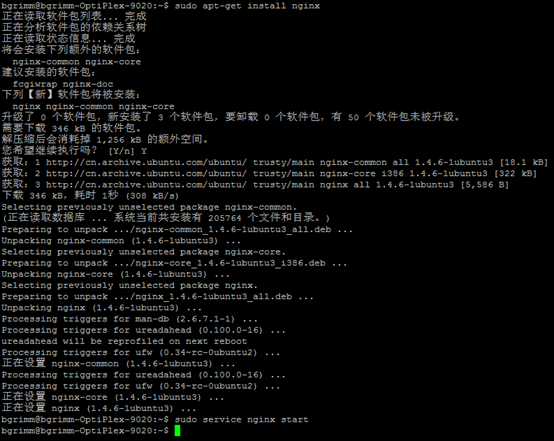
sudo apt-get install nginx
nginx不会自己启动,你需要启动它sudo service nginx start
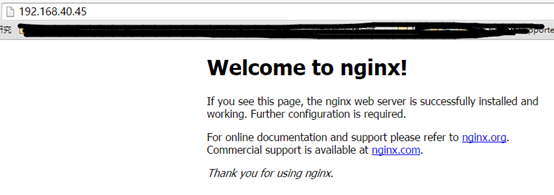
命令如下所示,如果nginx安装成功了,可以在浏览器里访问
4)安装php
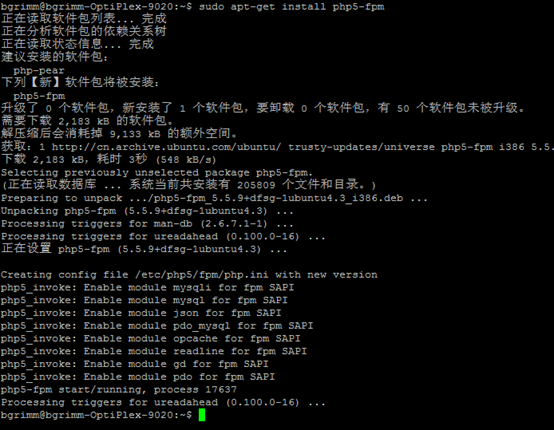
sudo apt-get install php5-fpm
5)配置PHP
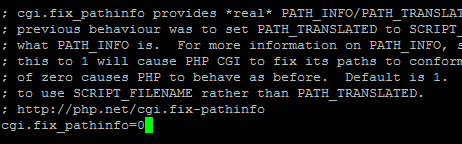
输入sudo nano /etc/php5/fpm/php.ini
找到cgi.fix_pathinfo=1,把1改成0,去掉;号
接着配置www.conf文件
sudo nano /etc/php5/fpm/pool.d/www.conf
找到listen关键字,改成listen = /var/run/php5-fpm.sock
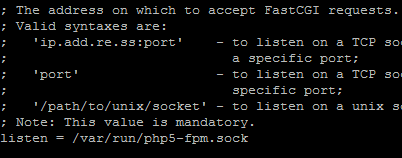
启动php-fpm
sudo service php5-fpm restart
6)配置nginx
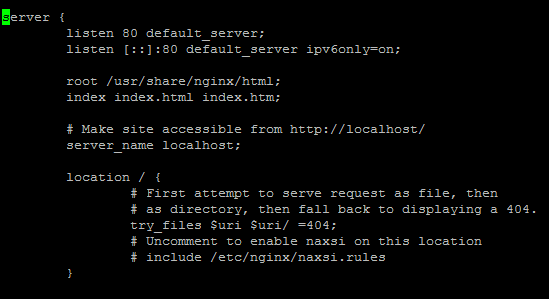
sudo nano /etc/nginx/sites-available/default
打开之后是这样
改成

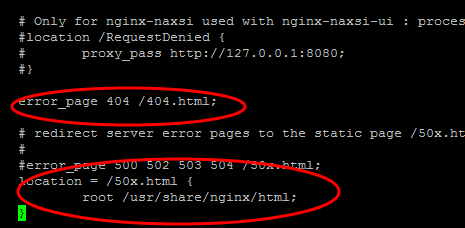
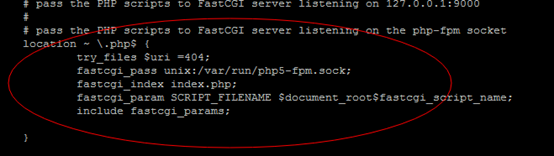
# pass the PHP scripts to FastCGI server listening on the php-fpm socket
location ~ \.php$ {
try_files $uri =404;
fastcgi_pass unix:/var/run/php5-fpm.sock;
fastcgi_index index.php;
fastcgi_param SCRIPT_FILENAME $document_root$fastcgi_script_name;
include fastcgi_params;
}
7)测试安装成功
sudo nano /usr/share/nginx/html/info.php
文件中输入
<?php
phpinfo();
?>
保存后重启nginx
sudo service nginx restart
输入网址能看到php信息页面即说明安装成功。
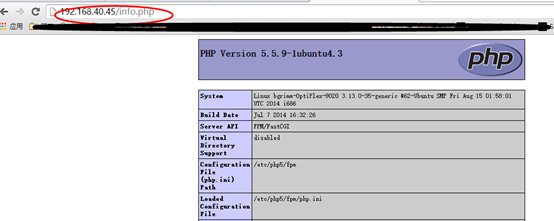
8)安装phpmyadmin
sudo apt-get install phpmyadmin
sudo ln -s /usr/share/phpmyadmin/ /usr/share/nginx/html/phpmyadmin
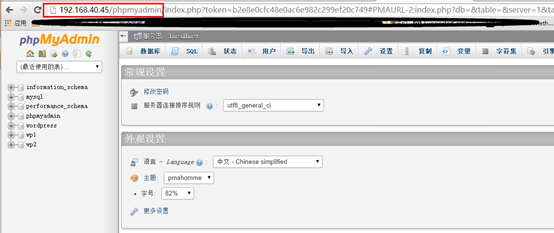
9)安装WordPress
原理同上,不再赘述,/usr/share/nginx/html 即可本台服务器的默认访问位置。在下面部署网站,url上通过 xxxx/you_folder_name 访问
允许固定链接的url改写,修改conf
location / {
# First attempt to serve request as file, then
# as directory, then fall back to displaying a 404.
#try_files $uri $uri/ =404;
try_files $uri $uri/ /index.php?q=$uri&$args;
# Uncomment to enable naxsi on this location
# include /etc/nginx/naxsi.rules
}
location /wp-blog/ {
try_files $uri $uri/ /wp-blog/index.php?$args;
}
关于上传权限配置
sudo chown -R www-data your-folder

sudo chmod -R 775 your-folder
wordpress访问加速的一些设置
一篇禁用Google fonts的文章 http://www.wpyou.com/disable-goole-fonts.html
禁止Google fonts 和 avatar头像
/**
* 删除Google fonts 或者直接安装 Disable Google Fonts插件
*/
function coolwp_remove_open_sans_from_wp_core() {
wp_deregister_style( 'open-sans' );
wp_register_style( 'open-sans', false );
wp_enqueue_style('open-sans','');
}
add_action( 'init', 'coolwp_remove_open_sans_from_wp_core' );
一些插件记录
Disable Google Fonts
googlefonts to 360
Remove Open Sans font from WP core
Useso take over Google
WP CN Excerpt
//disable gravator
建立缓存目录
在wp-content 的同級目录建立一个文件夹,命名为 avatar ,设置该文件夹的权限为 0755 (如果 0755 不行,就试一下 0777)。
设置默认头像
准备一张大小适合的默认头像,命名为"default.jpg" ,放在 avatar 文件夹里面。
添加缓存代码
将下面的代码复制到模板的 functions.php 文件中即可
function my_avatar($avatar) {

  $tmp = strpos($avatar, 'http');

  $g = substr($avatar, $tmp, strpos($avatar, "'", $tmp) - $tmp);

  $tmp = strpos($g, 'avatar/') + 7;

  $f = substr($g, $tmp, strpos($g, "?", $tmp) - $tmp);

  $w = get_bloginfo('wpurl');

  $e = ABSPATH .'avatar/'. $f .'.jpg';

  $t = 1209600; //設定14天, 單位:秒

  if ( !is_file($e) || (time() - filemtime($e)) > $t ) { //當頭像不存在或文件超過14天才更新

    copy(htmlspecialchars_decode($g), $e);

  } else  $avatar = strtr($avatar, array($g => $w.'/avatar/'.$f.'.jpg'));

  if (filesize($e) < 500) copy($w.'/avatar/default.jpg', $e);

  return $avatar;

}

add_filter('get_avatar', 'my_avatar');
linux其他参考
在Ubuntu上安装 nginx, MySQL, PHP (LEMP),phpmyadmin和WordPress的更多相关文章
- ubuntu上安装nginx+mysql+php5-fpm(PHP5 - FastCGI Process Manager)
题外话:由于近段时间测试环境ssh链路质量不大好,经常短线.故我把整个安装过程放到screen里去执行,以防止断线中断了安装过程.执行screen -S install,这样断线后,只要再执行scre ...
- 在Ubuntu上安装Redis MySQL MongoDB memcached Nginx
1.安装Redis sudo apt-get install redis-server 2.安装MySQL sudo apt-get install mysql-server 3.安装MongoDB ...
- ubuntu上安装apache2+mysql+php5-fpm(PHP5 - FastCGI Process Manager)
1: 安装mysql apt-get install mysql-server mysql-client 安装过程中会被问到设置mysql root的密码 New password for t ...
- 在 Bash on Ubuntu 上安装Nginx
前言 Win10 上的 Bash on Ubuntu 是个很好用的玩具,让windows开发环境下的人能无缝操练Linux,但是涉及到网络部分还是有很多要该进的地方,比如Nginx的安装就遇到了问题. ...
- Ubuntu下安装Nginx,PHP5(及PHP-FPM),MySQL
.简介: Tomcat在高并发环境下处理动态请求时性能很低,而在处理静态页面更加脆弱.虽然Tomcat的最新版本支持epoll,但是通过Nginx来处理静态页面要比通过Tomcat处理在性能方面好很多 ...
- 如何在Ubuntu 16.04上安装Nginx
原文链接https://www.digitalocean.com/community/tutorials/how-to-install-nginx-on-ubuntu-16-04 介绍 Nginx是世 ...
- ubuntu上安装mysql 编译安装
为什么要折腾?首先说明的是ubuntu上安装mysql等软件是非常容易简单的,其简单的程度盖过windows上的安装,一句sudo apt-get install就可以搞定.如果想用最简便的方法安装m ...
- Ubuntu上安装MySQL
Ubuntu上安装MySQL非常简单只需要几条命令就可以完成.`````` sudo apt-get update sudo apt-get install mysql-server 会弹出提示,让输 ...
- Ubuntu 14.04TLS和CentOS-6(64bit)上安装Nginx
Ubuntu 14.04上安装Nginx [参考地址]https://www.digitalocean.com/community/tutorials/how-to-install-nginx-on- ...
随机推荐
- 在.NET Fiddle有趣的沙盒代码
在.NET Fiddle有趣的沙盒代码 笔者:Tony Patton | 托尼·巴顿译:PurpleEndurer,2014-11-18,第1版 C#和VB.NET开发者能够使用.NET Fiddle ...
- ios正在使用NSDateComponents、NSDate、NSCalendar它的结论是在当前时间是在一段时间在一天。
一般应用程序设置这一组的存在,比如夜间模式,如果你.从8:00-23:00.在这个当前的时间是如何推断出期间.主要的困难在于如何使用NSDate生成8:00时间和23:00时间.然后用当前时间,也许有 ...
- Chain of Responsibility - 责任链模式
定义 使多个对象都有机会处理请求,从而避免请求的发送者和接受者之间的耦合度. 案例 比方如今有一个图形界面,它包含一个应用Application类,一个主窗体Window,一个buttonButton ...
- 使用Eclipse+Maven+Jetty构建Java Web开发环境(几个教程综合集成2014发行)
工作需要使用Jetty由于web集装箱,得知Eclipse+Maven+Jetty该组合是非常好的,因此,要在网上找了很多教程,但不写或多或少特定的或过时的内容而导致最终的配置失败,易于配置为未来的同 ...
- 2015傅富泰写——STRING权
前两天我在丰富的祝福大福参加了宣讲会.并参加了笔试,最后,一个大问题,我在这里谈解决方案,关于这些问题的含义是这样的,您只能使用c图书馆,实现一个功能void MakeString(char *pSt ...
- 如何为ios酷我音乐盒下载导出的音乐文件(使用Java程序设计)
这个工具已经准备第二版,读者了解编程软件,可以直接使用,请阅读和使用这个场地 http://blog.csdn.net/jzj1993/article/details/44459983 本文所涉及内容 ...
- 兼容安卓的javaproject1.0
<pre class="java" name="code"> //兼容安卓的系统package cn.com.likeshow; import ja ...
- wcf系列5天速成——第一天 binding的使用(1)
原文:wcf系列5天速成--第一天 binding的使用(1) 作为WCF速成系列,只介绍些项目开发中常用到的实战知识. 学习wcf,还是对其中的几个术语要了解一下.wcf中有一个ABC的概念,就是 ...
- css3布局相关(持续更新)
1三栏布局,两边定宽,中间自适应 2让文字位于div元素的正中央 3不管浏览器窗口如何变化,让一张图片始终显示在浏览器正中央.
- 【Swift】沙盒缓存
本地sandbox缓存目录 沙盒の 主目录: po NSHomeDirectory() /Users/SpongeBob/Library/Developer/CoreSimulator/D ...