【HarmonyOS】【Demo】【JAVA UI】 鸿蒙怎么在Webview上添加组件
在大家HarmonyOS开发中,Webview组件上添加组件可能是很常见的功能了,HarmonyOS的webview和Android的webwiew存在一点点区别,今天来实现这个功能
使用项目布局显示webview搭建和webview加载链接的基本功能
解决webview覆盖层不显示问题
查看运行效果
基础的webview学习,大家参考如下链接 :
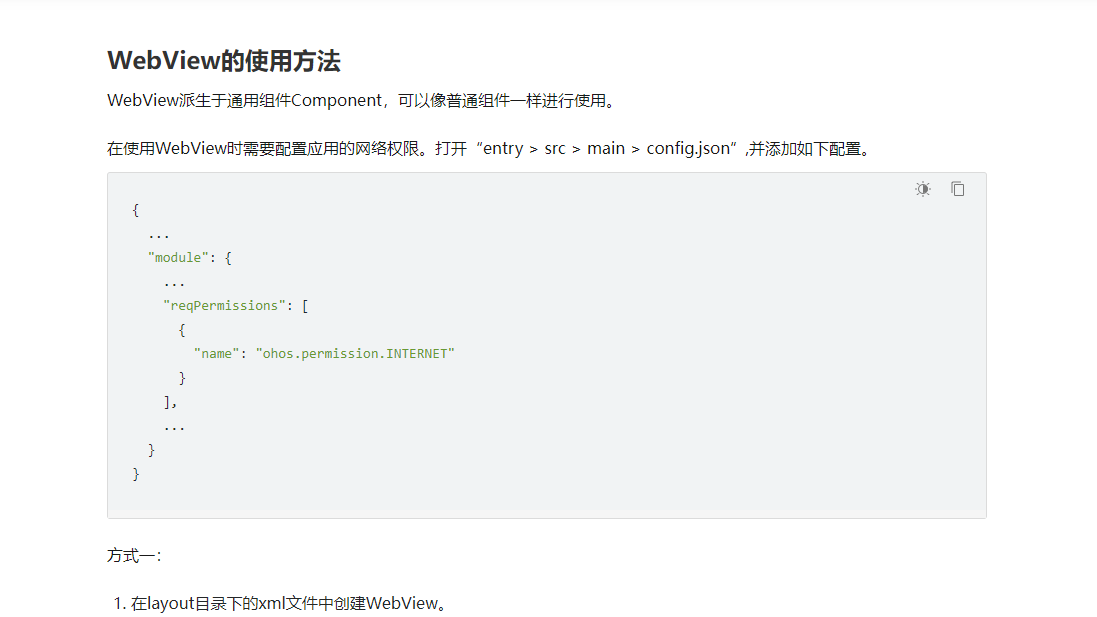
第一步 使用DependentLayout 简单大家一个layout布局界面
<?xml version="1.0" encoding="utf-8"?>

<DependentLayout

    xmlns:ohos="http://schemas.huawei.com/res/ohos"

    ohos:height="match_parent"

    ohos:width="match_parent"

    ohos:orientation="vertical"

    ohos:alignment="bottom">

    <ohos.agp.components.webengine.WebView

        ohos:id="$+id:webview"

        ohos:height="match_parent"

        ohos:width="match_parent">

    </ohos.agp.components.webengine.WebView>

    <Image

        ohos:id="$+id:myImage"

        ohos:height="100vp"

        ohos:width="100vp"

        ohos:image_src="$media:icon"/>

</DependentLayout>
Java代码如下:
package com.harmony.alliance.mydemo.slice;

import com.harmony.alliance.mydemo.ResourceTable;

import ohos.aafwk.ability.AbilitySlice;

import ohos.aafwk.content.Intent;

import ohos.agp.components.DirectionalLayout;

import ohos.agp.components.webengine.*;

import ohos.media.image.ImagePacker;

import ohos.media.image.PixelMap;

import ohos.media.image.common.PixelFormat;

import ohos.media.image.common.Size;

import java.io.File;

import java.io.FileOutputStream;

import java.io.IOException;

import java.io.OutputStream;

public class MainAbilitySlice extends AbilitySlice {

    private static final String EXAMPLE_URL = "https://developer.harmonyos.com/cn/docs/documentation/doc-references/js-apis-distributed-migration-0000001050024965";

    @Override

    public void onStart(Intent intent) {

        super.onStart(intent);

        super.setUIContent(ResourceTable.Layout_ability_main);

//        dl_bottom.requestForceForwardTouchEvent()

        WebView webView = (WebView) findComponentById(ResourceTable.Id_webview);

        webView.getWebConfig().setJavaScriptPermit(true);  // 如果网页需要使用JavaScript,增加此行;如何使用JavaScript下文有详细介绍

        webView.getWebConfig().setWebStoragePermit(true);

        webView.getWebConfig().setDataAbilityPermit(true);

        webView.getWebConfig().setLoadsImagesPermit(true);

        webView.getWebConfig().setMediaAutoReplay(true);

        webView.getWebConfig().setLocationPermit(true);

        webView.getWebConfig().setSecurityMode(WebConfig.SECURITY_SELF_ADAPTIVE);

        webView.load(EXAMPLE_URL);

//        HiLogUtils.PrintLog("webView.load======>>>"+EXAMPLE_URL);

    }

    @Override

    public void onActive() {

        super.onActive();

    }

    @Override

    public void onForeground(Intent intent) {

        super.onForeground(intent);

    }

}
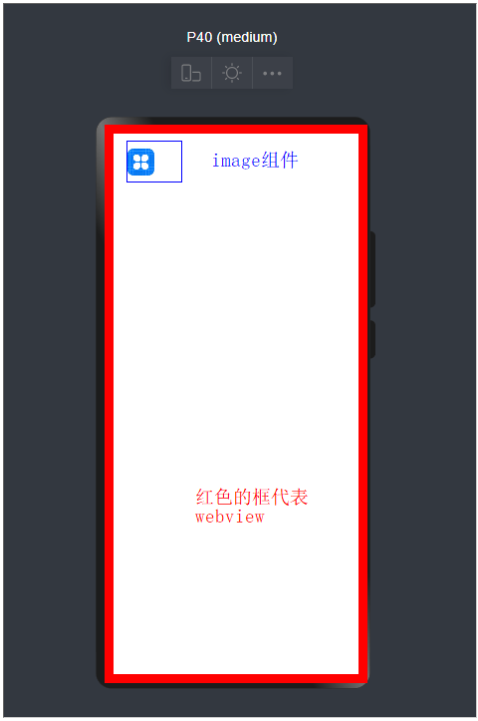
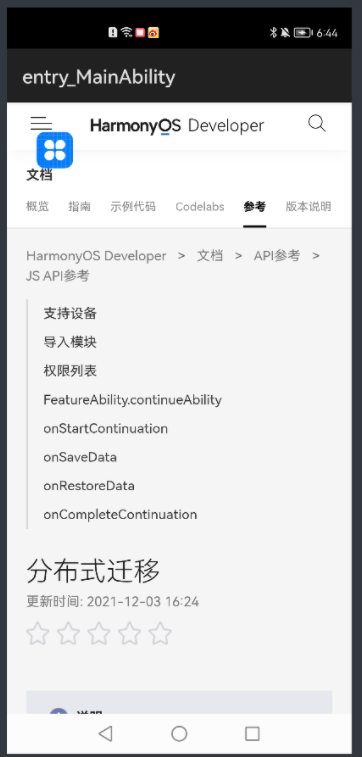
运行效果如下
第二步解决Webview覆盖层不显示的问题
这时候我们发现没有达到我想实现的效果,我们应该怎么解决呢?
2.1我们需要添加如下代码
    private void setWindowBgToAdaptWebView() {

        final String backgroundFileName = "_bg.jpg";

        File file = new File(getContext().getFilesDir(), backgroundFileName);

        if (file.exists()) {

            getWindow().setBackground(file.getPath());

            return;

        }

        PixelMap pixelMap = createBgPixelMap();

        if (pixelMap == null) {

            return;

        }

        ImagePacker imagePacker = ImagePacker.create();

        try (OutputStream outputStream = new FileOutputStream(file)) {

            ImagePacker.PackingOptions options = new ImagePacker.PackingOptions();

            if (!imagePacker.initializePacking(outputStream, options)) {

                return;

            }

            if (!imagePacker.addImage(pixelMap)) {

                return;

            }

            if (imagePacker.finalizePacking() < 0) {

                return;

            }

        } catch (IOException e) {

            e.printStackTrace();

        } finally {

            imagePacker.release();

        }

        getWindow().setBackground(file.getPath());

    }

    private PixelMap createBgPixelMap() {

        final int length = 10;

        PixelMap.InitializationOptions initializationOptions = new PixelMap.InitializationOptions();

        initializationOptions.size = new Size(length, length);

        initializationOptions.pixelFormat = PixelFormat.ARGB_8888;

        initializationOptions.editable = true;

        int[] defaultColors = new int[length * length];

        return PixelMap.create(defaultColors, initializationOptions);

}
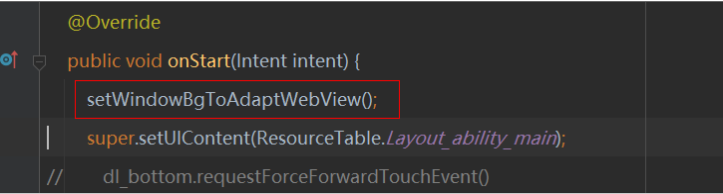
2.2我们要在OnStart的方法添加如下代码
全部代码如下
package com.harmony.alliance.mydemo.slice;

import com.harmony.alliance.mydemo.ResourceTable;

import ohos.aafwk.ability.AbilitySlice;

import ohos.aafwk.content.Intent;

import ohos.agp.components.DirectionalLayout;

import ohos.agp.components.webengine.*;

import ohos.media.image.ImagePacker;

import ohos.media.image.PixelMap;

import ohos.media.image.common.PixelFormat;

import ohos.media.image.common.Size;

import java.io.File;

import java.io.FileOutputStream;

import java.io.IOException;

import java.io.OutputStream;

public class MainAbilitySlice extends AbilitySlice {

    private static final String EXAMPLE_URL = "https://developer.harmonyos.com/cn/docs/documentation/doc-references/js-apis-distributed-migration-0000001050024965";

    @Override

    public void onStart(Intent intent) {

        setWindowBgToAdaptWebView();

        super.setUIContent(ResourceTable.Layout_ability_main);

//        dl_bottom.requestForceForwardTouchEvent()

        WebView webView = (WebView) findComponentById(ResourceTable.Id_webview);

        webView.getWebConfig().setJavaScriptPermit(true);  // 如果网页需要使用JavaScript,增加此行;如何使用JavaScript下文有详细介绍

        webView.getWebConfig().setWebStoragePermit(true);

        webView.getWebConfig().setDataAbilityPermit(true);

        webView.getWebConfig().setLoadsImagesPermit(true);

        webView.getWebConfig().setMediaAutoReplay(true);

        webView.getWebConfig().setLocationPermit(true);

        webView.getWebConfig().setSecurityMode(WebConfig.SECURITY_SELF_ADAPTIVE);

        webView.load(EXAMPLE_URL);

//        HiLogUtils.PrintLog("webView.load======>>>"+EXAMPLE_URL);

    }

    @Override

    public void onActive() {

        super.onActive();

    }

    @Override

    public void onForeground(Intent intent) {

        super.onForeground(intent);

    }

    private void setWindowBgToAdaptWebView() {

        final String backgroundFileName = "_bg.jpg";

        File file = new File(getContext().getFilesDir(), backgroundFileName);

        if (file.exists()) {

            getWindow().setBackground(file.getPath());

            return;

        }

        PixelMap pixelMap = createBgPixelMap();

        if (pixelMap == null) {

            return;

        }

        ImagePacker imagePacker = ImagePacker.create();

        try (OutputStream outputStream = new FileOutputStream(file)) {

            ImagePacker.PackingOptions options = new ImagePacker.PackingOptions();

            if (!imagePacker.initializePacking(outputStream, options)) {

                return;

            }

            if (!imagePacker.addImage(pixelMap)) {

                return;

            }

            if (imagePacker.finalizePacking() < 0) {

                return;

            }

        } catch (IOException e) {

            e.printStackTrace();

        } finally {

            imagePacker.release();

        }

        getWindow().setBackground(file.getPath());

    }

    private PixelMap createBgPixelMap() {

        final int length = 10;

        PixelMap.InitializationOptions initializationOptions = new PixelMap.InitializationOptions();

        initializationOptions.size = new Size(length, length);

        initializationOptions.pixelFormat = PixelFormat.ARGB_8888;

        initializationOptions.editable = true;

        int[] defaultColors = new int[length * length];

        return PixelMap.create(defaultColors, initializationOptions);

    }

}
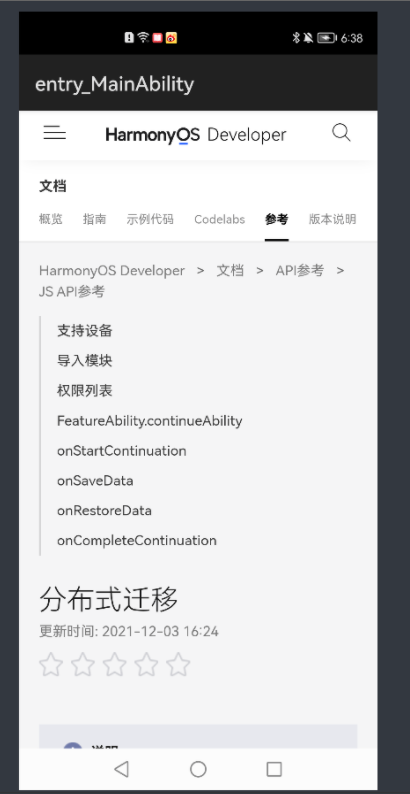
第三步查看运行效果
这时候我们在看一下运行效果
更多精彩内容,请见华为开发者官方论坛→https://developer.huawei.com/consumer/cn/forum/home?ha_source=sanfang
【HarmonyOS】【Demo】【JAVA UI】 鸿蒙怎么在Webview上添加组件的更多相关文章
- cocos2d-x 3.4版本,videoPlayer和webView上添加sprite等cocos控件
本帖源于小弟自己在项目过程中为了解决在cocos2d-x中实现ios里videoPlayer自定义控件的需求,所以挖出来大神的一个帖子http://www.cocoachina.com/bbs/rea ...
- HarmonyOS Java UI之DirectionalLayout布局
在之前的章节中我使用的是Java 代码构建UI界面,从本节开始,将使用XML构建UI界面. 使用XML构建UI(默认你已经会在项目中创建XML布局文件)界面相对Java代码构建的好处是:结构清晰,代码 ...
- HarmonyOS Java UI之DependentLayout布局示例
DependentLayout简介 DependentLayout意为相对位置布局,与DirectionalLayout相比较有更多的排布方式,每个组件可以指定相对于其他同级组件的位置,也可以指定相对 ...
- WebView 上传文件 WebChromeClient之openFileChooser函数
原链接:http://blog.saymagic.cn/2015/11/08/webview-upload.html?utm_source=tuicool&utm_medium=referra ...
- Java Project部署到Tomcat服务器上
所有的JAVA程序员,在编写WEB程序时,一般都通过工具如 MyEclipse,编写一个WEB Project,通过工具让这个WEB程序和Tomcat关联.其实在我们可以通过JAVA程序部署到Tomc ...
- 【Java Spring Cloud 实战之路】添加一个SpringBootAdmin监控
0. 前言 在之前的几章中,我们先搭建了一个项目骨架,又搭建了一个使用nacos的gateway网关项目,网关项目中并没有配置太多的东西.现在我们就接着搭建在Spring Cloud 微服务中另一个重 ...
- 面向UI编程:ui.js 1.1 使用观察者模式完成组件之间数据流转,彻底分离组件之间的耦合,完成组件的高内聚
开头想明确一些概念,因为有些概念不明确会导致很多问题,比如你写这个框架为什么不去解决啥啥啥的问题,哎,心累. 什么是框架? 百度的解释:框架(Framework)是整个或部分系统的可重用设计,表现为一 ...
- java~gradle构建公用包并上传到仓库
java~gradle构建公用包并上传到仓库 我们一般会把公用的代码放在一个包里,然后其它 项目可以直接使用,就像你使用第三方包一样! 仓库 存储包的地方叫做仓库,一般可以分为本地仓库和远程仓库,本地 ...
- java~gradle构建公用包并上传到仓库~使用私有仓库的包
在新的项目里使用仓库的包 上一讲中我们说了java~gradle构建公用包并上传到仓库,如何发布公用的非自启动类的包到私有仓库,而这一讲我们将学习如何使用这些包,就像我们使用spring框架里的功能包 ...
随机推荐
- 在CentOS7上安装 jq
安装EPEL源: yum install epel-release 安装完EPEL源后,可以查看下jq包是否存在: yum list jq 安装jq: yum -y install jq 命令参考资料 ...
- 详谈 Java工厂 --- 静态工厂 【简单工厂模式】
1.前言 什么是工厂模式? 就是为了尽可能将代码的耦合度降低而产生的设计模式. 这篇随笔讲解静态工厂的思路和具体操作. 2.总结 (1)静态工厂又称 简单 工厂模式 ,是最最简单的工厂模式. (2)优 ...
- 历时5月,Kubernetes1.19正式发布 !Ingress迎来GA,存储容量跟踪新特性
我们迎来了Kubernetes1.19,这是2020年发布的第二个版本,也是迄今为止最长的发布周期,总共持续了20周.它包括33个增强功能:12个增强功能达到稳定版,18个增强处在beta版,还有13 ...
- 【Java】抽象类与抽象方法
文章目录 抽象类与抽象方法 abstract关键字的使用 abstract修饰类:抽象类 abstract修饰方法:抽象方法 abstract使用上的注意点: 抽象类的匿名子类 模板方法设计模式 抽象 ...
- css中两种居中方式text-align:center和margin:0 auto 的使用场景
关于使用text-align:center和margin:0 auto 两种居中方式的比较 前言:最近由于要学习后端,需要提前学习一部分前端知识,补了补css知识,发现狂神在讲这一部分讲的不是特别清楚 ...
- C++内嵌汇编 教程1
注:本文的所有代码是在我自己的VS2008中测试的,由于环境的差别,不能保证能在所有的编译器上运行. 1.内嵌汇编介绍 在C++中,可以通过__asm关键字来嵌入汇编语言.例如 int main(){ ...
- 676. Implement Magic Dictionary
Implement a magic directory with buildDict, and search methods. For the method buildDict, you'll be ...
- IDEA中导入Maven工程(module)
导入其它Maven工程时可能会出现依赖代码变红等等可以重新导入 右键pom.xml文件 --->Maven---->Reimport ,idea强制刷新内容,一般能解决依赖没有识别的问题 ...
- 【简记】SpringBoot禁用Swagger
楔子 Swagger 是 Java Web 开发中常用的接口文档生成类库,在开发和前后端联调时使用它来模拟接口调用能提高开发效率.但是,在生产环境可能并不需要它,一个原因是启用它会延长程序启动时间(动 ...
- linux系统别名
目录 一:系统别名 一:系统别名 alias 格式: alias xxx='命令' alias : 查看系统别名 alias rm='xxx' : 设置系统别名 改别名 别名 执行这个命令 [root ...