Android-相对布局(RelativeLayout)
<?xml version="1.0" encoding="utf-8"?>
<RelativeLayout xmlns:android="http://schemas.android.com/apk/res/android"
    android:layout_width="match_parent"
    android:layout_height="match_parent">

   相对布局这里面到所有控件,都是有相对性的
                       1.相对与父控件
                       2.相对与和自己平级的控件

</RelativeLayout>

虽然相对布局需要对没有控件设置ID,才能使用,看起来LinearLayout方便写,实际上RelativeLayout更加对灵活,因为线性布局设置垂直或者水平就整版都是垂直与水平的,相对布局控制更加灵活写

相对布局,如果不指定ID,默认都是在左上角
相对bt_444控件中间线对齐:
android:layout_alignBaseline="@id/bt_333"

相对bt_444控件顶部对齐:
android:layout_alignTop="@id/bt_333"

相对bt_444控件的底部对齐:
android:layout_alignBottom="@id/bt_333"

<!--

    相对于父控件系列:

            相对于父控件垂直居中

            android:layout_centerVertical="true"

            相对于父控件水平居中

            android:layout_centerHorizontal="true"

            相对于父控件正中间

            android:layout_centerInParent="true"

            相对于父控件的右边

            android:layout_alignParentRight="true"

            相对于父控件的左边

            android:layout_alignParentLeft="true"

            相对于父控件的顶部

            android:layout_alignParentTop="true"

            相对于父控件的底部

            android:layout_alignParentBottom="true"

            相对于父控件的结束(通常情况下是在父控件最右边)

            android:layout_alignParentEnd="true"

            相对于父控件的开始 最左边 相对布局的默认

            android:layout_alignParentStart="true"

        相对于平级控件系列:

            相对于bt_111控件的底部

            android:layout_below="@+id/bt_111"

            相对于bt_111控件的顶部

            android:layout_above="@id/bt_111"

            相对于bt_111控件的右边

            android:layout_toRightOf="@id/bt_111"

            相对于bt_111控件的左边

            android:layout_toRightOf="@id/bt_111"

            相对与控件的中间对齐

            android:layout_alignBaseline="@id/bt_333"

            相对与控件的顶部对齐

            android:layout_alignTop="@id/bt_333"

            相对与控件的底部对齐

            android:layout_alignBottom="@id/bt_333"

            相对与控件的中间对齐

            android:layout_alignBaseline="@id/bt_333"

            相对与控件的左对齐

            android:layout_alignLife="@id/bt_333"

            相对与控件的右对齐

            android:layout_alignRight="@id/bt_333"

            // 外边距 上下左右 一般情况下用于 View

            android:layout_marginTop="20dp"

            android:layout_marginLeft="20dp"

            android:layout_marginBottom="20dp"

            android:layout_marginRight="20dp"

            android:layout_margin="20dp"

            外边距往水平方向80dp

            android:layout_marginHorizontal="80dp"

            外边距往垂直方向80dp

            android:layout_marginVertical="80dp"

            // 内边距 上下左右 一般情况下用于 ViewGroup 用来管控View

            android:padding="40dp"

            android:paddingLeft="40dp"

            android:paddingRight="40dp"

            android:paddingTop="40dp"

            android:paddingBottom="40dp"

            内边距往水平方向60dp

            android:paddingHorizontal="60dp"

            内边距往垂直方向60dp

            android:paddingVertical="60dp"

-->
相对布局测试的代码:
<?xml version="1.0" encoding="utf-8"?>
<RelativeLayout xmlns:android="http://schemas.android.com/apk/res/android"
android:layout_width="match_parent"
android:layout_height="match_parent"
android:orientation="vertical"> <Button
android:id="@+id/bt_111"
android:layout_width="wrap_content"
android:layout_height="wrap_content"
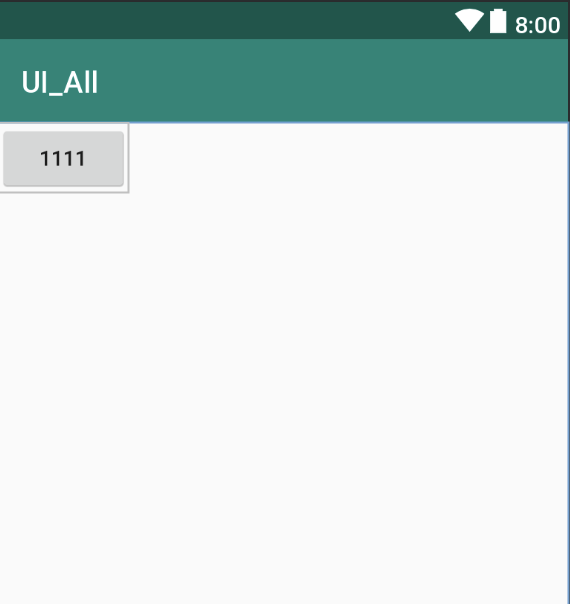
android:text="1111" android:layout_centerVertical="true"
android:layout_centerHorizontal="true"
android:layout_centerInParent="true" /> <Button
android:id="@+id/bt_222"
android:layout_width="wrap_content"
android:layout_height="wrap_content"
android:text="2222"
android:layout_toLeftOf="@id/bt_111"
android:layout_centerInParent="true"
/> <Button
android:id="@+id/bt_333"
android:layout_width="wrap_content"
android:layout_height="20dp"
android:text="333"
android:layout_marginLeft="130dp"
android:layout_marginTop="130dp"
android:background="#f00"
/> <Button
android:id="@+id/bt_444"
android:layout_width="wrap_content"
android:layout_height="40dp"
android:text="444"
android:layout_toRightOf="@id/bt_333"
android:layout_alignBaseline="@id/bt_333"
android:background="@color/colorAccent"
/> <Button
android:layout_width="wrap_content"
android:layout_height="wrap_content"
android:text="555"
android:layout_alignParentStart="true"
/> </RelativeLayout>
Android-相对布局(RelativeLayout)的更多相关文章
- Android相对布局(RelativeLayout)
Android相对布局(RelativeLayout) 备注:这里的视图和元素是等同的概念. RelativeLayout是一个允许子视图相对于其他兄弟视图或是父视图显示的视图组(通过ID指定).每个 ...
- Android之布局RelativeLayout
线性布局的weight属性在等比例分配时比较方便,但是对复杂的界面,嵌套多层LinearLayout布局会导致渲染变慢,占用更多系统资源:而使用RelativeLayout的话,可能仅仅需要一层就可以 ...
- android的布局-----RelativeLayout(相对布局)
学习导图 注:父容器定位的属性值只能是Boolean ,兄弟组件定位的属性值只能是ID 典型案例(梅花) <?xml version="1.0" encoding=" ...
- Android UI -- 布局介绍(布局包括FrameLayout, LinearLayout, RelativeLayout, GridLayout)
首先介绍常用布局类 FrameLayout 最简单的布局管理器. 这个布局管理类有几个特性: 添加组件默认在左上角的. 如果添加多个组件会叠加到一起,并且都在左上角.(可以通过一gravity属性改变 ...
- Android 自学之相对布局 RelativeLayout
相对布局(RelativeLayout),相对布局容器内子组件的位置总是相对兄弟组件.父容器来决定的. RelativeLayout的XML属性及相关方法说明 XML属性 相关方法 说明 androi ...
- [Irving]Android 常用布局之RelativeLayout
RelativeLayout相对布局 相对布局 RelativeLayout 允许子元素指定它们相对于其父元素或兄弟元素的位置,这是实际布局中最常用的布局方式之一. 它灵活性大很多,当然属性也多,操作 ...
- 一步一步学android之布局管理器——RelativeLayout
今天开始学习RelativeLayout(相对布局),相对布局在平时布局的时候用的较多,因为Android适配方面的原因.相对布局可以控制组件摆放的位置(放在任一组件的上下左右等位置),下面来看看类的 ...
- Android 五大布局(LinearLayout、FrameLayout、AbsoulteLayout、RelativeLayout、TableLayout )
前言 欢迎大家我分享和推荐好用的代码段~~ 声明 欢迎转载,但请保留文章原始出处: CSDN:http://www.csdn.net ...
- android LinearLayout和RelativeLayout实现精确布局
先明确几个概念的区别: padding margin:都是边距的含义,关键问题得明白是什么相对什么的边距padding:是控件的内容相对控件的边缘的边距. margin :是控件边缘相对父空间的边距 ...
- .Net程序猿玩转Android开发---(7)相对布局RelativeLayout
相对布局RelativeLayout是Android布局中一个比較经常使用的控件,使用该控件能够布局出适合各种屏幕分辨率的布局,RelativeLayout採用相对位置进行 ...
随机推荐
- Vim配置:在win10下用vim编译运行C/C++(异步插件管理,一键运行)
为什么用Vim 重新调配vim,追求尽量简单些. 安装 官网下载 PC: MS-DOS and MS-Windows下的 For modern MS-Windows systems (starting ...
- openLayers 3 之入门
openLayers 3 之入门 openlayer是web GIS客户端开发提供的javascript类库,也是开源框架,可以加载本地数据进行展示地图 1.下载相关引用的js.css文件 2.类似于 ...
- winform频繁刷新导致界面闪烁解决方法
转自龙心文 原文 winform频繁刷新导致界面闪烁解决方法 一.通过对窗体和控件使用双缓冲来减少图形闪烁(当绘制图片时出现闪烁时,使用双缓冲) 对于大多数应用程序,.NET Framework 提供 ...
- __slots__
__slots__ 由于Python是动态语言,任何实例在运行期都可以动态地添加属性. 如果要限制添加的属性,例如,Student类只允许添加 name.gender和score 这3个属性,就可以利 ...
- e s6 知识点
http://es6.ruanyifeng.com/#docs/reflect 1.资料对es6箭头函数中的this总结:箭头函数中的this指向的是 定义时的this,而不是 执行时的this.
- APP微信登录---第三方登录
(一)引入maven配置 <dependency> <groupId>com.github.liyiorg</groupId> <artifactId> ...
- keepalived和zookeeper对比
https://blog.csdn.net/vtopqx/article/details/79066703keepalived与zookeeper都可以用来实现高可用,高可用一般跟负载均衡会一起考虑, ...
- std::mutex 引起的 C2280 尝试引用已删除的函数
起因是把之前写的类中的 mutex 使用了(之前注释掉了没用到这个变量); 或者说添加了一个 mutex 变量, 然后 这个类有嵌套在了 其类的 map 中使用, 然后 编译 就报错 ` C2280 ...
- 利用fetch进行POST传参
fetch(config.host+"url",{ method:"POST", mode: 'cors',跨域请求 headers: { ...
- cdoj32-树上战争(Battle on the tree) 【记忆化搜索】
http://acm.uestc.edu.cn/#/problem/show/32 树上战争(Battle on the tree) Time Limit: 12000/4000MS (Java/Ot ...