小峰servlet/jsp(7)jstl国际化标签库、sql标签库等
一、jstl国际化标签库:
fmt:setLocale 设定用户所在的区域;
fmt:formatDate 对日期进行格式化
fmt:requestEncoding 设置所有的请求编码;
fmt:bundle fmt:message 读取国际化资源;
fmt:formatNumber 格式化数字;
fmt:timeZone 设置临时时区
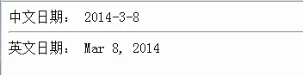
fmt:setLocale:
 <body>

 <%

     pageContext.setAttribute("date",new Date());

 %>

 中文日期:

 <fmt:setLocale value="zh_CN"/>

 <fmt:formatDate value="${date }"/>

 <hr/>

 英文日期:

 <fmt:setLocale value="en_US"/>

 <fmt:formatDate value="${date }"/>

 </body>
fmt:requestEncoding:
 <body>

 <fmt:requestEncoding value="UTF-8"/>

 </body>
fmt:bundle; fmt:message:
资源文件:
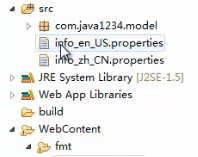
info_en_US.properties:
 name=xiaofeng

 info=Current user{0}:Welcome to use our system
info_zh_CN.properties:
 name=\u5c0f\u950b

 info=\u5f53\u524d\u7528\u6237{0}:\u6b22\u8fce\u4f7f\u7528\u672c\u7cfb\u7edf
<body>
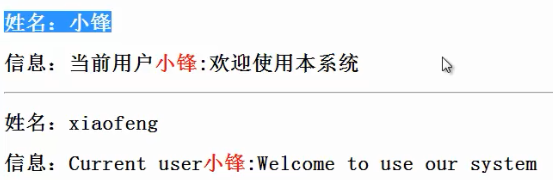
<fmt:setLocale value="zh_CN"/>
<fmt:bundle basename="info">
<fmt:message key="name" var="userName"/>
</fmt:bundle>
<h2>姓名:${userName }</h2>
<fmt:bundle basename="info">
<fmt:message key="info" var="infomation">
<fmt:param value="<font color='red'>小锋</font>"/>
</fmt:message>
</fmt:bundle>
<h2>信息:${infomation }</h2>
<hr/>
<fmt:setLocale value="en_US"/>
<fmt:bundle basename="info">
<fmt:message key="name" var="userName"/>
</fmt:bundle>
<h2>姓名:${userName }</h2>
<fmt:bundle basename="info">
<fmt:message key="info" var="infomation">
<fmt:param value="<font color='red'>小锋</font>"/>
</fmt:message>
</fmt:bundle>
<h2>信息:${infomation }</h2>
</body>
//<fmt:param value="<font color='red'>小锋</font>"/>是为properties中的占位符动态塞数据;
fmt:formatNumber:
 <body>

 <!-- value:数值 ;  type:数值类型;  pattern:格式 -->

 <fmt:formatNumber value="12" type="currency" pattern="$.00"/>

 <fmt:formatNumber value="12" type="currency" pattern="$.0#"/>

 <fmt:formatNumber value="1234567890" type="currency"/>

 <fmt:formatNumber value="123456.7891" pattern="#,#00.0#"/>

 </body>

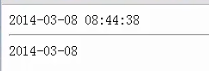
fmt:formatDate:
 <body>

 <!-- value:数值 ;  type:数值类型;  pattern:格式 -->

 <%

     Date date=new Date();

     pageContext.setAttribute("date",date);

 %>

 <fmt:formatDate value="${date }" pattern="yyyy-MM-dd HH:mm:ss"/>

 <hr/>

 <fmt:formatDate value="${date }" pattern="yyyy-MM-dd"/>

 </body>
fmt:timeZone:
<body>
<!-- value:数值 ; type:数值类型; pattern:格式 -->
<%
Date date=new Date();
pageContext.setAttribute("date",date);
%>
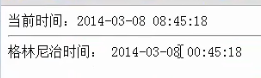
当前时间:<fmt:formatDate value="${date }" pattern="yyyy-MM-dd HH:mm:ss"/>
<hr/>
格林尼治时间:
<fmt:timeZone value="GMT">
<fmt:formatDate value="${date }" pattern="yyyy-MM-dd HH:mm:ss"/>
</fmt:timeZone>
</body>
二、jstl SQL标签库:
sql:setDataSource 设置JDBC连接;
sql:query 数据库查询操作
sql:update 数据库添加、修改、删除操作;
sql:transaction 数据库事务
sql:setDataSource/sql:query:
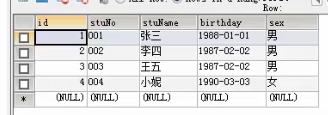
数据库中存在这样的表:t_student:
jsp页面要引入:<%@ taglib uri="http://java.sun.com/jsp/jstl/sql" prefix="sql" %>
<%@ page language="java" contentType="text/html; charset=UTF-8" pageEncoding="UTF-8"%>
<%@ taglib uri="http://java.sun.com/jsp/jstl/sql" prefix="sql" %>
<%@ taglib uri="http://java.sun.com/jsp/jstl/core" prefix="c"%>
<!DOCTYPE html PUBLIC "-//W3C//DTD HTML 4.01 Transitional//EN" "http://www.w3.org/TR/html4/loose.dtd">
<html>
<head>
<meta http-equiv="Content-Type" content="text/html; charset=UTF-8">
<title>Insert title here</title>
</head>
<body>
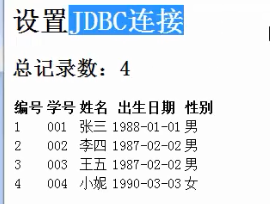
<h1>设置JDBC连接</h1>
<sql:setDataSource driver="com.mysql.jdbc.Driver" url="jdbc:mysql://localhost:3306/db_jstl" user="root" password="123456" />
<sql:query var="result">
select * from t_student;
</sql:query>
<h2>总记录数:${result.rowCount }</h2>
<table>
<tr>
<th>编号</th>
<th>学号</th>
<th>姓名</th>
<th>出生日期</th>
<th>性别</th>
</tr>
<c:forEach var="student" items="${result.rows }">
<tr>
<td>${student.id }</td>
<td>${student.stuNo }</td>
<td>${student.stuName }</td>
<td>${student.birthday }</td>
<td>${student.sex }</td>
</tr>
</c:forEach>
</table>
</body>
</html>
访问展示:
sql:update:
增:
 <body>

 <h1>设置JDBC连接</h1>

 <sql:setDataSource driver="com.mysql.jdbc.Driver" url="jdbc:mysql://localhost:3306/db_jstl" user="root" password="123456"/>

 <h1>添加数据</h1>

 <sql:update var="result" >

     insert into t_student values(null,"008","草泥马","1991-1-1","男");

 </sql:update>

 </body>
改:
 <body>

 <h1>设置JDBC连接</h1>

 <sql:setDataSource driver="com.mysql.jdbc.Driver" url="jdbc:mysql://localhost:3306/db_jstl" user="root" password="123456"/>

 <h1>修改数据</h1>

 <sql:update var="result" >

     update t_student set stuNo="010",sex="未知" where id=6

 </sql:update>

 </body>
删:
 <body>

 <h1>设置JDBC连接</h1>

 <sql:setDataSource driver="com.mysql.jdbc.Driver" url="jdbc:mysql://localhost:3306/db_jstl" user="root" password="123456"/>

 <h1>删除数据</h1>

 <sql:update var="result" >

     delete from t_student where id=6

 </sql:update>

 </body>
sql:transcation:
 <body>

 <h1>设置JDBC连接</h1>

 <sql:setDataSource driver="com.mysql.jdbc.Driver" url="jdbc:mysql://localhost:3306/db_jstl" user="root" password="123456"/>

 <h1>事务</h1>

 <sql:transaction>

     <sql:update var="result" >

         insert into t_student values(null,"008","草泥马","1991-1-1","男");

     </sql:update>

 </sql:transaction>

 </body>
三、jstl xml标签库:
x:parse 解析xml;
x:out 输出xml文件的内容
x:set 把xml读取的内容保存到指定的属性范围
x:if 判断指定路径的内容是否符合判断的条件;
x:choose/x:when/x:otherwise 多条件判断
x:forEach 遍历
需要引入xalan.jar;
jsp文件需要引入:<%@ taglib uri="http://java.sun.com/jsp/jstl/xml" prefix="x"%>
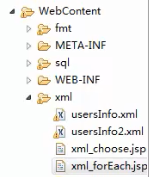
有这样两个xml文件,usersInfo.xml; usersInfo2.xml:
usersInfo.xml:
 <?xml version="1.0" encoding="UTF-8"?>

 <users>

     <user>

         <name id="n1">张三</name>

         <birthday>2011-1-1</birthday>

     </user>

 </users>
usersInfo2.xml:
 <?xml version="1.0" encoding="UTF-8"?>

 <users>

     <user>

         <name id="n1">张三</name>

         <birthday>2011-1-1</birthday>

     </user>

     <user>

         <name id="n2">王五</name>

         <birthday>2011-1-2</birthday>

     </user>

     <user>

         <name id="n3">赵六</name>

         <birthday>2011-1-3</birthday>

     </user>

 </users>
文件存放路径:
1)x:parse x:out
<%@ page language="java" contentType="text/html; charset=UTF-8" pageEncoding="UTF-8"%>
<%@ taglib uri="http://java.sun.com/jsp/jstl/core" prefix="c"%>
<%@ taglib uri="http://java.sun.com/jsp/jstl/xml" prefix="x"%>
<!DOCTYPE html PUBLIC "-//W3C//DTD HTML 4.01 Transitional//EN" "http://www.w3.org/TR/html4/loose.dtd">
<html>
<head>
<meta http-equiv="Content-Type" content="text/html; charset=UTF-8">
<title>Insert title here</title>
</head>
<body>
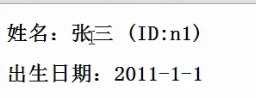
<c:import var="usersInfo" url="usersInfo.xml" charEncoding="UTF-8"/>
<x:parse var="usersInfoXml" doc="${usersInfo }"/> <h2>姓名:<x:out select="$usersInfoXml/users/user/name"/>
(ID:<x:out select="$usersInfoXml/users/user/name/@id"/>)</h2>
<h2>出生日期:<x:out select="$usersInfoXml/users/user/birthday"/></h2>
</body>
</html>
2) x:set
 <body>

 <c:import var="usersInfo" url="usersInfo.xml" charEncoding="UTF-8"/>

 <x:parse var="usersInfoXml" doc="${usersInfo }"/>

 <x:set var="userInfoXml" select="$usersInfoXml/users/user"/>

 <h2>姓名:<x:out select="$userInfoXml/name"/></h2>

 </body>
3) x:if
 <body>

 <c:import var="usersInfo" url="usersInfo.xml" charEncoding="UTF-8"/>

 <x:parse var="usersInfoXml" doc="${usersInfo }"/>

 <x:if select="$usersInfoXml/users/user/name/@id='n1'">

     <h2>有编号是n1的user信息</h2>

 </x:if>

 </body>
4) x:choose/x:when/x:otherwise
 <body>

 <c:import var="usersInfo" url="usersInfo.xml" charEncoding="UTF-8"/>

 <x:parse var="usersInfoXml" doc="${usersInfo }"/>

 <x:choose>

     <x:when select="$usersInfoXml/users/user/name/@id='n2'">

         <h2>有编号是n2的user信息</h2>

     </x:when>

     <x:otherwise>

         <h2>没有编号是n2的user信息</h2>

     </x:otherwise>

 </x:choose>

 </body>
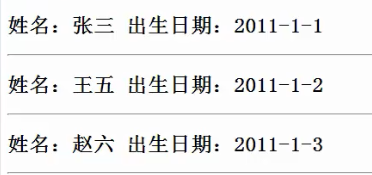
5) x:forEach:
<body>
<c:import var="usersInfo" url="usersInfo2.xml" charEncoding="UTF-8"/>
<x:parse var="usersInfoXml" doc="${usersInfo }"/>
<x:forEach select="$usersInfoXml/users/user" var="userInfoXml">
<h2>姓名:<x:out select="$userInfoXml/name"/> 出生日期:<x:out select="$userInfoXml/birthday"/></h2>
<hr/>
</x:forEach>
</body>
四、jstl函数标签库:
jsp页面需要引入:
<%@ taglib uri="http://java.sun.com/jsp/jstl/functions" prefix="fn"%>
<%@ page language="java" contentType="text/html; charset=UTF-8" pageEncoding="UTF-8"%>
<%@ taglib uri="http://java.sun.com/jsp/jstl/functions" prefix="fn"%>
<!DOCTYPE html PUBLIC "-//W3C//DTD HTML 4.01 Transitional//EN" "http://www.w3.org/TR/html4/loose.dtd">
<html>
<head>
<meta http-equiv="Content-Type" content="text/html; charset=UTF-8">
<title>Insert title here</title>
</head>
<body>
<%
pageContext.setAttribute("info","www.java1234.com");
%>
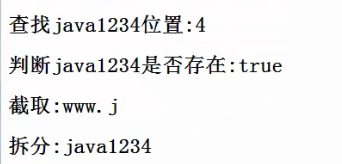
<h2>查找java1234位置:${fn:indexOf(info,"java1234")}</h2>
<h2>判断java1234是否存在:${fn:contains(info,"java1234")}</h2>
<h2>截取:${fn:substring(info,0,5)}</h2>
<h2>拆分:${fn:split(info,".")[1]}</h2>
</body>
</html>
页面展示:
函数标签一些:
<c:if test="${fun:length(operation.rangeList) > 0}">
小峰servlet/jsp(7)jstl国际化标签库、sql标签库等的更多相关文章
- 小峰servlet/jsp(5)jsp自定义标签
一.自定义标签helloworld: 二.自定义有属性的标签: HelloWorldTag.java:继承TagSupport: package com.java1234.tag; import ja ...
- 小峰servlet/jsp(1)
一.scriptlet标签: 通过scriptlet标签我们可以可以在jsp理嵌入java代码: 第一种:<%! %> 可以在里面定义全局变量.方法.类: 第二种:<% %> ...
- 小峰servlet/jsp(6)jstl核心标签库
一.引入jstl 需要jstl.jar;standard.jar; 二.jstl核心标签库: c:out 内容输出标签; c:set 用来设置4种属性范围值的标签: c:re ...
- 小峰servlet/jsp(3)登陆功能实现
一.User模型: User.java: package com.java1234.model; public class User { private int id; private String ...
- 小峰servlet/jsp(4)EL表达式
一.EL表达式内置对象: 二.EL表达式访问4种范围属性: 寻找值的顺序: page-->request-->session-->application; 三.EL表达式接收请求参数 ...
- 小峰servlet/jsp(2)
一.jsp javaBean组件引入 <jsp:useBean id="实例化对象名称" scope="保存范围" class="类完整名称&q ...
- JSP中 JSTL和EL标签的使用
使用JSTL前的准备 想要使用JSTL,首先需要给工程导入JSTL的包(JSTL.jar和standard.jar). JSTL简介 JSP标准标签库(JSTL)是一个JSP标签集合,它封装了JSP应 ...
- Java Servlet(十):JSTL核心标签库
JSTL全名称:JaveServer Pages Standard Tag Library.JSTL是由JCP(Java Community Process)所定制的标准规范,它主要提供给Java W ...
- servlet&jsp高级:第三部分
声明:原创作品,转载时请注明文章来自SAP师太技术博客( 博/客/园www.cnblogs.com):www.cnblogs.com/jiangzhengjun,并以超链接形式标明文章原始出处,否则将 ...
随机推荐
- HTML(一)基础
一.HTML简介 文本标记语言,即HTML(Hypertext Markup Language),是用于描述网页文档的一种标记语言. HTML之所以称为超文本标记语言,是因为文本中包含了所谓“超级链接 ...
- delphi 高亮选中MEMO某一行
http://www.delphitop.com/html/kongjian/2641.html选中第5行 //转到指定行并选中这行的文本 procedure SelectLine(Memo1: TM ...
- POJ 1007 DNA sorting (关于字符串和排序的水题)
#include<iostream>//写字符串的题目可以用这种方式:str[i][j] &str[i] using namespace std; int main() {int ...
- Python3 集合(set)(十五)
集合(set)是一个无序不重复元素的序列. 它的主要作用如下: 去重,把一个列表变成集合,就自动去重了 关系测试,测试两组数据之前的交集.差集.并集等关系 set和dict类似,也是一组key的集合, ...
- Linux便捷命令
快捷键: tab:命令和文件名称补齐功能快捷键 Ctrl + c:中断当前程序 Ctrl + d:退出当前终端 求助快捷键: man:manual的简写,如man ls man命令: / string ...
- scroll事件的优化以及scrollTop的兼容性
scrollTop的兼容性 scroll事件,当用户滚动带滚动条的元素中的内容时,在该元素上面触发.<body>元素中包含所加载页面的滚动条. 虽然scroll事件是在window对象上发 ...
- tomcat catalina.out(一,windows下的catalina.out)
最近在研究项目时,发现linux操作系统中,catalina_home/logs/catalina.out的文件有几个G的大小,便上网查了下这个文件的生成方式及如何避免,下面是我整理的材料: 之前我们 ...
- H - 【59】Lazier Salesgirl 模拟//lxm
Kochiya Sanae is a lazy girl who makes and sells bread. She is an expert at bread making and selling ...
- 6.1 socket 长连接、短连接
一般情况下,服务器的长连接和短连接不是服务器说了算,而是客户端说了算.因为服务器是给别人提供业务的,一旦连接建立起来之后,服务器端不会主动把连接给close掉. 客户端发送一笔业务,没有关闭连接,然后 ...
- c++ json 详解
一. 使用jsoncpp解析json Jsoncpp是个跨平台的开源库,首先从http://jsoncpp.sourceforge.net/上下载jsoncpp库源码,我下载的是v0.5.0,压缩包大 ...