Haproxy+ssl+nvm+forever
1 nvm介绍
- NVM(Node version manager)顾名思义,就是Node.js的版本管理软件,可以轻松的在Node.js各个版本间切换,项目源码在GitHub;
#安装git客户端

[root@node-v1 ~]# yum install git-core -y

[root@node-v1 ~]# cd /usr/local/src/

[root@node-v1 src]# git clone https://github.com/cnpm/nvm.git

[root@node-v1 src]# cd nvm/

[root@node-v1 nvm]# ./install.sh

[root@node-v1 nvm]# source nvm.sh

[root@node-v1 nvm]# nvm install 8

######################################################################## 100.0%

WARNING: checksums are currently disabled for node.js v4.0 and later

Now using node v8.9.4 (npm v5.6.0)

[root@node-v1 bin]# echo "export PATH=/usr/local/src/nvm/versions/node/v8.9.4/bin:$PATH" >> /etc/profile

[root@node-v2 .nvm]# cat >>/etc/profile<<EOF

> export NVM_DIR="/usr/local/src/nvm"

> [ -s "$NVM_DIR/nvm.sh" ] && . "$NVM_DIR/nvm.sh"

> EOF
- 使用方法
- 列出所有可安装的版本nvm list-remote;
- 安装相应的版本使用nvm install 8;还可以直接安装 各个版本;
- 查看一下你当前已经安装的版本:nvm ls;
- 切换版本;nvm use v0.12.4;
- 设置默认版本 nvm alias default v0.12.4
- 注意:具体操作很简单,使用帮助通过nvm help;
1.1 编写hello.js试验
[root@node-v1 ~]# cat hello.js

var http = require('http');

var server = http.createServer(function(req, res) {

res.writeHead(200, {'Content-Type' : 'text/html'});

res.write('<head><meta charset="utf-8"/></head>');

res.end("Hello world node-v1");

});

server.listen(3000, '10.0.0.7');

- node-v2也是如此
1.2 安装forever让node永久运行
[root@node-v1 ~]# npm install forever -g

[root@node-v1 ~]# forever start hello.js

[root@node-v1 ~]# forever stop hello.js
2 安装Haproxy
[root@haproxy ~]# yum install -y haproxy

[root@haproxy ~]# cp /etc/haproxy/haproxy.cfg{,.bak}
2.1 Haproxy开启日志记录
[root@haproxy ~]# mkdir /var/log/haproxy

[root@haproxy ~]# chmod a+w /var/log/haproxy

[root@haproxy ~]# egrep -v "#|^$" /etc/rsyslog.conf

$ModLoad imudp

$UDPServerRun 514

$WorkDirectory /var/lib/rsyslog

$ActionFileDefaultTemplate RSYSLOG_TraditionalFileFormat

$IncludeConfig /etc/rsyslog.d/*.conf

$OmitLocalLogging on

$IMJournalStateFile imjournal.state

*.info;mail.none;authpriv.none;cron.none                /var/log/messages

authpriv.*                                              /var/log/secure

mail.*                                                  -/var/log/maillog

cron.*                                                  /var/log/cron

*.emerg                                                 :omusrmsg:*

uucp,news.crit                                          /var/log/spooler

local7.*                                                /var/log/boot.log
2.2 修改“/etc/sysconfig/rsyslog”文件,内容如下
[root@haproxy ~]# cat /etc/sysconfig/rsyslog

# Options for rsyslogd

# Syslogd options are deprecated since rsyslog v3.

# If you want to use them, switch to compatibility mode 2 by "-c 2"

# See rsyslogd(8) for more details

SYSLOGD_OPTIONS="-r -m 0 -c 2"
2.3 修改Haproxy的配置文件如下:
[root@haproxy ~]# cat /etc/haproxy/haproxy.cfg

global

    log         127.0.0.1 local0  info  #定义全局syslog服务,127.0.0.1表示将日志发送到本地保存

    chroot      /var/lib/haproxy

    pidfile     /var/run/haproxy.pid

    maxconn     25600              #最大连接数

    user        haproxy            #用户名

    group       haproxy            #组

    daemon                         #以守护进程方式运行

    stats socket /var/lib/haproxy/stats     # turn on stats unix socket

defaults                                         #为frontend和backend提供默认参数

    mode                    http                 #模式

    log                     global               #日志

    option  httplog                              #详细记录http日志

    option  dontlognull                          #不记录健康检查的日志信息

    retries 3                                    #3次连接失败则认为服务不可用

    option  redispatch                           #ServerID对应的服务器宕机后,强制定向到其他运行正常的服务器

    maxconn 30000                                #默认的最大连接数

    contimeout  5000                             #连接超时

    clitimeout  5000                            #客户端超时

    srvtimeout  5000                             #服务器超时

    timeout check   1s                           #心跳检测超时

    timeout http-request    10s                  #默认http请求超时时间

    timeout queue           1m                   #默认队列超时时间

    timeout connect         10s                  #默认连接超时时间

    timeout client          1m                   #默认客户端超时时间

    timeout server          1m                   #默认服务器超时时间

    timeout http-keep-alive 10s                  #默认持久连接超时时间

listen  stats

    mode http

    bind 0.0.0.0:8090                            #指定IP地址与Port

    stats enable                                 #开启Haproxy统计状态

    stats refresh 3s                             #统计页面自动刷新时间间隔

    stats hide-version                           #状态页面不显示版本号

    stats uri   /haproxyadmin?stats              #统计页面的uri为"/haproxyadmin?stats"

    stats realm Haproxy\ Statistics              #统计页面认证时提示内容信息

    stats auth  admin:admin                      #统计页面的用户名与密码

    stats admin if TRUE                          #启用或禁用状态页面

frontend node                                   #定义前端服务器

    bind *:80

    mode http

    option httpclose                             #每次请求完成主动关闭http连接

    option forwardfor                            #后端服务器获取客户端的IP地址,可以从http header中获取

    acl url_static path_end -i .html .jpg .gif   #定义ACL规则以如".html"结尾的文件;-i:忽略大小写

    acl url_dynamic path_end -i .php

    default_backend node-web                     #客户端访问时默认调用后端服务器地址池

backend node-web                                 #定义后端服务器

    balance roundrobin                           #定义算法;基于权重进行轮询

    server node1 10.0.0.7:3000 check rise 2 fall 1 weight 2

    server node2 10.0.0.8:3000 check rise 2 fall 1 weight 2
- 访问


3 配置 Haproxy+ssl
3.1 Haproxy配置http跳转https
[root@haproxy_v1 haproxy]# cat haproxy.cfg

global

    log         127.0.0.1 local0  info  #定义全局syslog服务,127.0.0.1表示将日志发送到本地保存

    chroot      /var/lib/haproxy

    pidfile     /var/run/haproxy.pid

    maxconn     25600              #最大连接数

    user        haproxy            #用户名

    group       haproxy            #组

    daemon                         #以守护进程方式运行

    tune.ssl.default-dh-param 2048

    stats socket /var/lib/haproxy/stats     # turn on stats unix socket

defaults                                         #为frontend和backend提供默认参数

    mode                    http                 #模式

    log                     global               #日志

    option  httplog                              #详细记录http日志

    option  dontlognull                          #不记录健康检查的日志信息

    retries 3                                    #3次连接失败则认为服务不可用

    option  redispatch                           #ServerID对应的服务器宕机后,强制定向到其他运行正常的服务器

    maxconn 30000                                #默认的最大连接数

    #contimeout  5000                             #连接超时

    #clitimeout  5000                             #客户端超时

    #srvtimeout  5000                             #服务器超时

    timeout check   1s                           #心跳检测超时

    timeout http-request    10s                  #默认http请求超时时间

    timeout queue           1m                   #默认队列超时时间

    timeout connect         10s                  #默认连接超时时间

    timeout client          1m                   #默认客户端超时时间

    timeout server          1m                   #默认服务器超时时间

    timeout http-keep-alive 10s                  #默认持久连接超时时间

listen  stats

    mode http

    bind 0.0.0.0:8090                            #指定IP地址与Port

    stats enable                                 #开启Haproxy统计状态

    stats refresh 3s                             #统计页面自动刷新时间间隔

    stats hide-version                           #状态页面不显示版本号

    stats uri   /haproxyadmin?stats              #统计页面的uri为"/haproxyadmin?stats"

    stats realm Haproxy\ Statistics              #统计页面认证时提示内容信息

    stats auth  admin:admin                      #统计页面的用户名与密码

    stats admin if TRUE                          #启用或禁用状态页面

frontend node                                    #定义前端服务器

    bind *:80

    acl is_http hdr_beg(host) 10.0.0.60

    redirect scheme https if ! { ssl_fc }

    bind *:443 ssl crt /etc/haproxy/xiao.pem

    use_backend node-web if is_http

backend node-web                                 #定义后端服务器

    balance roundrobin                           #定义算法;基于权重进行轮询

    server node1 10.0.0.7:3000 check rise 2 fall 1 weight 2

    server node2 10.0.0.8:3000 check rise 2 fall 1 weight 2
证书的处理,需要将网站的根证书和key简单的合并在一起:
[root@haproxy_v1 haproxy]# pwd

/etc/haproxy

[root@haproxy_v1 haproxy]# ll

total 16

-rw-r--r-- 1 root root 3165 Jan  6 00:00 haproxy.cfg

-rw-r--r-- 1 root root 3142 Jan  5 00:11 haproxy.cfg.bak

-rw-r--r-- 1 root root 1675 Jan 17  2018 privatekey.pem

-rw-r--r-- 1 root root 1184 Jan 17  2018 server.pem

[root@haproxy_v1 haproxy]# cat server.pem privatekey.pem |tee xiao.pem
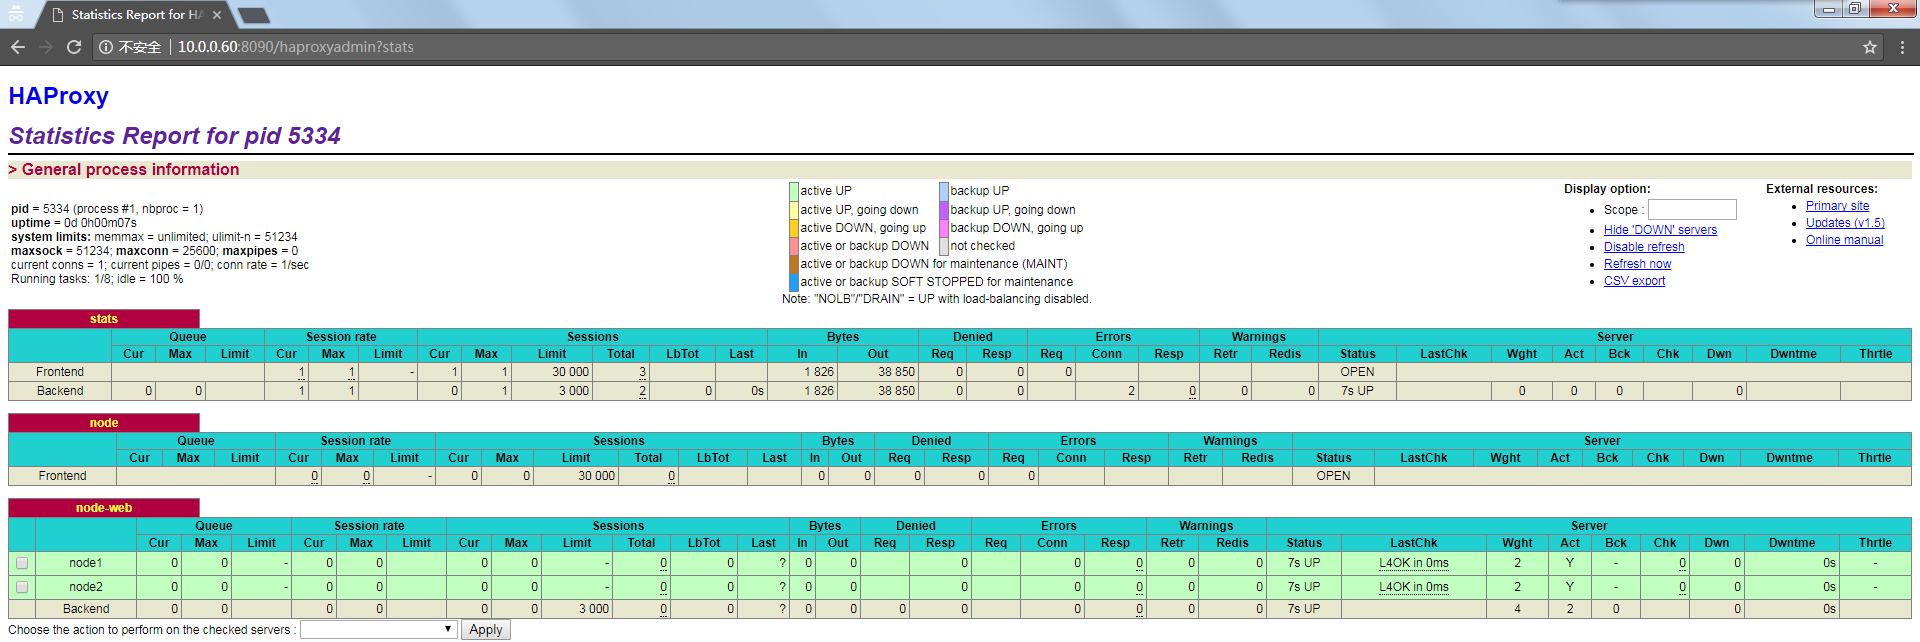
访问10.0.0.60跳转到https://10.0.0.60


Haproxy+ssl+nvm+forever的更多相关文章
- Haproxy ssl 配置方式
通过haproxy redirect请求重定向的方法实现HTTP跳转HTTPS 配置实现http跳转到https,采用redirect重定向的做法,只需在frontend端添加: frontend h ...
- haproxy ssl相关配置
ssl-default-bind-options [<option>]... This setting is only available when support for OpenSSL ...
- haproxy反向代理环境部署(http和https代理)
操作背景:前方有一台haproxy代理机器(115.100.120.57/192.168.1.7),后方两台realserver机器(192.168.1.150.192.168.1.151,没有公网i ...
- 负载均衡服务之HAProxy https配置、四层负载均衡以及访问控制
前文我们聊了下haproxy的访问控制ACL的配置,回顾请参考https://www.cnblogs.com/qiuhom-1874/p/12817773.html:今天我们来聊一聊haproxy的h ...
- haproxy 2.2代理后端https服务
globalmaxconn 100000chroot /usr/local/haproxystats socket /var/lib/haproxy/haproxy.sock mode 600 lev ...
- HAProxy配置SSL
前沿 据悉苹果强制APP在2016年底使用ATS协议,所以公司准备将部分站点http统一替换成https.所有我们就得测试下 1.首先原有的haproxy1.5升级到了1.7版本支持ssl 2.查看相 ...
- 配置Nginx支持SSL SNI(一个IP绑定多个证书) 以及Haproxy实现多域名证书
概述 传统的每个SSL证书签发,每个证书都需要独立ip,假如你编译openssl和nginx时候开启TLS SNI (Server Name Identification) 支持,这样你可以安装多个S ...
- haproxy 关闭ssl 3.0 加密
global log 127.0.0.1 local3 maxconn 65535 chroot /usr/local/haproxy uid 500 gid 500 daemon ssl-defau ...
- haproxy配置基于ssl证书的https负载均衡
本实验全部在haproxy1.5.19版本进行测试通过,经过测试1.7.X及haproxy1.3版本以下haproxy配置参数可能不适用,需要注意版本号. 一.业务要求现在根据业务的实际需要,有以下几 ...
随机推荐
- PHP 算式验证码
这里不多说,直接上代码! /** * 改造的加减法验证类 * 使用示例 VerifyCode::get('xxx', 20); * 验证示例 VerifyCode::check('1', 'xxx') ...
- Codeforces 500D New Year Santa Network(树 + 计数)
D. New Year Santa Network time limit per test 2 seconds memory limit per test 256 megabytes input st ...
- 43.和为S的连续正数序列
题目描述: 小明很喜欢数学,有一天他在做数学作业时,要求计算出9~16的和,他马上就写出了正确答案是100.但是他并不满足于此,他在想究竟有多少种连续的正数序列的和为100(至少包括两个数).没多 ...
- adb]ADB server didn't ACK
遇到上述问题 此时由于不正常退出 会在进程中遗留Android debug进程 ,需要强制删除
- Windows开发,关于通过写代码加载PDB的那些事
最近,接到一个活,要写一个程序,用来批量分析一堆dll和对应的PDB, 其实工作很简单,就是根据一堆偏移,通过PDB文件,找到对应dll里面对应位置的明文符号, 简单的需求,实现起来,通常都很麻烦, ...
- go语言从例子开始之Example24.通道同步
我们可以使用通道来同步 Go 协程间的执行状态.这里是一个使用阻塞的接受方式来等待一个 Go 协程的运行结束. Example: package main import "fmt" ...
- (PASS)JAVA数组去重 三种方法 (不用集合)
第一种方法(只学到数组的看): 定义一个新的数组长度和旧数组的长度一样,存储除去重复数据的旧数组的数据和0, package demo01; import java.sql.Array; import ...
- 【leetcode】654. Maximum Binary Tree
题目如下: Given an integer array with no duplicates. A maximum tree building on this array is defined as ...
- Android中的ImageView的getDrawableCache获取背景图片的时候注意的问题
获取ImageView的背景图片使用getDrawableCache方法,不要使用getDrawable方法,后者获取不到图片的. 1.在调用imageView.getDrawableCache()之 ...
- 【软工项目Beta阶段】绝不划水队OUC-Market版本测试报告
我们在开发APP的时候进行了软件的测试,同时发现了一些BUG,如下: bug 我的:与各种页面之间的交互不灵活 登录与注册:记住密码功能不完善 商场主界面:搜索功能还没有完善 收藏功能:与数据库的交互 ...